
Blurring a section of an image in Microsoft PowerPoint streamlines privacy protection, focuses viewer attention, and helps you control what stands out in your slides. PowerPoint’s built-in image editing tools allow you to blur an entire image or just a selected part—no need for external photo editors or advanced graphic design skills. The following step-by-step methods show you how to blur part of an image directly in PowerPoint, as well as alternative approaches for different needs.
Blur a Specific Part of an Image in PowerPoint
Duplicating and cropping images is the most effective way to blur only a portion of an image in PowerPoint. This approach gives you precise control over what gets blurred, making it ideal for hiding faces, text, or other sensitive details without affecting the rest of the picture.
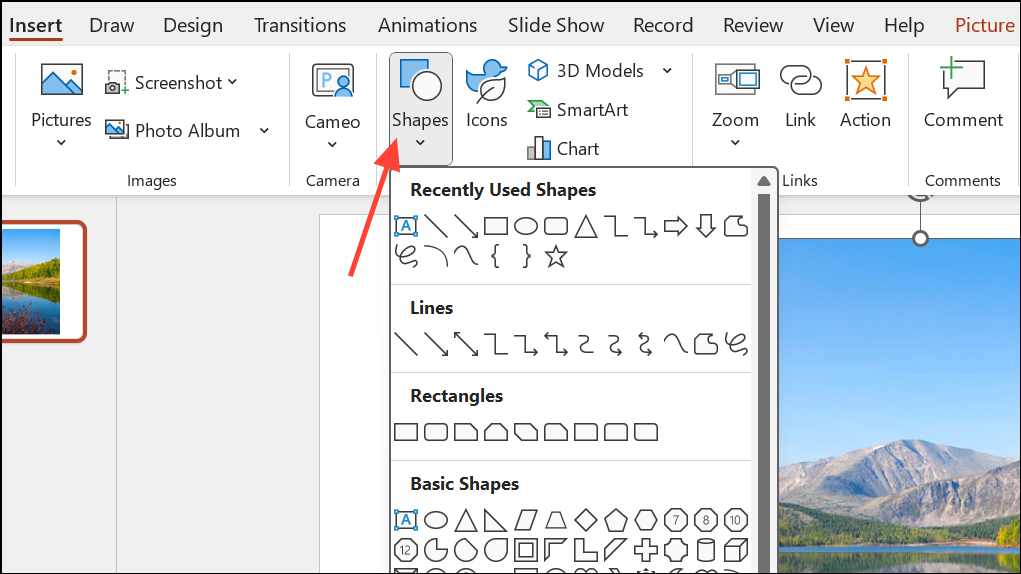
Step 1: Insert the image you want to edit by selecting Insert > Pictures from the ribbon. Choose the image file from your device and place it on your slide.

Step 2: With the image selected, duplicate it using the Ctrl + D keyboard shortcut. Carefully align the duplicated image directly on top of the original to ensure both images match up perfectly. This alignment is crucial for a seamless blur effect.
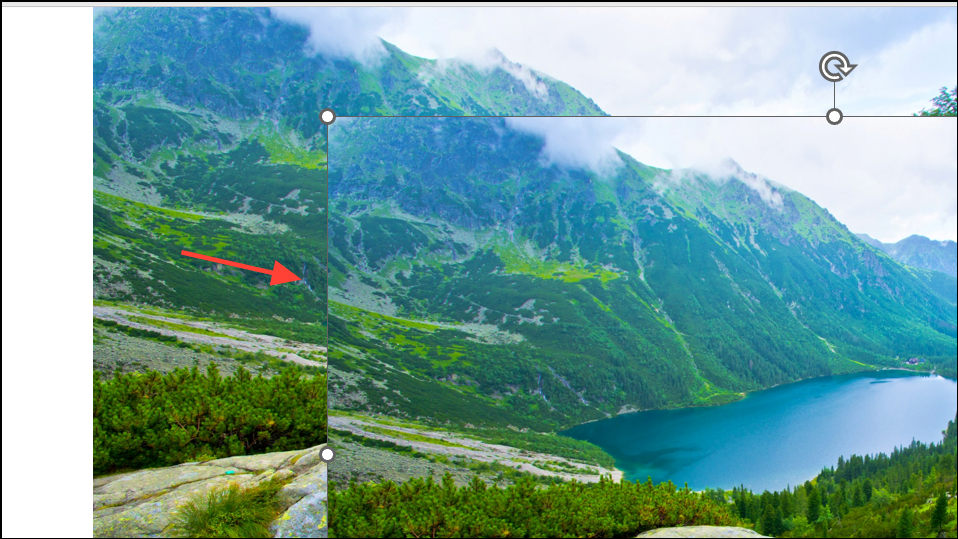
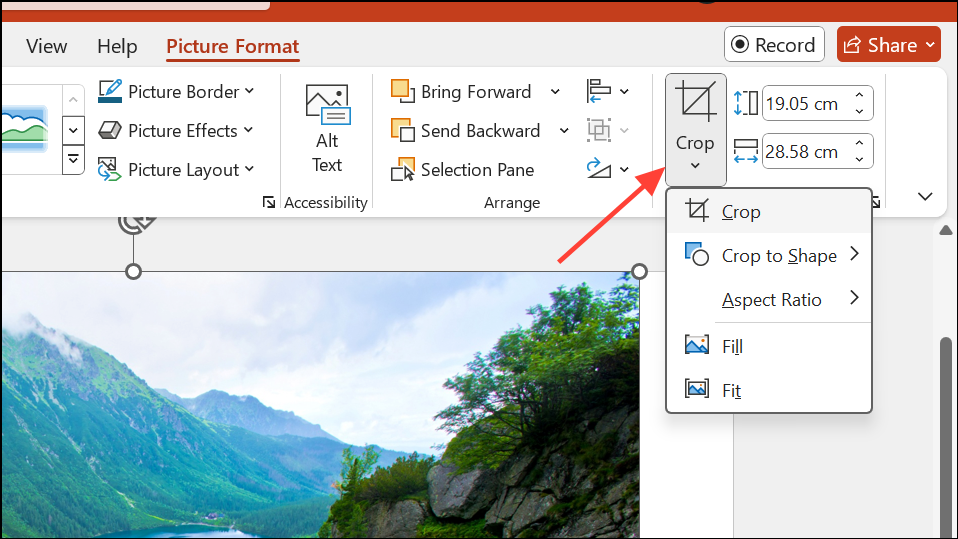
Step 3: Select the top (duplicated) image and go to Picture Format > Crop. Adjust the cropping handles so that only the area you want to blur remains visible. Press Enter to apply the crop. The rest of the image will be hidden in this layer.
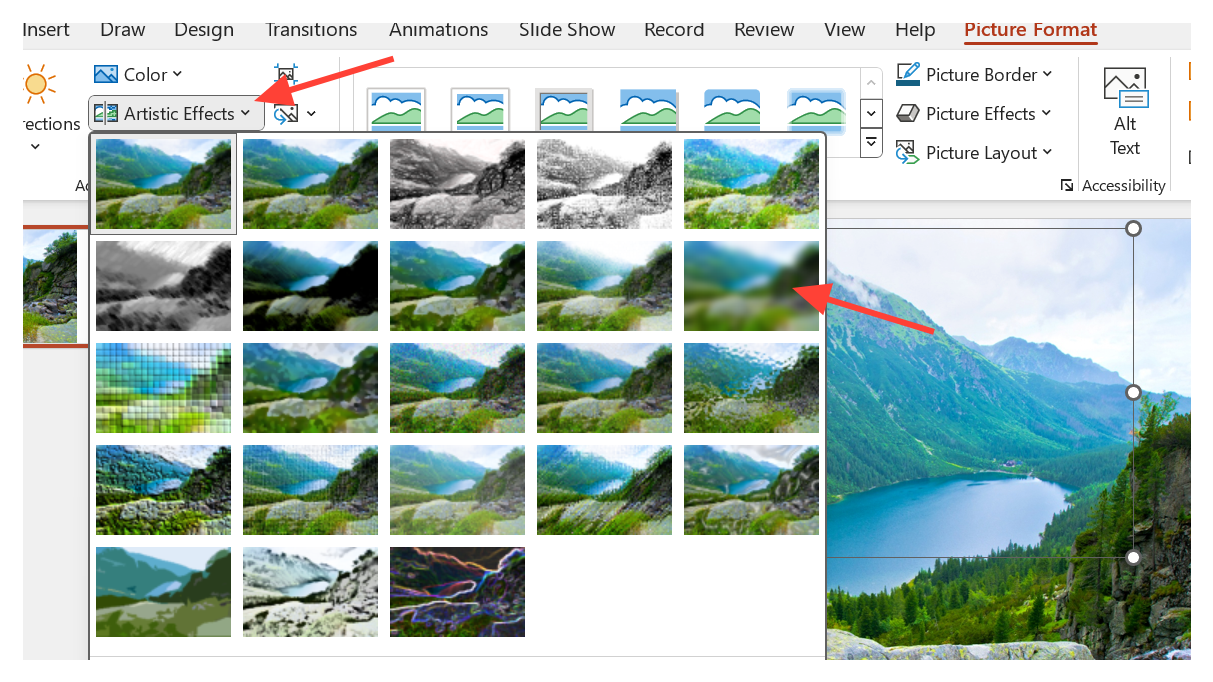
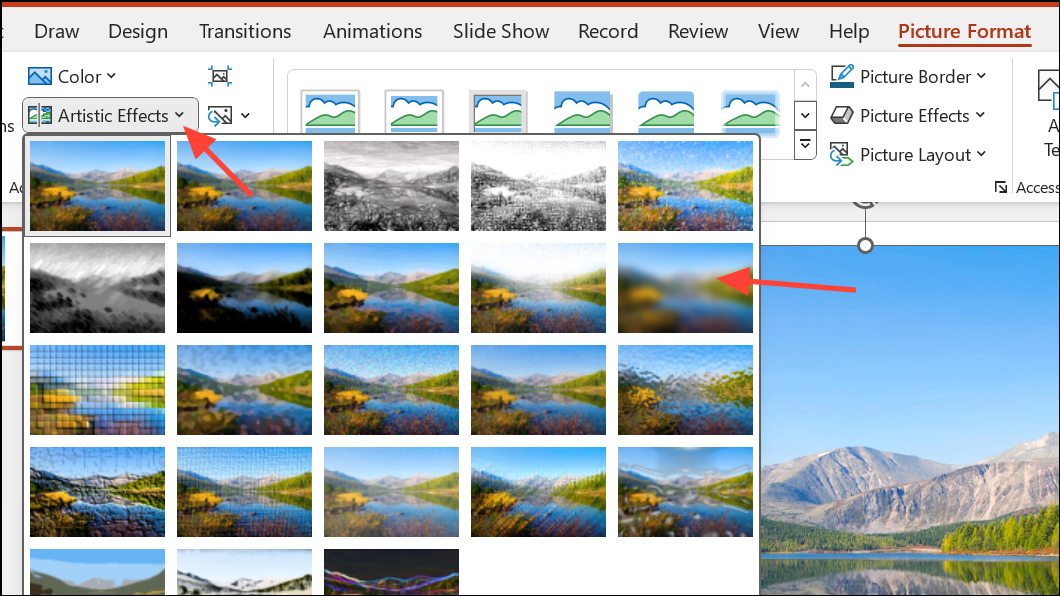
Step 4: With the cropped image still selected, navigate to Picture Format > Artistic Effects and choose the Blur option. This applies a blur to the visible cropped area.
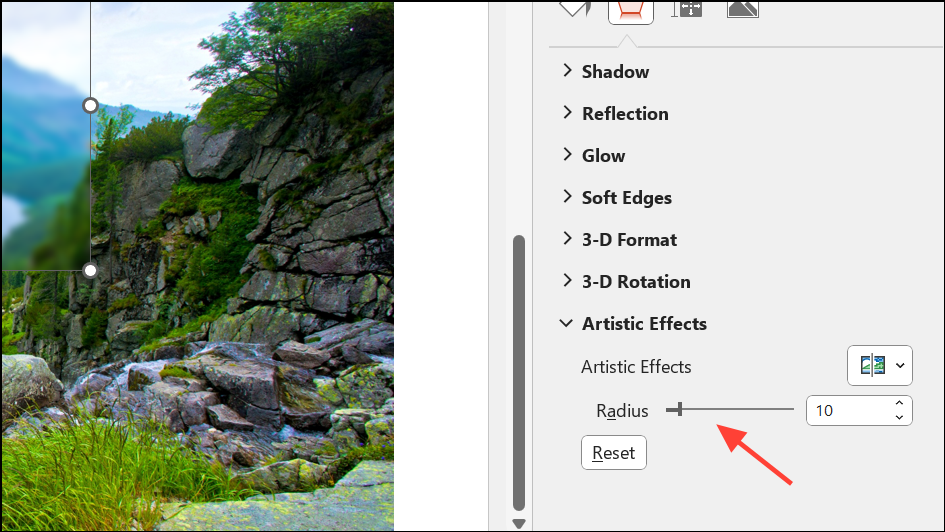
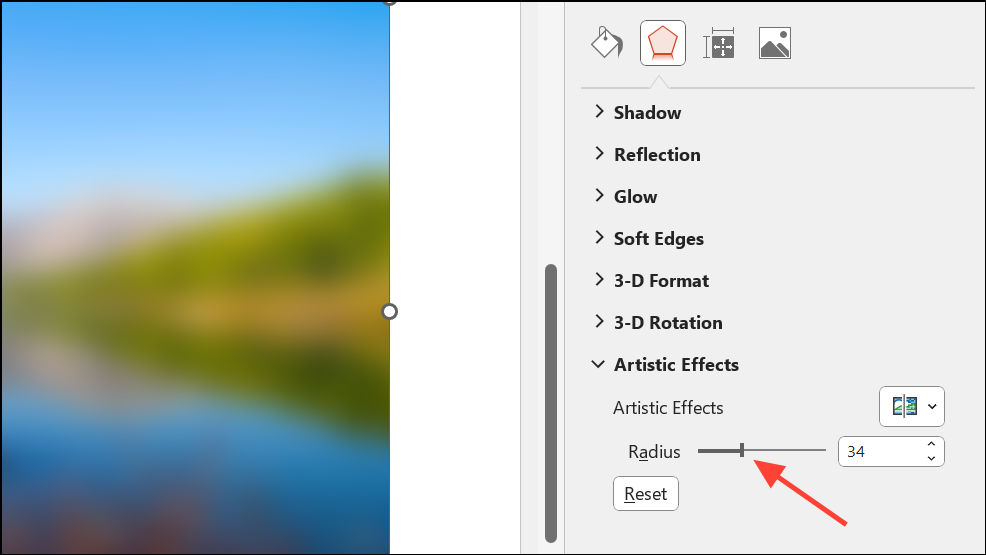
Step 5: To increase or decrease the blur intensity, open Artistic Effects Options (found at the bottom of the Artistic Effects menu or via Format Picture in the right-click menu). Adjust the Radius slider until the blur covers the area as strongly as needed.
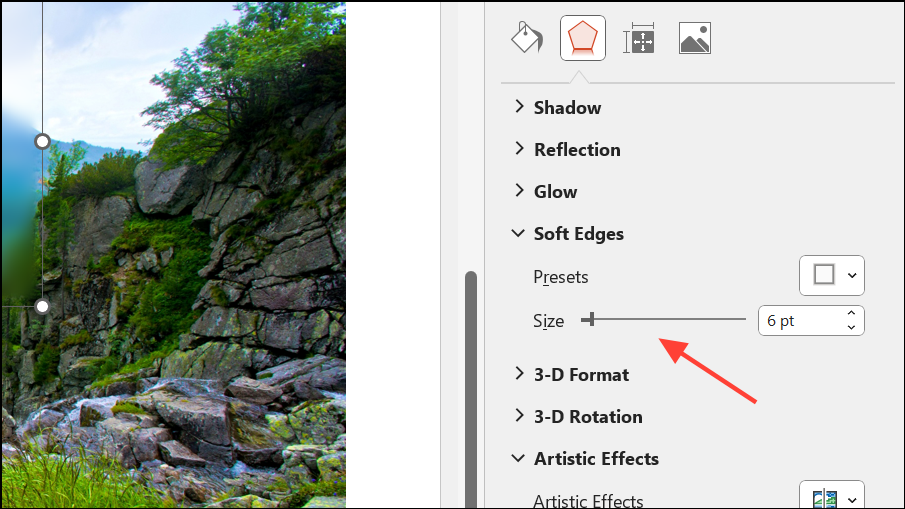
Step 6: The edges of the blurred area may appear too sharp. To soften them, right-click the cropped image and select Format Picture. In the Format Picture pane, navigate to Soft Edges and increase the value to create a gradual transition between the blurred and unblurred areas.
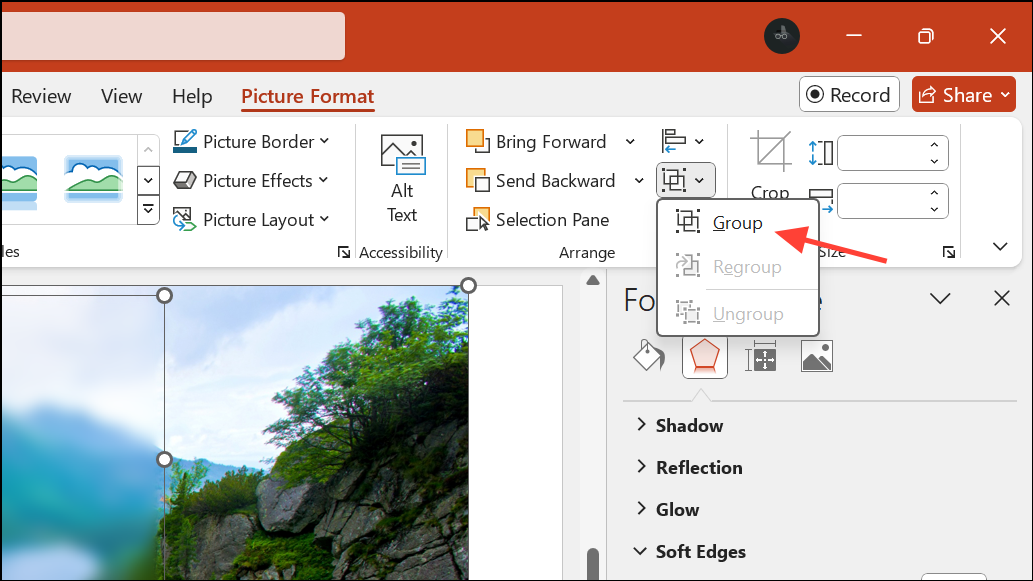
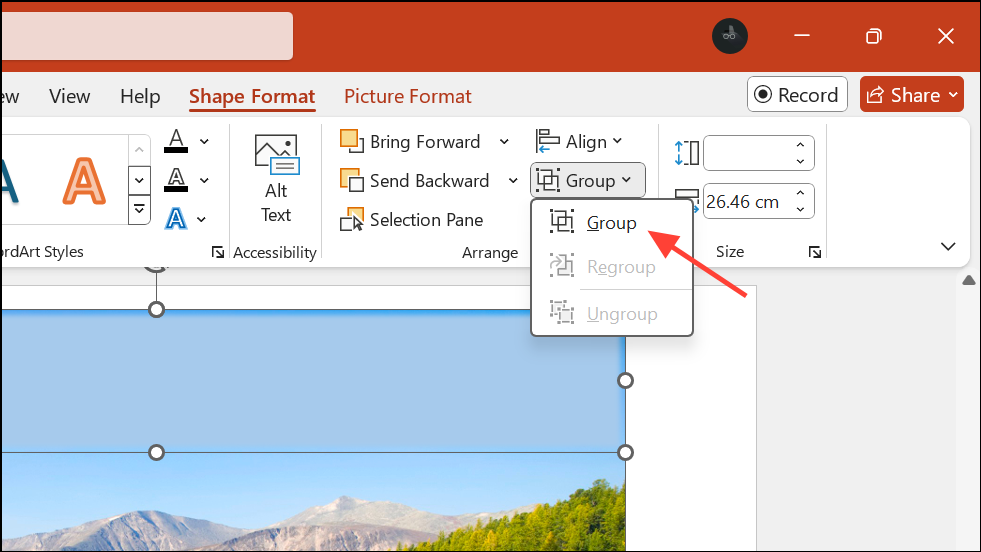
Step 7: To keep the blurred section and the original image together, select both images (use Ctrl + Click), then go to Picture Format > Group > Group. This makes it easier to move or resize the edited image as a single object.
This method allows you to blur any segment of an image, such as a face or text, while leaving the rest of the picture untouched. If you need to blur multiple areas, repeat the process for each section—though this can be time-consuming for complex images.
Blur the Entire Image in PowerPoint
When you want to use a blurred image as a background or obscure all details, PowerPoint’s built-in blur effect can be applied to the whole picture in just a few steps.
Step 1: Add your image to the slide via Insert > Pictures.
Step 2: Select the image and go to Picture Format > Artistic Effects. Click on the Blur effect from the drop-down menu.
Step 3: To adjust how blurry the image appears, choose Artistic Effects Options at the bottom of the menu. In the Format Picture pane, move the Radius slider or enter a value between 0 and 100. Higher numbers increase the blur strength, making details less visible.
This approach is fast and works well for backgrounds or when you need to hide all image details at once.
Blur Part of an Image Using Shapes and Soft Edges
For a quick way to obscure information without duplicating images, you can overlay a shape and apply soft edge effects. This method is less precise but can be effective for basic privacy masking or visual emphasis.
Step 1: Insert your image onto the slide as usual.
Step 2: Go to Insert > Shapes and select a shape (rectangle, oval, or custom freeform) that covers the area you want to hide.
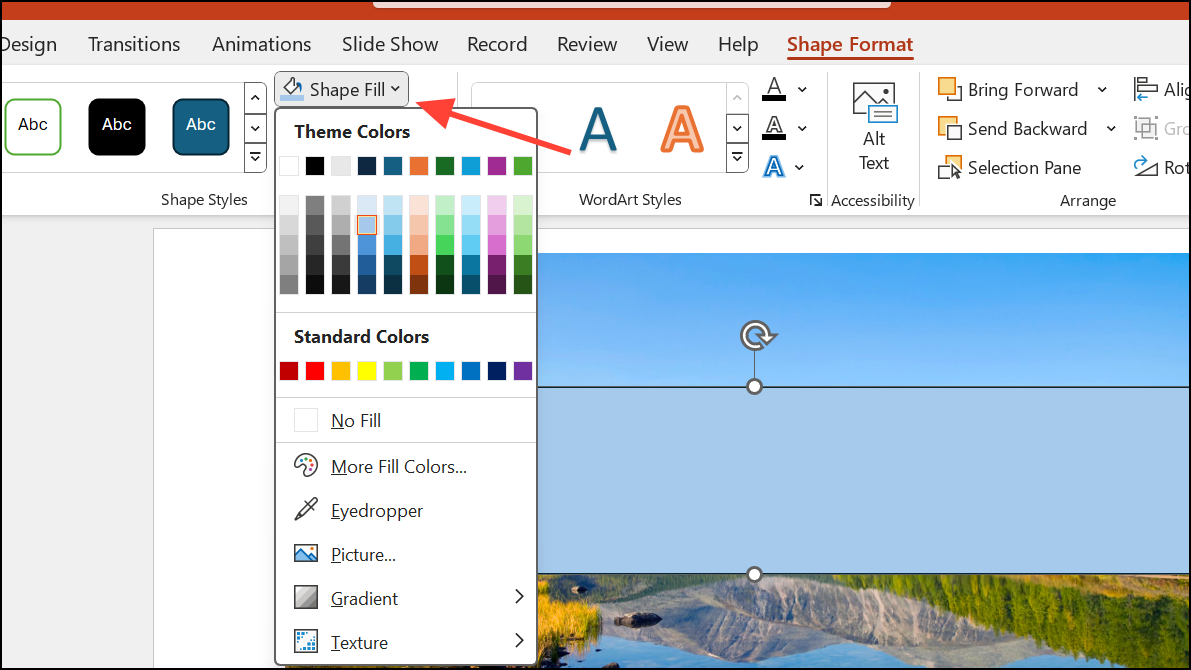
Step 3: Draw the shape over the target area. With the shape selected, use Shape Format > Shape Fill to choose a color that blends with the image, or use a neutral color for clarity.
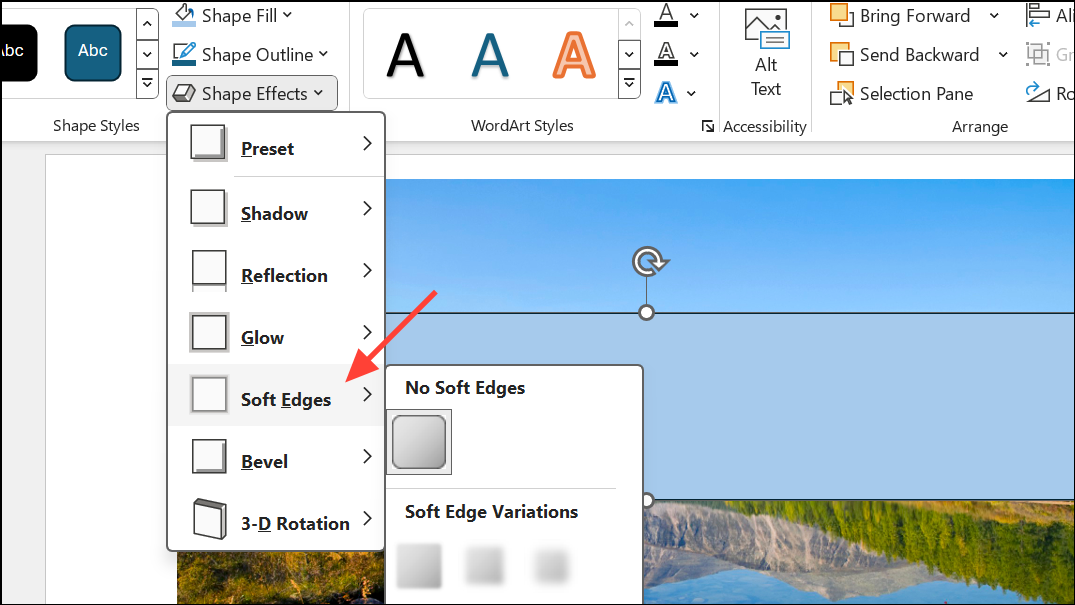
Step 4: To soften the mask, go to Shape Effects > Soft Edges and adjust to your preference. This creates a feathered edge, making the overlay less harsh and more visually appealing.
Step 5: If you want the shape to move with the image, select both, then group them using Ctrl + Click and Group from the Arrange menu.
This method doesn’t truly blur the underlying image, but provides a simple way to mask or de-emphasize parts of a picture for presentations.
Alternative: Use Online Tools for Faster Batch Blurring
If you need to blur multiple images or several areas within a single image, PowerPoint’s manual process can become tedious. Online tools like Watermarkly or Fotor offer browser-based blur features that automate much of the work. These platforms let you upload images, select blur shapes (rectangular or oval), and apply the effect with soft edges automatically—no alignment or cropping needed. Some tools even use AI to detect faces or license plates for quick privacy masking.
After editing, you can download the blurred images and insert them back into your PowerPoint presentation. This approach speeds up the process, especially when working with many images or complex blurring needs. However, you’ll need to edit images outside PowerPoint and re-import them, which may not be ideal for quick, in-slide adjustments.
Blurring specific parts of an image in PowerPoint is straightforward once you know the steps. Whether you need to hide sensitive details, highlight key areas, or create stylish backgrounds, these methods give you flexible options for privacy and emphasis in your presentations.