Keeping your computer's time zone accurate is essential for timely notifications, scheduled tasks, and maintaining correct system logs. Whether you're traveling to a different region or your system isn't displaying the correct time, Windows 11 provides easy ways to change your time zone settings. Here's how you can adjust them manually, set them to update automatically, or troubleshoot common issues.
How to Set Windows 11 to Change Time Zones Automatically
If you frequently travel between different time zones, enabling automatic time zone updates can save you the hassle of manual adjustments.
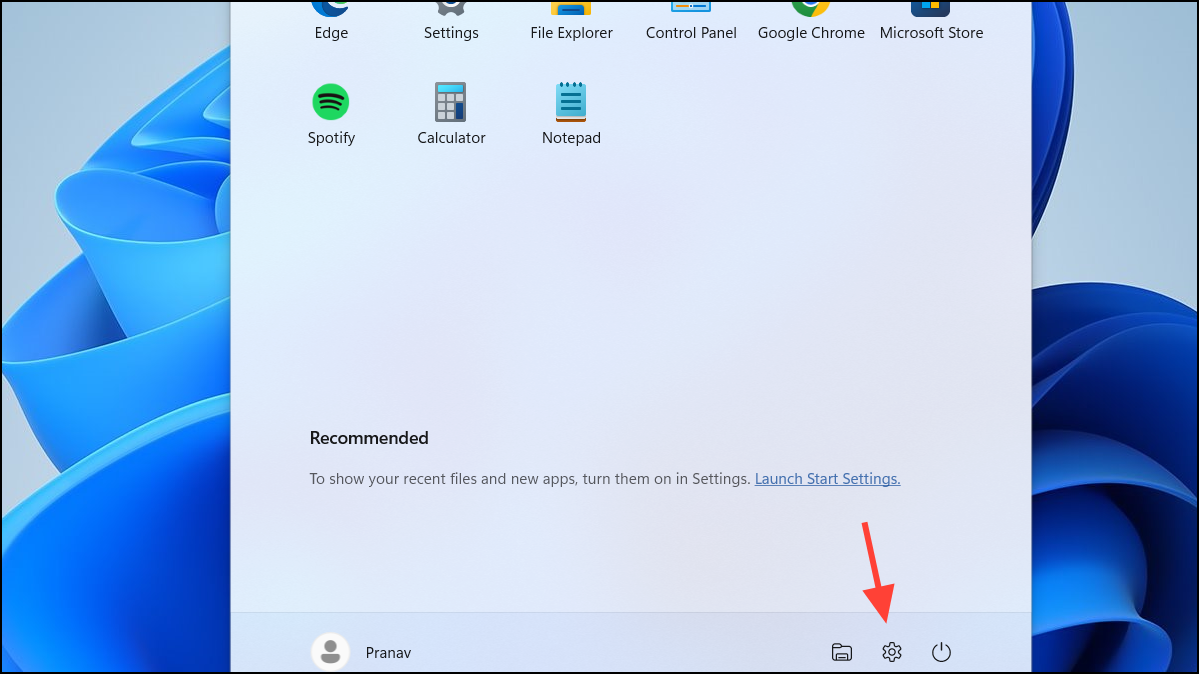
Step 1: Click on the Start menu and select the Settings app (the gear icon).
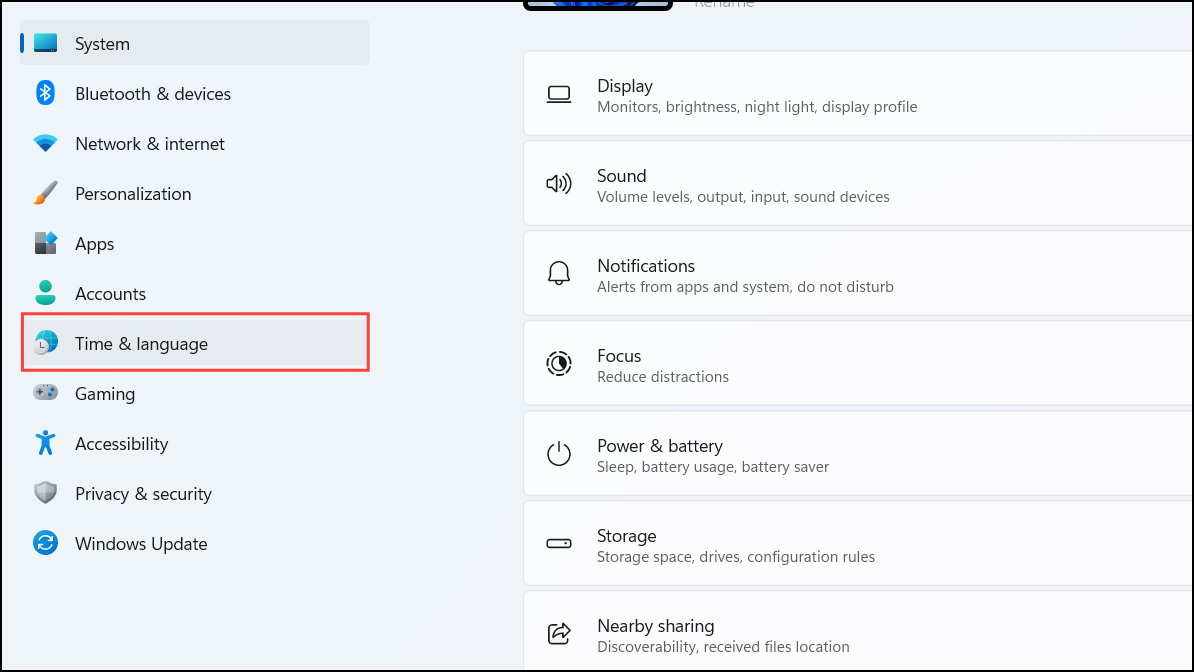
Step 2: In the Settings window, select Time & language from the left sidebar.
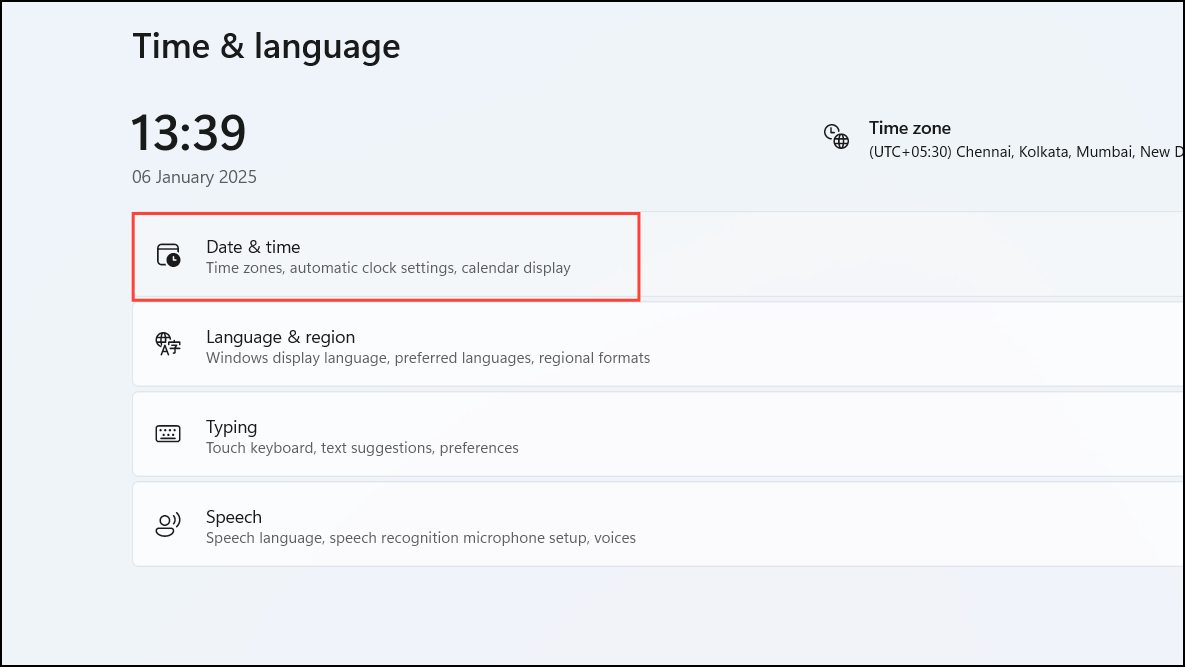
Step 3: Click on Date & time on the right pane.
Step 4: Toggle the switch next to Set time zone automatically to On.
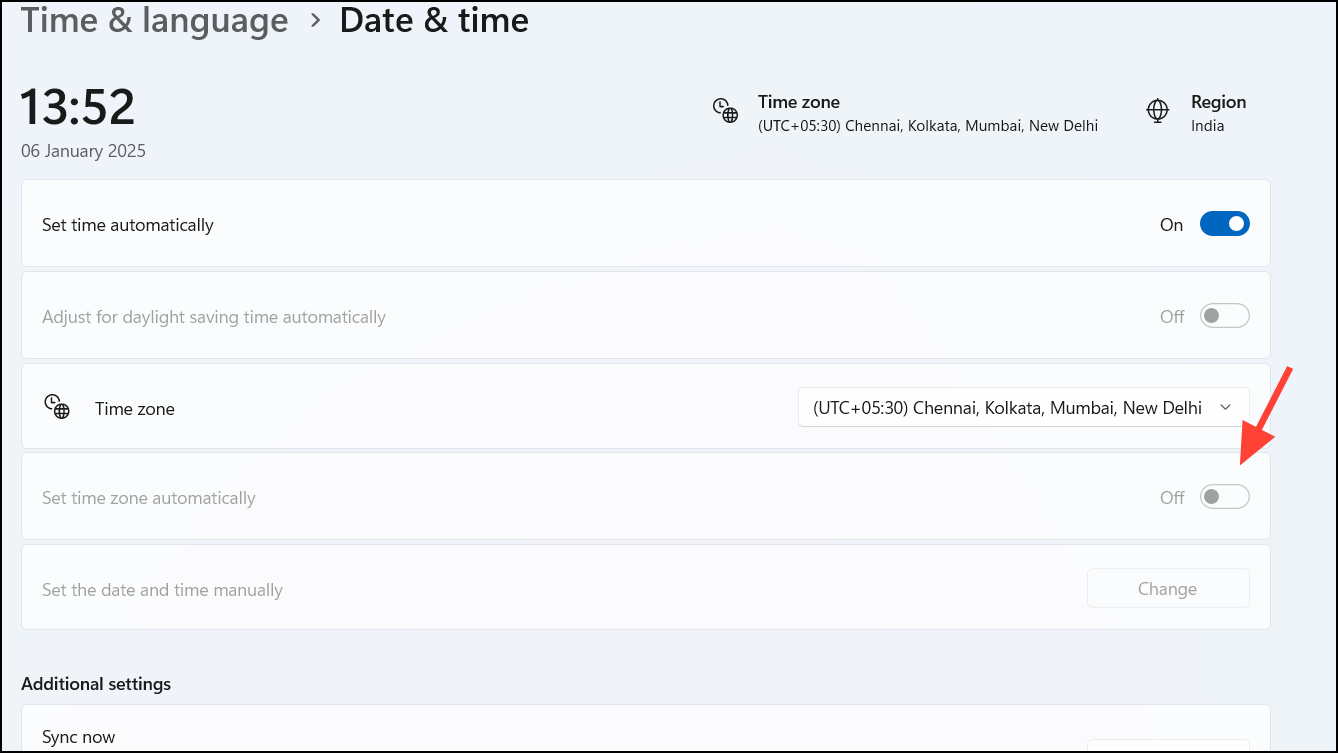
Step 5: Ensure that Set time automatically is also turned On to keep your system clock accurate.
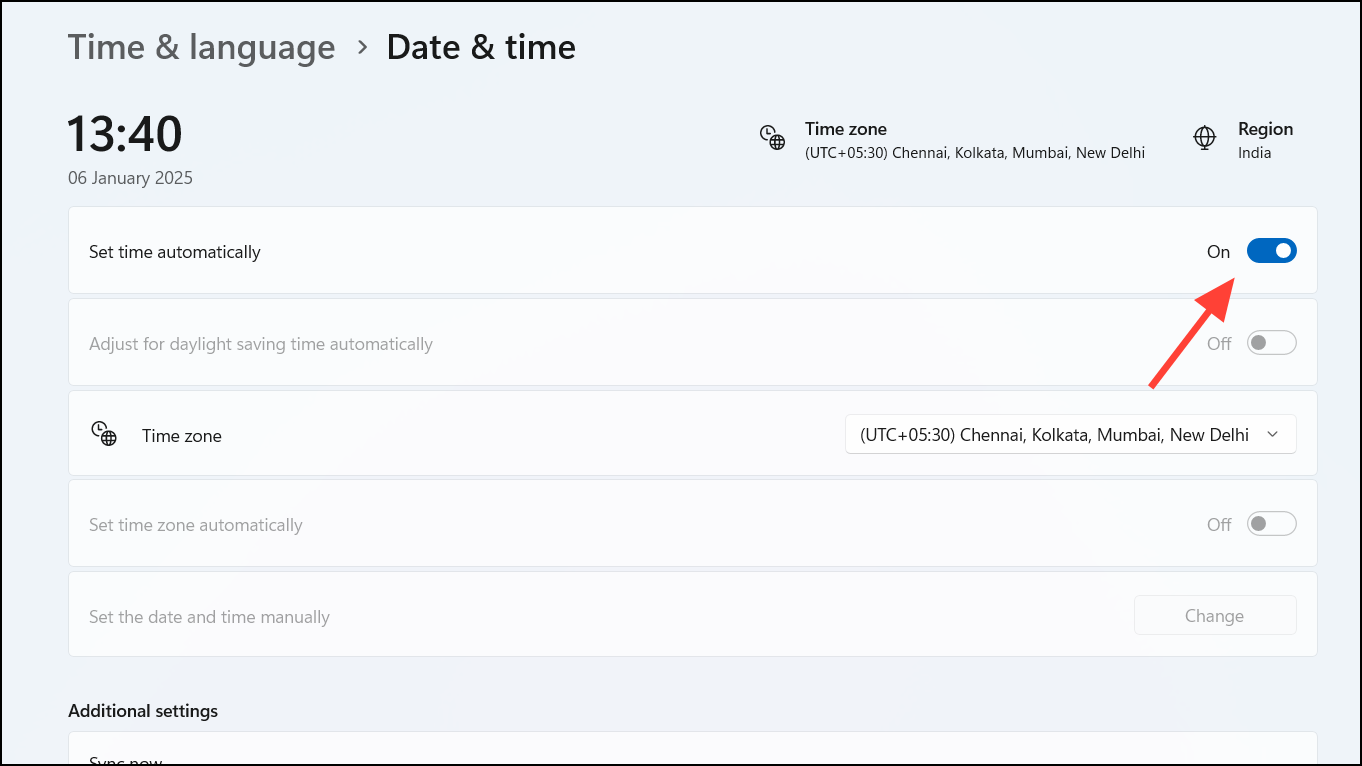
With these settings enabled, Windows 11 will automatically detect your location and update the time zone accordingly whenever you travel.
How to Change the Time Zone Manually in Windows 11
If Windows isn't detecting your time zone correctly or you prefer to set it yourself, you can manually choose your time zone.
Step 1: Open the Settings app by clicking the Start menu and selecting Settings.

Step 2: Navigate to Time & language in the left sidebar.

Step 3: Click on Date & time on the right.

Step 4: Toggle the switch next to Set time zone automatically to Off.

Step 5: Click the dropdown menu under Time zone and select your desired time zone from the list.
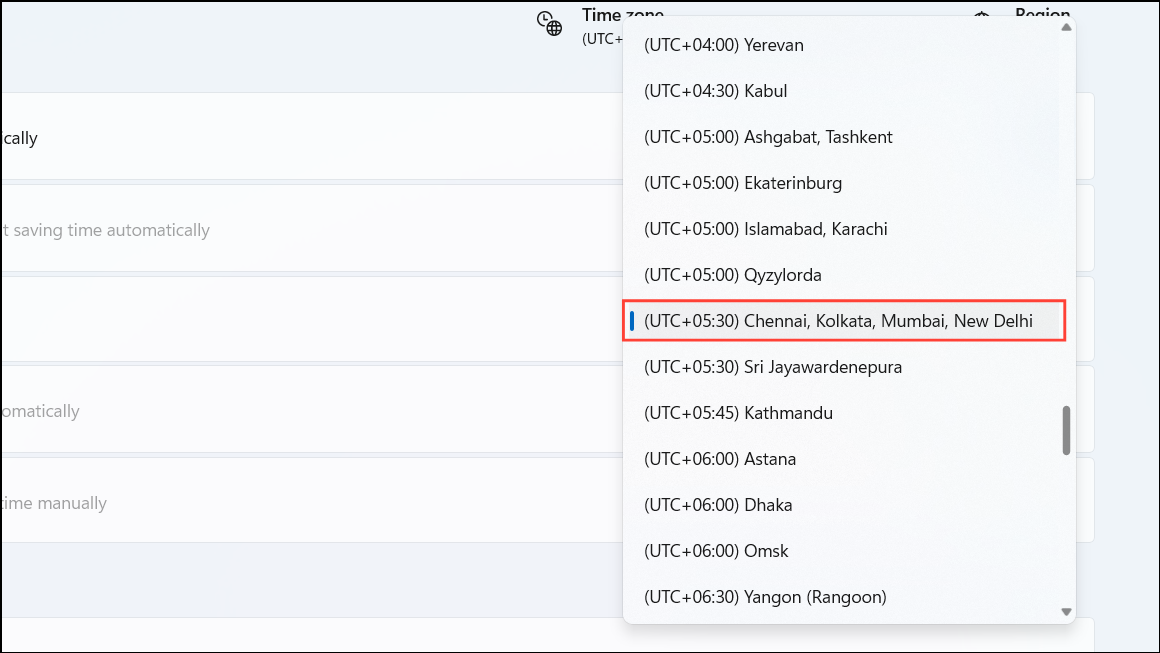
Your system clock will now update to reflect the selected time zone.
How to Manually Set the Date and Time in Windows 11
If you need to set a specific date and time, you can manually adjust these settings.
Step 1: Open the Settings app from the Start menu.

Step 2: Select Time & language and then click on Date & time.

Step 3: Turn the switch next to Set time automatically to Off.
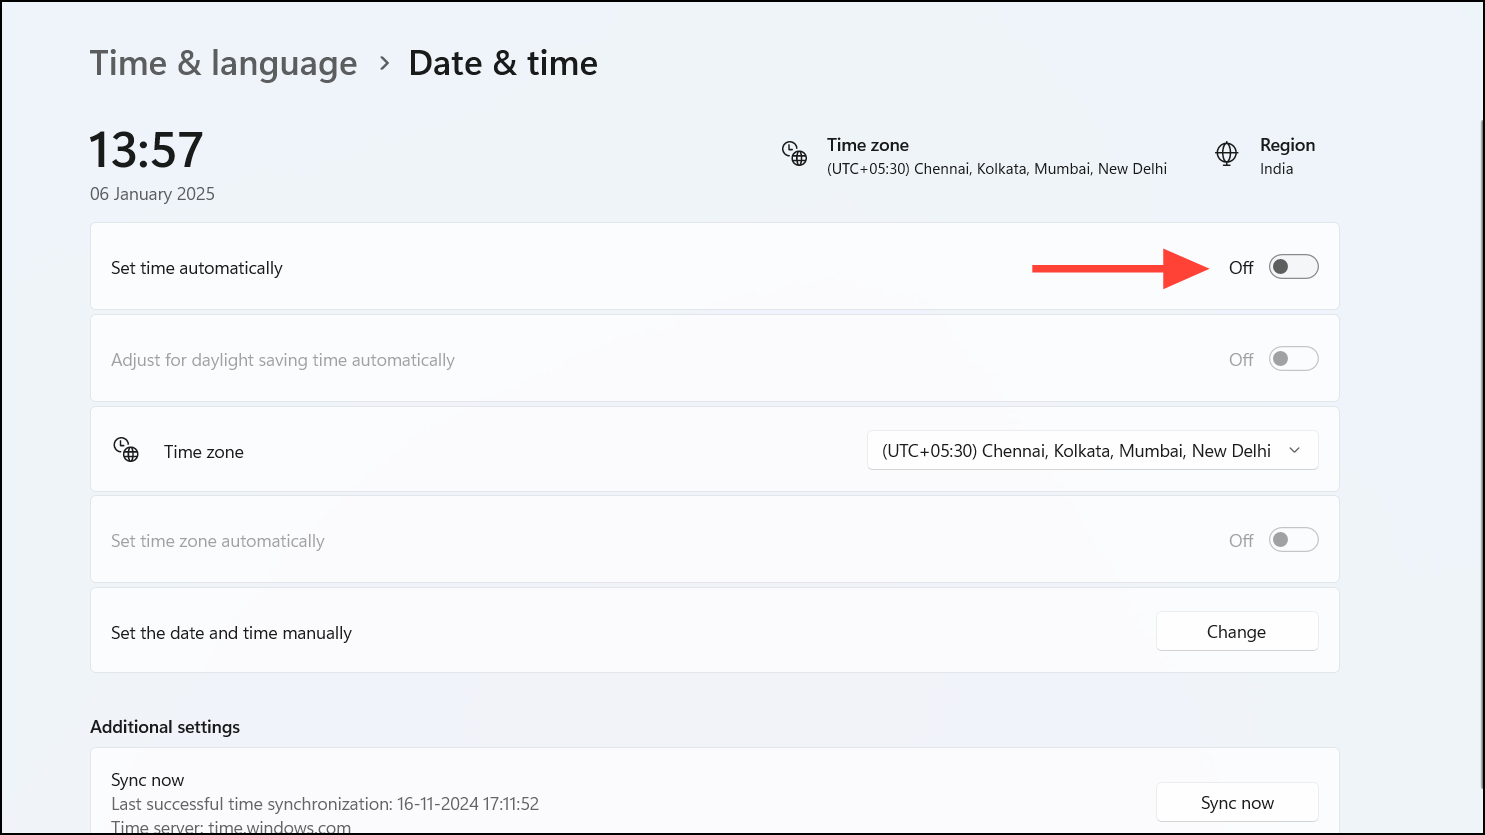
Step 4: Click the Change button next to Set the date and time manually.
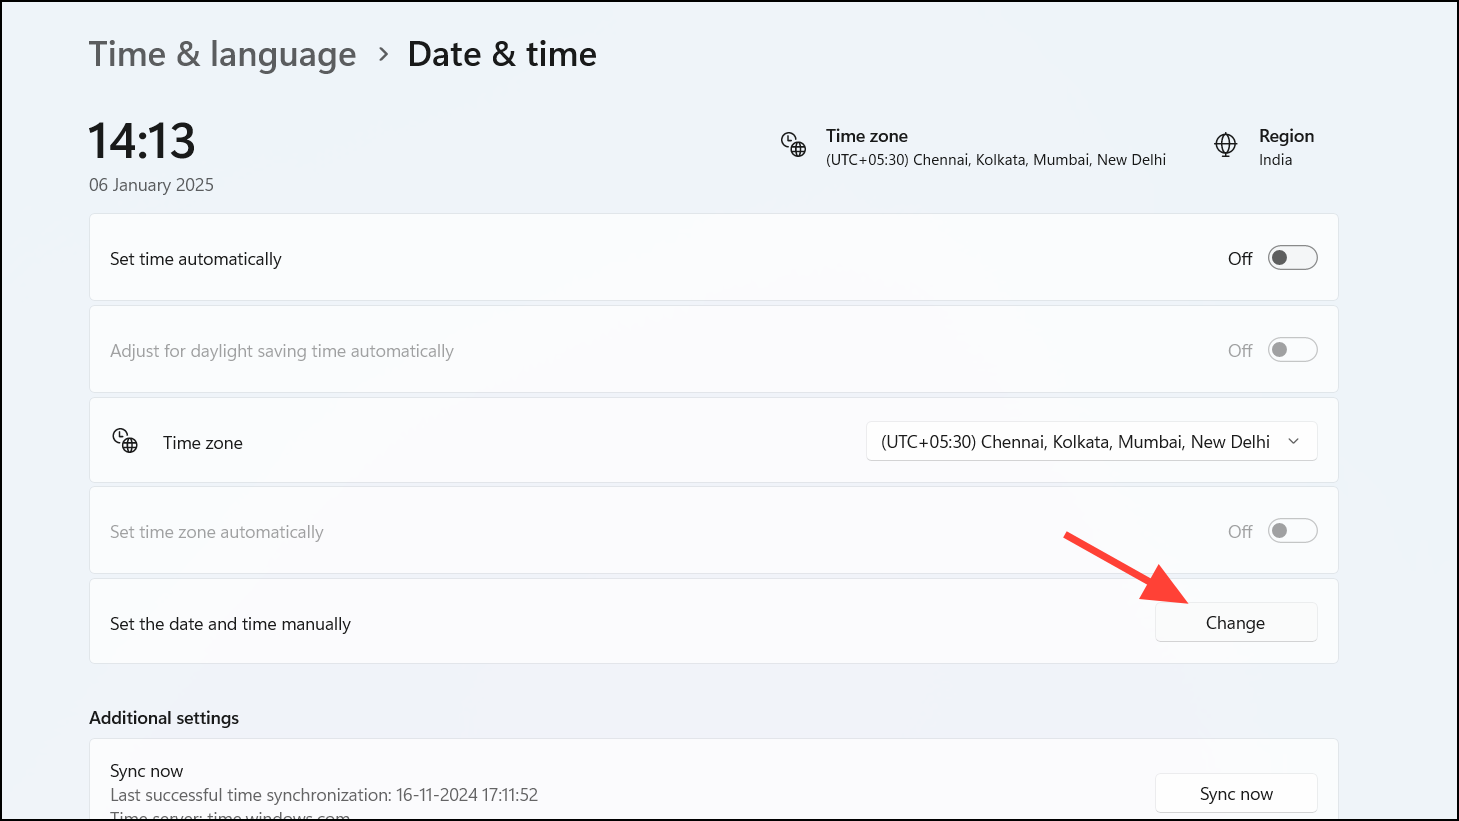
Step 5: In the dialog box, adjust the date and time to your desired settings, then click Change to apply.
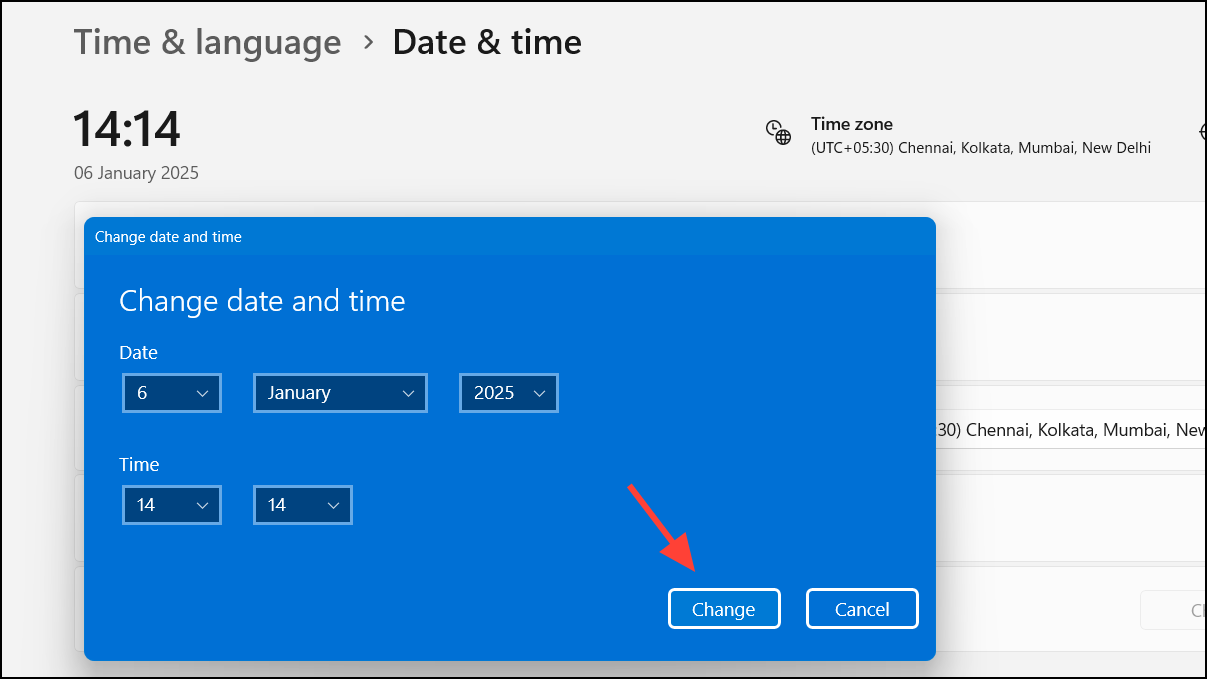
Your system will now use the manually entered date and time.
How to Change the Time Zone Using Command Prompt or PowerShell
For advanced users, you can also adjust the time zone using Command Prompt or PowerShell.
Using Command Prompt:
Step 1: Open Command Prompt as an administrator. Search for cmd in the Start menu, right-click Command Prompt, and select Run as administrator.
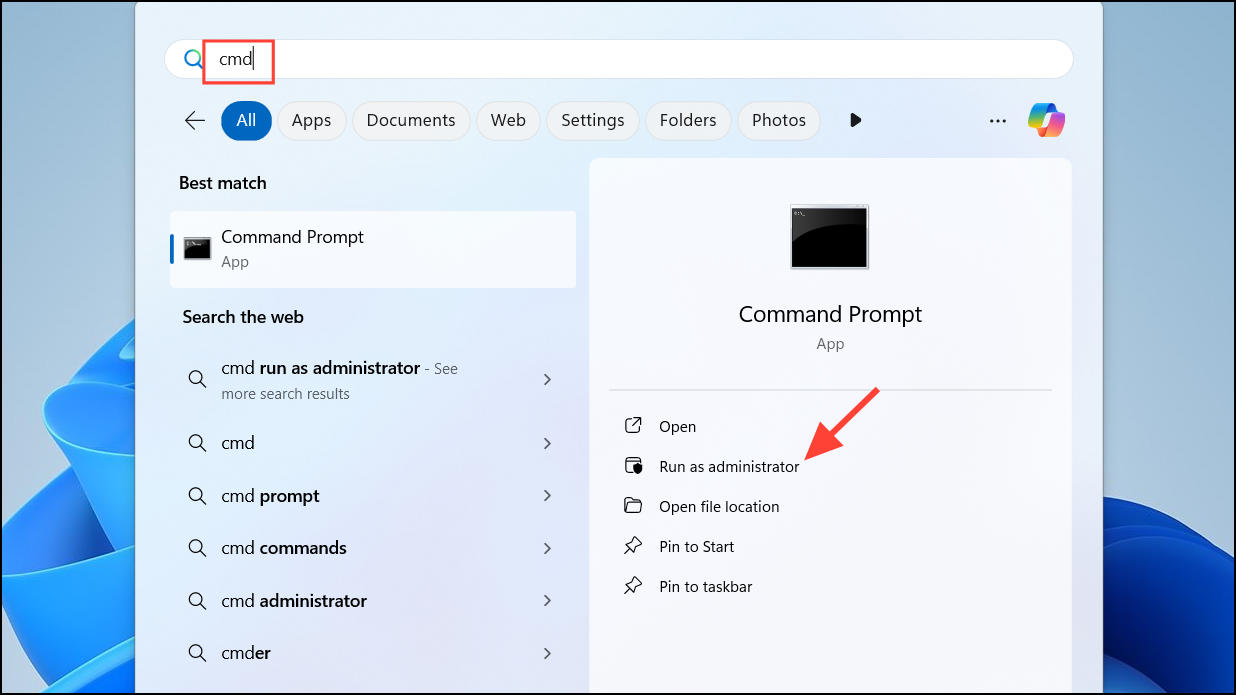
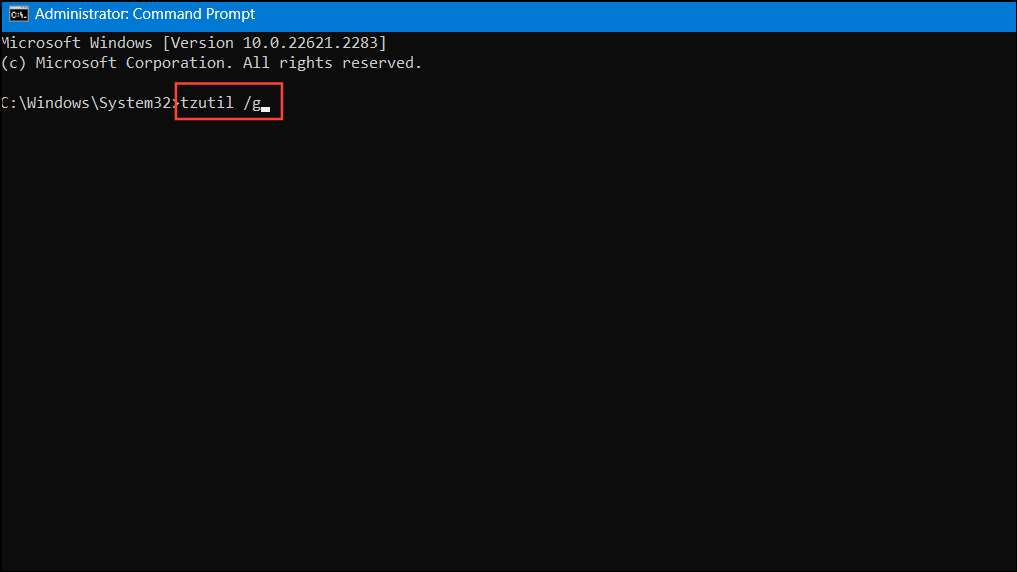
Step 2: To view the current time zone, type tzutil /g and press Enter.
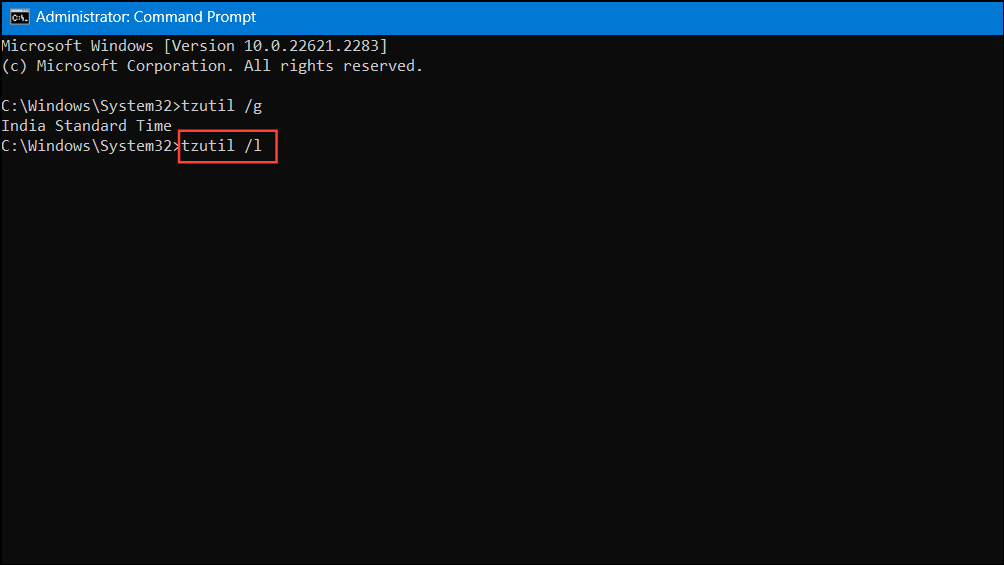
Step 3: To list all available time zones, type tzutil /l.
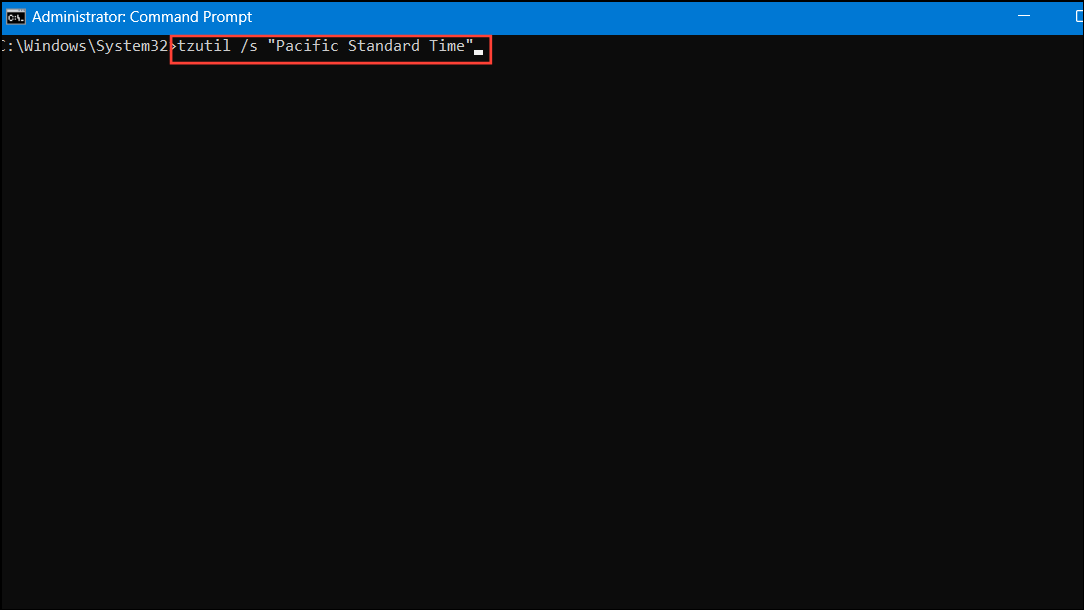
Step 4: Find the time zone you wish to set from the list, then enter tzutil /s "Your Time Zone", replacing "Your Time Zone" with the exact name from the list.
Example: tzutil /s "Pacific Standard Time"
Using PowerShell:
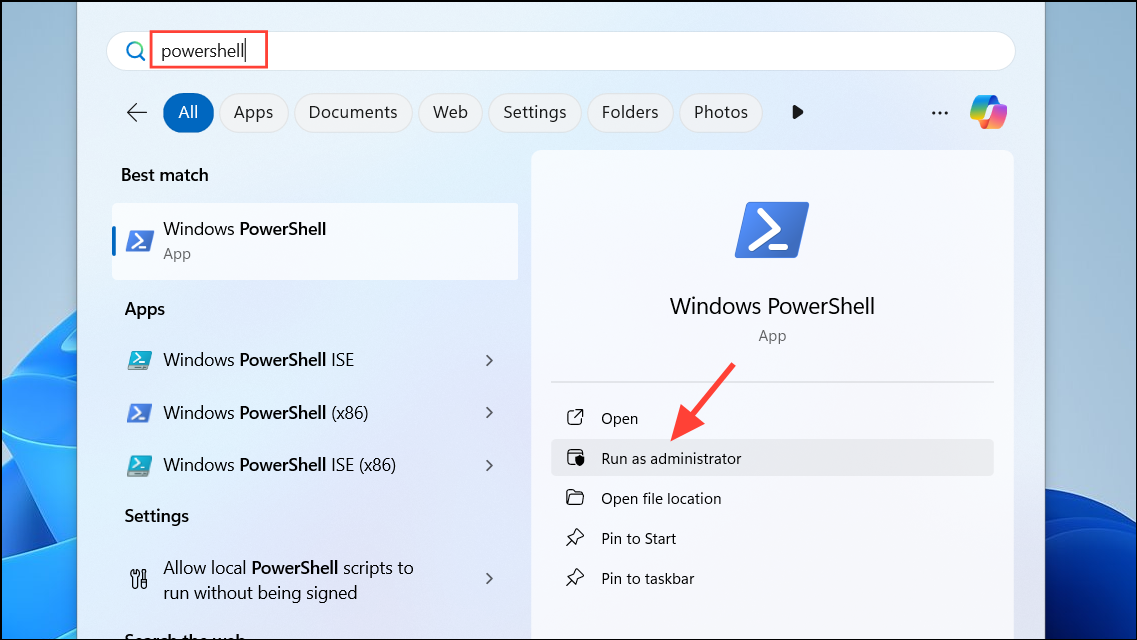
Step 1: Open PowerShell as an administrator by searching for PowerShell, right-clicking on Windows PowerShell, and selecting Run as administrator.
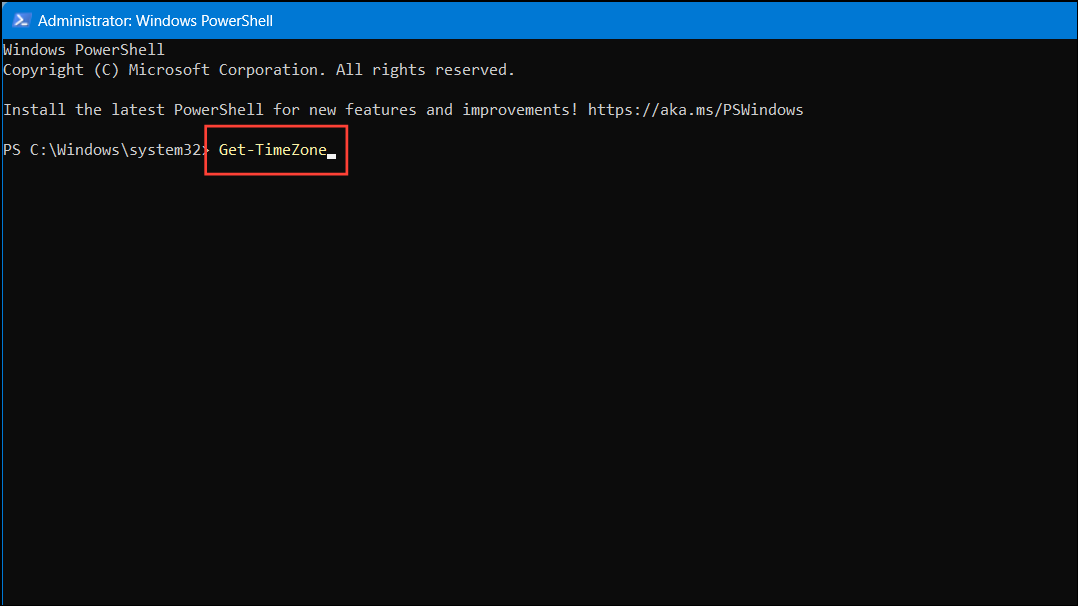
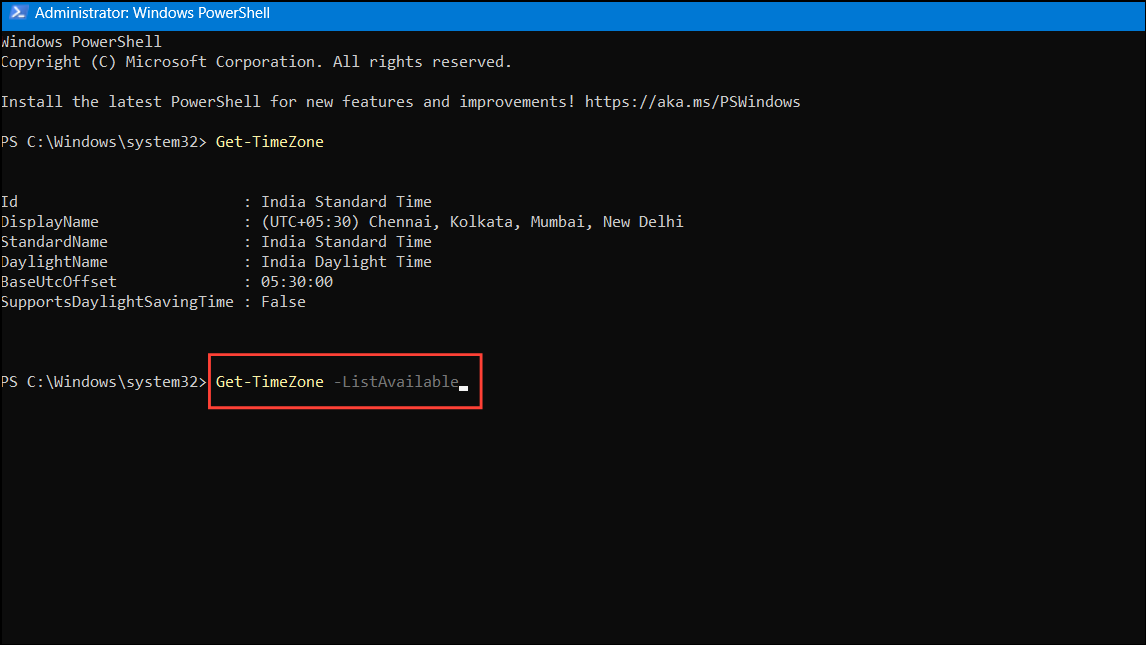
Step 2: To display the current time zone, type Get-TimeZone and press Enter.
Step 3: To list all available time zones, type Get-TimeZone -ListAvailable.
Step 4: Set the time zone by typing Set-TimeZone -Name "Your Time Zone", replacing "Your Time Zone" with the desired time zone name.
Example: Set-TimeZone -Name "Eastern Standard Time"
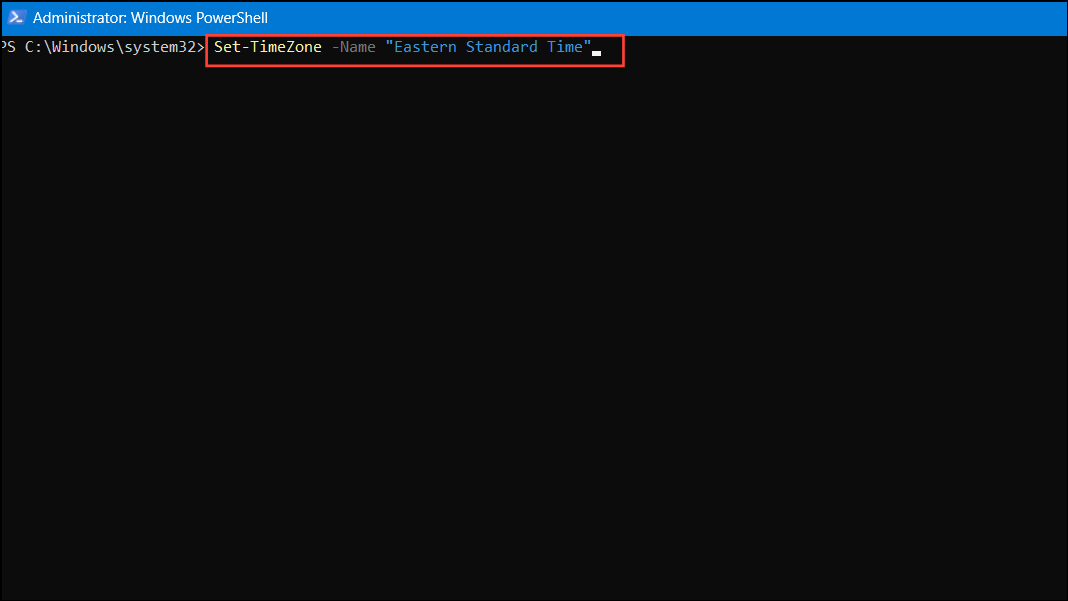
These commands allow you to script time zone changes or adjust settings remotely.
Troubleshooting Time Zone Issues in Windows 11
If you're unable to change the time zone, it might be due to account permissions or system policies.
Step 1: Verify that you're logged in with an administrator account. Open Settings, click on Accounts, and confirm that your account has administrative privileges.
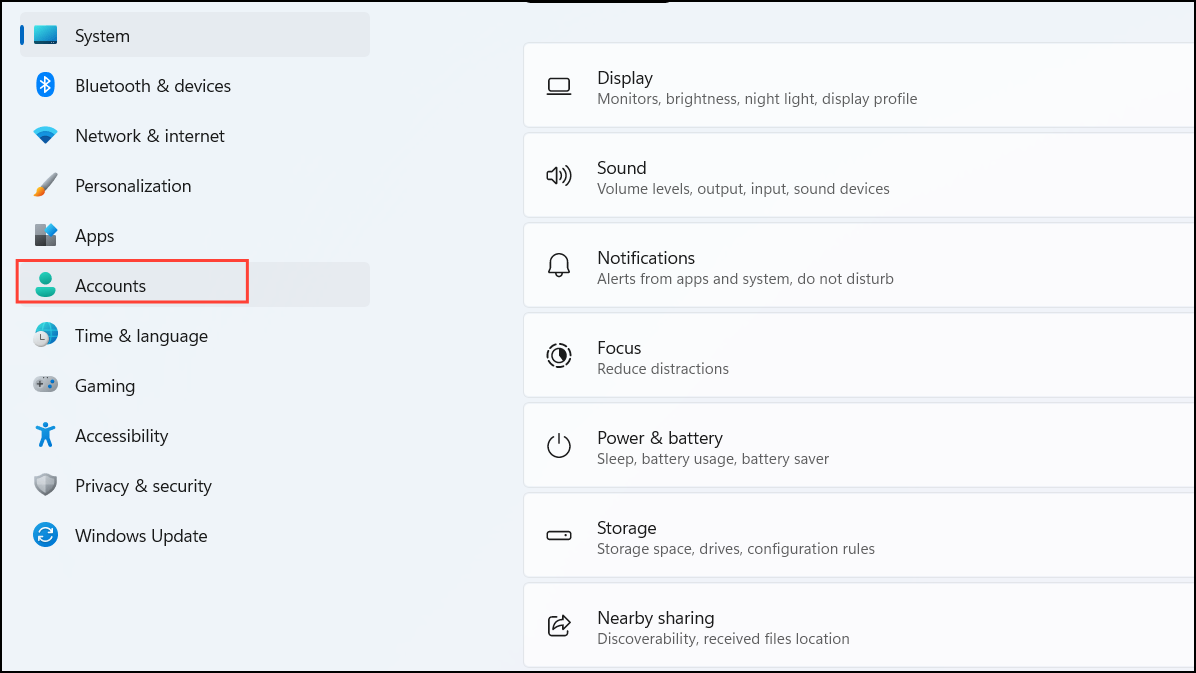
Step 2: If you're not an administrator, log in with an admin account or contact your system administrator for assistance.
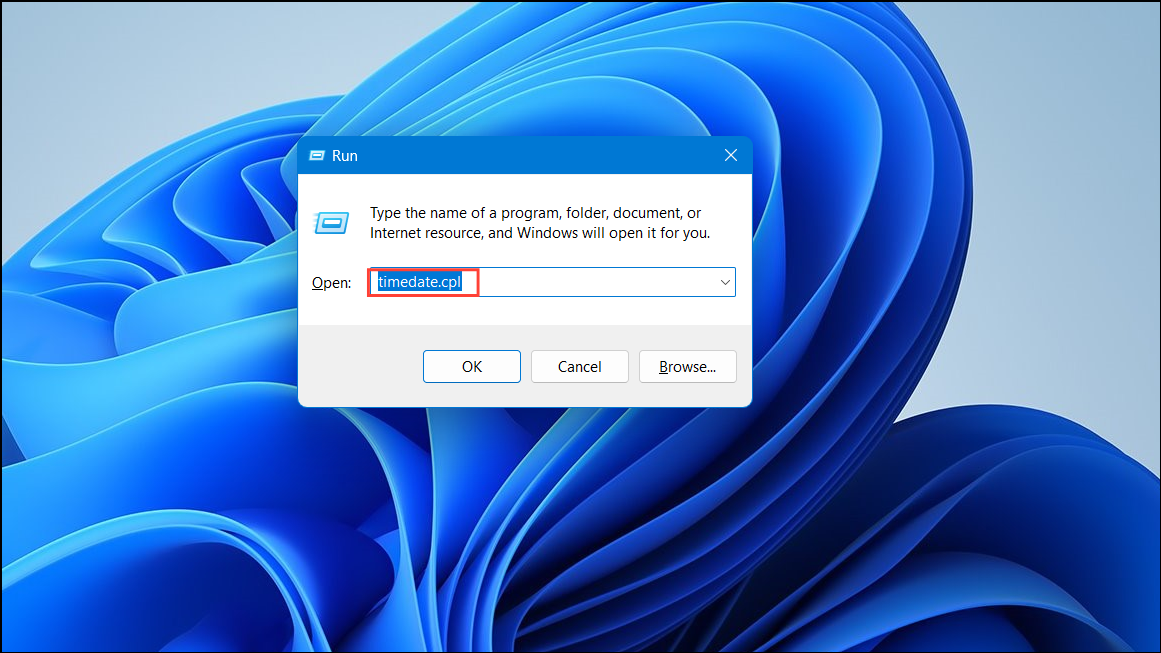
Step 3: Use the Control Panel to adjust the time zone. Press Windows + R to open the Run dialog, type timedate.cpl, and press Enter.
Step 4: In the Date and Time window, click on Change time zone... and select your desired time zone from the dropdown menu.
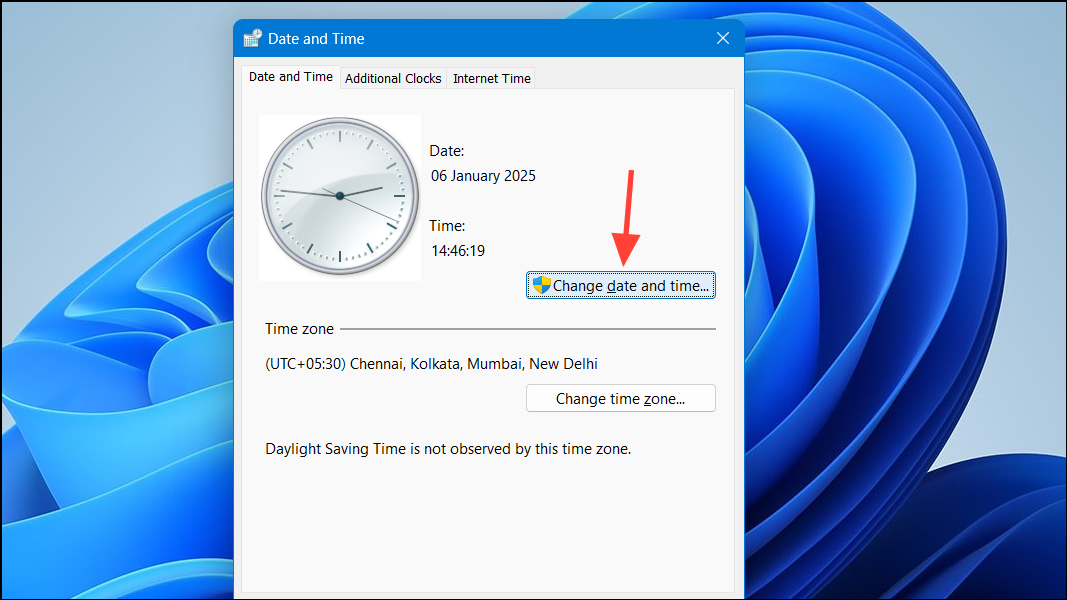
Step 5: Click OK to apply the changes.
By following these methods, you can ensure that your Windows 11 device displays the correct time, keeping your schedule organized and your applications running smoothly.


