
Customizing your computer’s name in Windows 11 is a straightforward process that can be accomplished through various methods. Whether you’ve recently acquired a new PC or simply want to personalize your existing one, this guide will walk you through the different approaches to change your computer’s name.
Rename your PC using Windows Settings
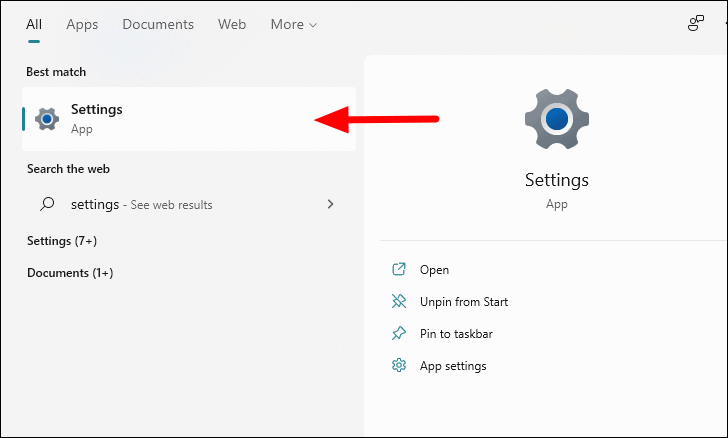
The most user-friendly method to change your computer’s name in Windows 11 is through the Settings app:
- Press the Windows key and type “Settings”, then click on the app to open it.
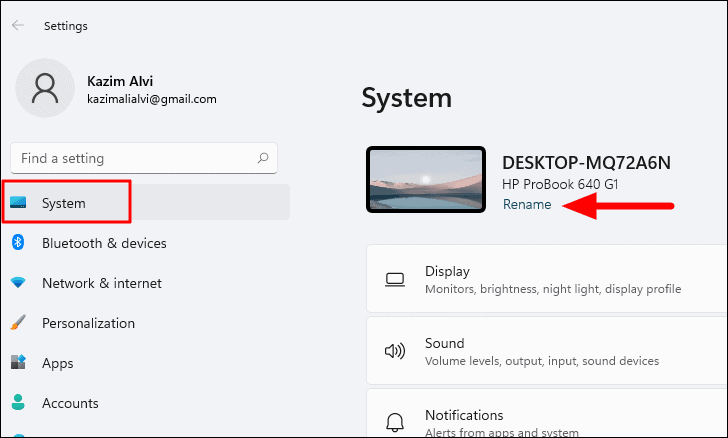
- In the System settings, you’ll see your current computer name displayed at the top right. Click on the “Rename” button beneath it.
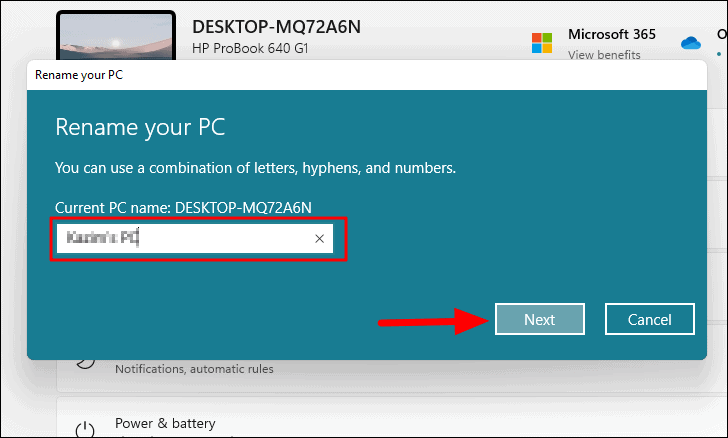
- Enter your desired new name for the computer and click “Next”.
- You’ll be prompted to restart your computer to apply the changes. Save any open work and restart when ready.
Note: Avoid using spaces, apostrophes, colons, underscores, periods, or other special characters in the computer name. Stick to alphabets, numbers, and hyphens for a valid name.
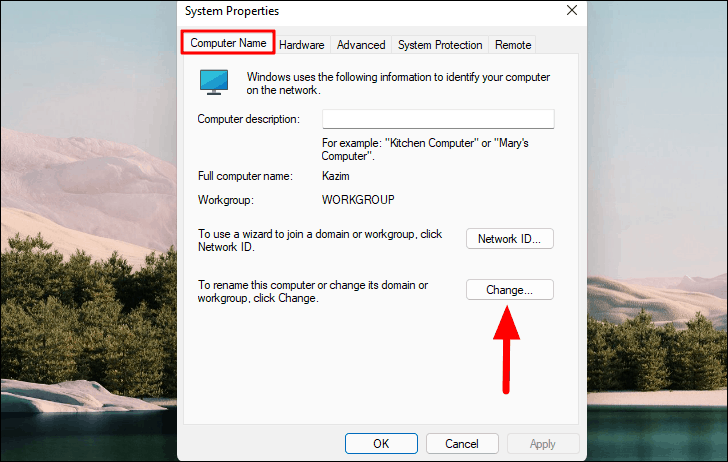
Modify computer name via System Properties
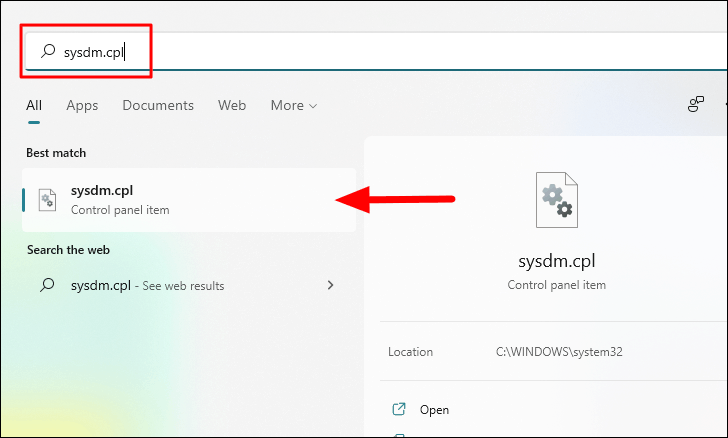
Another method that provides helpful feedback on naming conventions is through System Properties:
- Press the Windows key, type “sysdm.cpl”, and click on the result to open System Properties.
- In the Computer Name tab, click on the “Change” button.
- Enter the new name for your computer and click “OK”.
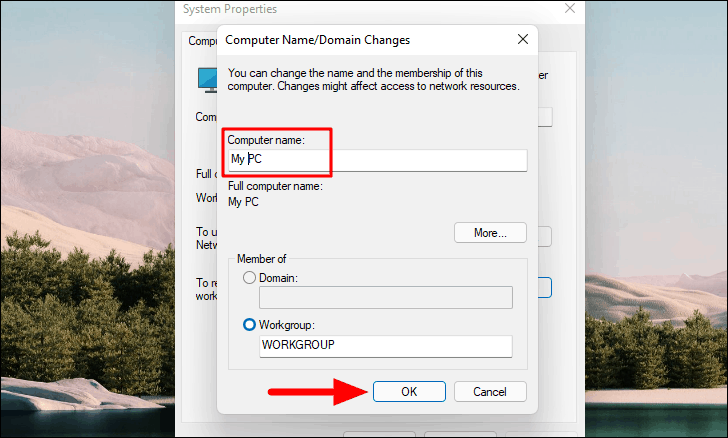
- When prompted, choose to restart your computer immediately or later.
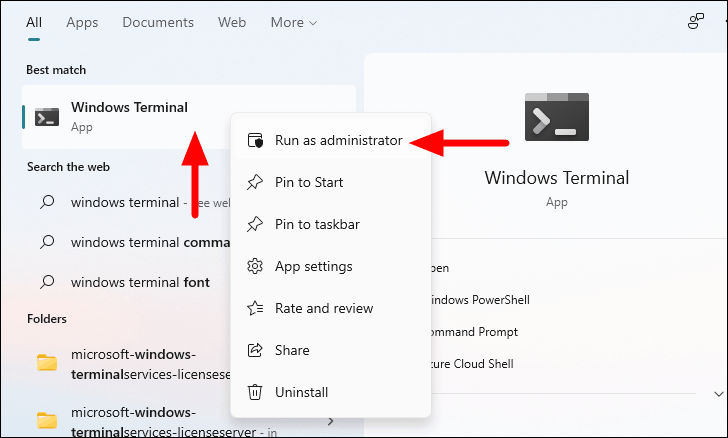
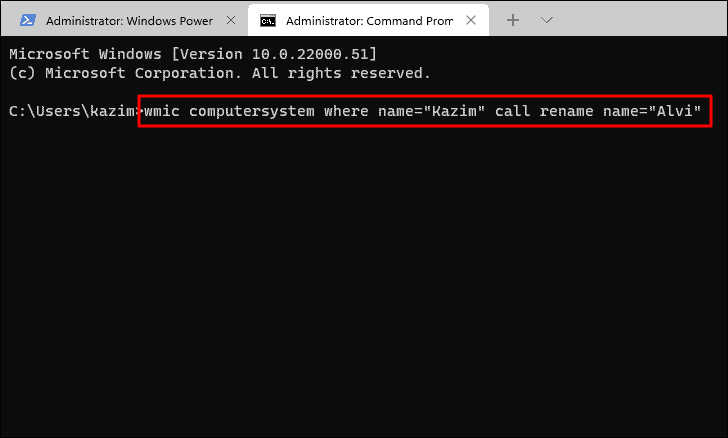
Alter computer name using Command Prompt
For those comfortable with command-line interfaces, the Command Prompt offers another way to rename your PC:
- Search for “Windows Terminal” in the Start menu, right-click it, and select “Run as administrator”.
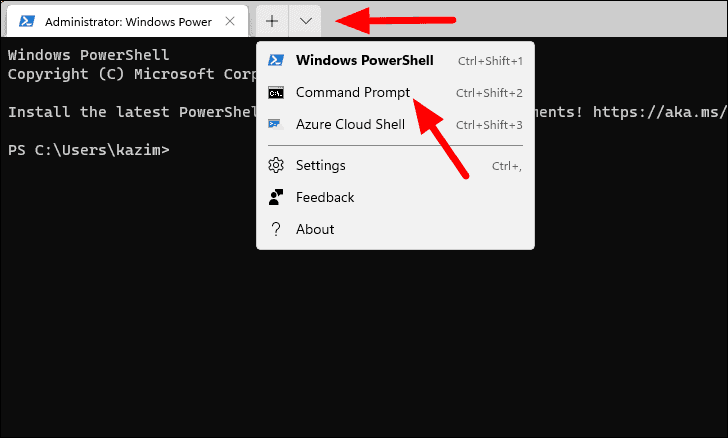
- Ensure you’re in the Command Prompt tab, not PowerShell or Azure Cloud Shell.
- Type the following command, replacing “Current Name” with your PC’s current name and “New Name” with your desired name:
wmic computersystem where name="Current Name" call rename name="New Name"
- Press Enter to execute the command.
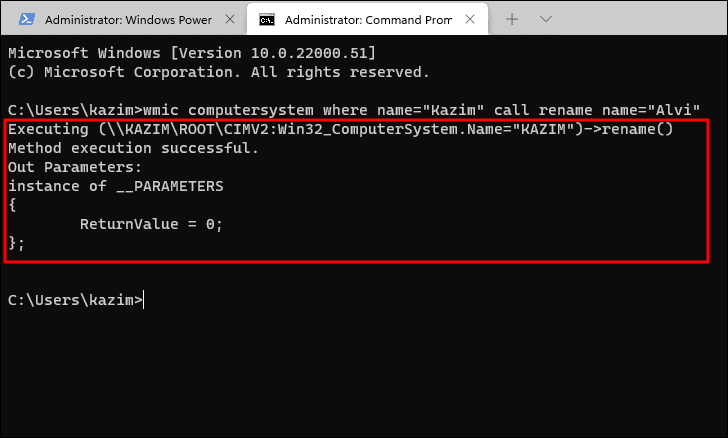
- If successful, you’ll see “ReturnValue = 0”. Close the Terminal and restart your computer.
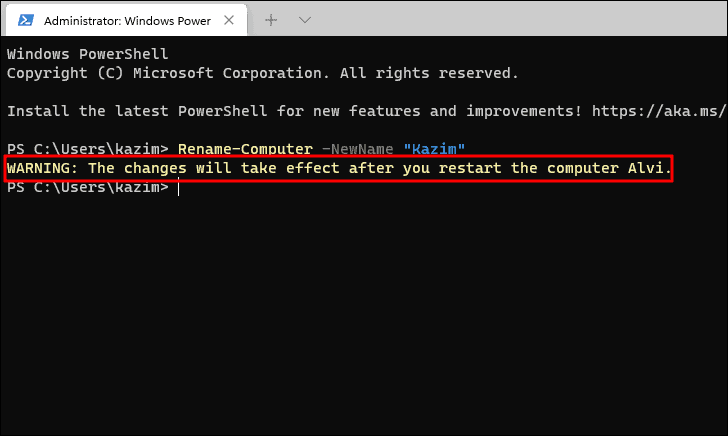
Rename PC with PowerShell
PowerShell provides yet another method to change your computer’s name:
-
Open Windows Terminal as an administrator, as described in the Command Prompt method.
-
Switch to the PowerShell tab and enter this command, replacing “New Name” with your chosen name:
Rename-Computer -NewName "New Name"
- Press Enter to execute the command.

- After successful execution, close the Terminal and restart your computer to apply the changes.
Each of these methods will effectively change your computer’s name in Windows 11. Choose the one that best suits your comfort level with different interfaces and tools.


