
Windows 11 stores a record of your activity history, including the apps you use, files you open, and websites you visit in Microsoft Edge. This feature supports features like Timeline and cross-device syncing if you use a Microsoft account. However, retaining this data can raise privacy concerns or clutter your device with records you no longer need. Clearing your recent activities directly addresses these issues, giving you more control over your personal information and device performance.
Clear Activity History Using Windows 11 Settings
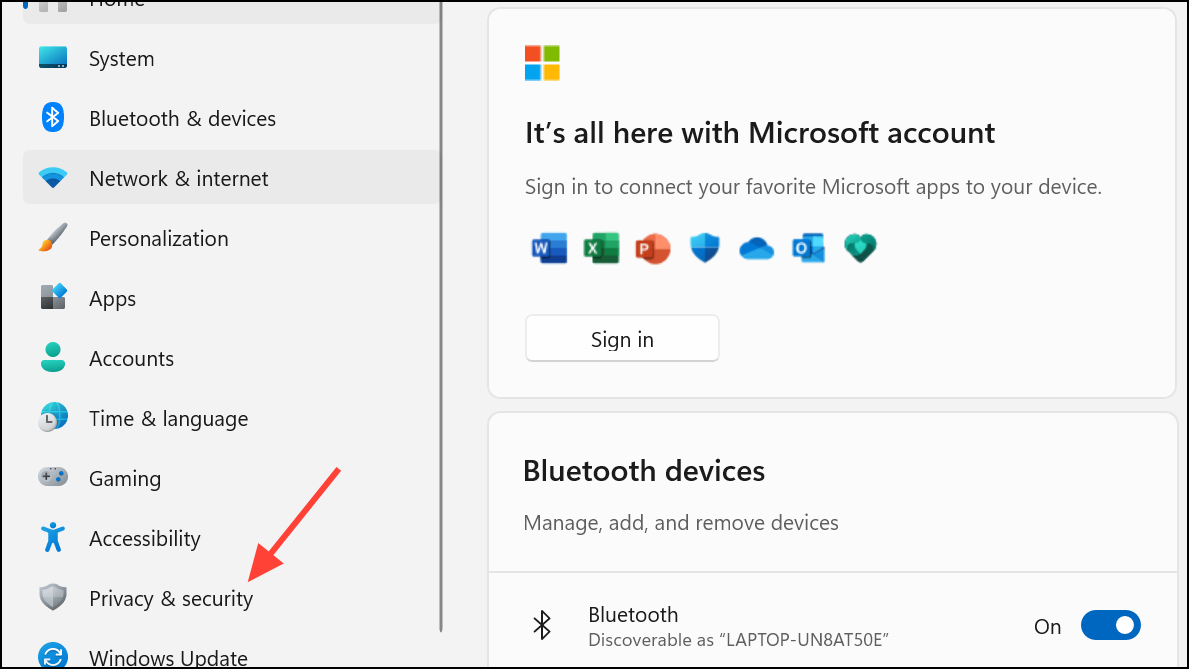
Step 1: Open the Settings app by pressing Win + I on your keyboard. This shortcut quickly brings up the main configuration panel for your system.
Step 2: In the left-hand menu, select Privacy & security. This section contains all privacy-related settings, including permissions and activity tracking.
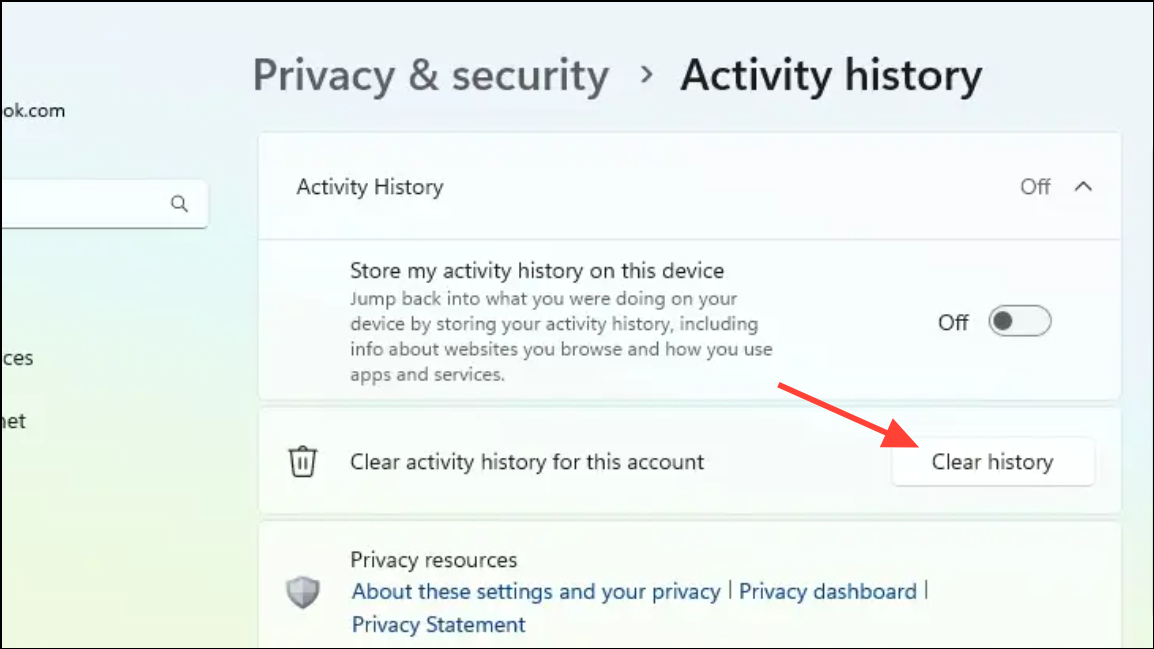
Step 3: Scroll down and click on Activity history under the “Windows permissions” section. Here you will find options to manage what Windows records about your usage.
Step 4: Locate the Clear activity history for this account option. Click the Clear history button. A checkmark will appear next to the button after your history is successfully deleted, confirming the process is complete.
Clearing your activity history in this way removes locally stored records of your recent activities. This action does not affect your browsing history in Microsoft Edge or other browsers, nor does it remove files from your device—it only deletes the record of access.
Stop Windows 11 from Saving Future Activity History
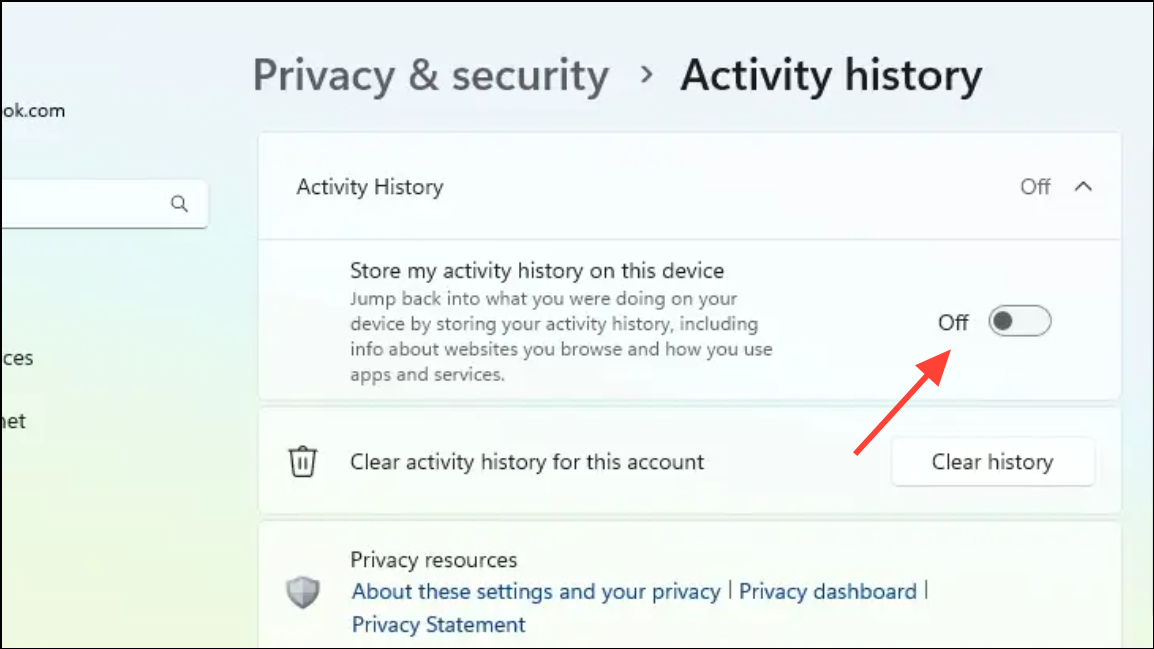
Step 1: In the same Activity history settings page, find the toggle labeled Store my activity history on this device.
Step 2: Switch this setting to Off. This prevents Windows from recording your future activities, giving you greater privacy control moving forward.
Turning off this setting means features like Timeline and some personalized suggestions will no longer reflect your previous actions. However, your browsing history in Microsoft Edge and other application-specific histories may still be retained separately.
Delete Activity History from Your Microsoft Account Online
For users who previously allowed Windows to sync activity history with their Microsoft account, additional records may exist in the cloud. Removing these ensures your data is not retained across devices or on Microsoft servers.
Step 1: Go to the Microsoft Privacy Dashboard in your web browser and sign in with your Microsoft account credentials.
Step 2: Expand the relevant activity categories, such as App and service activity, Browsing history, or Location activity.
Step 3: Click the Clear all ... activity link for each category you want to remove. Confirm your choice when prompted. If you prefer, you can delete individual items instead of clearing all at once by clicking the trash can icon beside each entry.
Remove Specific Activities from Timeline (If Available)
On some Windows 11 builds, Timeline lets you view and manage your daily activities. If you want to clear only certain items instead of your entire history:
Step 1: Open Timeline by pressing Win + Tab.
Step 2: Right-click on any activity you wish to delete. Select the appropriate option to remove that activity or clear all activities from a specific day.
This approach allows for granular control, enabling you to keep useful records while removing sensitive or unnecessary entries.
Using The Group Policy Editor
Administrators or advanced users can use Group Policy or Registry Editor to disable activity history collection across multiple devices or enforce privacy policies. To use the Group Policy Editor in Windows,
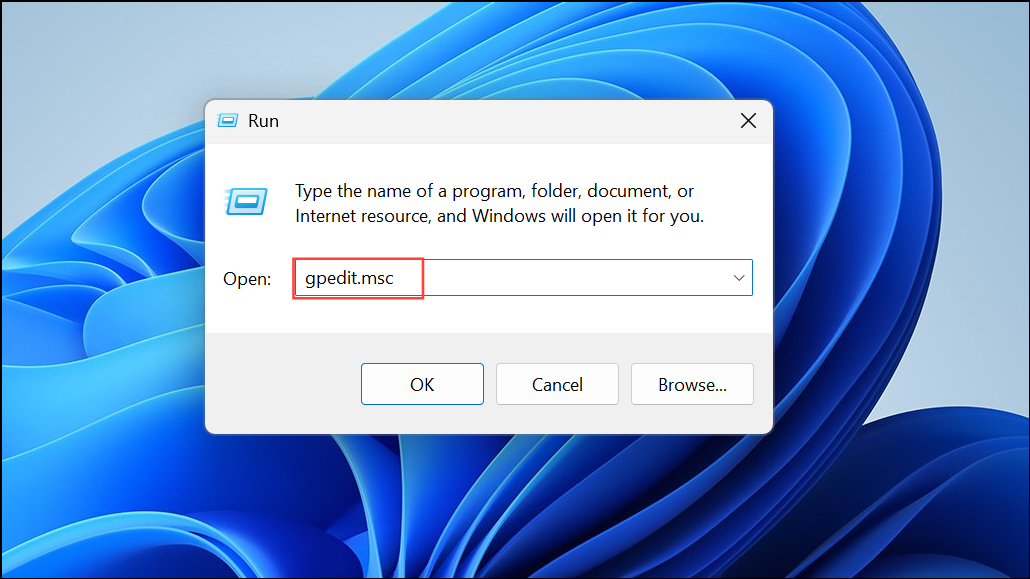
Step 1: Press Win + R, type gpedit.msc, and press Enter.
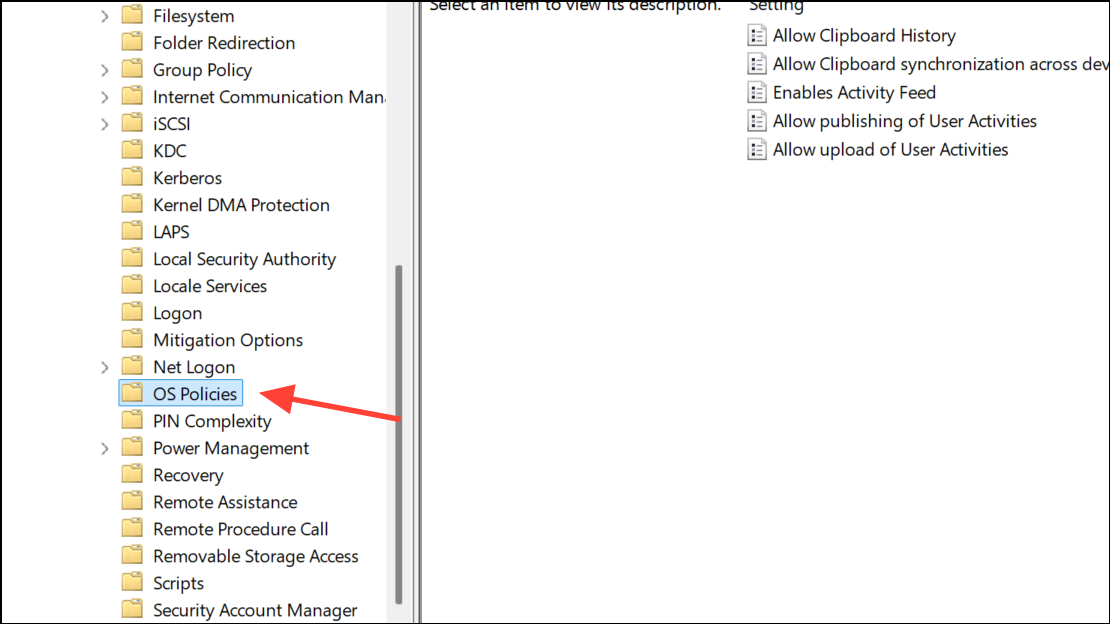
Step 2: Navigate to Computer Configuration > Administrative Templates > System > OS Policies.
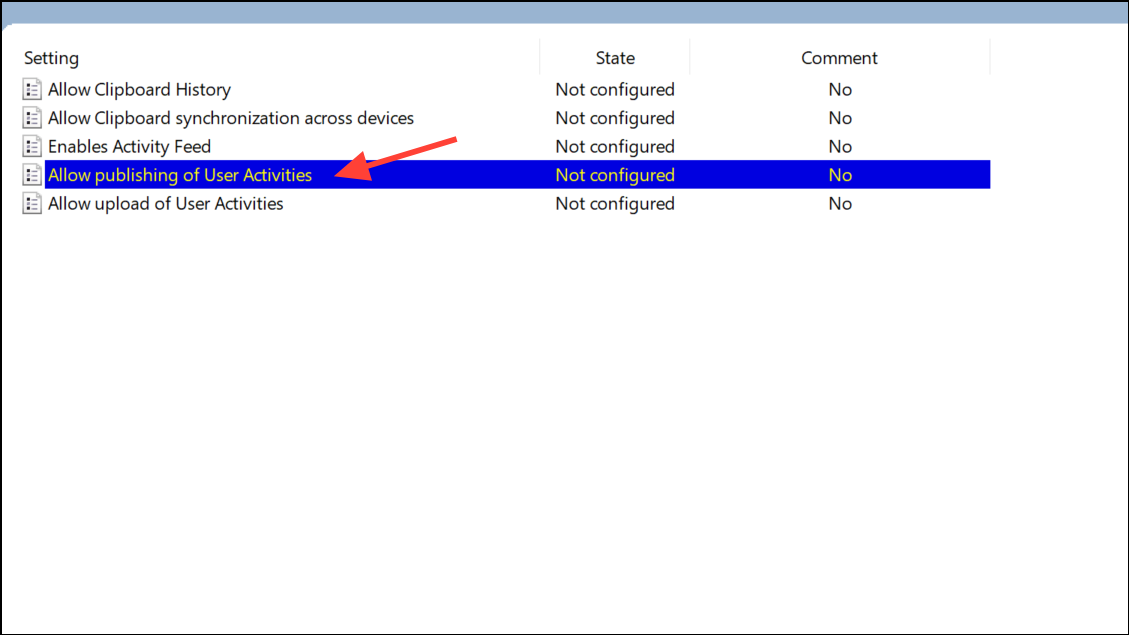
Step 3: Double-click “Allow publishing of User Activities.”
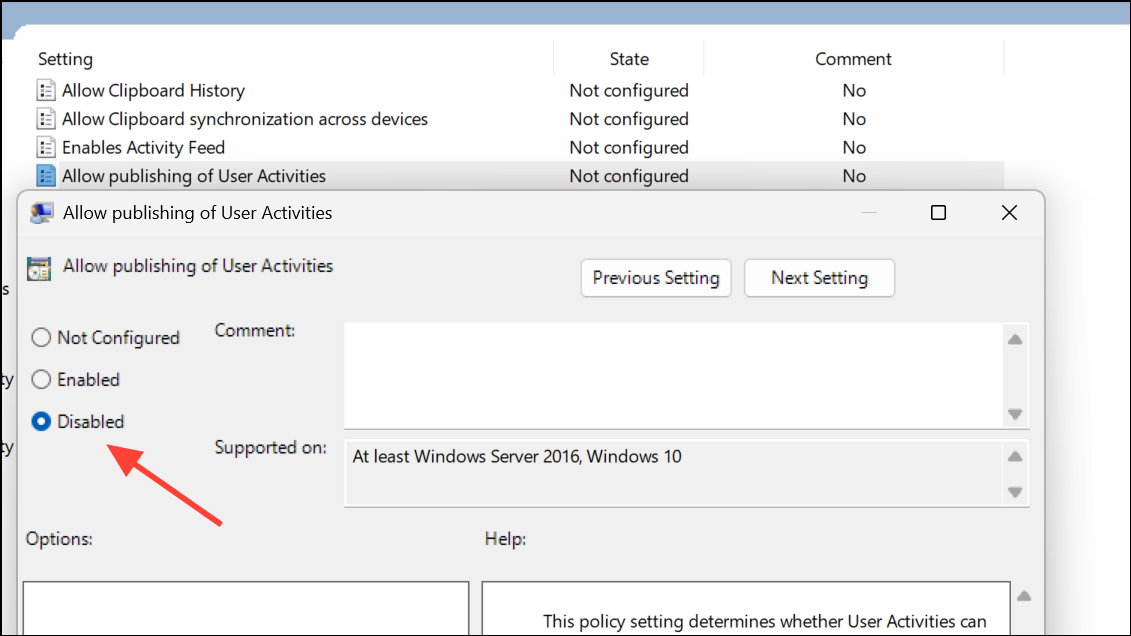
Step 4: Select “Disabled” to block activity tracking.
Step 5: Click Apply, then OK.
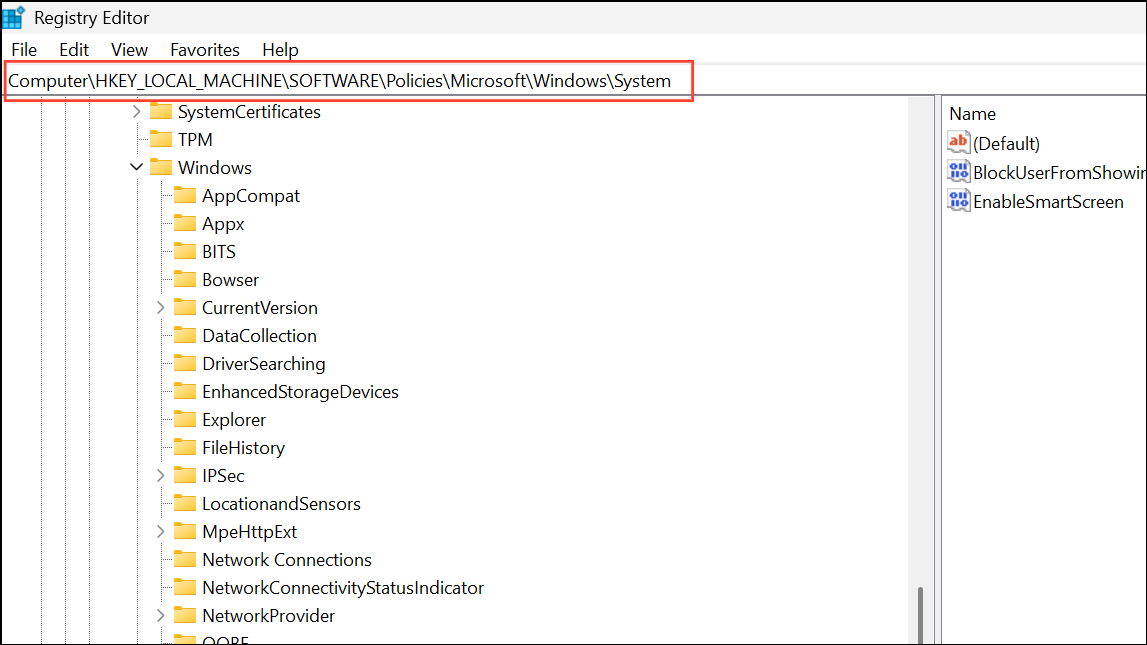
Using The Registry Editor
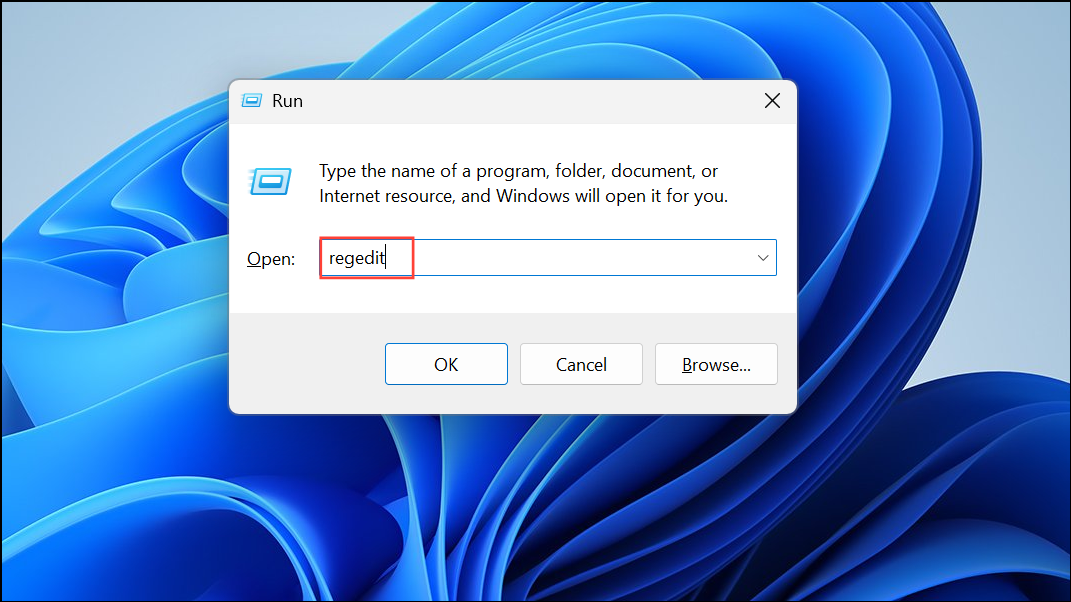
Step 1: Press Win + R, type regedit, and press Enter.
Step 2: Navigate to HKEY_LOCAL_MACHINE\SOFTWARE\Policies\Microsoft\Windows\System. If the System key doesn’t exist, create it by right-clicking and selecting New > Key.
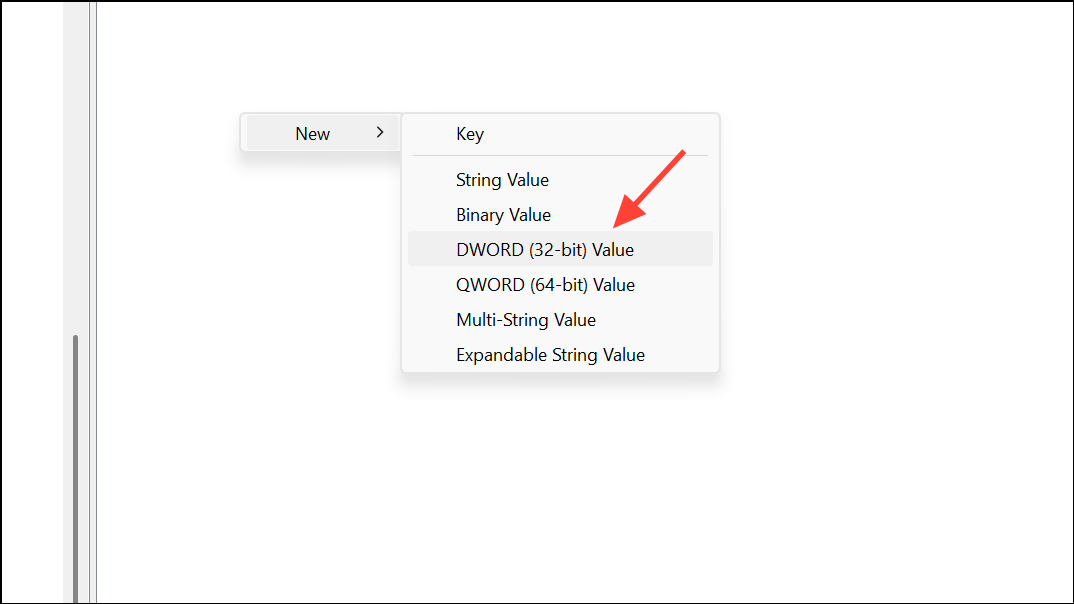
Step 3: Right-click in the right pane, select New > DWORD (32-bit) Value, and name it PublishUserActivities.
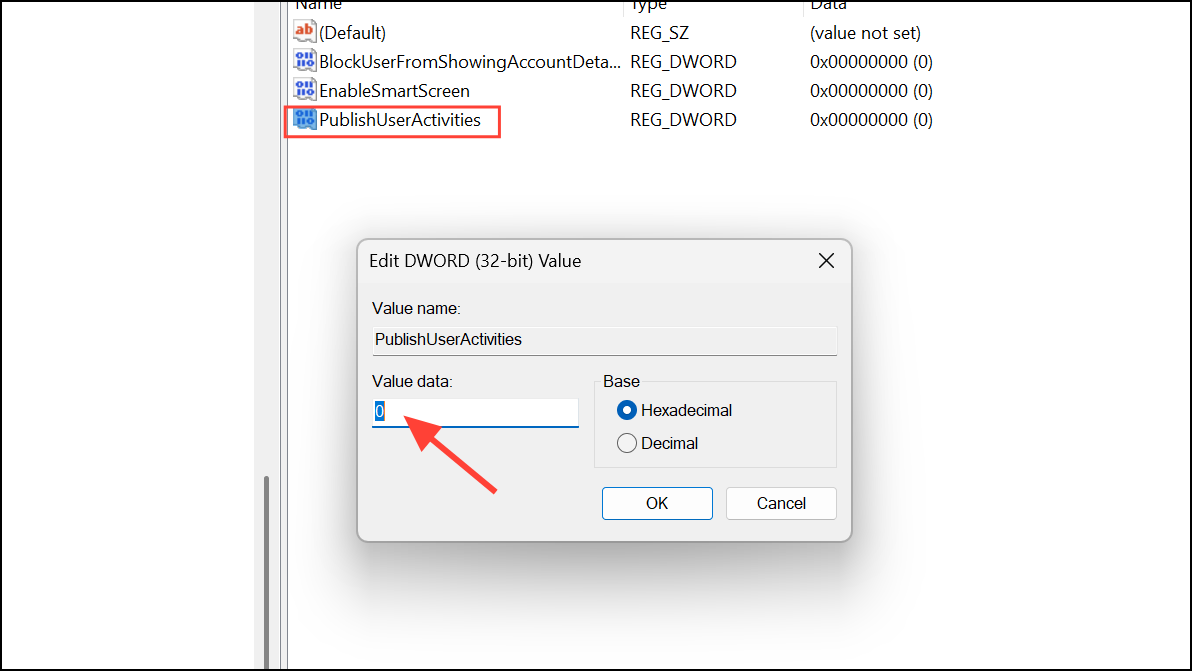
Step 4: Set its value to 0 and restart your PC for changes to take effect.
These steps provide persistent control over activity history collection, especially useful in managed or shared environments.
Clearing recent activities on Windows 11 gives you direct control over your privacy and can help keep your device clutter-free. Regularly reviewing and managing these settings ensures your data stays secure and only as visible as you want it to be.