
We’re going about our daily lives, trying to install the latest software update or download a new app, when suddenly we can’t. It’s one of the inevitable truths of the modern world: we run out of storage on our phones.
And when it comes to iPhones, it’s a serious problem as you cannot expand your storage. It doesn’t matter how much you invested in the higher storage model to get that extra storage. Eventually, we all hit that wall. The storage hogged by photos or apps is fine. We know what they are and we can even delete them whenever we want.
But it’s the ‘System Data’ (dubbed ‘Other storage’ in previous iOS iterations) that perplexes everyone. Let’s see what exactly this storage is and how to get rid of it.
What is System Data and Where to Find it?
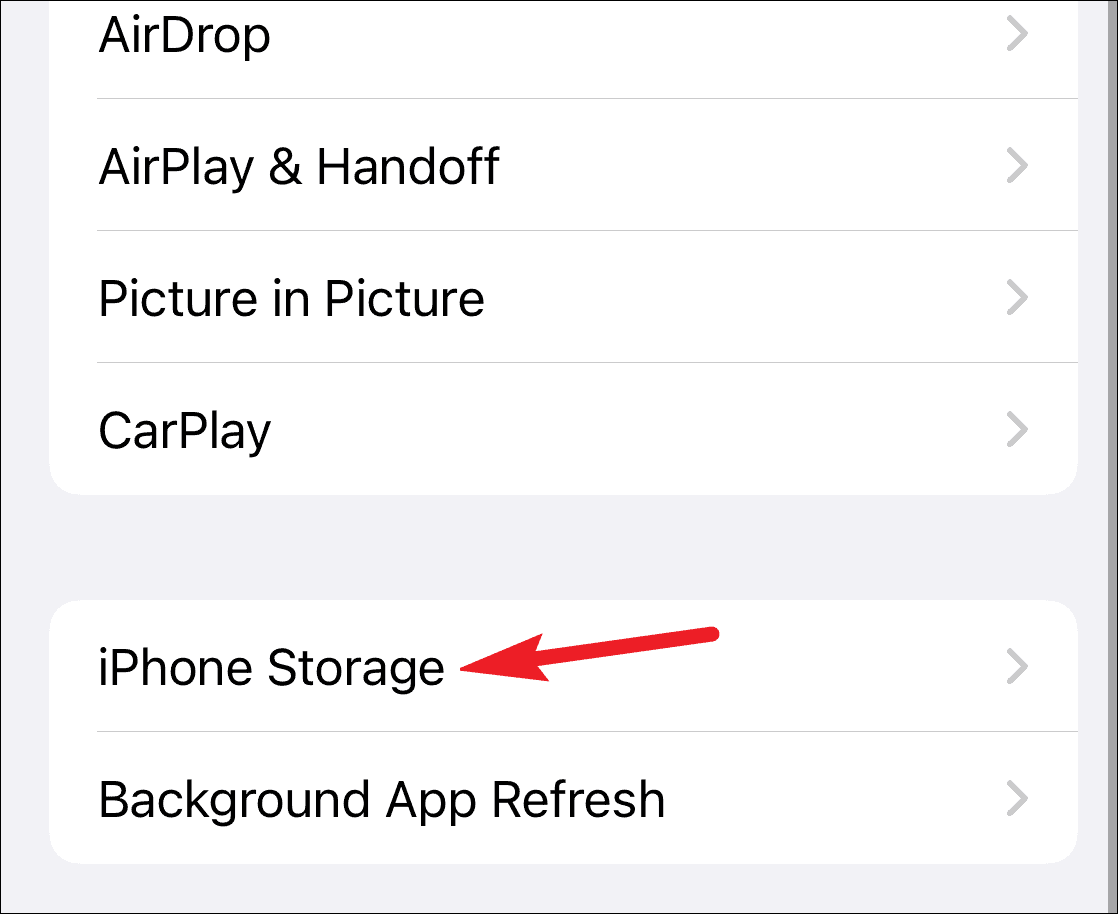
First, you should see if System Data is the bane of your existence. Open the Settings app and scroll down to ‘General’.
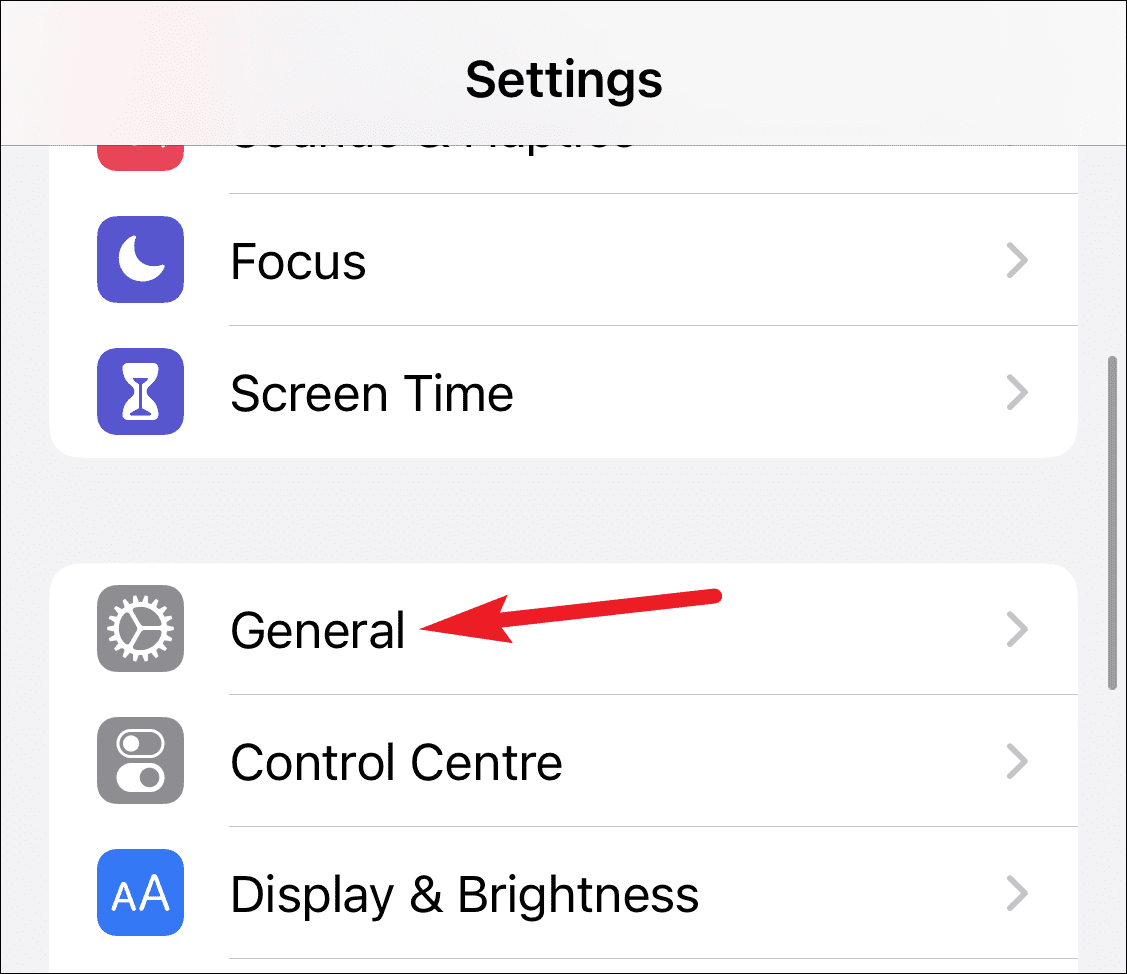
Then, tap ‘iPhone Storage’.
A bar chart will appear representing your iPhone storage as an amalgam of different categories like photos, apps, media, etc. It’ll also show your apps in descending order of the amount of storage they’re occupying, from the apps taking most storage to the least. It might take a few seconds to refresh and accurately represent the latest stats.
Once the bar chart loads, look closely at the categories. If ‘System Data’ or ‘Other’ storage is hogging space on your iPhone, you’ll see a large grey chunk taking up a lot of space in the bar chart towards the right end.
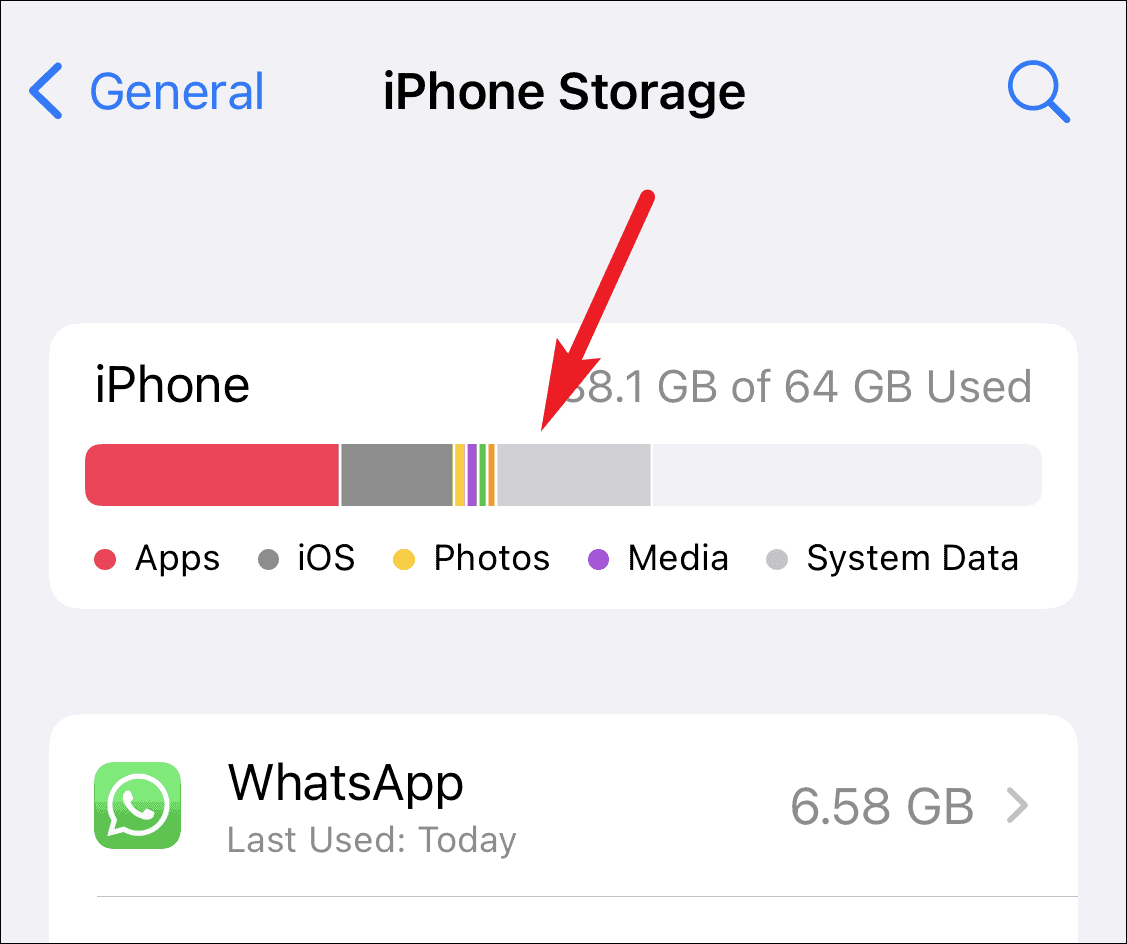
If you do see such a category, scroll past the apps all the way down.
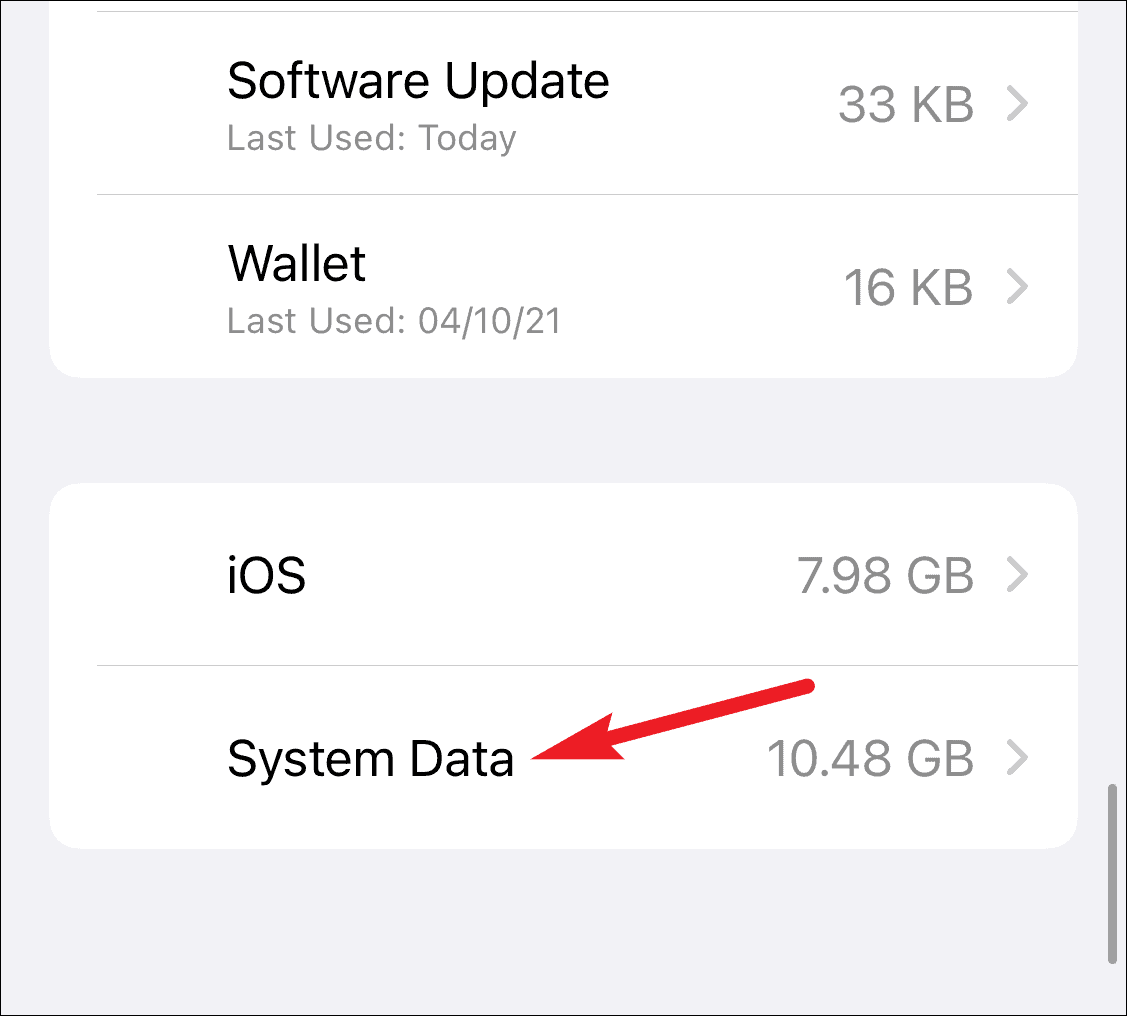
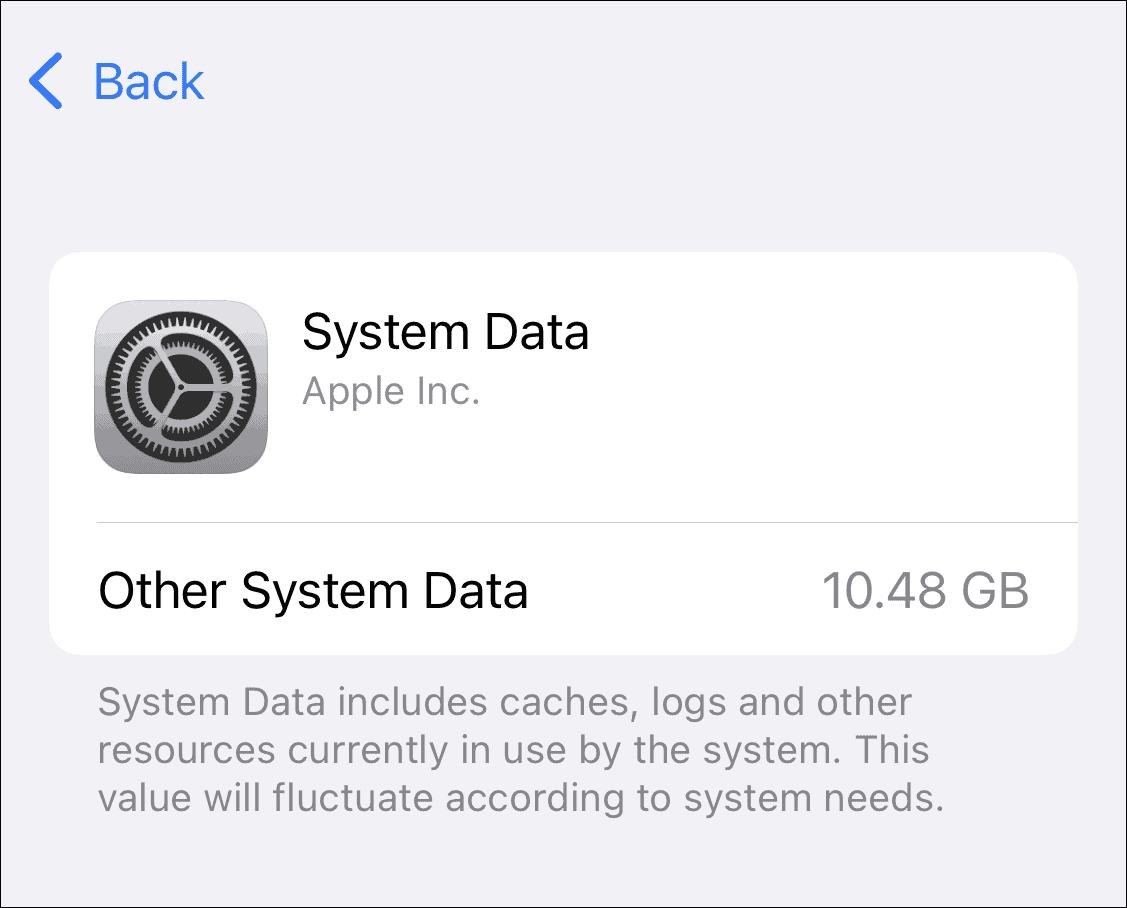
There you’ll see the option for ‘System Data’ (or ‘Other’, storage depending on which iOS you are) and the storage it’s currently occupying. It can range anywhere from a few hundred MBs to even 50 GB for some people. Tap it to open it.
You’ll see that iOS does not provide much information about what it is. It just says that Other System Data “includes caches, logs, and other system resources currently in use by the system.” That’s not much to go on. And unlike other categories, there’s not even an option to delete it.
So, what exactly is this? This storage keeps on varying because it’s made up of a lot of miscellaneous categories. It’s made up of system caches, logs, Siri voices (if you download more than one), to name a few. Most of these generally don’t take up much space but they can accumulate over time.
One of the biggest culprits is the data we stream, though. When we stream music, movies, or videos, they all contribute to the system data or other storage. If you were downloading these, they’d belong to the media section instead. But when we stream, iOS saves caches, especially of songs or videos we play the most, to ensure smooth playback. The cached content also includes data from browsers and other apps like Twitter, TikTok, Instagram, etc.
Although iOS is responsible for managing this System data so it doesn’t pose a problem, more often than not, it does end up creating a problem. Ideally, the cache for streaming a movie, for instance, should get cleared as soon as you’re done watching it. But it doesn’t always happen. And that’s how System Data starts to get out of hand.
iPhone acts like a true hoarder when it comes to storing cache. And the longer you’ve had your iPhone, the more System Data you’ve most likely racked.
How to Delete the System Data?
There’s no straightforward way to delete the system data. If it’s less than 5 GB, you might not even want to bother. But as the System Data increases and you get desperate for free storage on your iPhone, it’s perfectly understandable to want even those extra 4 or 5 GBs. While you can’t completely get rid of it, you can bring it down to less than 1 or 2 GB with extreme measures.
Let’s start with simpler solutions and work our way up to the most competent yet difficult fix.
Clear Safari History and Cache
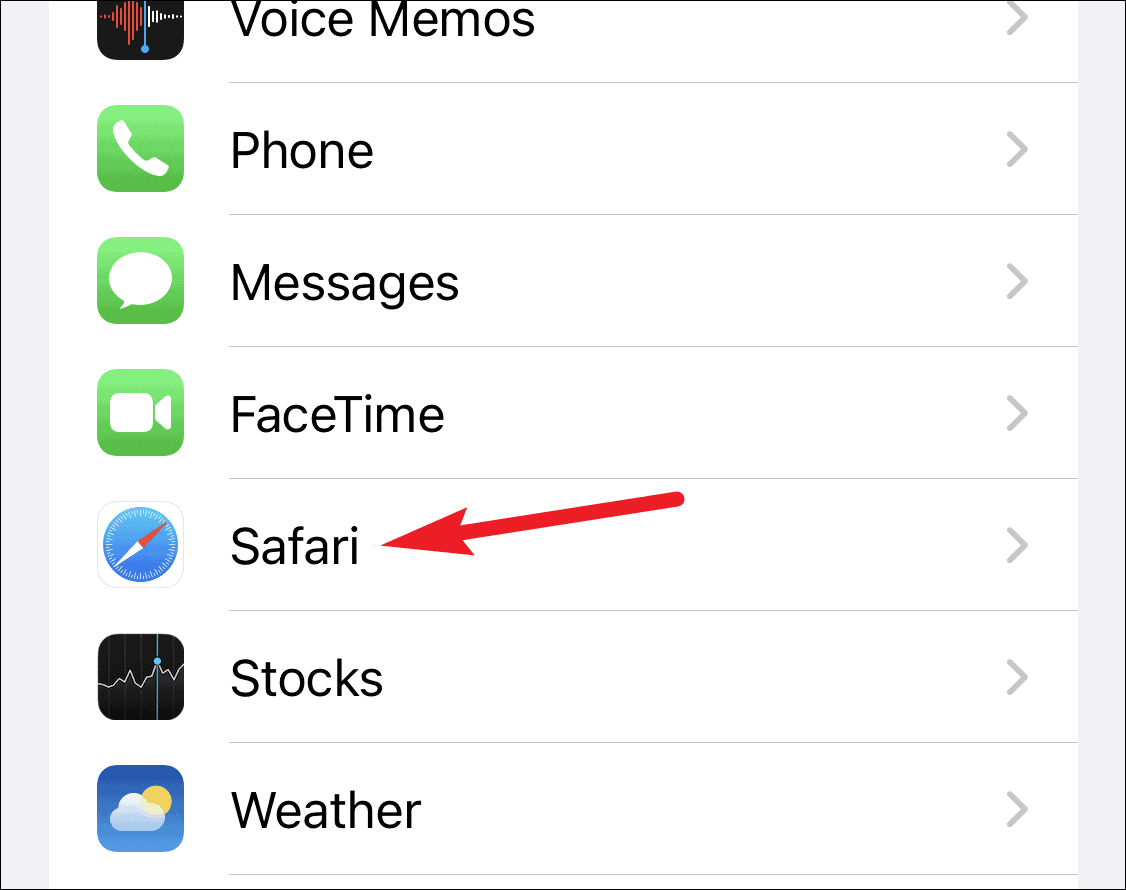
This is the most simple fix that clears up some System Data at least. Open the Settings app. Find and tap the option for ‘Safari’.
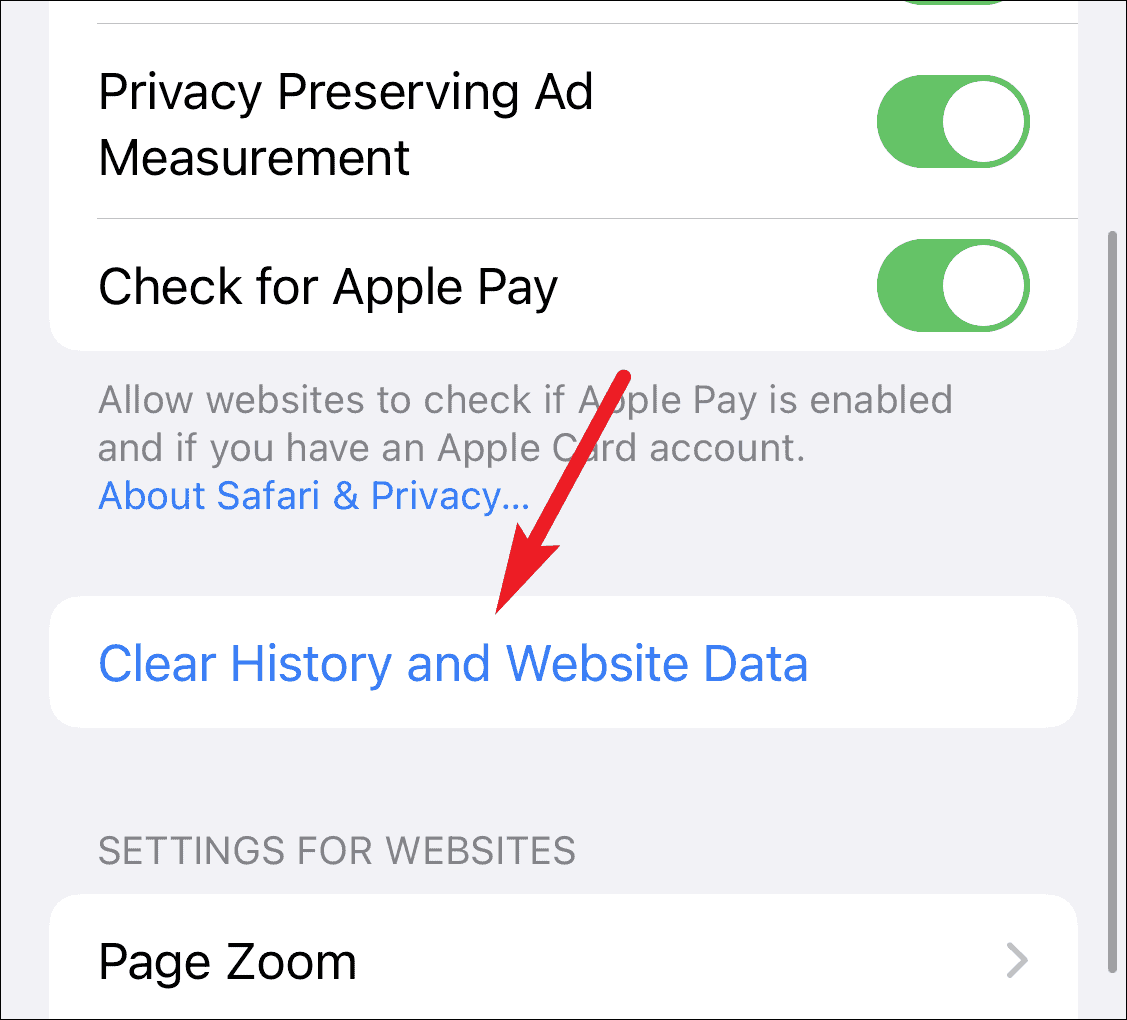
Then, scroll down and tap the option for ‘Clear History and Website Data’.
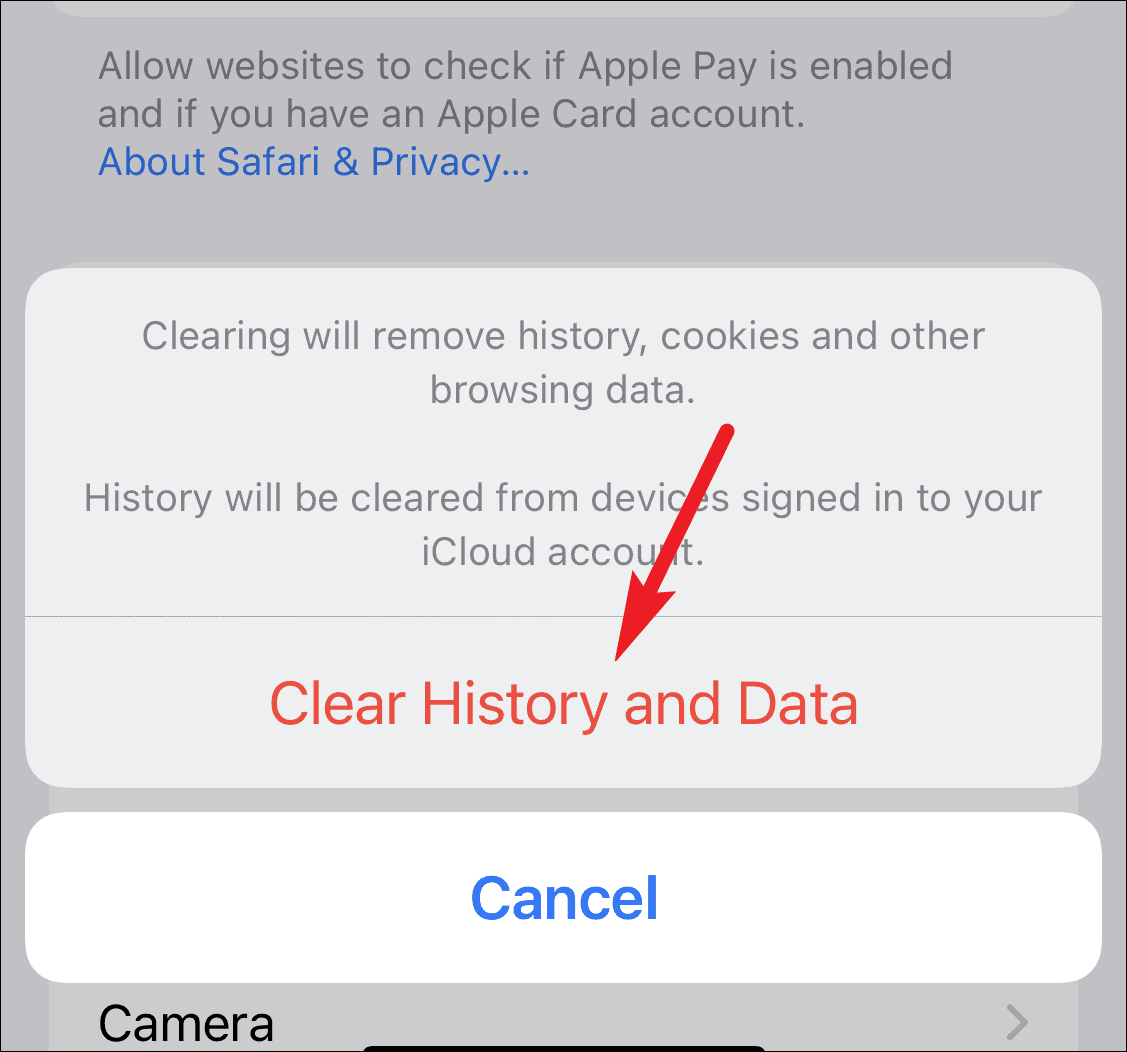
A confirmation prompt will appear. Tap ‘Clear History and Data’ to delete Safari history, cookies, and other browsing data.
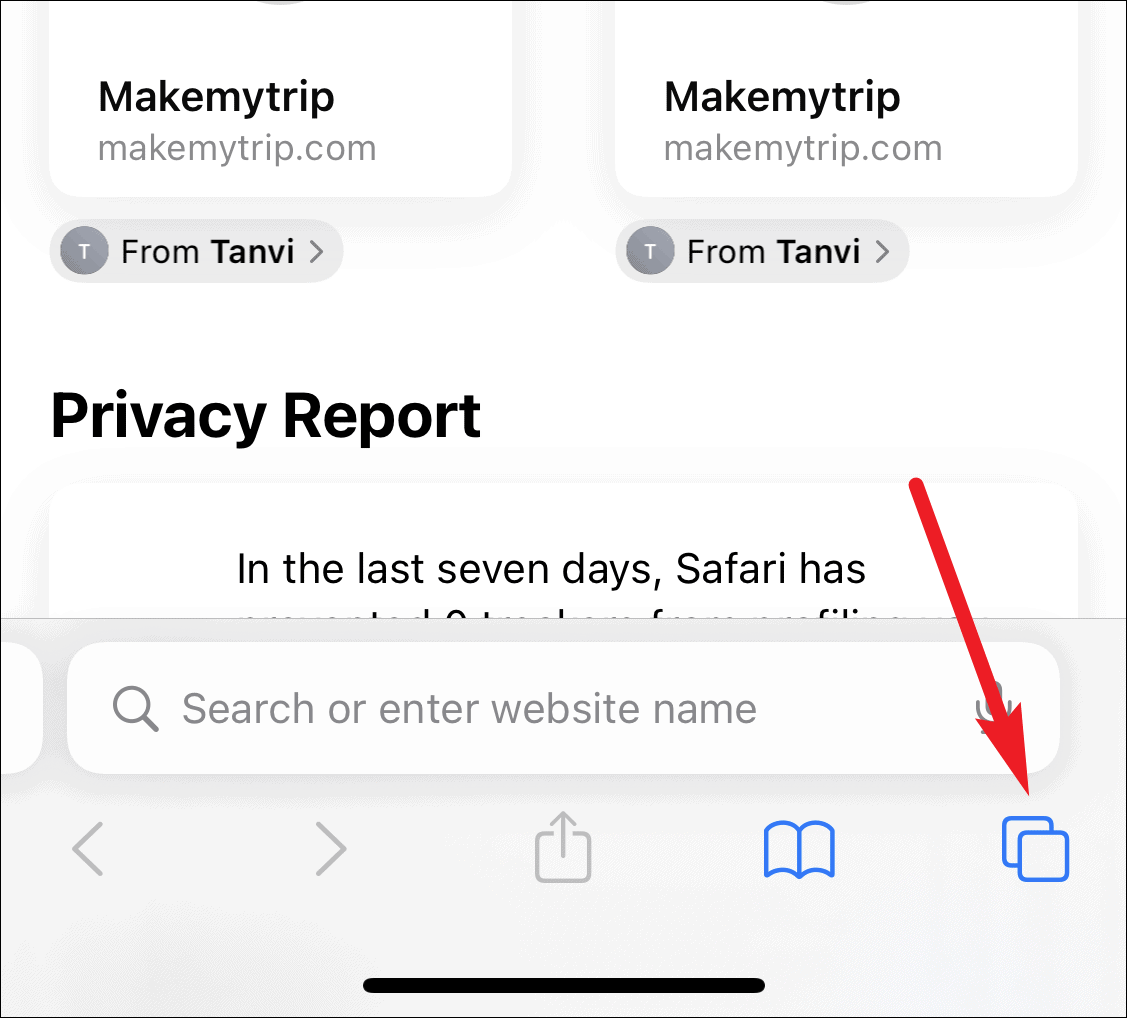
Alternative. If you want to keep your tabs open, you can also delete history and browsing data from Safari itself. Tap the ‘Bookmarks’ icon from the Safari toolbar at the bottom of the screen.
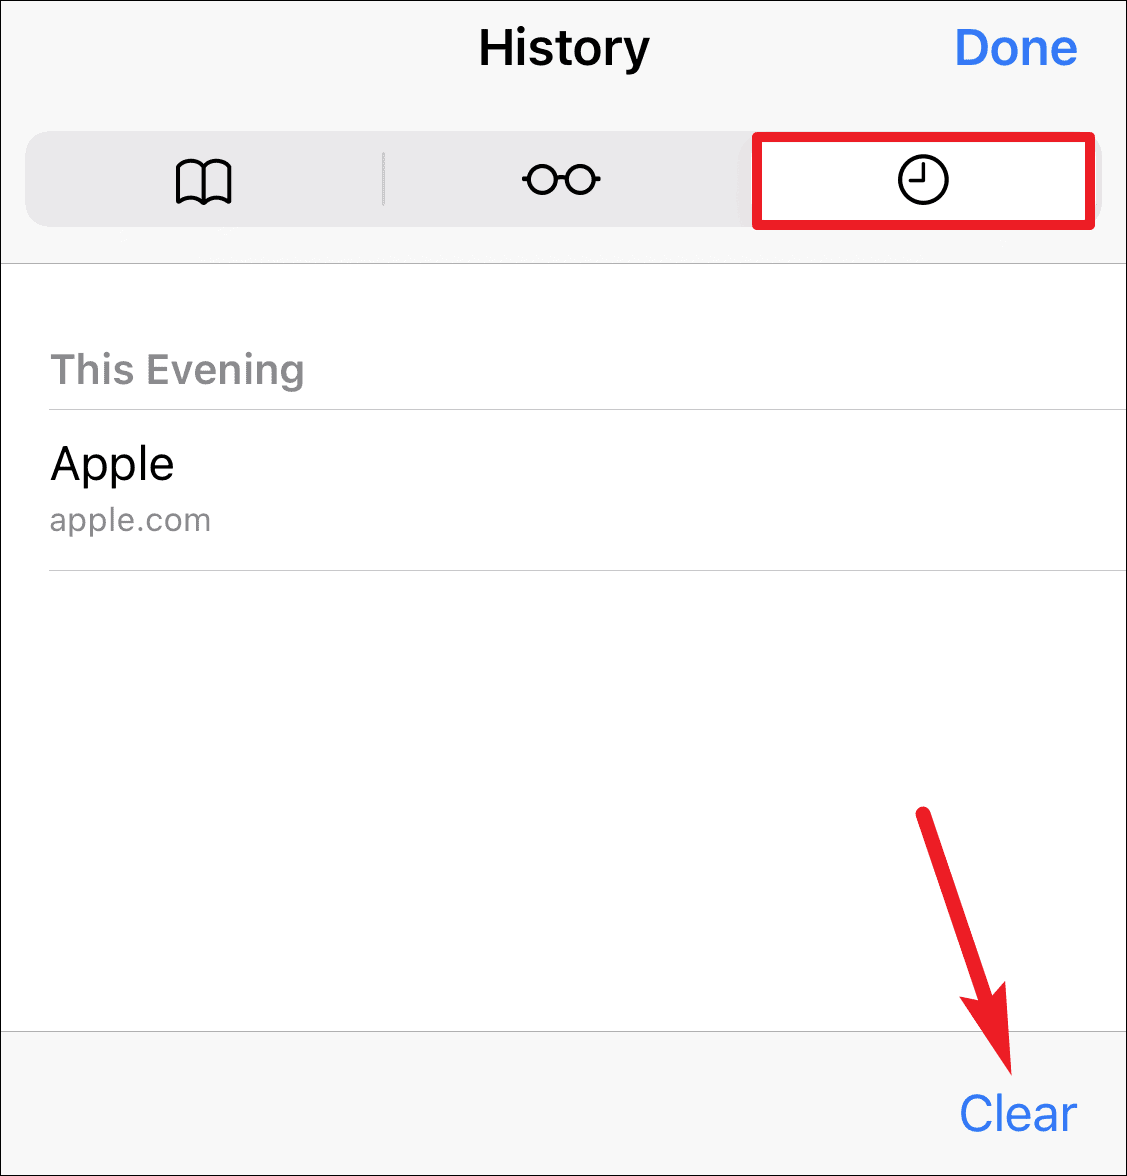
Then, go to the ‘History’ tab. Tap ‘Clear’ in the bottom-right corner of the screen.
Options like ‘All time’, ‘Today and yesterday’, ‘Today’, and ‘The last hour’ will appear. Tap ‘All Time’.
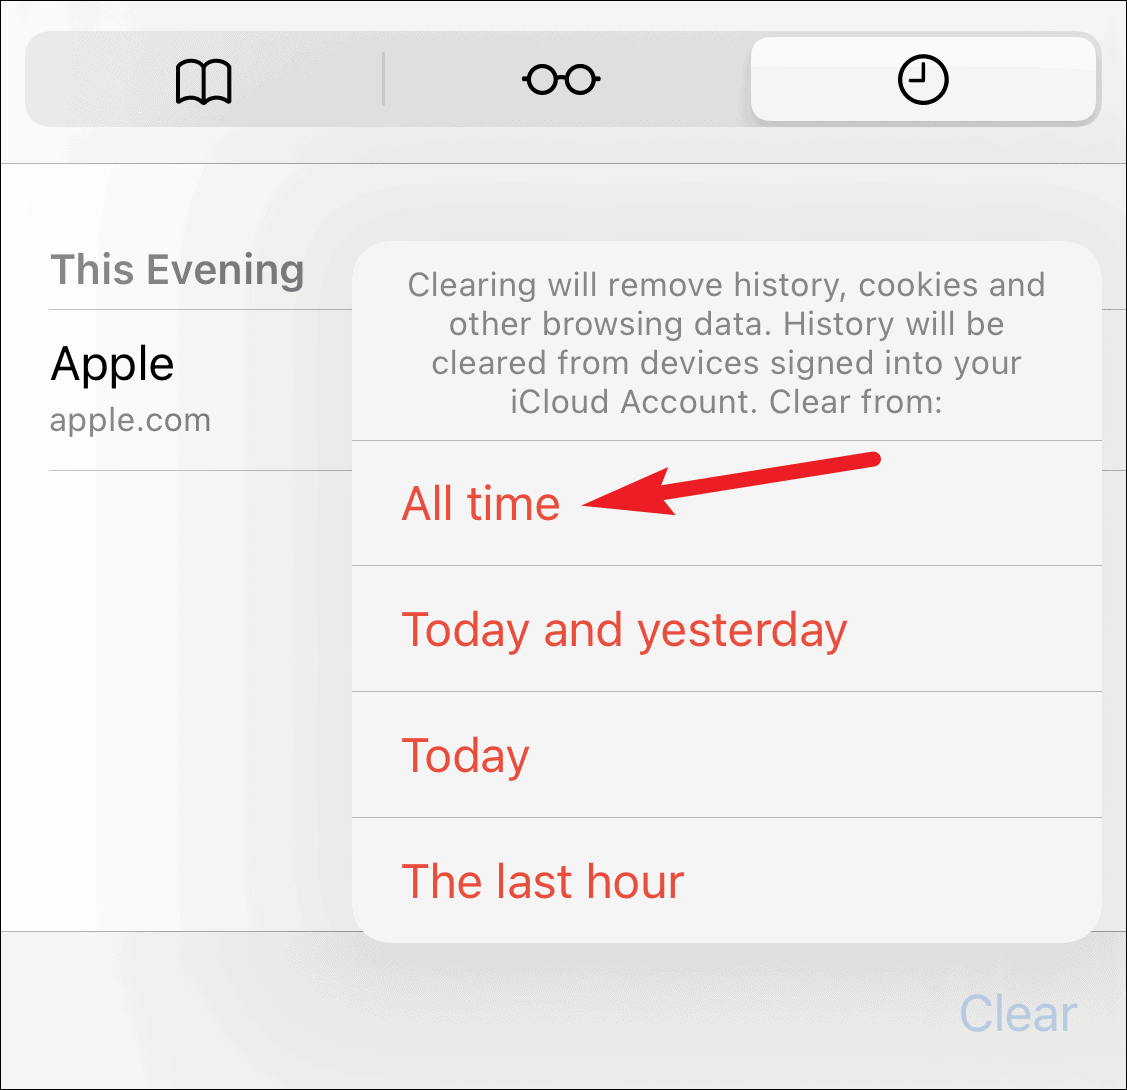
Your history will be deleted from all iCloud devices but your open tabs won’t be affected.
Now, go to iPhone Storage from General settings and check the status of System Data.
Offload Apps You Don’t Need
You can get rid of some System Data storage by clearing the cache from some of the apps. When you see the storage occupied by an app, you’ll see that the size of the app is considerably smaller than the total size. Though the rest of the size is for documents and data, there’s the cache for the app too.
Although there’s no direct way to clear app cache in iOS, it isn’t an impossible task. Offloading an app doesn’t delete the documents or data for the app but it will most likely delete the app cache.
If you’re not offloading apps, you can either enable the option for automatic offloading or offload them manually.
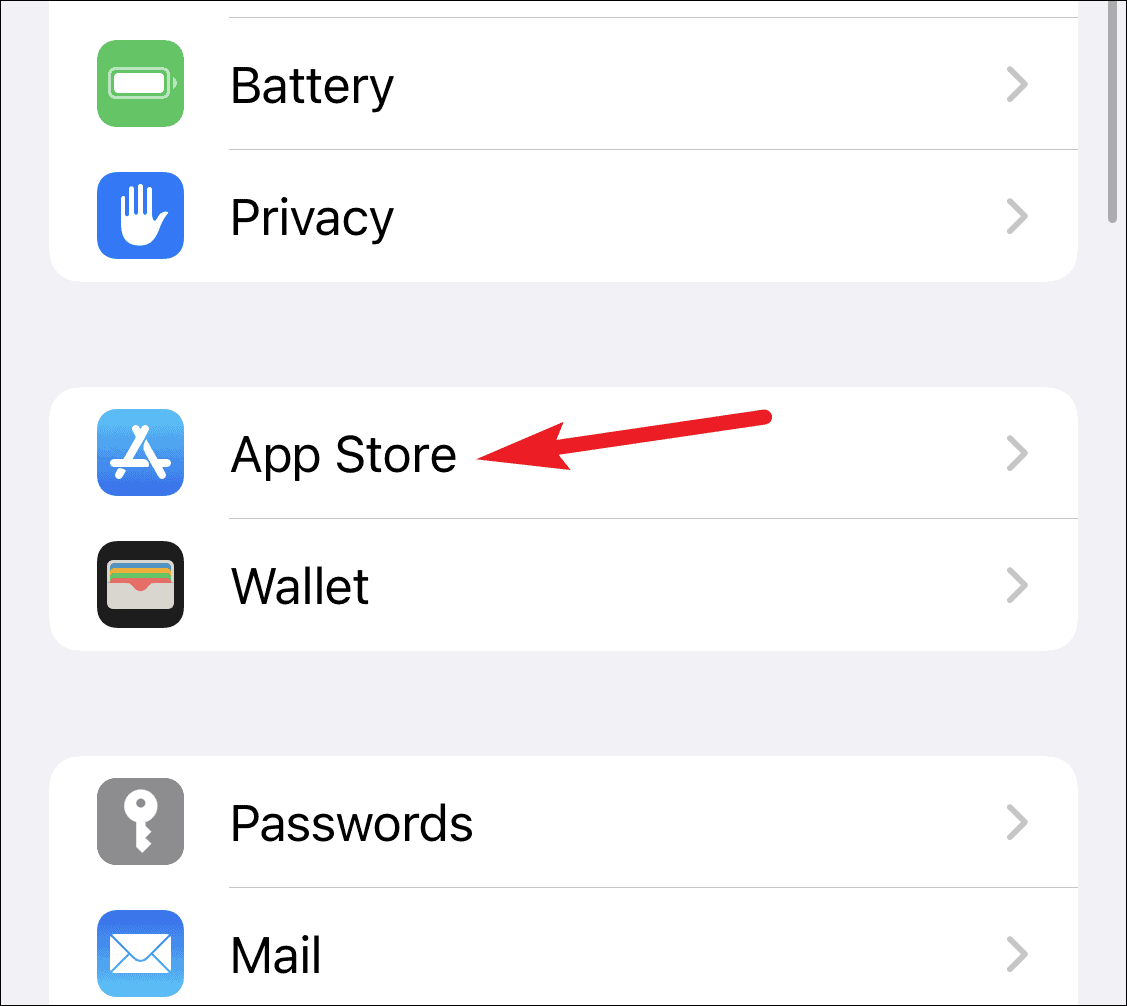
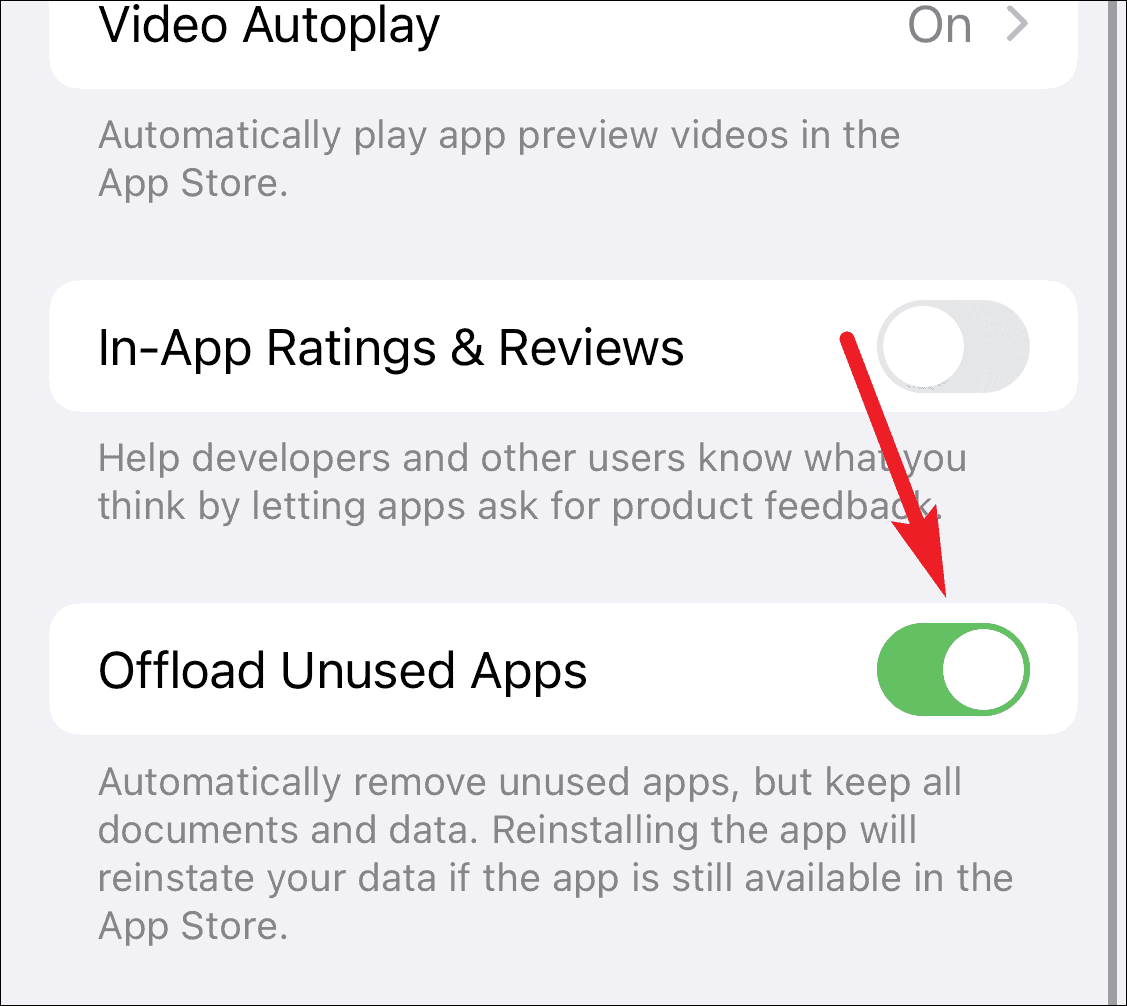
The option to enable offloading for apps will appear in the iPhone Storage settings as well under recommendations. If you’re not getting it, go to ‘App Store’ from settings.
Then, enable the toggle for ‘Offload Unused Apps’. This automatically offloads any unused apps on your iPhone regularly.
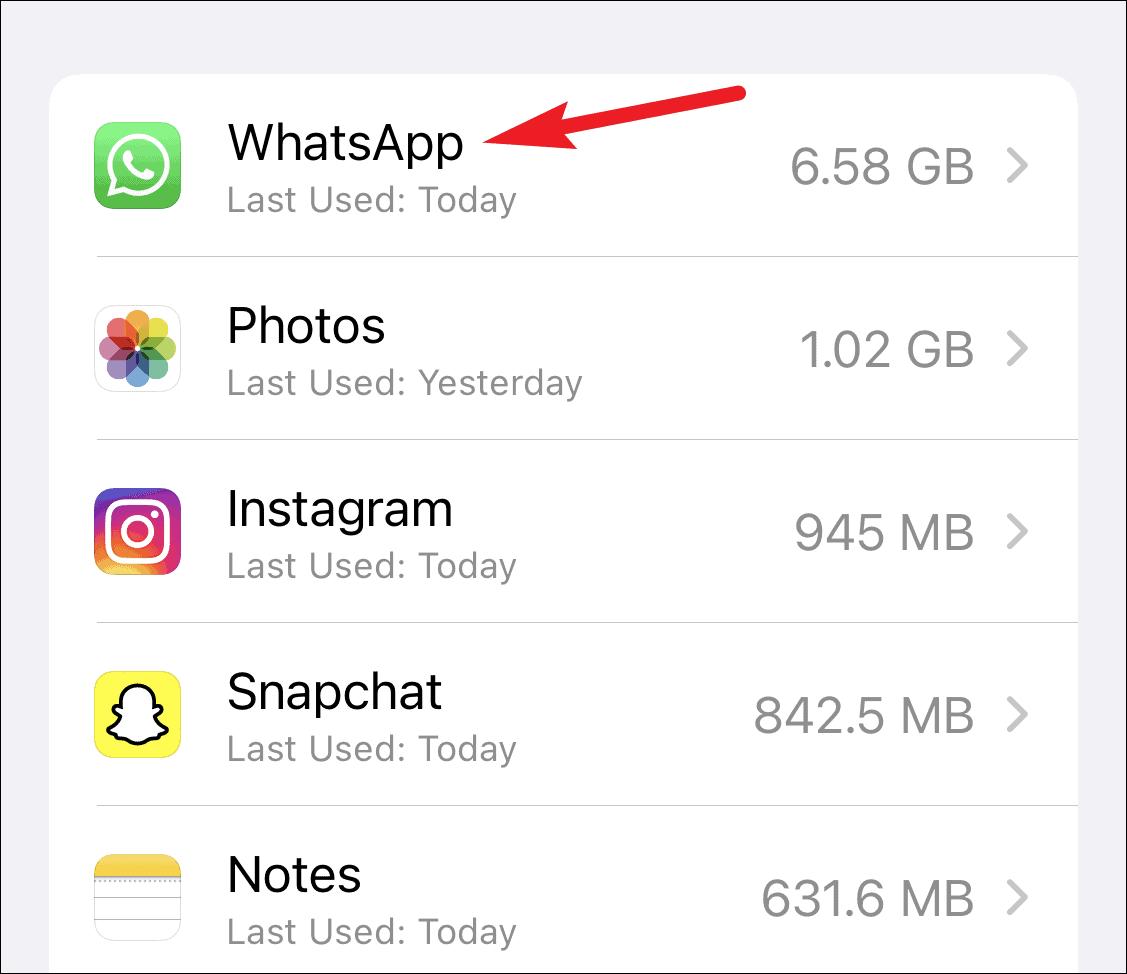
To offload apps manually, go back to ‘iPhone Storage’ from General settings. Then, tap the app you want to offload from the list of apps.
Then, tap the ‘Offload app’ option.
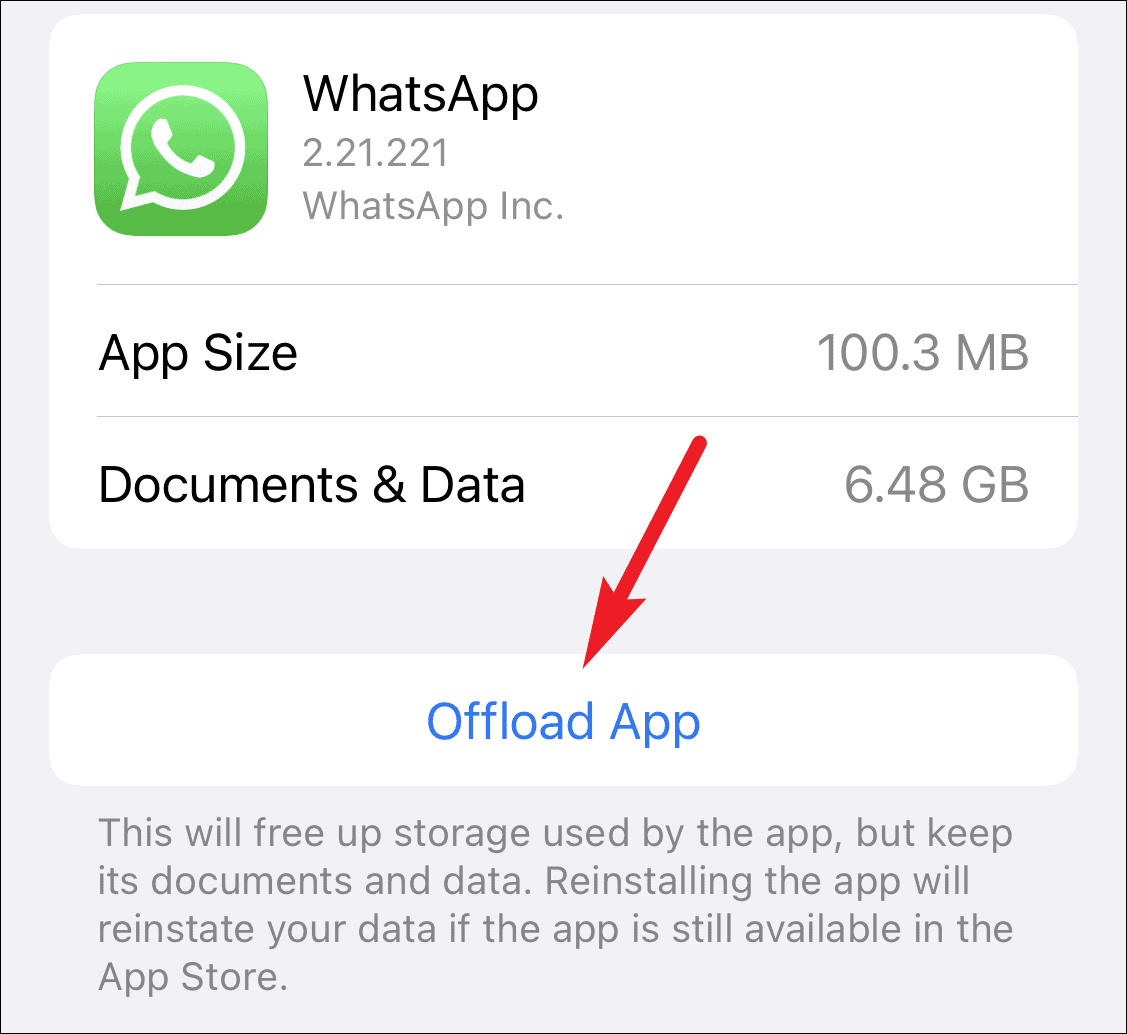
The app will be deleted from your iPhone and with it, the cache. Its data and icon will stay on your phone; tap the icon to re-install the app at any time.
Go to iPhone storage to check if that put a dent in the System Data storage.
Update to the Latest Software
This one here will present as a conundrum for some people. If you’re on a quest to free up space so you can install the latest software update, you’re going to have to skip this one.
But if you’re freeing up space for other needs but do have enough space to install the latest software update, it’s time to do just that. Installing the latest software update somehow puts a huge dent in the System Data storage.
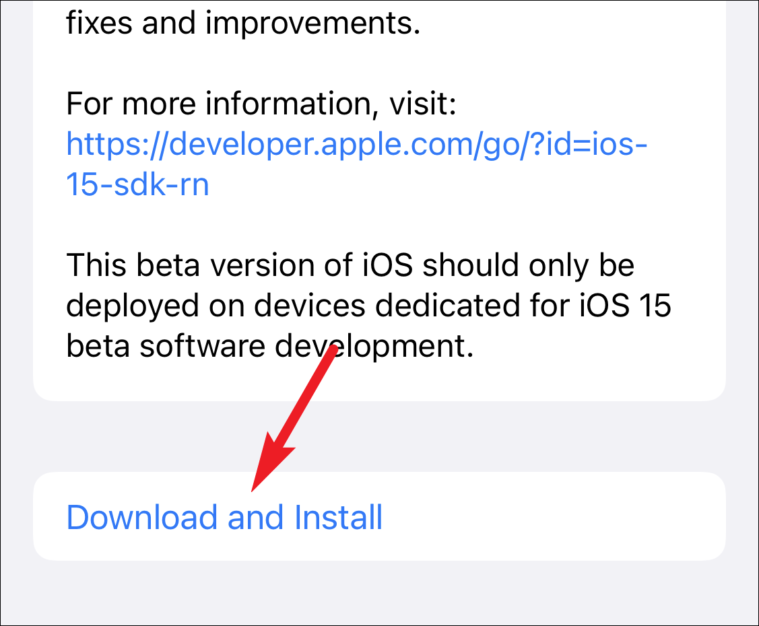
Go to General settings and tap the option for ‘Software Update’.
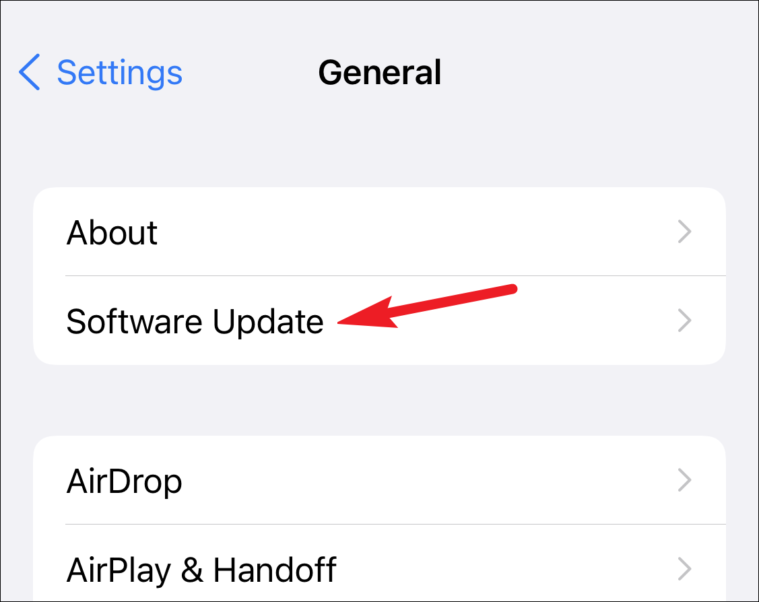
The latest available software update will appear. Tap ‘Download and Install’ to install the update.
Once your iPhone updates, go to iPhone Storage to check the status of the System Data storage.
Reset your iPhone
If none of the above options are working or even if they did work but it’s just not enough, there’s only one option that’ll fix this problem. Even if it seems like going nuclear, if memory-hogging is creating too much trouble, it’ll be completely worth it.
There are two options to completely reset your iPhone: you can either back it up to iCloud and reset from the phone itself or use iTunes (or Finder on Mac) to back up and restore your phone.
Backup and Restore using iCloud
Resetting your iPhone using iCloud backup has to be the most hassle-free option provided you have enough space in your cloud. You don’t have to worry about encrypting the backup to make sure everything gets backed up.
First, make sure you back up everything to iCloud so you can get it back after resetting your phone.
Open the Settings app and tap your name card at the bottom.
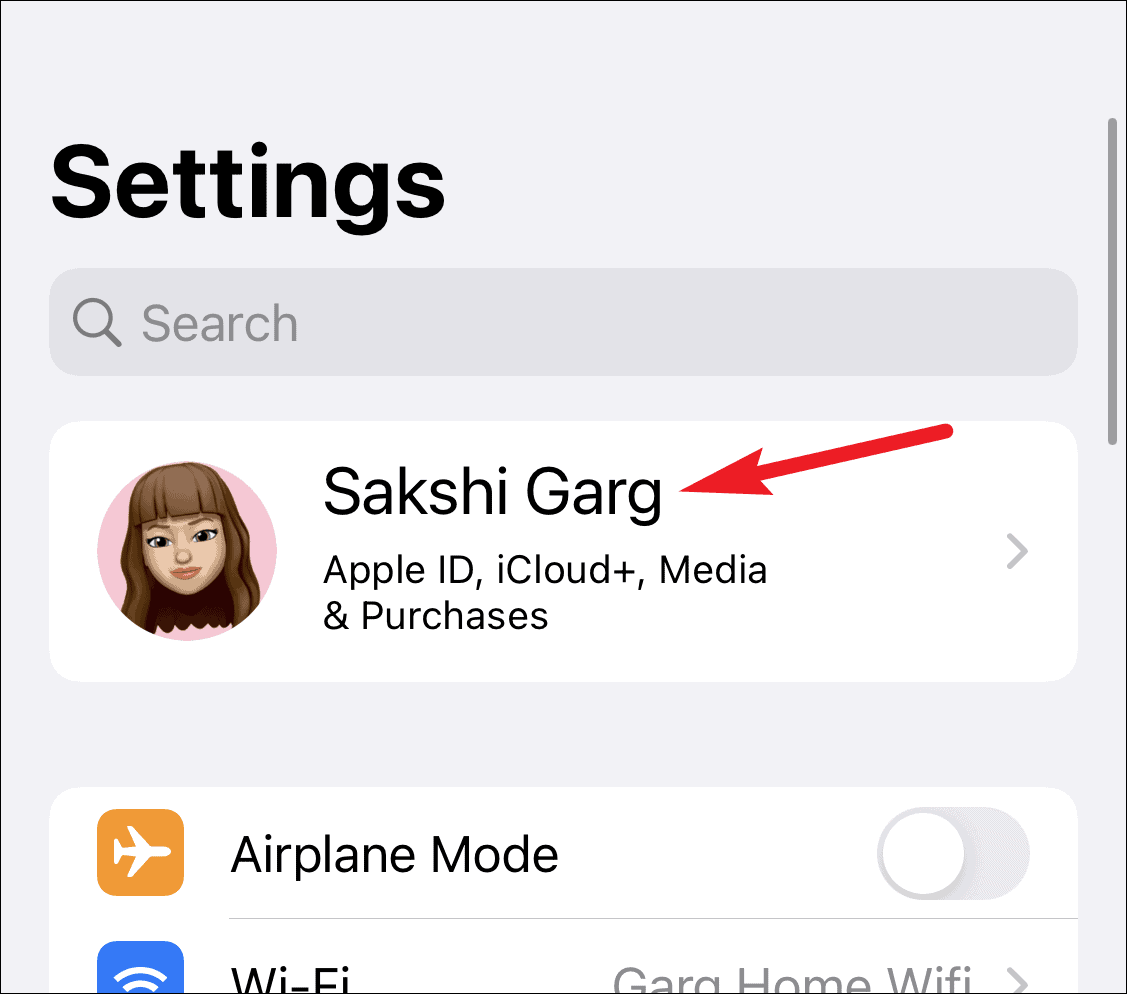
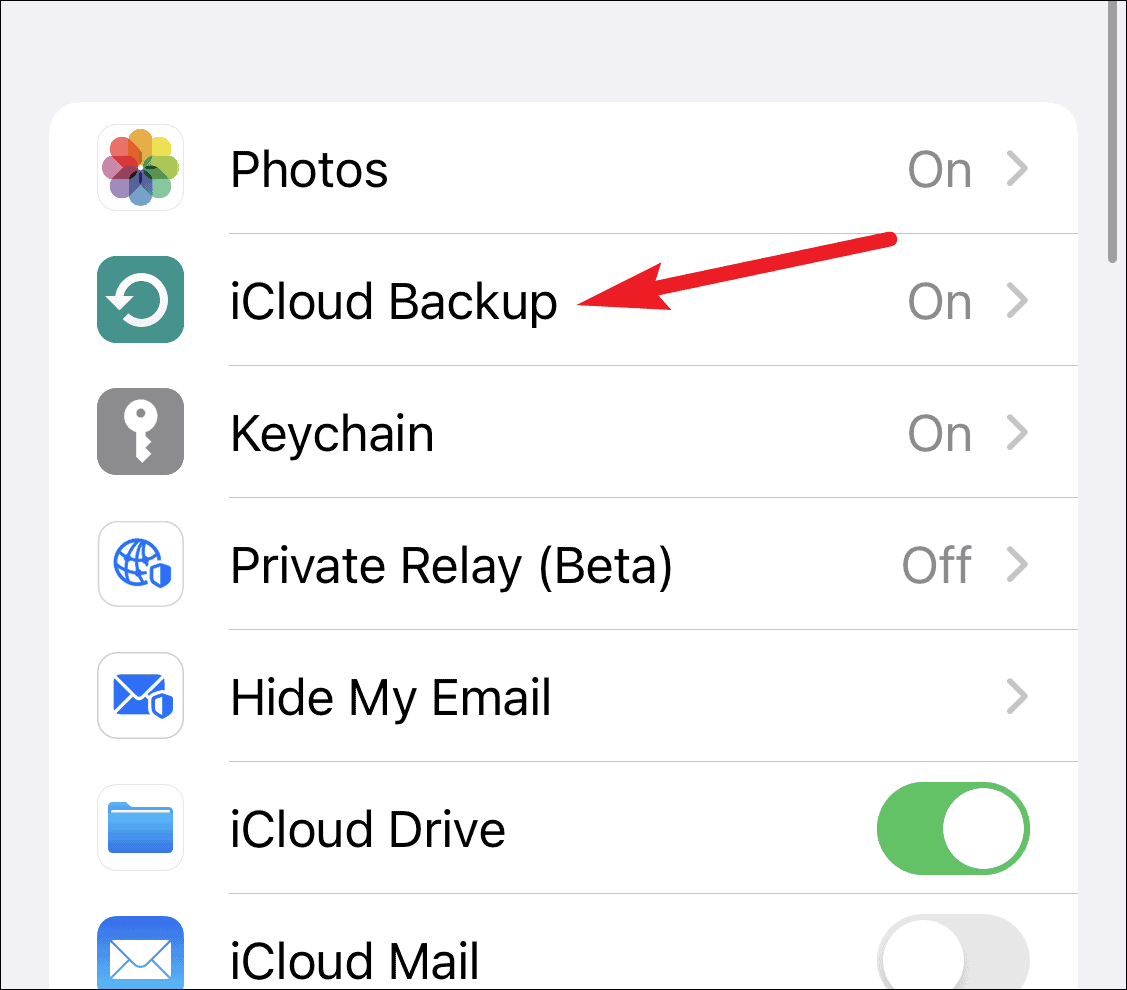
Then, tap the option for ‘iCloud’.
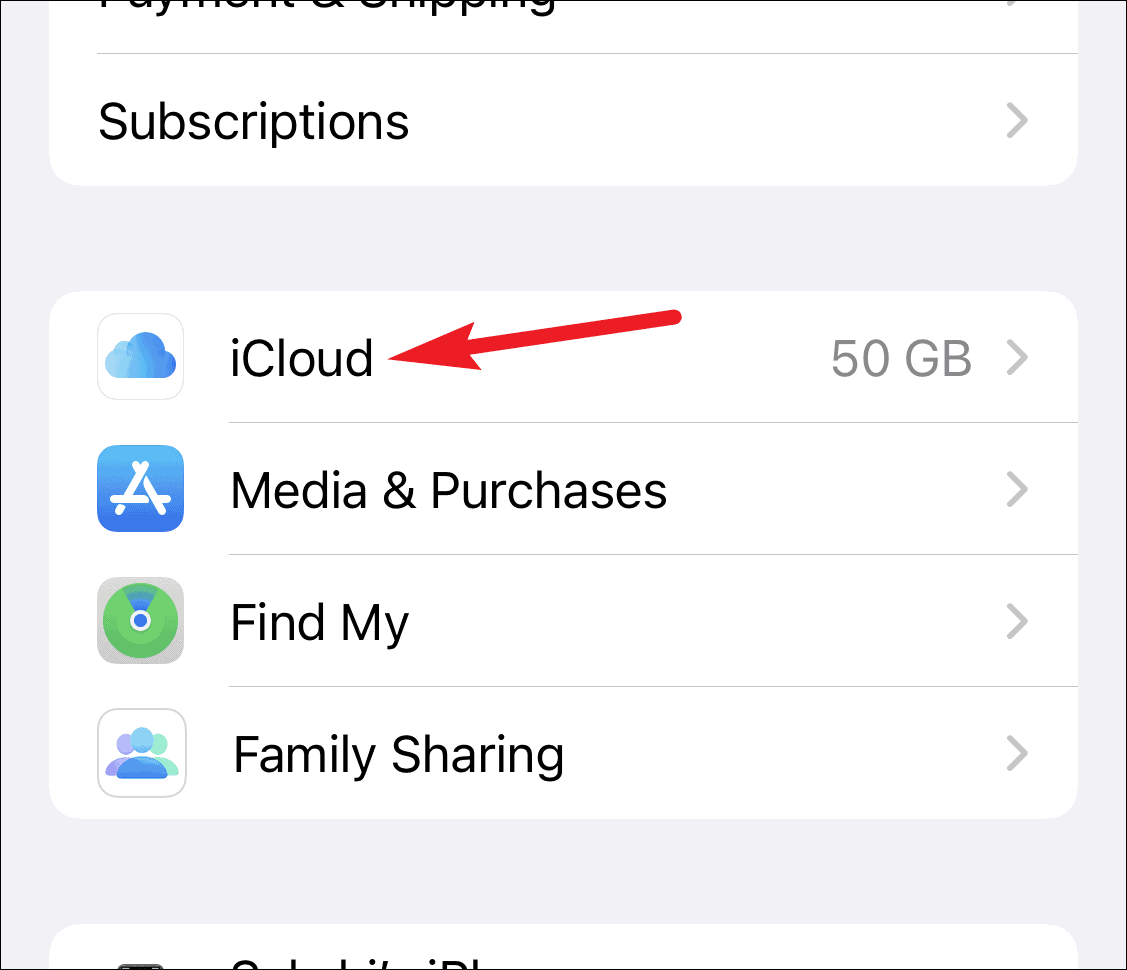
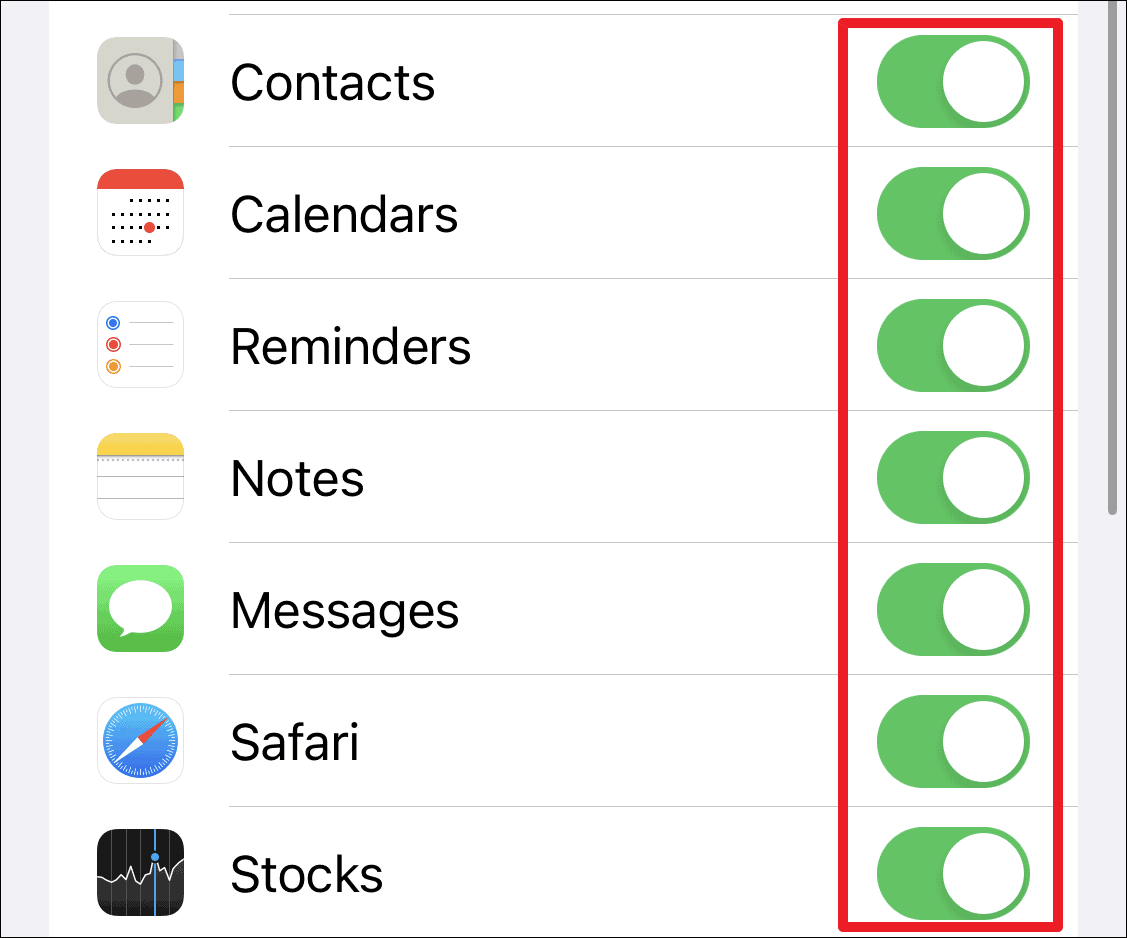
Enable the toggle for all the apps.
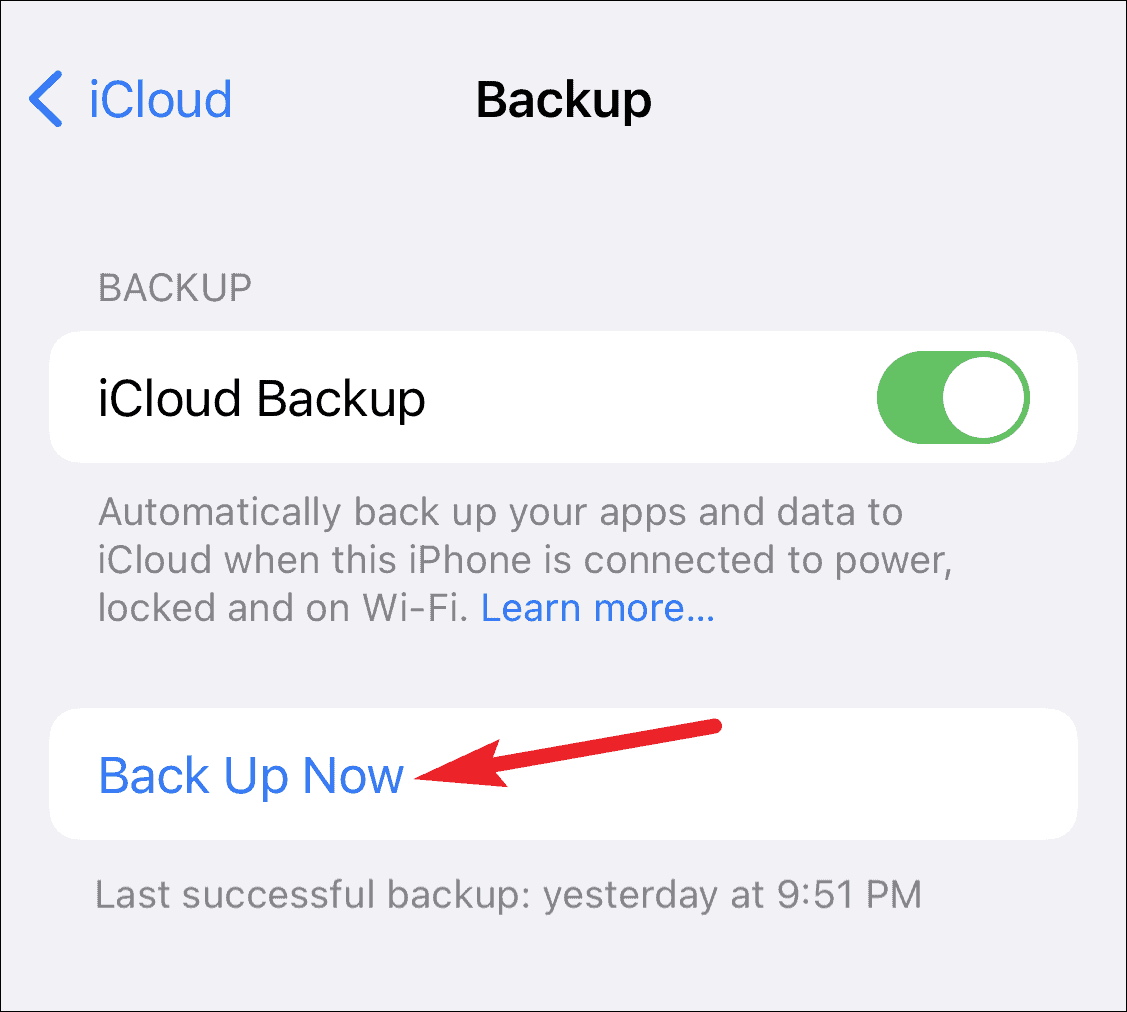
Then, tap the option for ‘iCloud Backup’.
Tap ‘Backup now’ to backup your apps and data to iCloud. Depending on the size of the backup, it’ll take somewhere from a few minutes to maybe an hour for the backup to complete.
If you don’t have enough storage in iCloud, you could either buy more storage or turn off apps or data you don’t need. You can also use other options for backing up Photos like Google Photos as photos generally take up most space. Or else, you could skip this step and use iTunes to back up and restore your iPhone.
Once the backup is complete, it’s time to reset your phone.
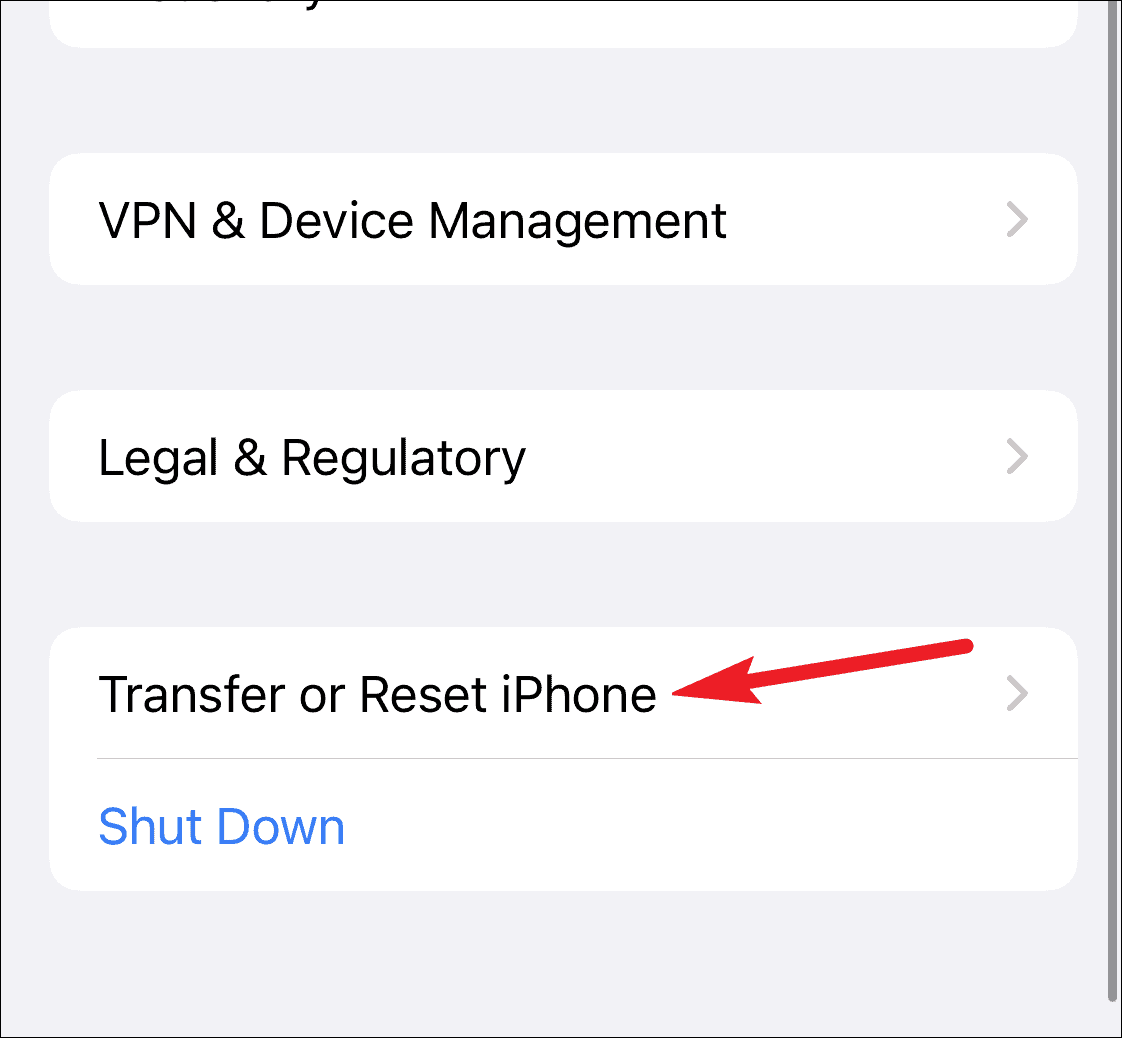
Go to ‘General’ settings. Then, scroll down and tap ‘Transfer or Reset iPhone’.
Tap ‘Reset All Content and Settings’.
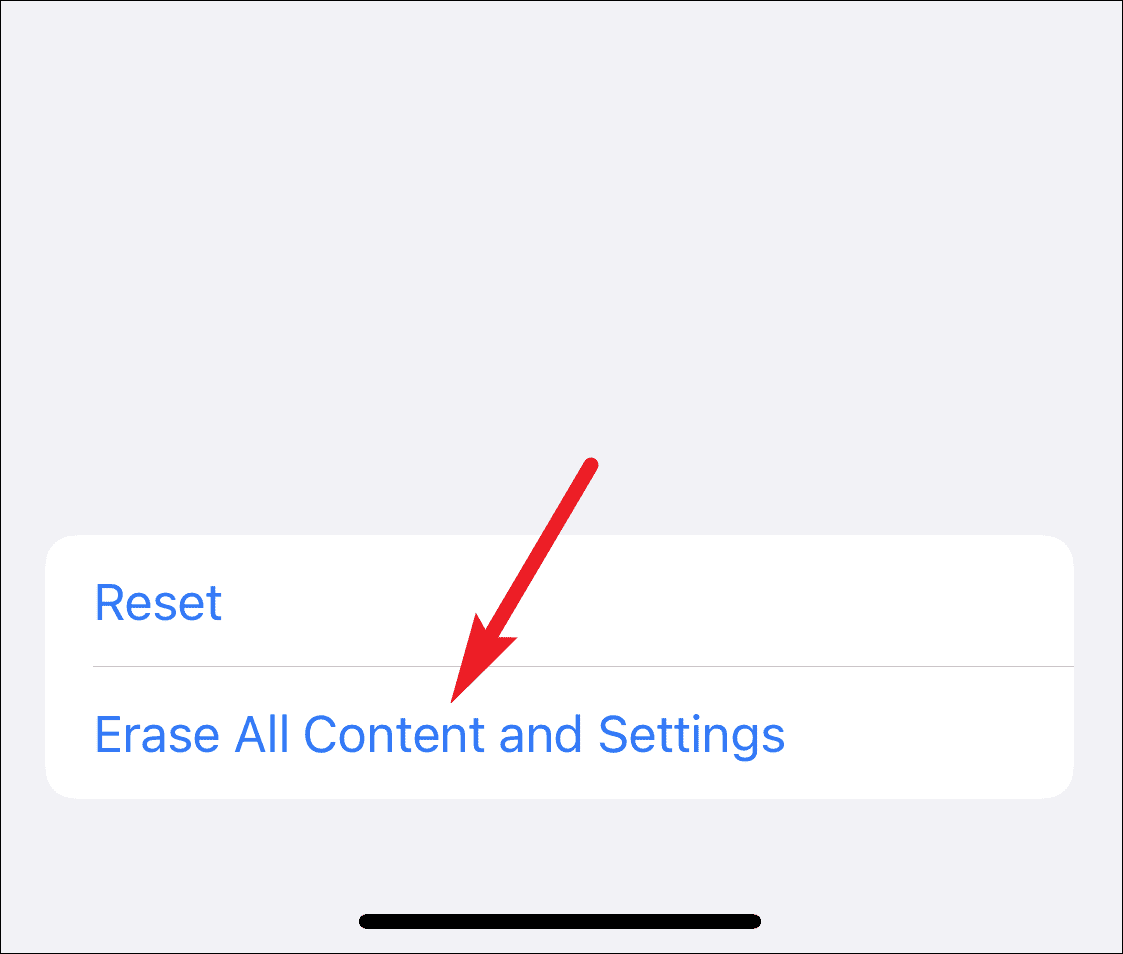
Tap ‘Continue’ on the Erase This iPhone to erase your iPhone. Enter your passcode when prompted and tap ‘Erase iPhone’ again.
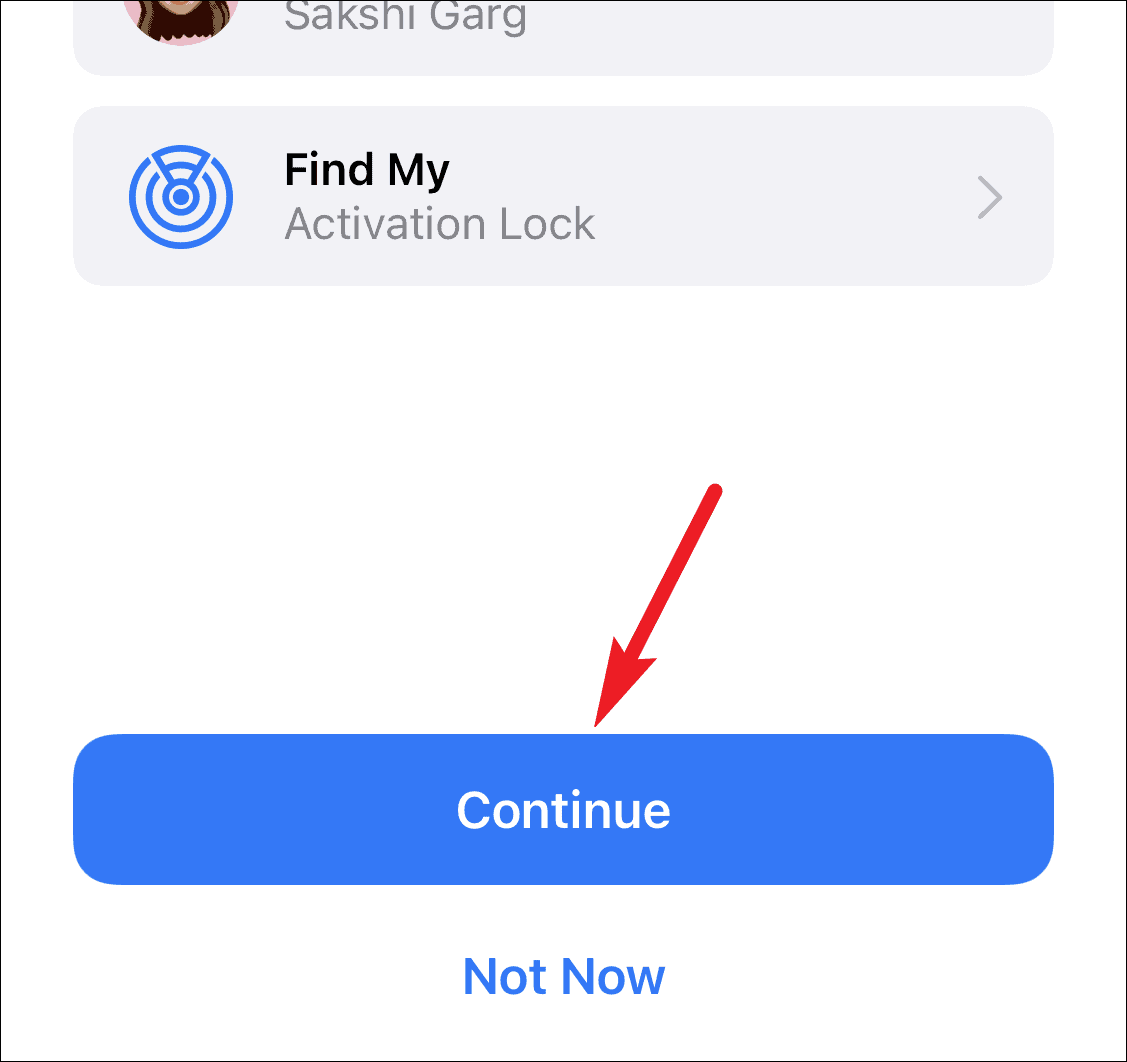
Once your iPhone is erased and starts back up again, you’ll reach the Hello screen. Follow the instructions on the screen until you reach the Apps & Data screen.
Then, tap ‘Restore from iCloud Backup’.

Sign in to your Apple ID and choose the most relevant backup by looking at the date and size of the backup. The transfer of backup will start. Make sure your phone has enough battery and an uninterrupted internet connection while the transfer is happening. You’ll be able to see the progress on your screen.
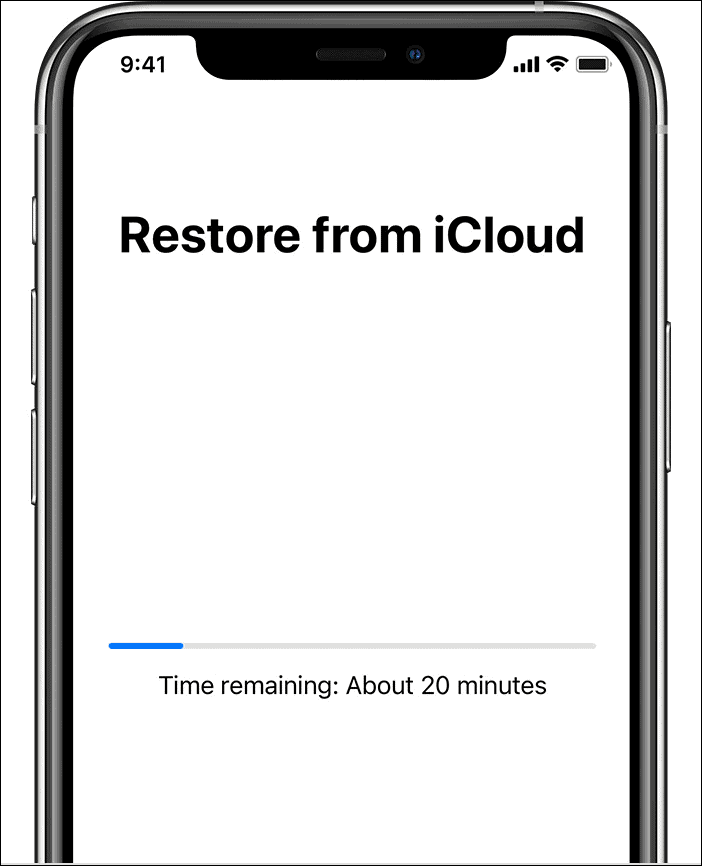
Once the phone completes restoration, you can continue setting up your iPhone. Other content like apps, photos, data, music, etc will restore in the background over the next few hours or days depending on the size.
Backup and Restore using iTunes
Connect your iPhone to your Windows PC and open iTunes. If a prompt appears on your phone to Trust this Computer, tap ‘Trust’.
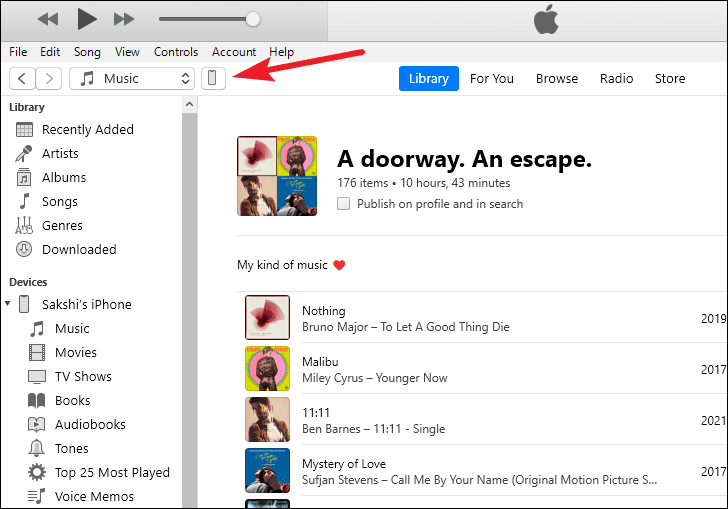
Then, click the icon for ‘iPhone’ in the iTunes window when it appears.
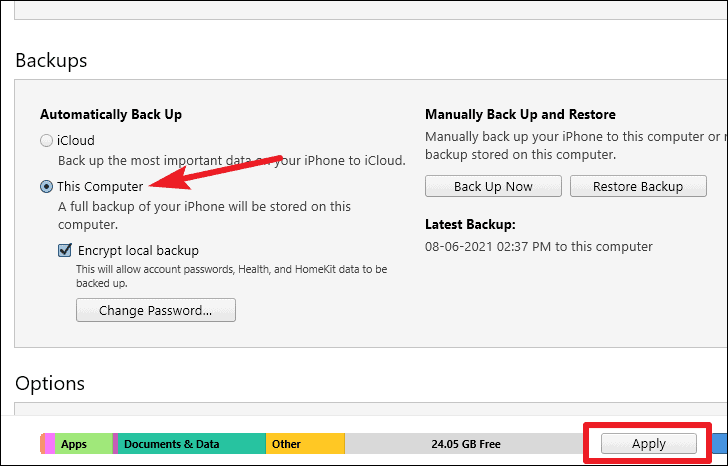
Back up your iPhone to iTunes by selecting ‘This Computer’ under Automatically Back up. To backup your passwords and health data as well, select the option ‘Encrypt local backup’ and choose a password, otherwise iTunes won’t back up this data. But remember the password as you’ll need it to restore your phone using the backup. Click the ‘Apply’ button.
Once the backup is completed, click the ‘Restore iPhone’ option and follow any instructions on the screen. The process will take some time.
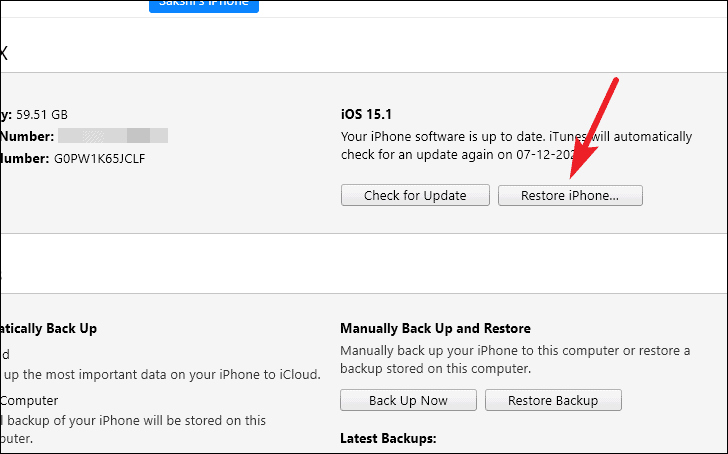
Once iPhone is restored, click ‘Restore Backup’ from the iTunes app.
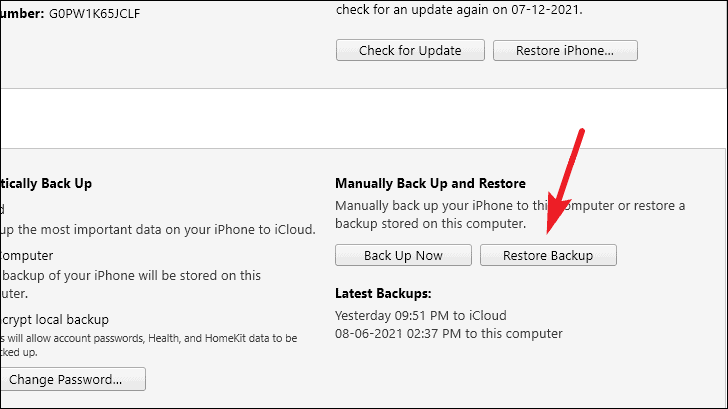
Select the relevant backup depending on the date to restore your iPhone. Enter the password if you encrypted the backup and click ‘Restore’.
Keep your iPhone connected to the computer while it restores from the backup.
Once you’ve reset and restored your iPhone with either option, go back to iPhone storage in settings. You’ll find that System Data or Other Storage won’t be taking too much space on your phone any longer.
The few MBs that it’ll be taking are necessary for the functioning of the iPhone and it’s the closest you’ll get to being completely rid of it. The only way it’ll be completely non-existent is when your iPhone is set up as new.


