
Encountering the application error code 0xc0000135 on Windows 11 when trying to run an executable file can be perplexing. Fortunately, this error is usually straightforward to fix, and you can resolve it without professional help. This guide provides detailed solutions to help you eliminate this error and get your applications up and running.
What causes the application error 0xc0000135?
The 0xc0000135 error typically occurs due to missing files in the .NET Framework installed on your computer. Applications often require specific components of the .NET Framework to function properly. If these components are missing or not enabled, you may encounter errors when launching programs that depend on them.
In more technical terms, this error arises when applications request access to the Windows Communication Foundation (WCF) and Windows Workflow Foundation (WWF) within the .NET Framework, but these features are not enabled on your system.
It’s possible that some applications work correctly while others fail to launch or operate as expected. This discrepancy can happen because different applications rely on different versions or components of the .NET Framework.
For example, if your system has both .NET Framework 3.5 and 4.8 installed, and a necessary DLL file is missing from .NET Framework 3.5, applications that rely on that version may not function properly, while those using .NET Framework 4.8 continue to work.
Additionally, incompatible drivers or residual cache files from previous installations can contribute to this error. Regardless of the underlying cause, the following methods can help you resolve the issue.
Ways to fix application error 0xc0000135 on Windows 11
- Re-enable .NET Framework 3.5.
- Clear cache files.
- Roll back the KB5012643 update.
Method 1: Re-enable .NET Framework 3.5
Re-enabling .NET Framework 3.5 can often resolve the 0xc0000135 error since many applications depend on it. Even if this framework is already installed, re-enabling it ensures that all necessary components are active.
Windows Features in the search bar. From the search results, click on Turn Windows features on or off. This will open a new window with a list of Windows features.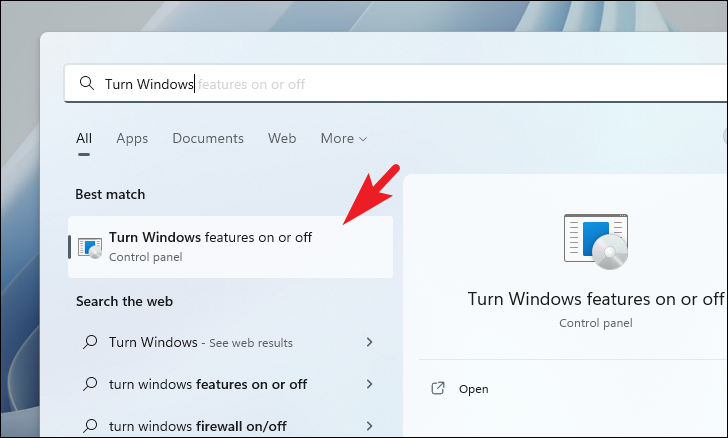
+) to expand it.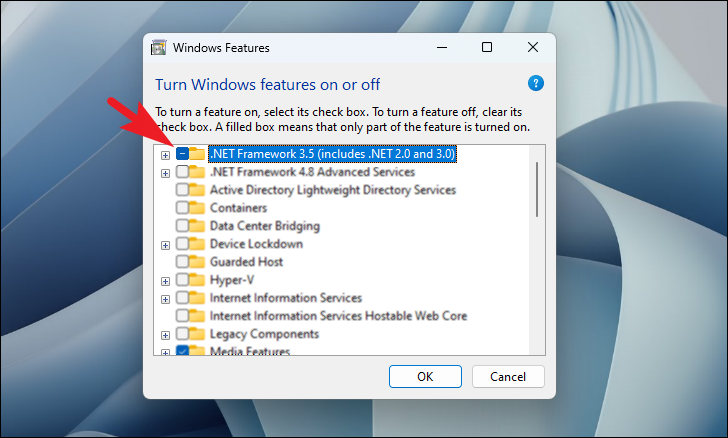
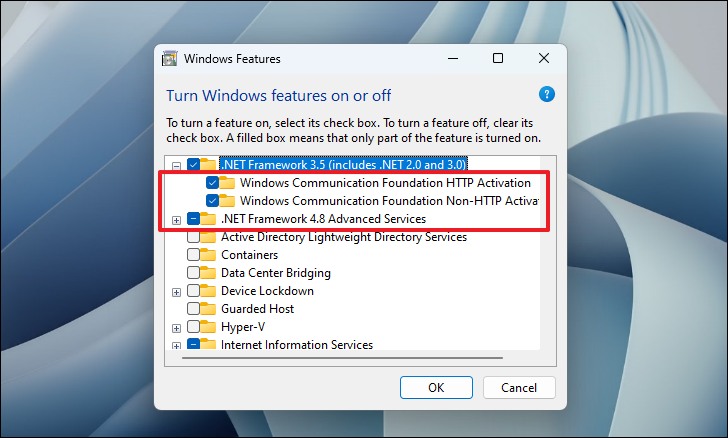
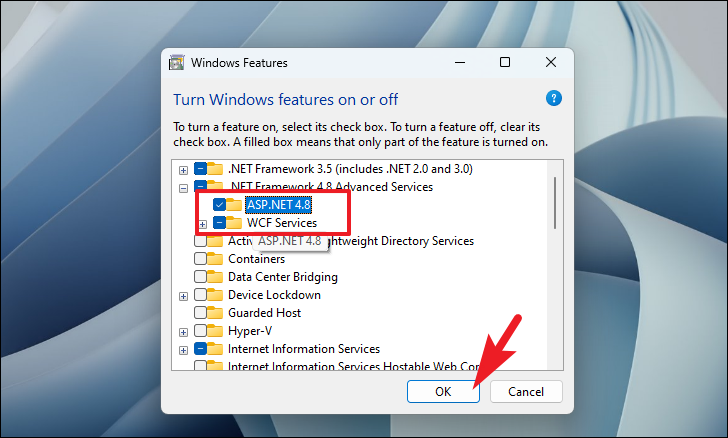
+).
If you’re unable to enable the .NET Framework using the graphical interface, you can accomplish this via the Command Prompt.
Enable .NET Framework 3.5 using Command Prompt
Terminal. Right-click on Terminal in the search results and select Run as administrator.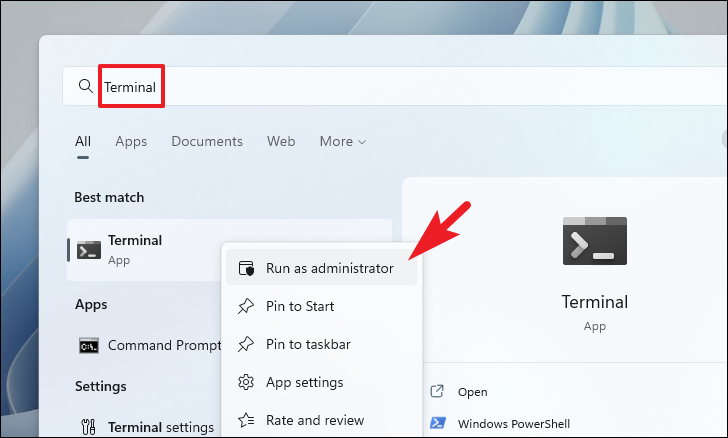

˅) at the top and select Command Prompt to open it in a new tab. Alternatively, you can press Ctrl+Shift+2 on your keyboard.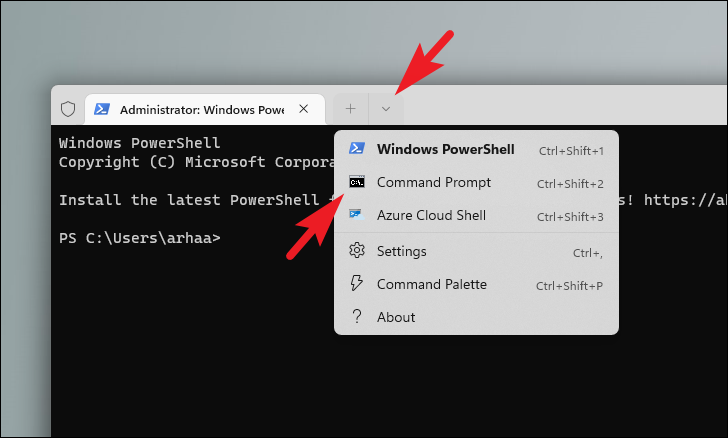
Enter to enable .NET Framework 3.5:dism /online /enable-feature /featurename:netfx3 /all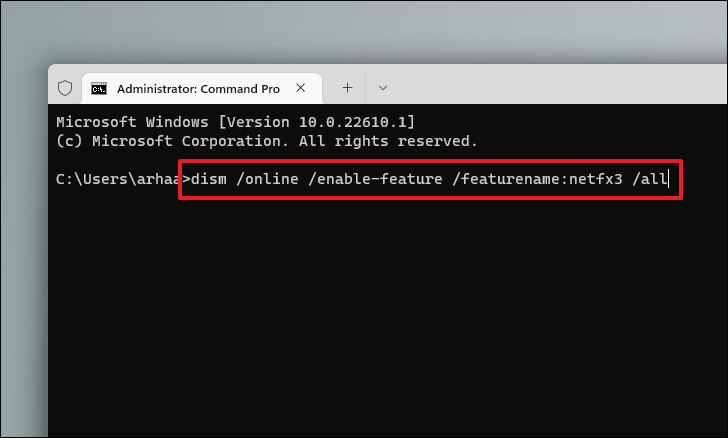
dism /online /enable-feature /featurename:WCF-HTTP-Activation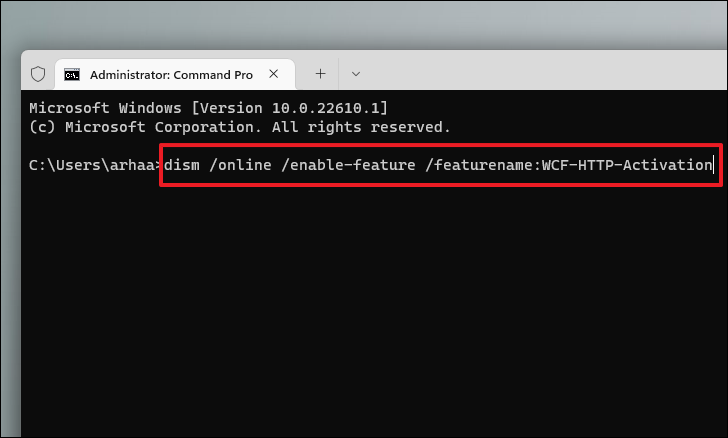
dism /online /enable-feature /featurename:WCF-NonHTTP-Activation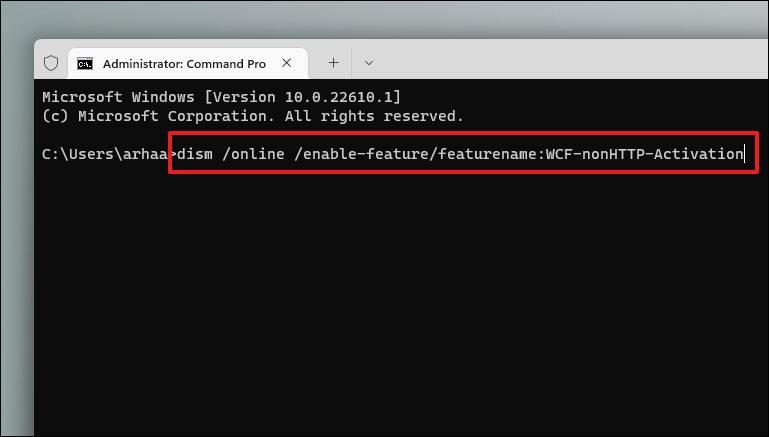
Method 2: Clear cache files on your computer
Clearing cache files can help eliminate residual files that might interfere with the .NET Framework or application functionality. Windows stores various types of cache files, and removing them can help resolve the error.
Step 1: Run Disk Cleanup
The Disk Cleanup utility is a built-in tool in Windows that allows you to delete unnecessary files from your system.
Disk Cleanup. Click on Disk Cleanup from the search results to launch the utility.Alternative: Press Windows+R to open the Run dialog box, type cleanmgr, and press Enter.
C:) and click OK. The utility will calculate how much space can be freed.Step 2: Use Cleanup Recommendations
Windows 11 offers Cleanup Recommendations to help you remove unnecessary files quickly.
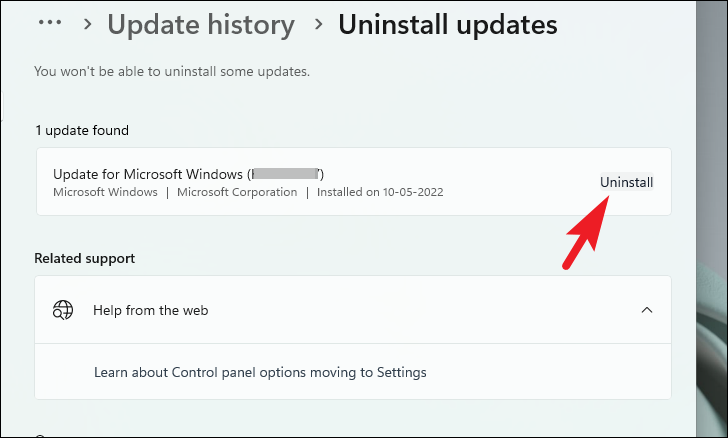
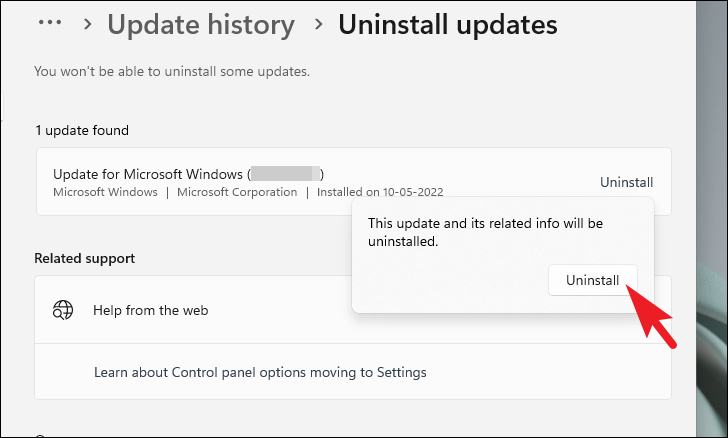
Method 3: Roll back the KB5012643 update
The 0xc0000135 error may occur after installing the KB5012643 update (OS Build 22000.652) on Windows 11. Microsoft is aware of this issue and working on a fix. If the previous methods haven’t resolved the error, you can uninstall this update as a temporary workaround.

By following these methods, you should be able to fix the 0xc0000135 application error on your Windows 11 system and get your applications working properly again.


