Uninstalling programs from Windows often leaves behind a few files, which may be useful when you reinstall those programs. However, if you do not intend to install those applications again, it is a good idea to get rid of the remnants from your computer. Sometimes, you may even need to completely remove everything to prevent problems when reinstalling programs. Here is how you can do so.
Get rid of registry entries
Some applications use the Windows Registry to store the data they need to work, such as user preferences, settings, information regarding trial periods, etc. Such data may not be removed from your PC when you uninstall the programs, and you may have to remove it manually.
- Open the Start menu, type
regeditand click on 'Run as administrator' when the Registry Editor appears.
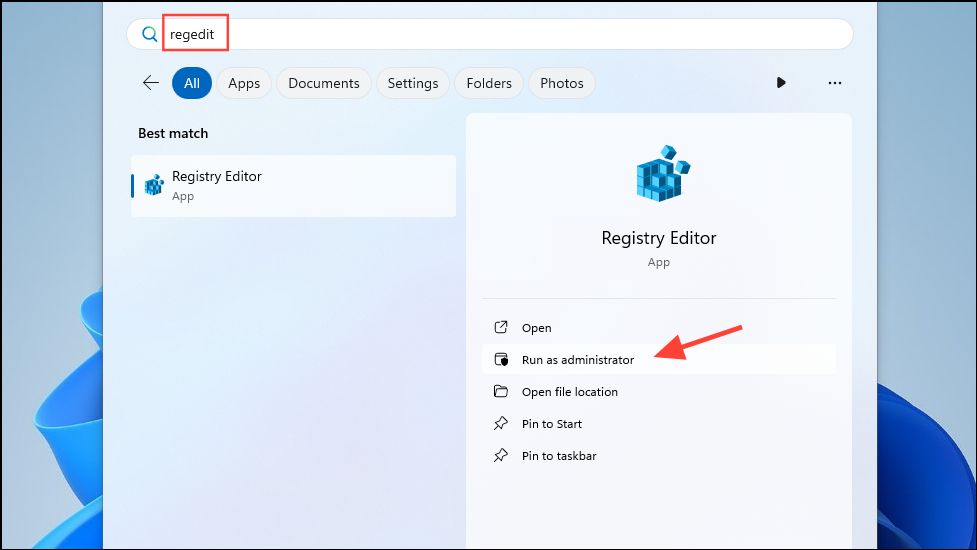
- When the Registry Editor opens, navigate to the following directory:
HKEY_LOCAL_MACHINE\SOFTWARE\.

- This directory contains the registry entries made by apps that you have installed in your system. Right-click on the folder of the app whose registry entries you want to delete and click on 'Delete'.
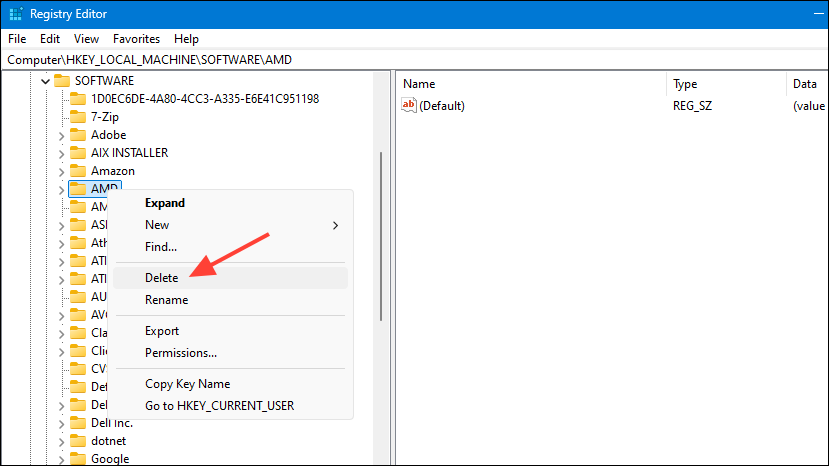
- Confirm that you want to delete the folder in the pop-up that appears. Just make sure you are deleting the right key when following this method.
Manually delete leftover folders
Windows installs programs in different directories and folders, which means you need to remove any folders that are leftover from wherever they may have been created.
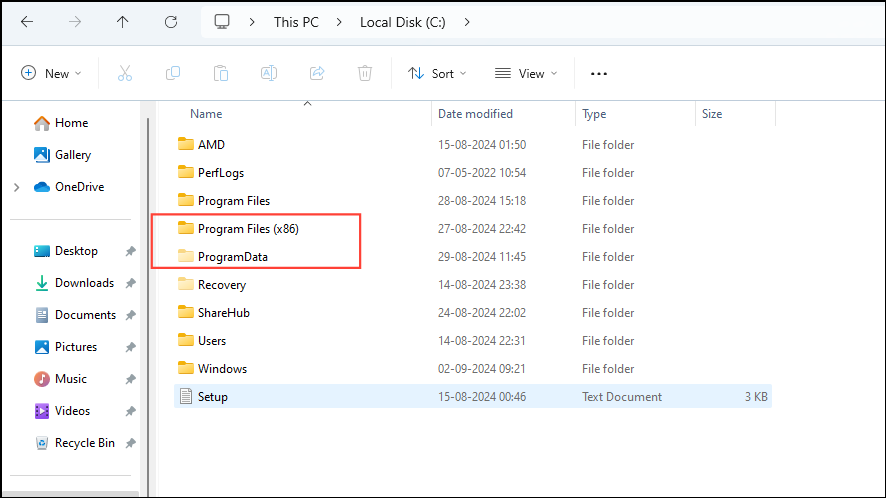
- Open the Windows File Explorer from the taskbar and click on 'This PC' on the left.

- Next, open the 'C' drive, which is usually where Windows installs all programs unless you manually change the installation directory.

- It should contain the 'Program Files' and 'Program Files (x86)' folders, among several others. You will need to check both for leftover folders of uninstalled programs and delete them.
- Once you've deleted the leftover folders, use the
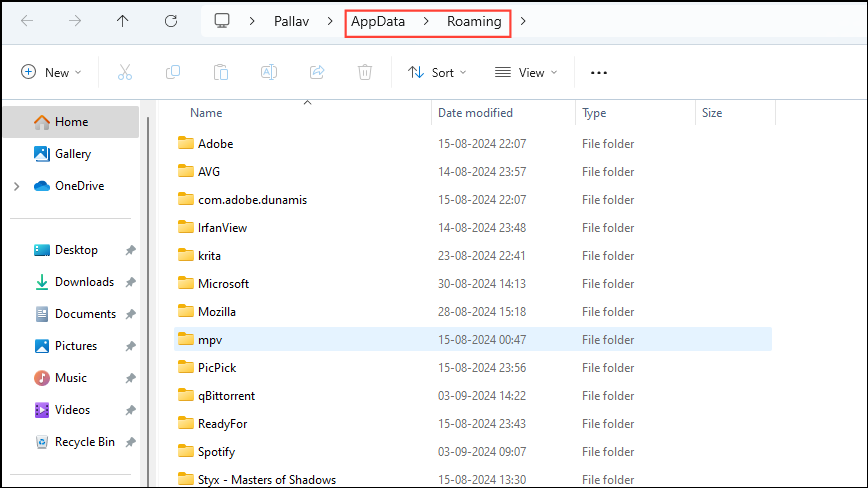
Win + Rshortcut to open the 'Run' dialog. Enter%appdata%in the box and press Enter.
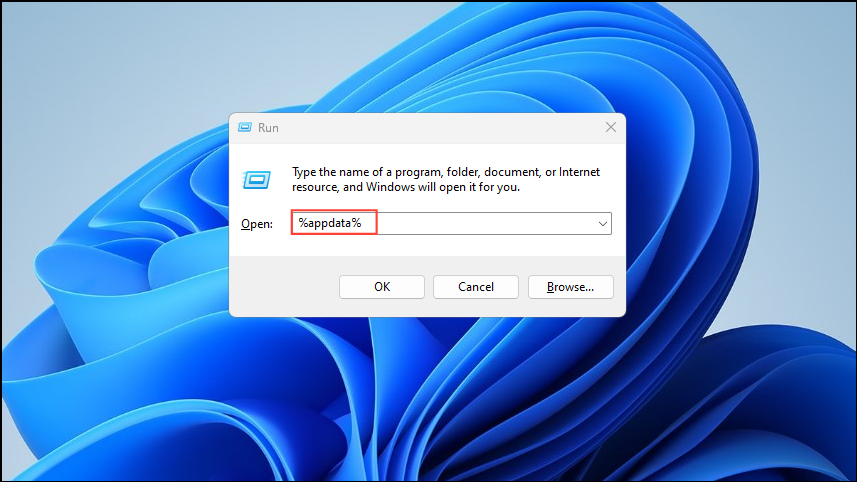
- You will now see the 'Roaming' folder located within the 'AppData' folder. Look for and delete all the folders you don't need.
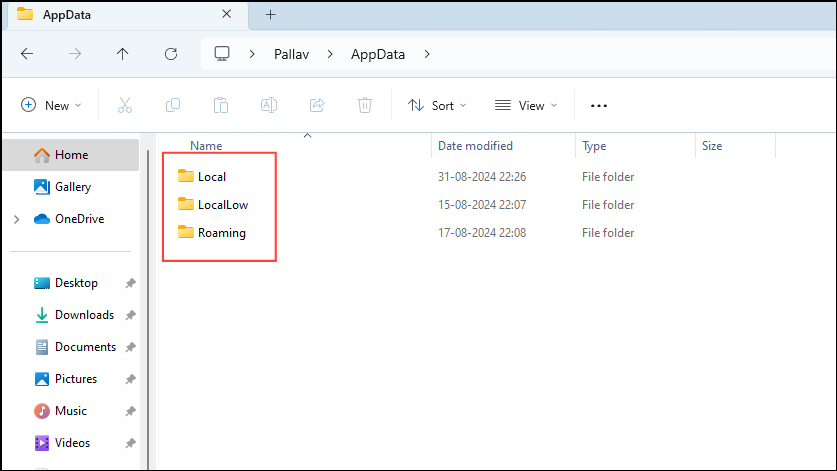
- After deleting the leftover folders, click on the 'Up' arrow to go to the 'AppData' folder and delete the unneeded folders from the 'Local' and 'LocalLow' folders.
Remove temporary files
Windows has a 'Temp' folder where it stores cached data from various programs as well as their launch settings and configurations. This data is automatically deleted after some time but you can also do so manually after you remove an app from your PC.
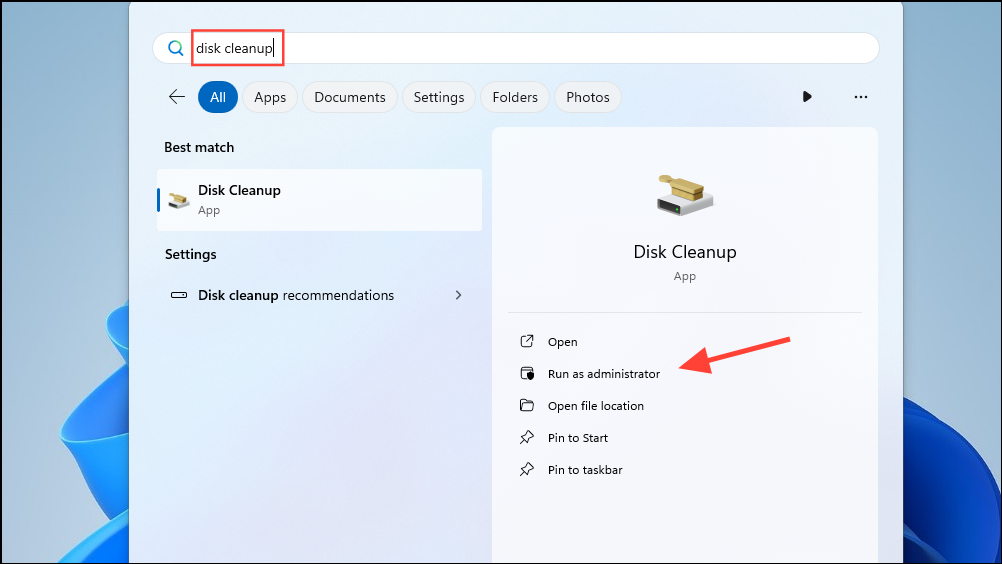
- Open the Start menu, type
disk cleanup, and click on 'Run as administrator'.
- When the Disk Cleanup utility opens, select the drive from where you uninstalled the program whose temporary files you want to remove by clicking on the dropdown button.
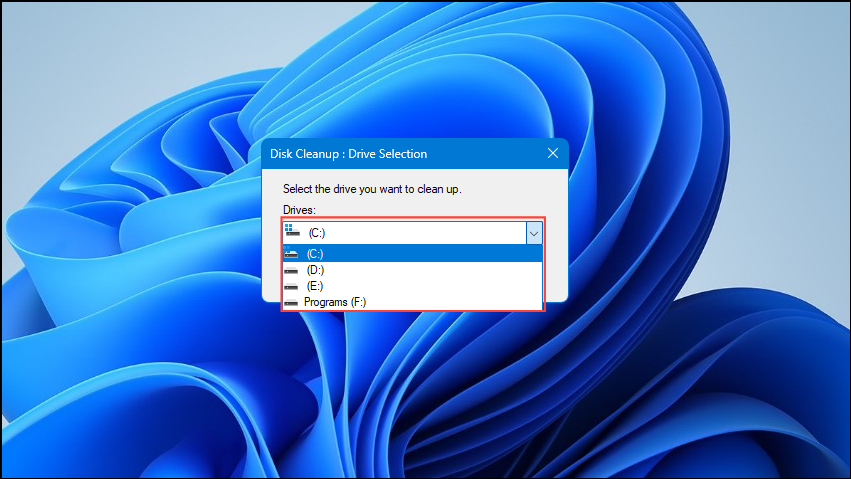
- After selecting the drive, click on the 'OK' button and then click on the 'Temporary Files' checkbox to select it.
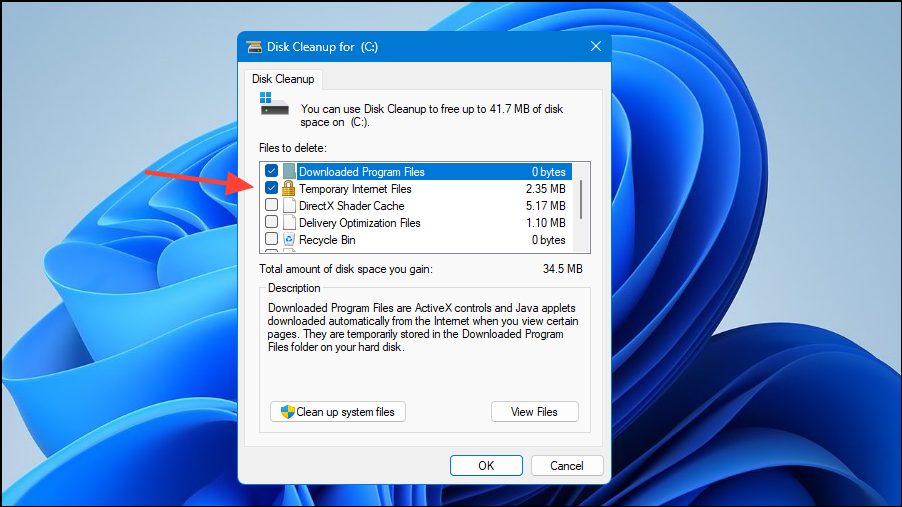
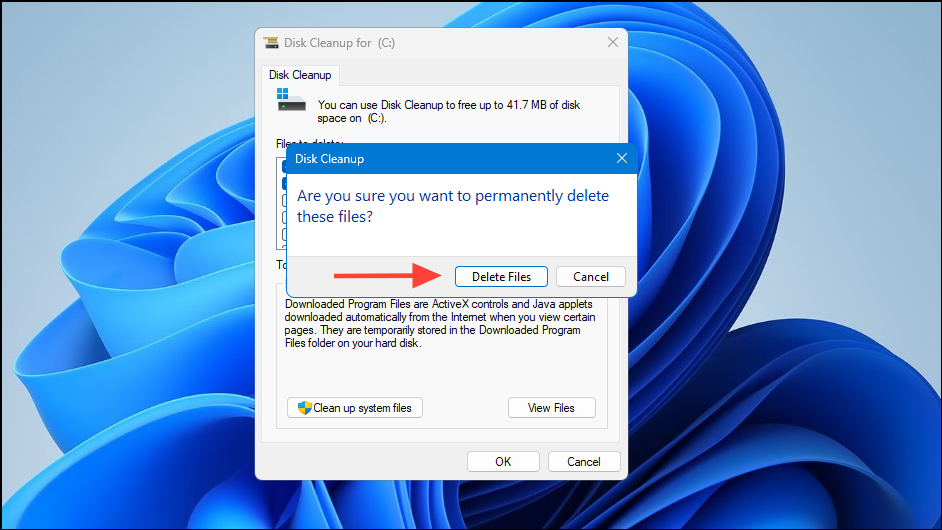
- Click on the 'OK' button at the bottom and then on 'Delete Files' in the pop-up that appears.
%temp% , and pressing Enter. When the temp folder opens, delete the temporary files you want to get rid of. Things to know
- Windows 11 has a built-in feature called 'Storage Sense', which automatically gets rid of temporary files while also freeing up your storage.
- If you are unsure about deleting a temporary file, you can look it up online and check whether it is safe to remove it. In most cases, temporary files are safe to delete and you won't run into any issues after deleting them.
- When deleting temporary files, you may see a message stating that the file is in use. In that case, you can simply skip those files and delete the rest.
- Besides the methods mentioned here, you can rely on third-party tools that can locate and delete files and folders left over after programs have been uninstalled.

