The ultimate guide to uninstalling apps on Windows 11.
The ultimate guide to uninstalling apps on Windows 11.
by Raj Kumar
Over time, your Windows 11 computer can accumulate applications that you no longer use or need. Removing these unnecessary apps not only frees up valuable disk space but also enhances your system’s performance. Windows 11 offers several methods to uninstall both third-party and built-in applications. In this guide, we’ll explore various ways to remove apps from your Windows 11 PC.
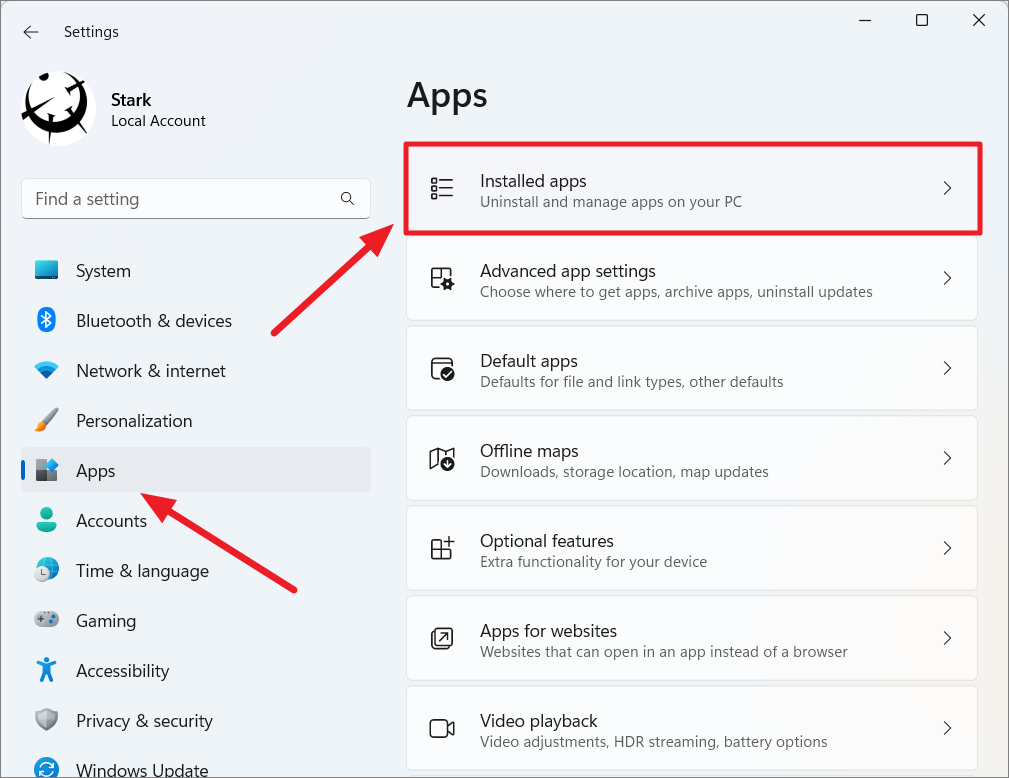
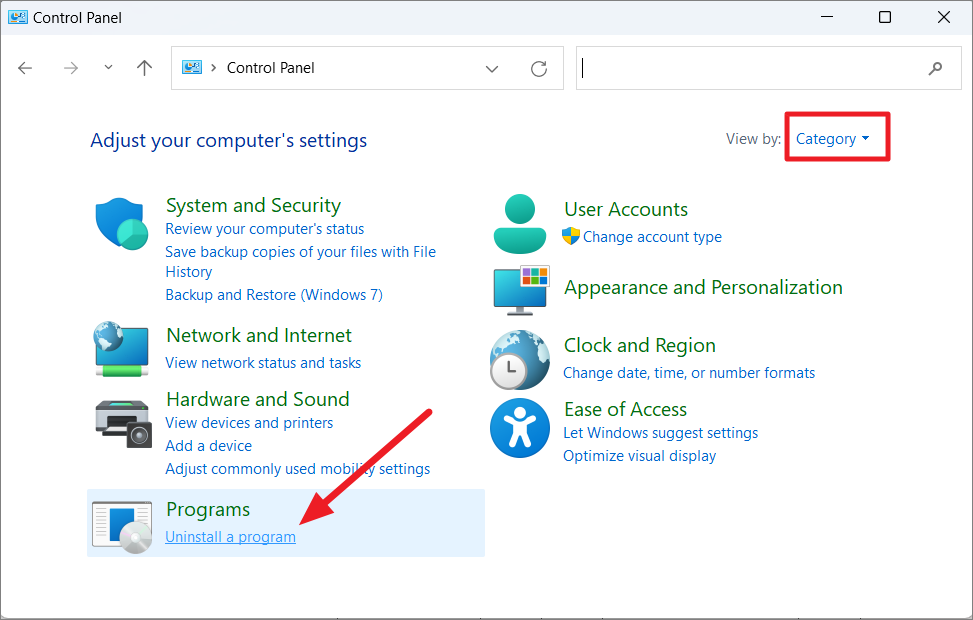
Uninstalling apps from Windows Settings
One of the most straightforward methods to uninstall applications is through the Windows Settings app.
Press Windows key+I to open the Settings app. You can also right-click the Start button and select Settings from the menu, or open Settings from the Pinned apps in the Start menu.
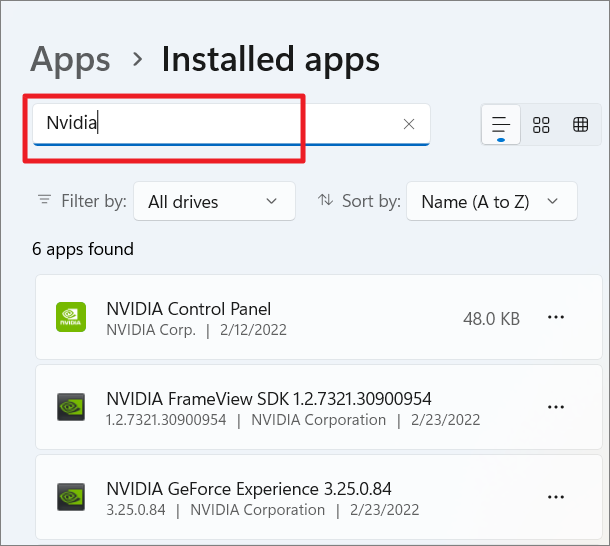
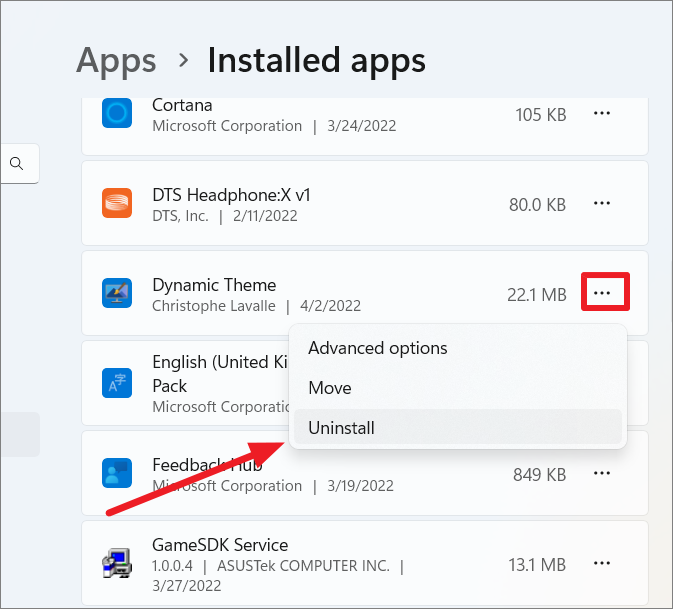
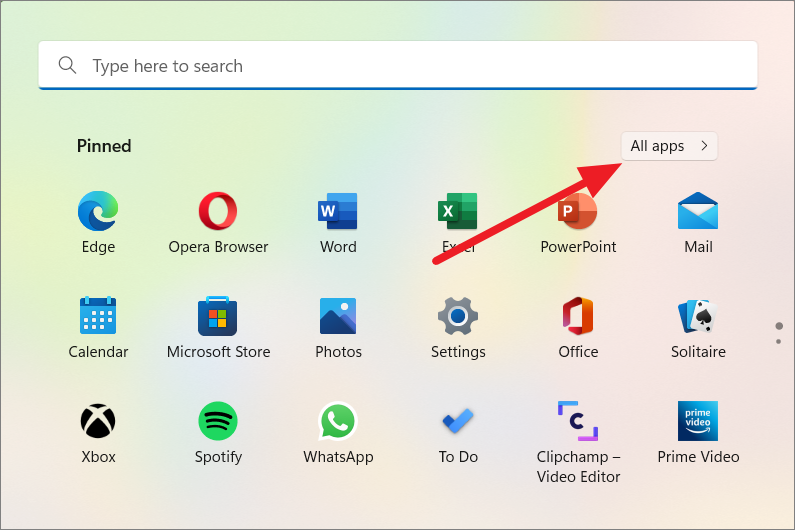
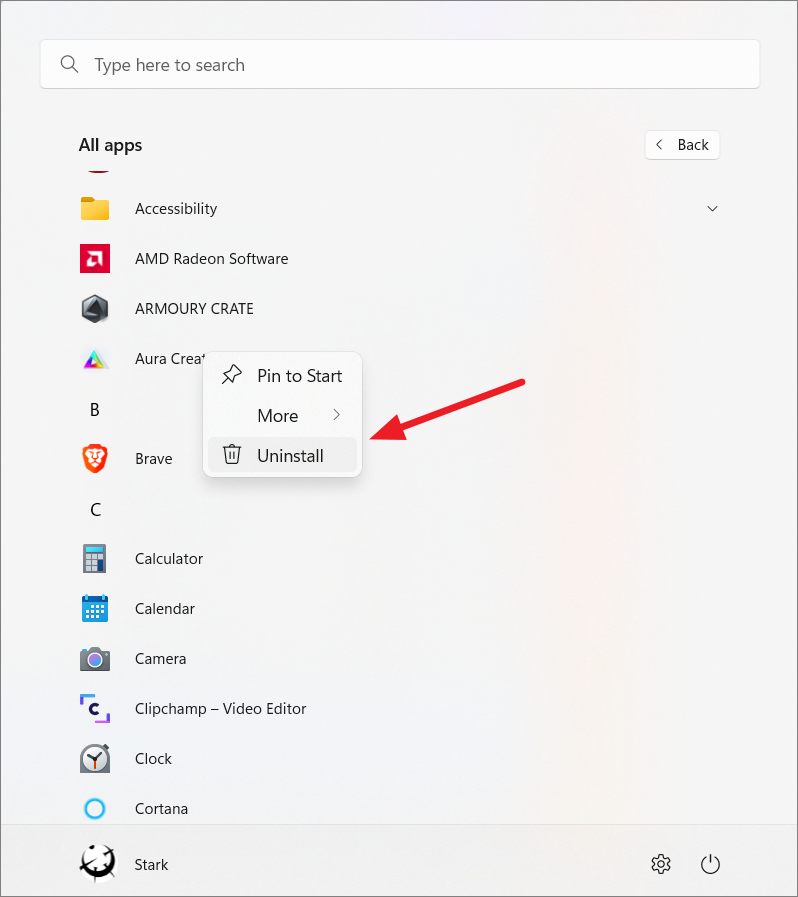
Scroll through the list of installed apps to locate the application you wish to remove. If you have trouble finding it, use the search bar above to quickly find the app.
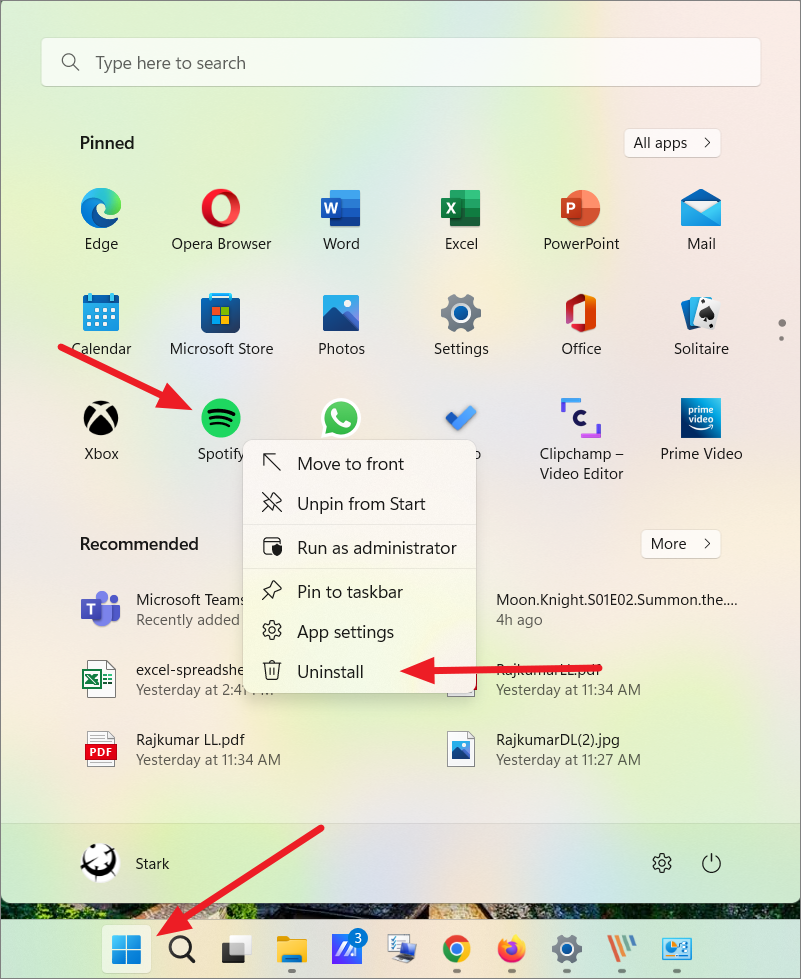
Click the Start button on the taskbar to open the Start menu. If the app you wish to uninstall is pinned under the Pinned section, right-click it and select Uninstall.
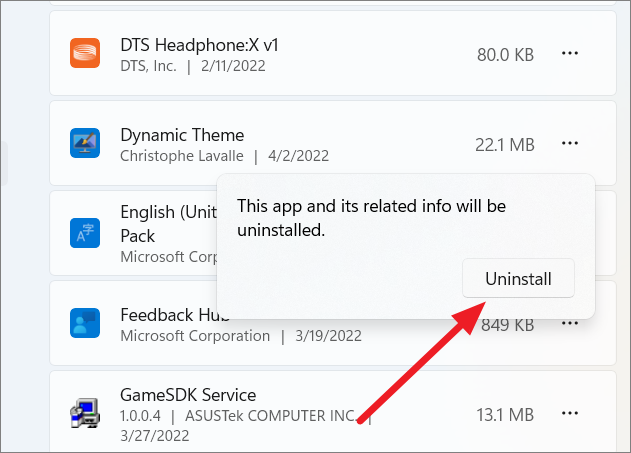
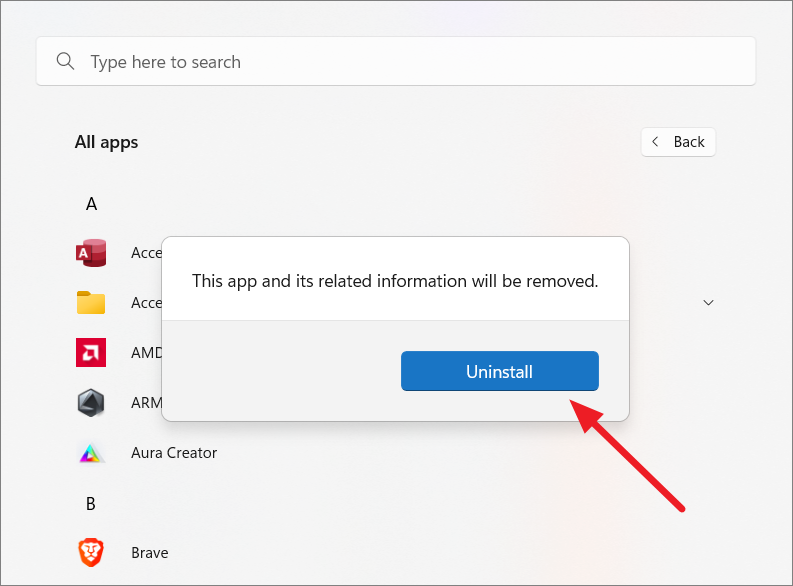
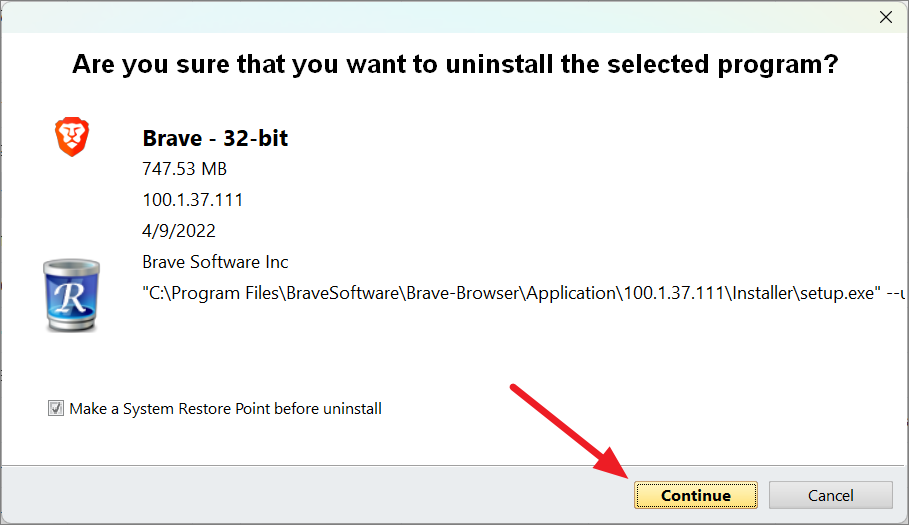
A confirmation dialog may appear. Click Uninstall to proceed. If it’s a desktop app, you might be redirected to the Control Panel to complete the uninstallation.
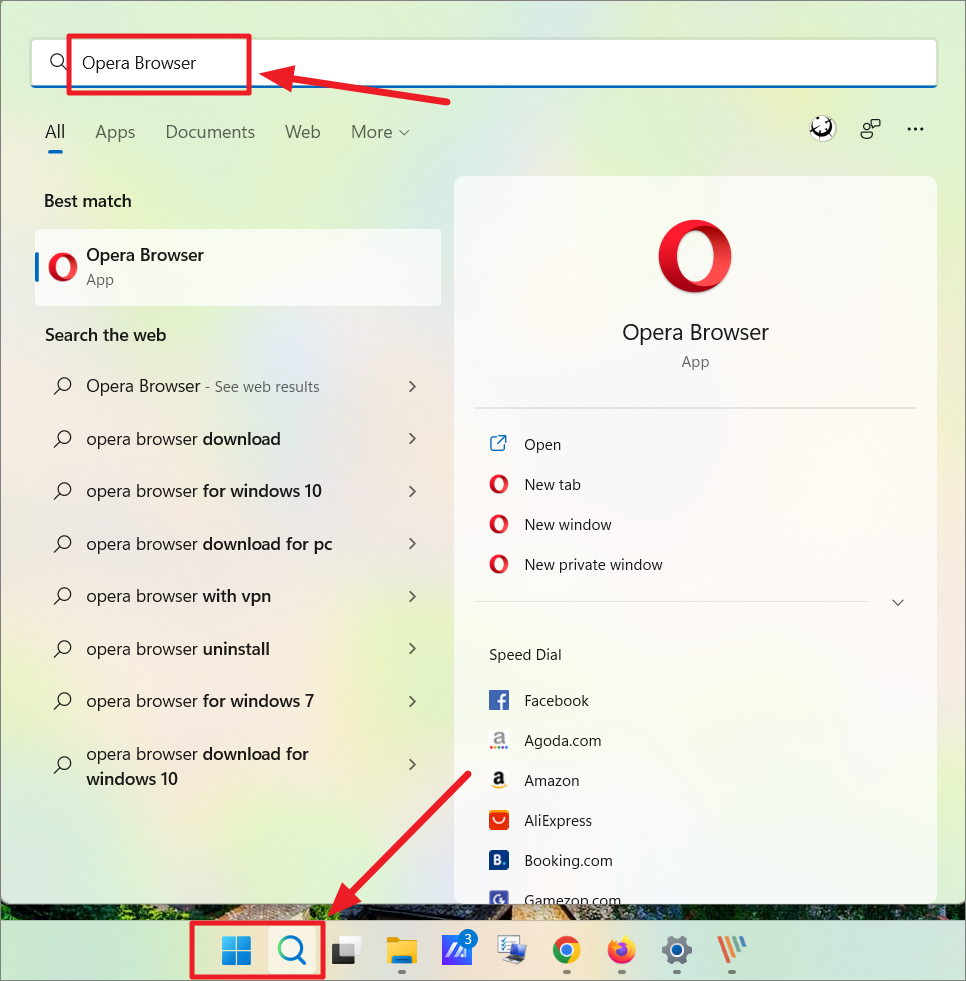
Uninstalling apps via Windows Search
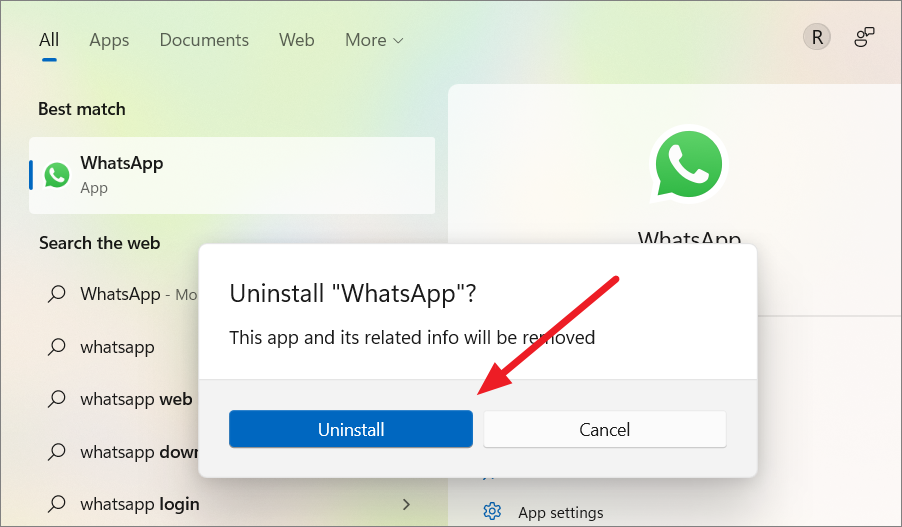
Windows Search allows you to uninstall apps directly from the search results.
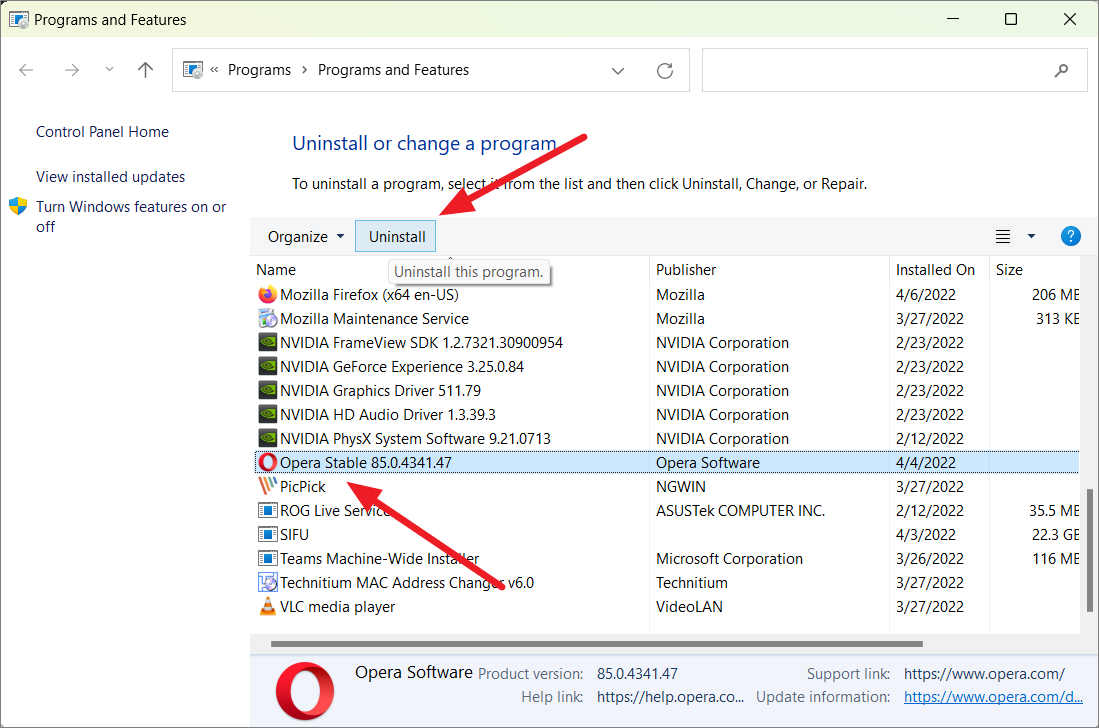
If prompted with an Uninstall confirmation, click Uninstall to remove the app. For desktop apps, you may be redirected to the Control Panel’s Programs and Features window to complete the process.
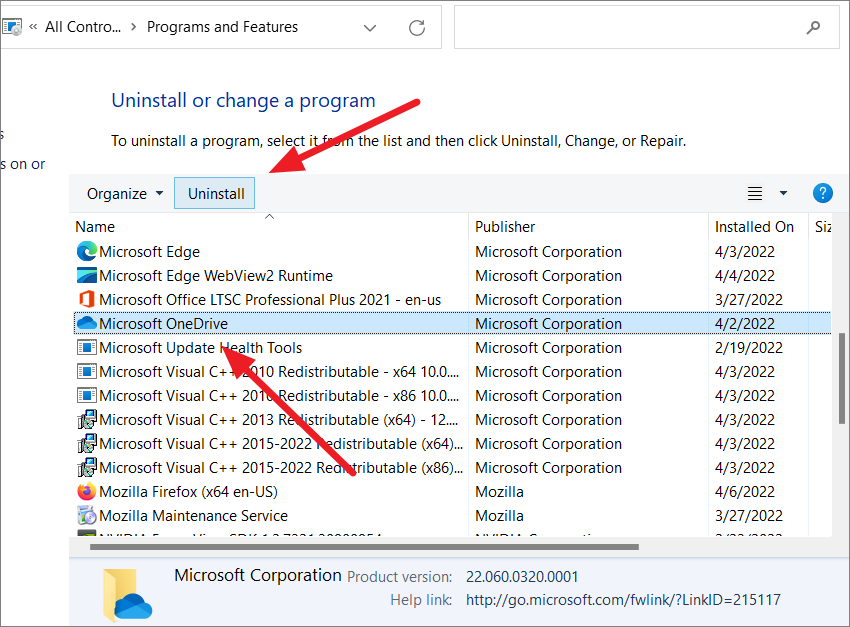
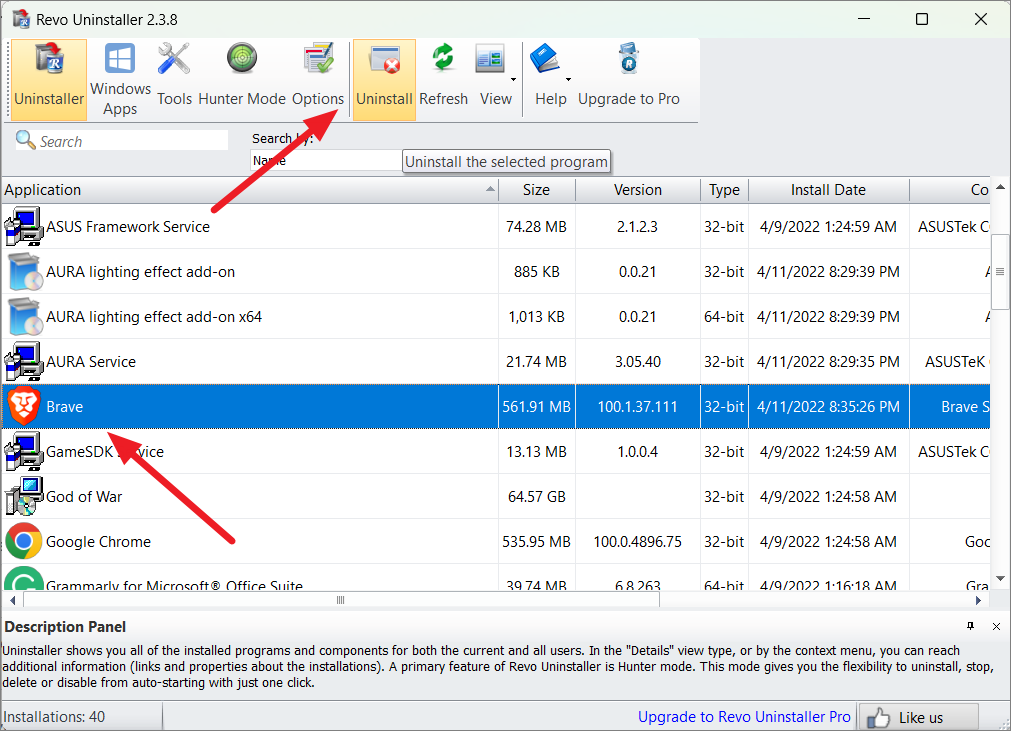
Find the program you want to uninstall from the list. Click on it to select, then click Uninstall at the top of the list or right-click and select Uninstall.
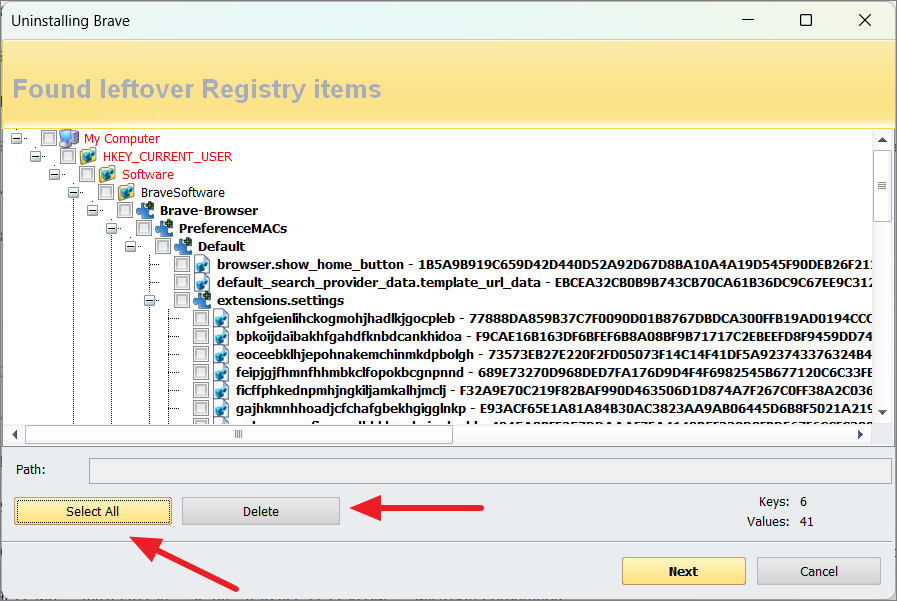
Choose a scanning mode to search for leftover files and registry entries. After the scan, select all detected items and click Delete to fully remove the application.
Unable to uninstall applications on Windows 11?
If you encounter difficulties uninstalling an application, try these troubleshooting steps.
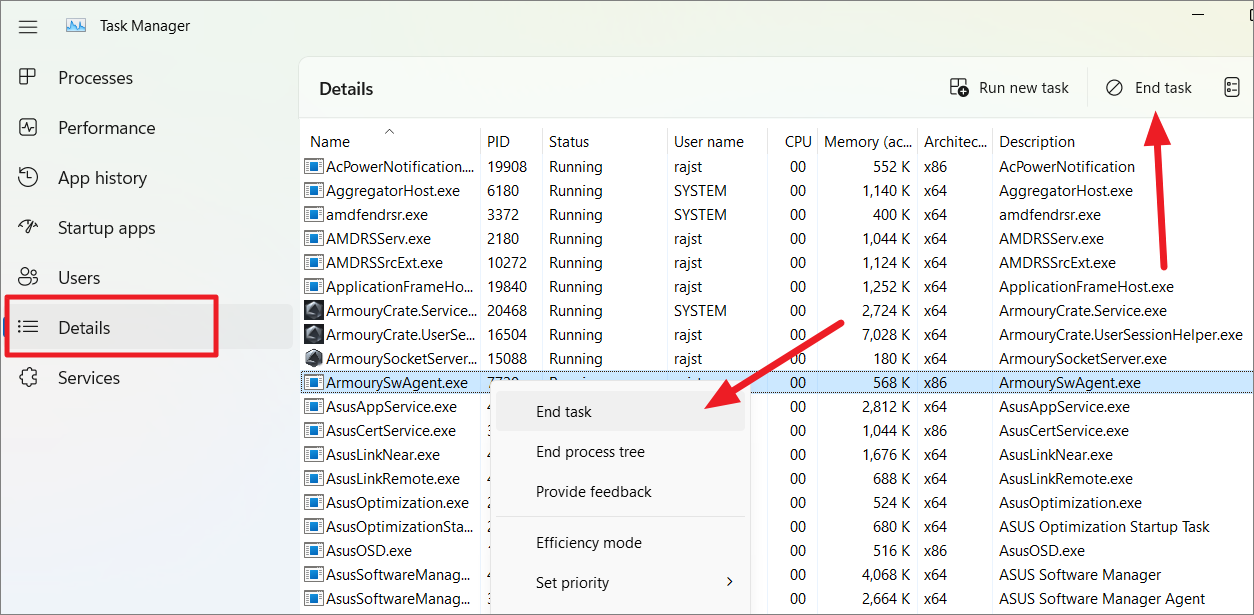
Closing app instances and processes in Task Manager:
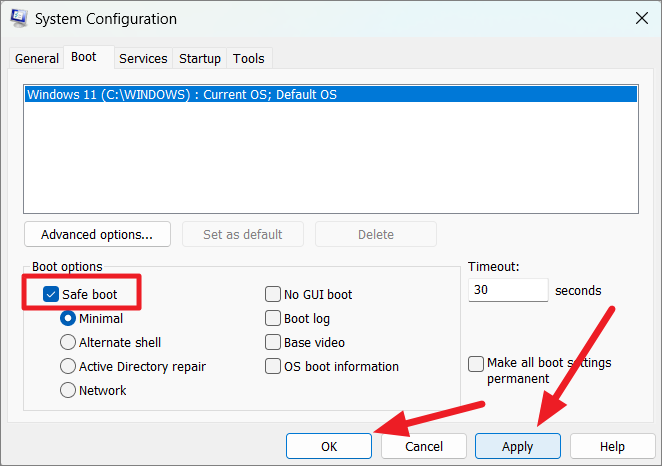
Restart your computer to boot into Safe Mode. Then, try uninstalling the application using any of the methods above.
Cleaning up residual files after uninstallation
Even after uninstalling, some files and registry entries may remain. Step 1: Navigate to the following directories and delete any folders or files related to the uninstalled application:
C:\Program Files (x86)
C:\Program Files
C:\ProgramData
C:\Users\[Your Username]\AppData\Local
C:\Users\[Your Username]\AppData\Roaming
By utilizing these methods, you can effectively remove unwanted applications from your Windows 11 PC, helping to optimize performance and free up valuable storage space.