
Videos can take up a lot of storage space on your computer. If you are running low on storage, you got to come up with a solution to reduce your video. Many users go ahead and delete the video altogether without realizing that compressing it would help clear a lot of storage. Also, compressing videos has become a lot simpler and convenient with the availability of multiple video editor apps for Windows 10.
The need to compress videos not just arises when you are running low on storage. For instance, you want to share a video but can’t due to size restrictions on both email and chat platforms. Also, uploading and downloading compressed videos is a lot quicker.
Many users have to upload videos on various portals for work or educational purposes. These portals may also have put in place certain limitations on the video size. If your video size is more than the limit, try compressing it. Also, if your internet speed is low or keeps fluctuating, uploading a compressed smaller size video would be the ideal approach.
There are various apps you can use to compress or reduce the size of the video and we will walk you through the process with VLC Media Player. It’s free, open-source, supports almost all of the video formats, and is available for most operating systems, thus making it the preferred option.
How to Compress a Video on Windows 10?
Before we move to the process, it’s imperative for you to understand the various parameters that are modified to compress a video and how they affect it.
- Convert to MPEG4 format: A video, like any other file, has various formats. Videos in some formats occupy more storage compared to others due to their larger size. Therefore, it is recommended that you convert the video to MP4 format to reduce its size.
- Decrease the Resolution: Resolution is the number of pixels that can be distinctly displayed in a given dimension. It’s written as ‘width x height’. If you ever use YouTube or other video streaming services, you would find the option to change the resolution. A lower video resolution translates to a smaller-sized video. It however affects the quality of the video, therefore, lower it only when the quality is not a critical factor.
- Decrease the Bitrate: Bitrate is the number of bits that are processed in unit time. Lower the bitrate, lower is the size of the video. Bitrate is expressed in bits per sec. If the bit rate is high, you might find prefixes like ‘k (Kilo)’, ‘M (Mega)’, or ‘G (Gega)’ affixed to it.
- Decrease the Frame Rate: Frame rate is the rate at which consecutive frames (images) are displayed on the screen. It’s sometimes referred to as the ‘Frame Frequency’ and is measured in ‘Frames per Second (FPS)’. When you lower the frame rate, it simultaneously reduces the file size.
- Decrease the Video Length: It is one of the simplest solutions to reduce the size of a video. Many a time, the video may have parts that are irrelevant, and simply cutting them out will reduce the video size.
- Crop the Video: Similar to images, you can crop certain portions of the videos that are necessary and remove the remaining ones. For instance, if the portion on the left does not contain any relevant information, cropping it would do no harm. However, it would act to your benefit by reducing the video size.
Now that you how to compress a video and reduce its size, we will walk you through the process for each.
Download VLC Media Player on Windows 10
If you don’t have the VLC Media player installed on your system yet, it’s time you install it before we move to the various video compression methods. To download VLC Media Player, go to videlan.org/vlc and click on the ‘Download VLC’ option.
After you have download the installer, launch it, and then follow the on-screen instructions to complete the installation process.
Change the Video Format to MP4 using VLC
If the format of the current video is ‘MKV’ or ‘AVI’, converting it to ‘MP4’ will reduce the size. The files in ‘MKV’ or ‘AVI’ format are generally larger due to the additional features. Also, the quality of the video is not affected, since it depends on the ‘codec’ and not the format. The conversion process is seamless with VLC Media Player.
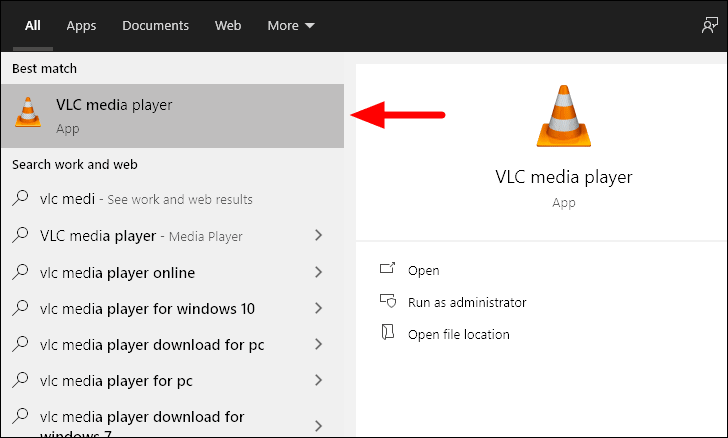
To change the format, search for ‘VLC Media Player’ in the ‘Start Menu’ and then click on the search result to launch the app.
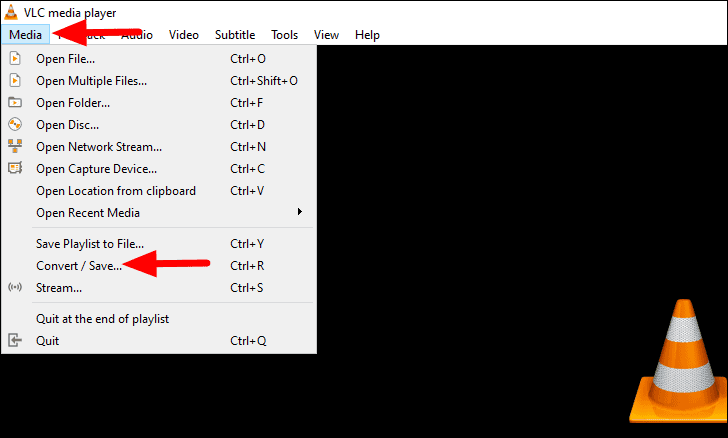
In the VLC media player, click on ‘Media’ from the menu bar, and then select ‘Convert/Save’ from the drop-down menu.
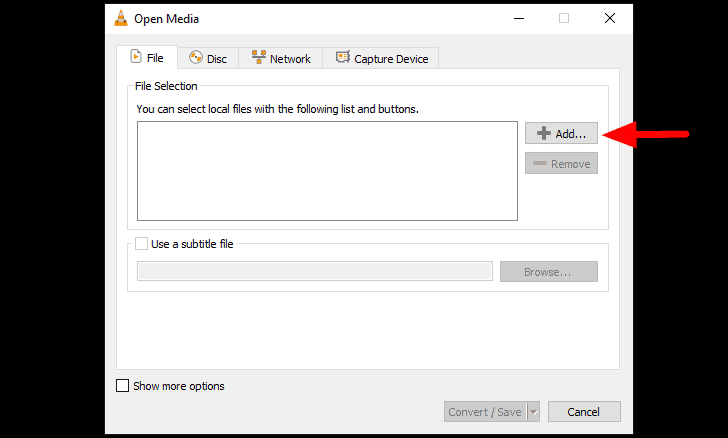
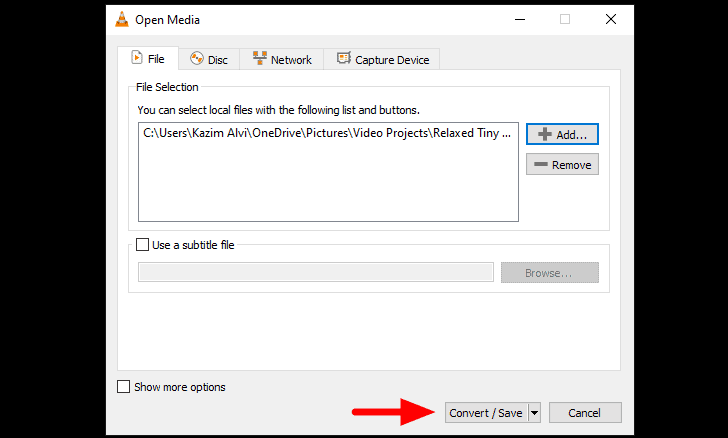
The ‘Open Media’ window will launch. Click on the ‘Add’ option to select and add a video.
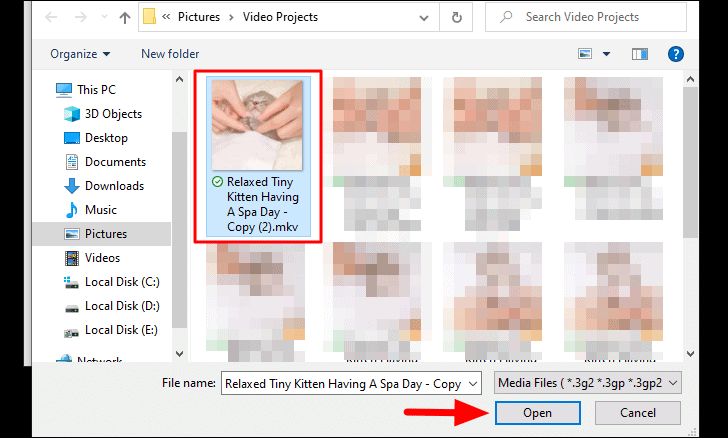
Next, browse and select the video, and then click on ‘Open’ at the bottom.
After the video has been added, click on the ‘Convert/Save’ option at the bottom.
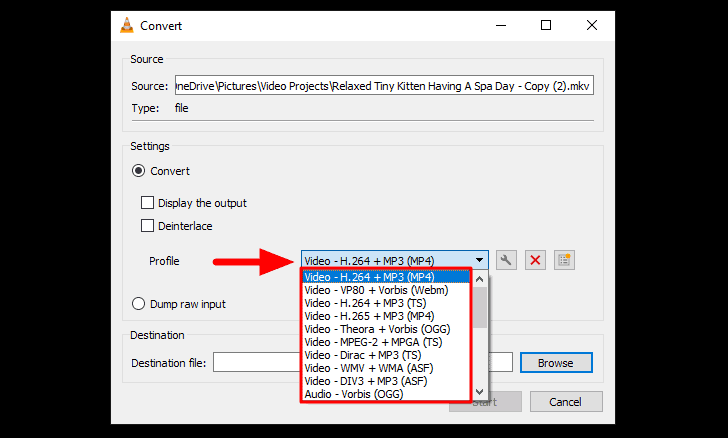
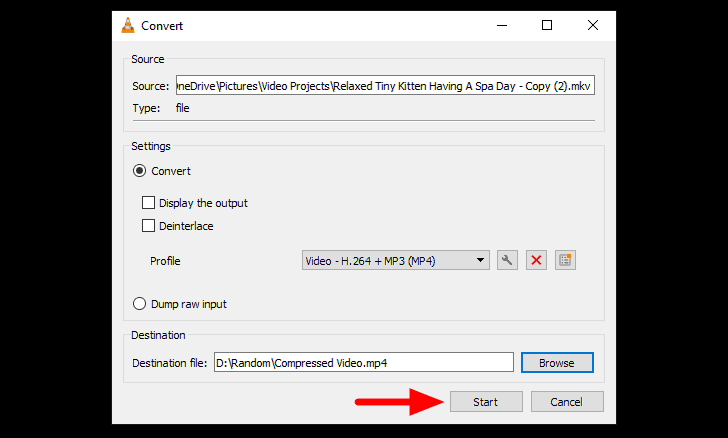
The ‘Convert’ window will now appear from where you can select any other format. It’s however recommended that you go with the first option, i.e., ‘MP4’, since its a versatile format supported by all the multimedia players.
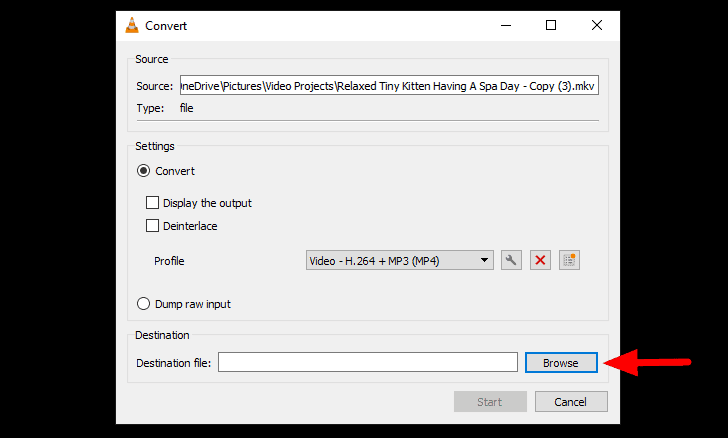
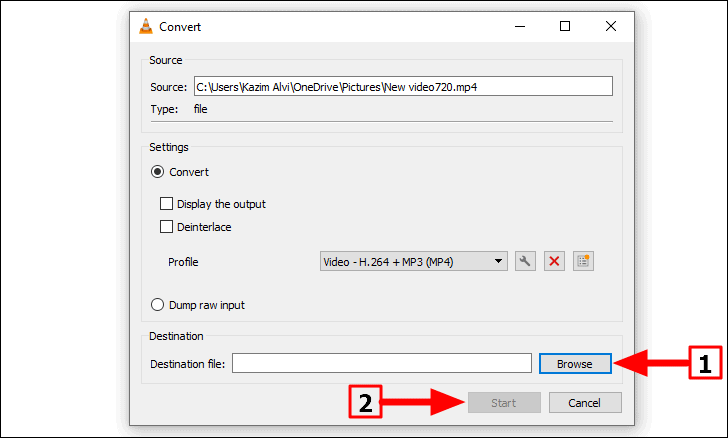
After you have chosen the new format, click on the ‘Browse’ option to chose the destination folder and set a file name for the new video.
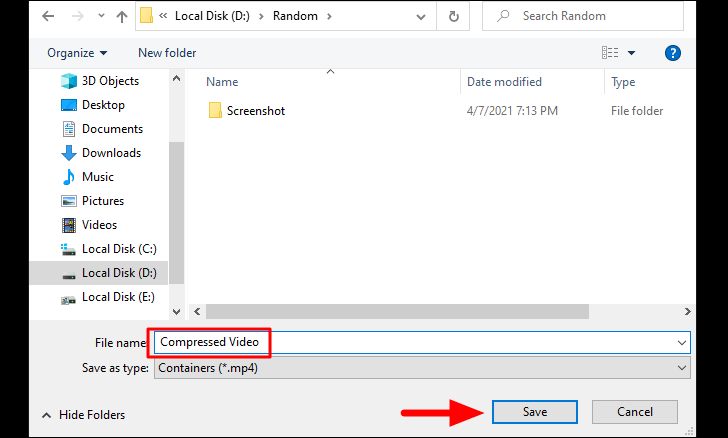
Now, locate the destination of the new video, enter a new name for it in the provided section, and then click on ‘Save’ at the bottom.
All that’s left for you to do is click on the ‘Start’ option at the bottom to begin the conversion process.
It will take a few moments for the conversion process to complete. Once it’s done, check whether the new video runs perfectly and then delete the old one, if required.
Compress a Video by Modifying the Video Parameters using VLC
In this section, will discuss the various video compression techniques through modifying the video parameters.
Find the Various Parameters of the Current Video
Before you proceed to the compression method, you must know the current parameters of the video you are about to compress.
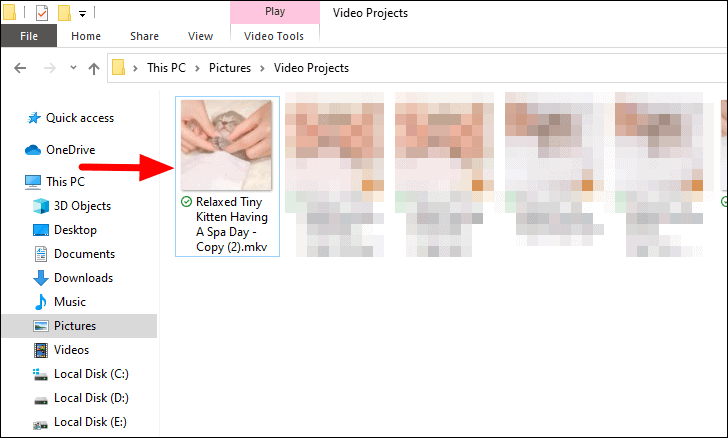
To check the parameters, first, browse and locate the video and then right-click on it. The current format of the video will be suffixed to the name itself. However, if you have hidden the ‘Extensions’ from the ‘Control Panel’, it can found in the ‘General’ tab of video properties.
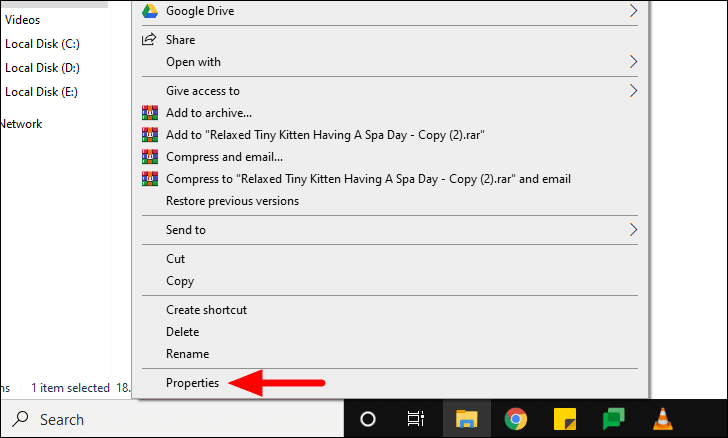
Next, select the ‘Properties’ option from the context menu.
Navigate to the ‘Details’ tab at the top and you can now view the various video parameters such as ‘Width’, ‘Height’, ‘Bitrate’, and ‘Frame rate’.
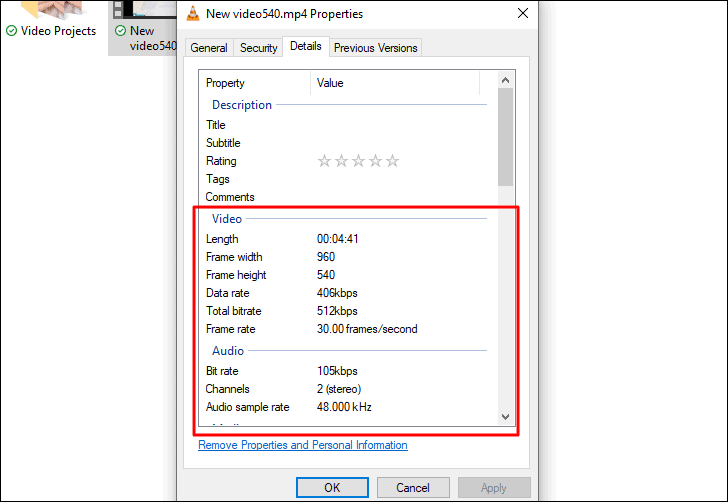
There are some video formats where the parameters may not be displayed in the ‘Details’ tab. In such cases, it’s recommended to convert the video file to ‘MP4’ by following the steps mentioned in the above section and then viewing the video parameters.
You will need these parameters when compressing the video since the changes will be made relative to the current ones.
Modifying the Video Parameters using VLC
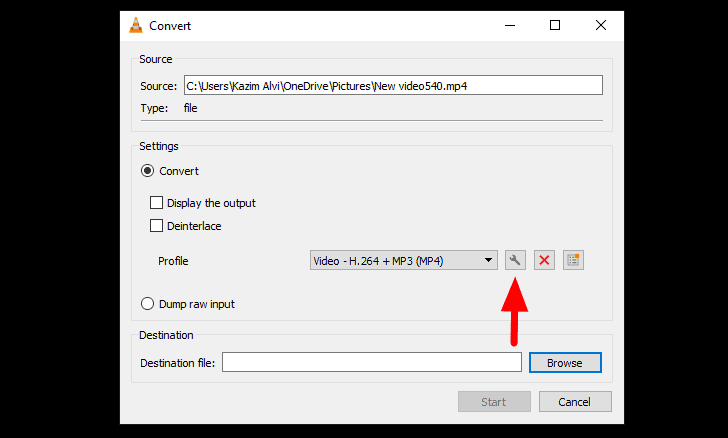
After you have selected the video as discussed above, click on the wrench icon next to the video ‘Profile’.
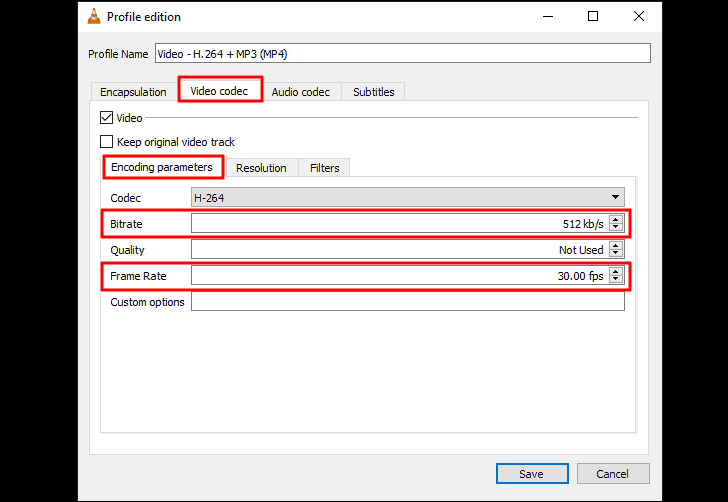
To change the video Bitrate and Frame Rate, navigate to the ‘Video codec’ tab and select the ‘Encoding parameters’ section. Now, enter a lower value for both manually or use the arrows given next to them to increase/decrease the rate.
To change the video resolution, navigate to the ‘Resolution’ section of the ‘Video codec’ tab. Next, change the width and height of the frame by either manually entering the new values or using the arrows for each. Also, never change the width to height ratio of a video as it will affect the overall quality.

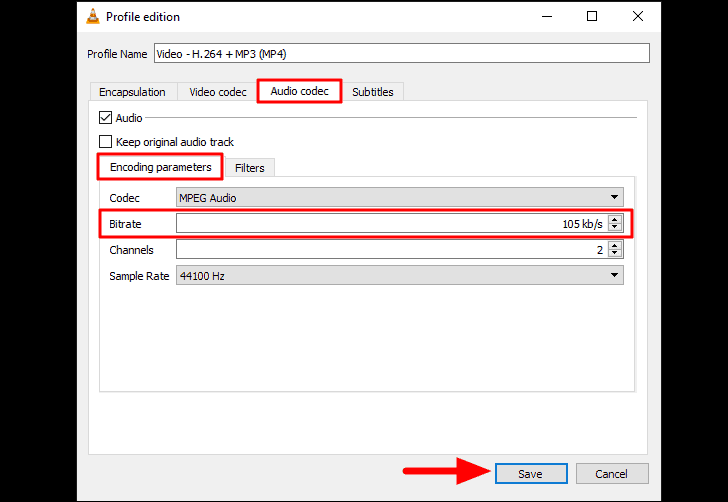
To change the audio Bitrate, navigate to the ‘Audio codec’ tab and then select the ‘Encoding parameters’ section. Next, decrease the bitrate to reduce the size of the video. After you have made the necessary changes, click on ‘Save’ at the bottom to proceed to the conversion process.
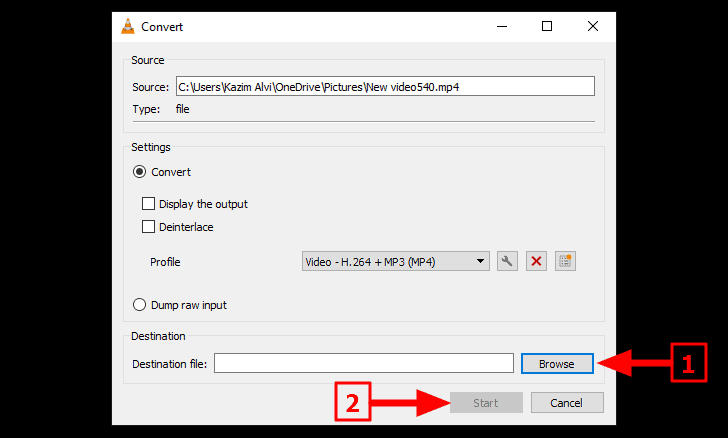
Next, click on browse to select the destination folder, choose a file name and then click on ‘Start’ to start the conversion process as discussed in the previous section.
VLC will now start the conversion process which will take a couple of moments to finish.
Trim/Cut a Video using VLC on Windows 10
If the part of the video that you want to share, upload or save is way too smaller than the whole duration, you can simply trim or cut that part out. This will considerably reduce the size of the video and also remove the irrelevant part of it, thus making it more effective.
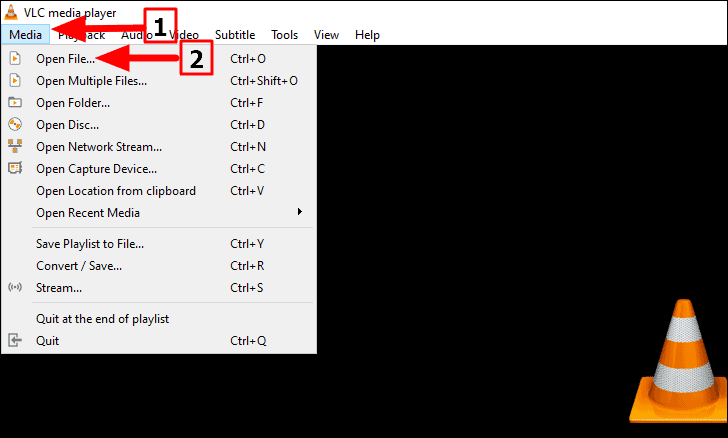
To trim the video with VLC, launch the player, click on ‘Media’ from the menu bar and then select ‘Open File’ from the drop-down menu.
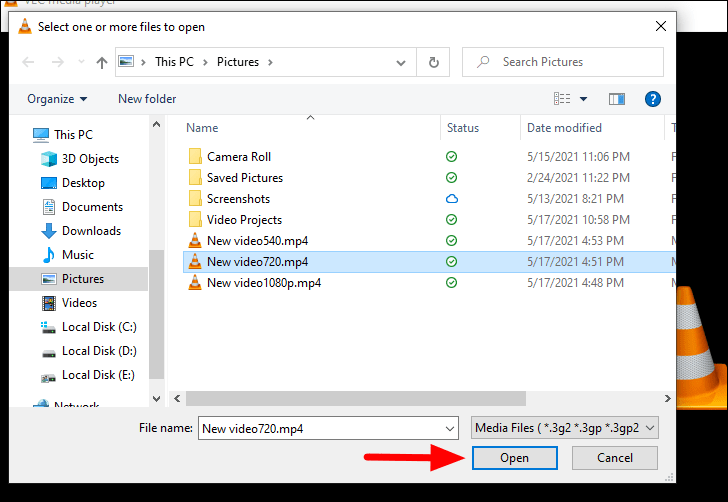
Locate and select the video that you want to trim and click on ‘Open’ at the bottom.
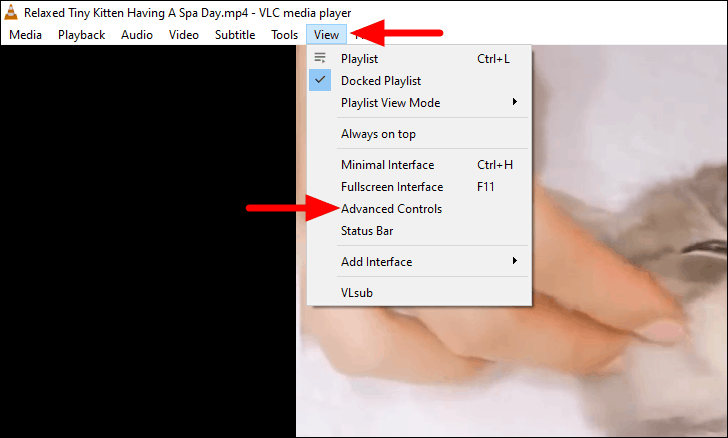
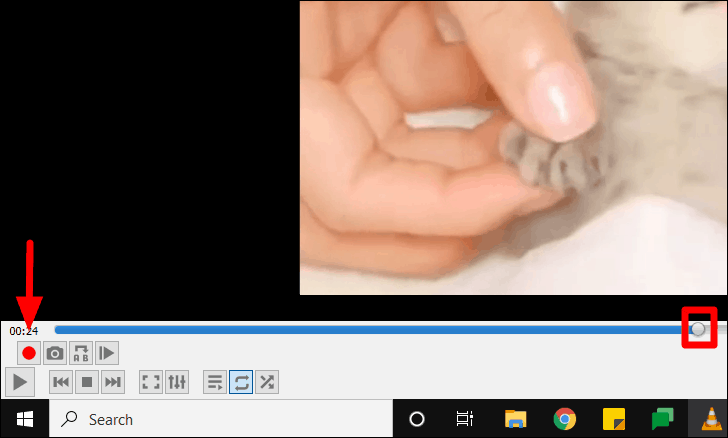
After the video is loaded in VLC media player, click on ‘View’ in the menu bar and select ‘Advanced Controls from the menu.
A set of additional controls will now be visible at the bottom. Now, position the video at the point from where you want to trim it. Next, click on the ‘Record’ button and then click on the ‘Play’ button. The video will be recorded from this point onwards.
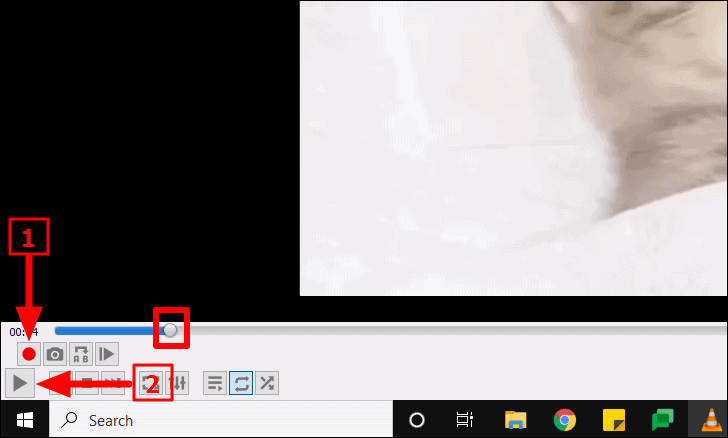
When you reach the point where the relevant part of the video end, again click on the ‘Record’ button to stop the recording.
The portion recorded/trimmed above will automatically be saved in the ‘Videos’ folder on your system.
Crop a Video using VLC on Windows 10
As already discussed earlier, if the video contains irrelevant portions throughout its duration, you can crop them out and reduce the size of the video. Although the process may seem highly intricate to many, it’s as simple as any other. Before you proceed to crop a certain portion out, watch the complete video and verify if it’s actually irrelevant throughout.
To crop a video with VLC, launch the player, click on ‘Media’ from the top-left corner and then select ‘Open File’ from the menu.
Browse and select the video that you want to crop and then click on ‘Open’ at the bottom.
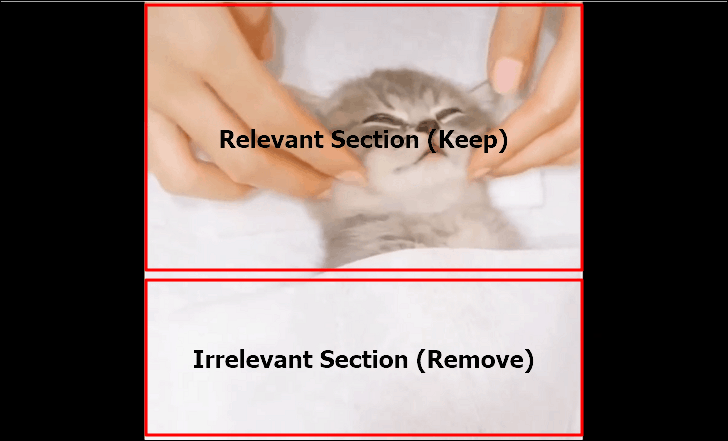
Now identify the portion of the screen that you want to keep and the one that you want to remove.
Note: The picture below is just to help you get an idea of the concept and is not actually drawn in the VLC media player.
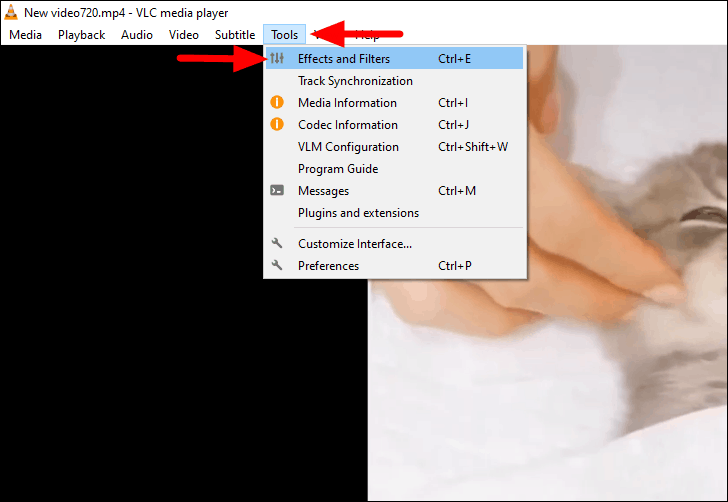
After you have identified the portion to keep in the video, click on the ‘Tools’ menu and select ‘Effect and Filters’ from the drop-down menu.
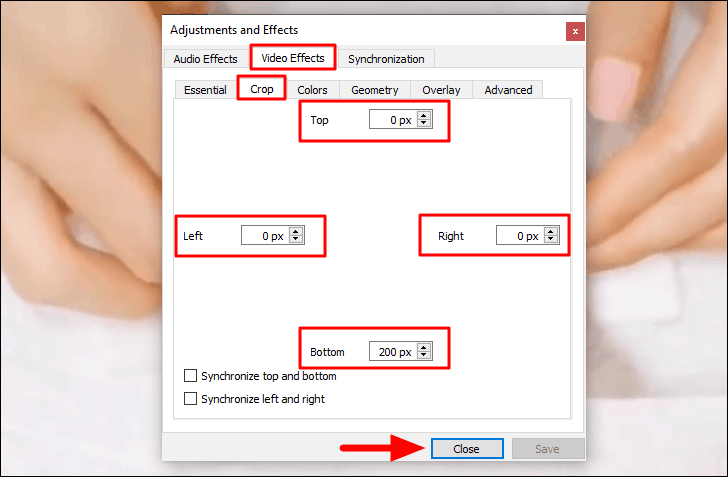
Next, navigate to the ‘Video Effects’ tab from the top and select the ‘Crop’ section under it. Now enter the values in the four boxes to select the part that you want to crop (keep). You might need to adjust the values a few times to get the desired result. Once the values have been set, either press ENTER or click on ‘Close’ at the bottom to apply and save the changes. Also, jot down the value somewhere as they will be used a few steps later.
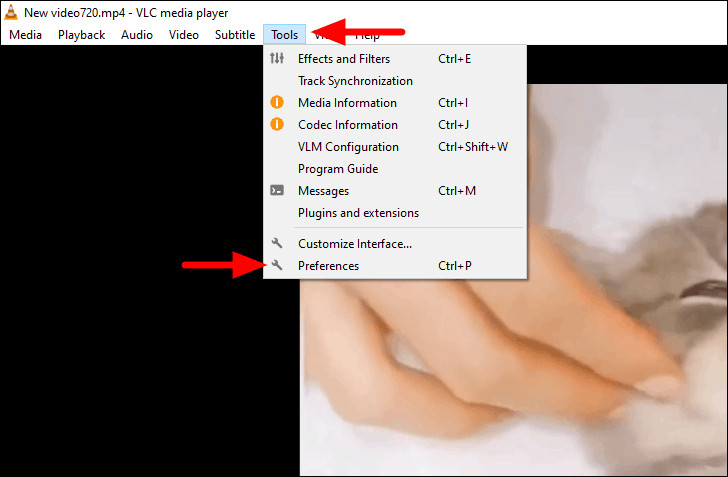
The process isn’t over yet, since you need to apply filters to the video for optimum result. Next, click on ‘Tools’ and select ‘Preferences’ from the drop-down menu.
In the ‘Simple Preferences’ window, tick the checkbox for ‘All’ to view the complete settings.

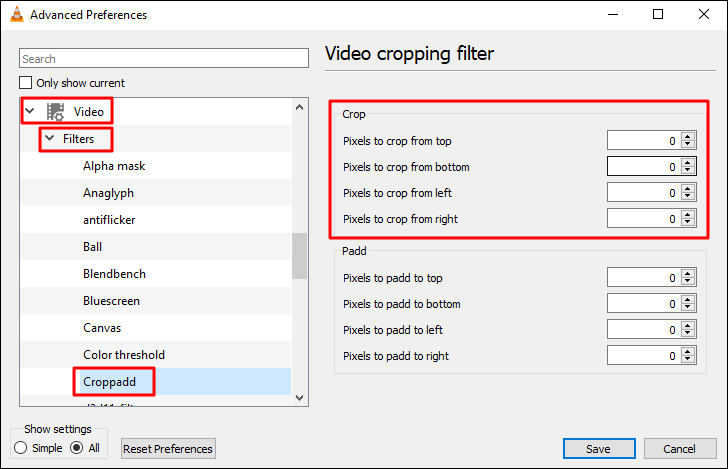
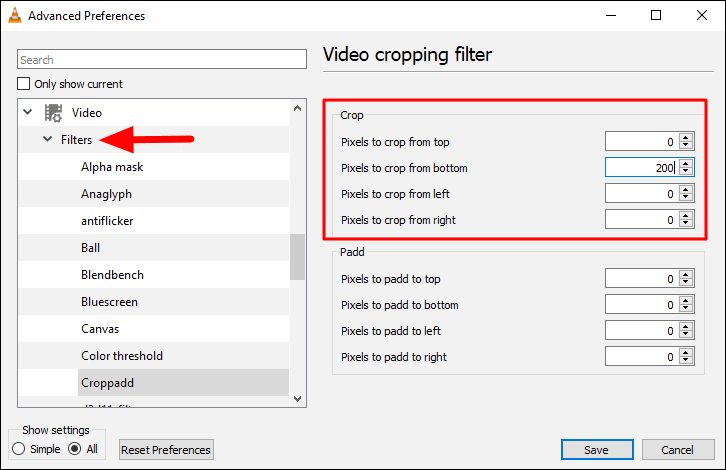
Next, navigate to the ‘Video’ tab on the left and select the ‘Croppadd’ section under ‘Filters’. You will now find two sections on the right, ‘Crop’ and Padd’. Enter the values you noted down earlier from the ‘Adjustment and Effects’ window in the ‘Crop’ section only.
After you have entered the values, click on the ‘Filters’ subtab on the left.
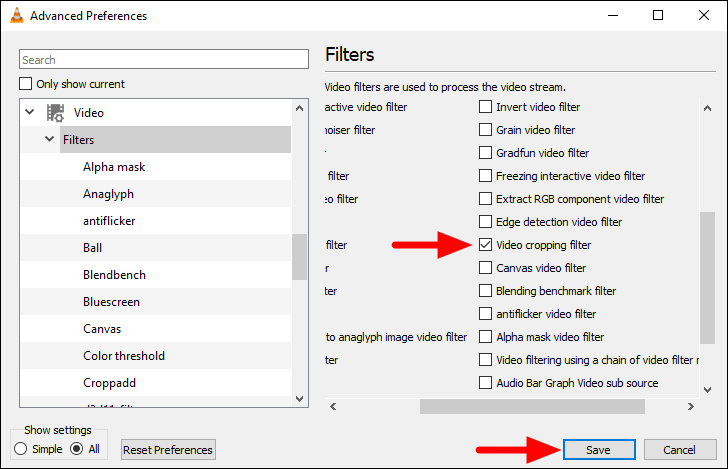
Now, find the ‘Video cropping filter’ on the right and tick the checkbox meant for it. In some versions of VLC, you will find the ‘Video scaling filter’ option instead, but they both perform the same function. After you have applied the filters, click on ‘Save’ at the bottom to apply and save the filters.
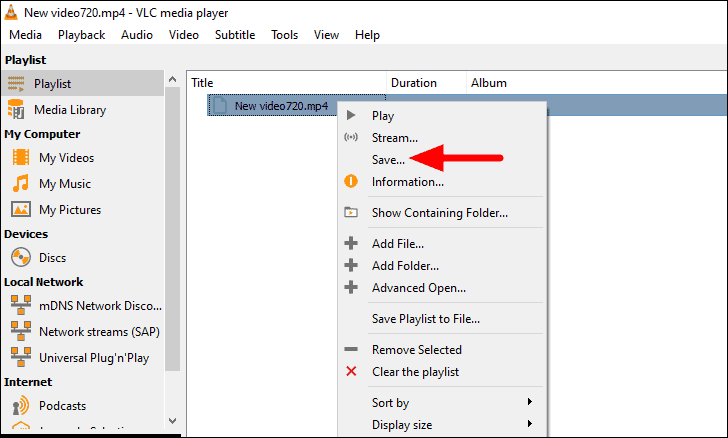
The cropped video is all set, all that is left to do is saving the video. To save the video, press CTRL + L to view the playlist. Next, right-click on the current video that is listed on the right and select ‘Save’ from the context menu.
If you have read the previous sections, you are familiar with the ‘Convert’ window. Now, click on the ‘Browse’ option, select the destination folder for the video and enter a name for it. Once you are back on this screen, click on the ‘Start’ option to create a new video of the cropped area. The process may take a few moments and you must never interrupt it.
After the video is created, open its properties to view its size and you will realize how effective the cropping method is.
By now, you must be well oriented with the concept of compressing a video and the various methods to reduce its size. Sharing videos or uploading them on protals with size restrictions wouldn’t be an issue anymore.


