
SmartArt graphics in Microsoft Word provide a structured way to present information visually, making complex ideas easier to understand. While Word does not allow direct conversion of standalone images into SmartArt, you can use SmartArt layouts that include image placeholders to integrate your pictures into organized diagrams. This approach helps you display images alongside text in a cohesive, professional format. The following steps explain how to convert a picture to SmartArt using the built-in tools in Word, along with tips for customizing your graphic.
Using Picture-Enabled SmartArt Layouts
Step 1: Open your Word document and place the cursor where you want the SmartArt graphic to appear. This ensures the graphic is inserted at the correct location in your document.
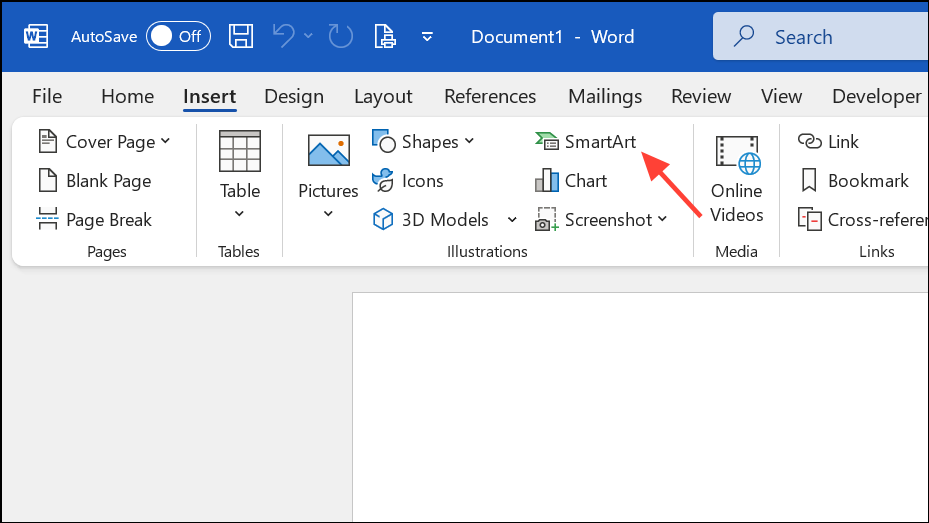
Step 2: Navigate to the Insert tab on the Ribbon. In the Illustrations group, click SmartArt. This opens the SmartArt Graphic selection dialog box.
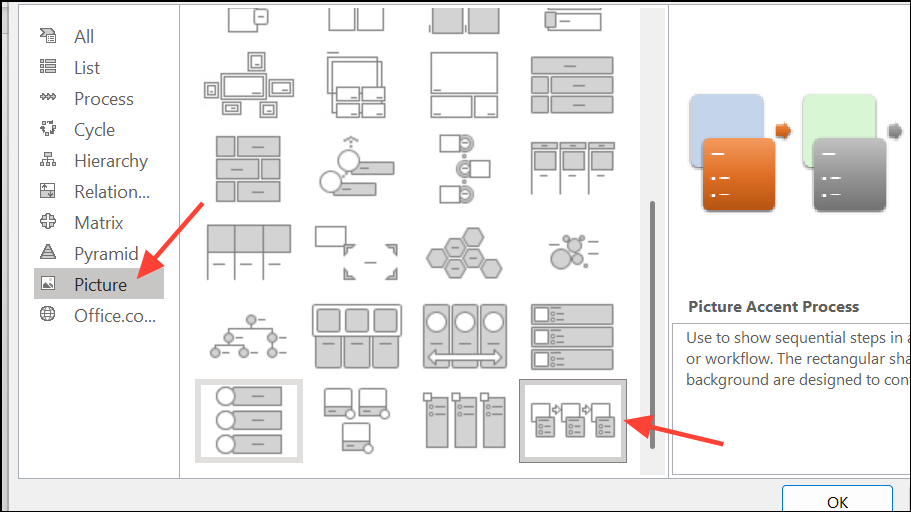
Step 3: In the dialog box, select the Picture category on the left. Choose a SmartArt layout that includes image placeholders, such as Picture Accent Process or Picture List. Click OK to insert the selected layout into your document.
Step 4: Click the image icon inside one of the SmartArt shapes. A dialog will prompt you to select an image file from your computer. Browse to your desired picture, select it, and click Insert. The image will appear inside the SmartArt shape.
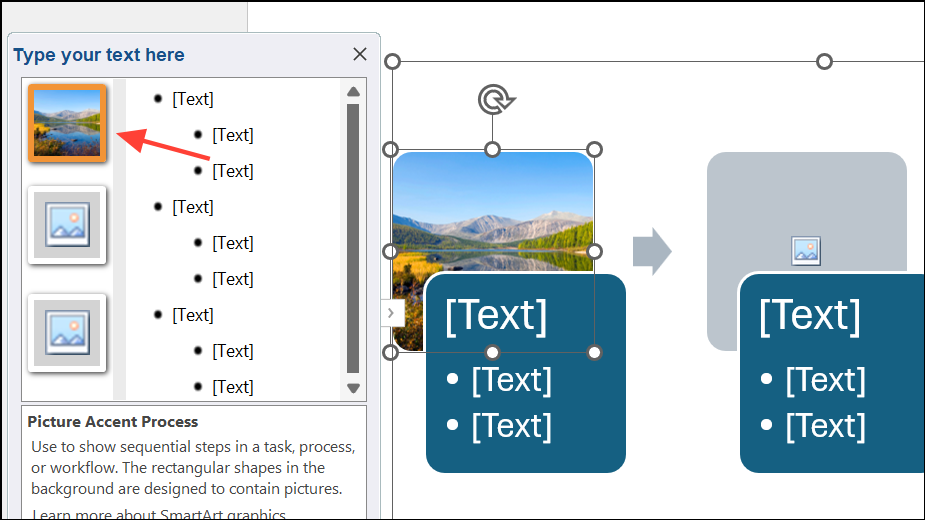
Step 5: Add text to the corresponding text pane or directly inside the shapes, depending on your chosen layout. This step allows you to pair images with descriptive labels or explanations.
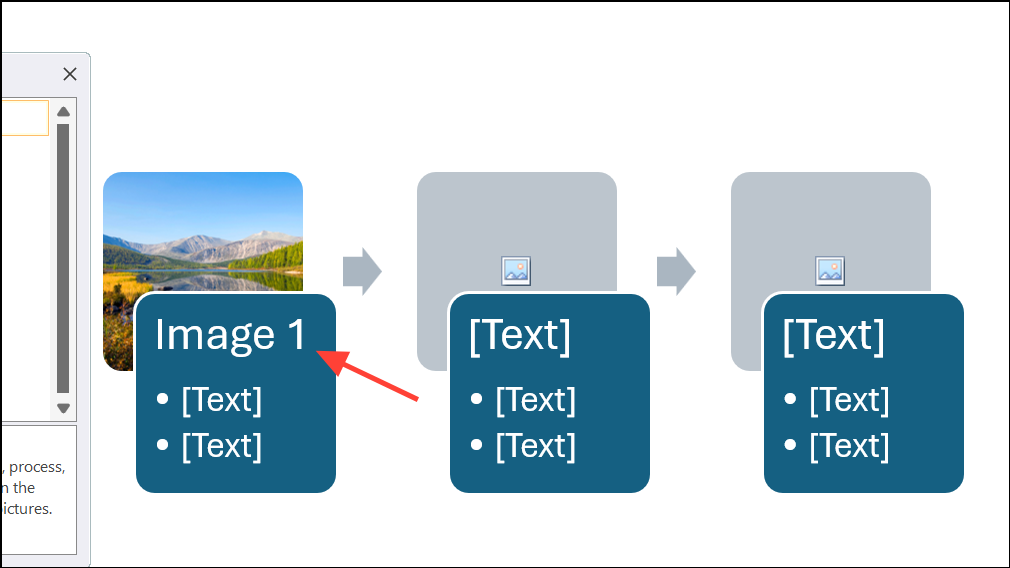
Step 6: Repeat the process for additional images if your SmartArt layout contains multiple picture placeholders. Each placeholder can hold a different image, helping you build a visually rich diagram.
Step 7: To modify the appearance, select the SmartArt graphic. The SmartArt Design and Format tabs will appear on the Ribbon. Use these tabs to change the layout, color scheme, or apply different SmartArt styles. This step lets you tailor the look of your graphic to fit your document’s design.
Alternative: Manually Positioning Images Over SmartArt
If you want to use a picture in a SmartArt layout that does not support images, you can manually overlay the image on top of a SmartArt shape. This method is less dynamic, as the image and SmartArt will not move together if you edit the graphic, but it allows for more flexibility in design.
Step 1: Insert the desired SmartArt layout using the Insert > SmartArt command.
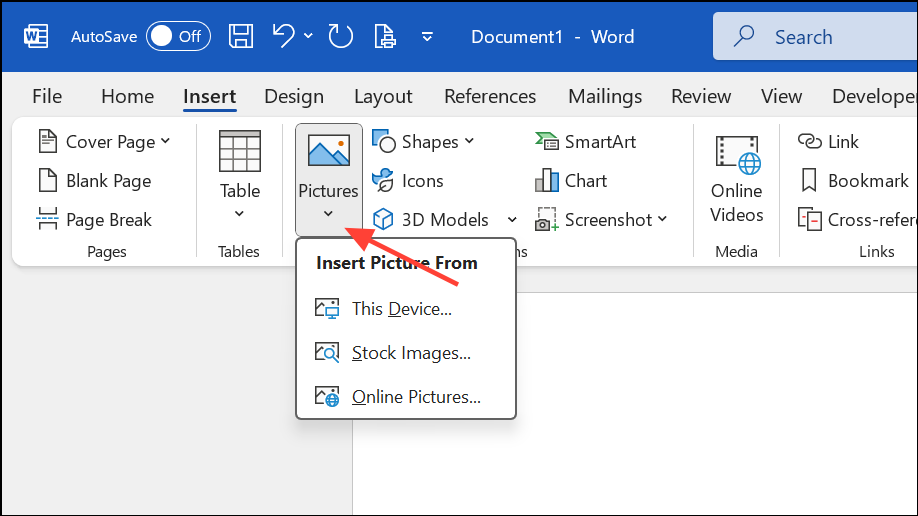
Step 2: Insert your image by selecting Insert > Pictures, then choose the image file from your device.
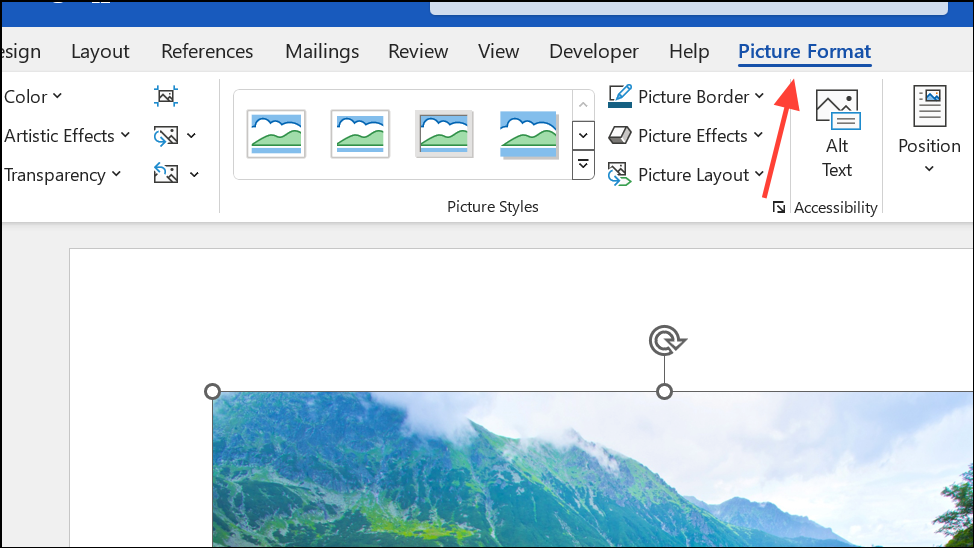
Step 3: Move and resize the image so that it fits neatly over or within the relevant SmartArt shape. Use the Picture Format tab to adjust the image as needed.
Step 4: Group the image and SmartArt if you want them to stay together. Select both, right-click, and choose Group from the context menu. Note that grouping disables some SmartArt editing features.
Tips for Working with Images in SmartArt
- To replace an image in a SmartArt shape, right-click the image and select
Change PictureorChange Graphic > From Stock Images(on supported versions). - If the SmartArt text pane is not visible, click the small arrow on the left edge of the graphic to open it.
- Some SmartArt layouts automatically resize text and images to fit the shapes, which improves alignment and readability.
- Custom SmartArt templates with dynamic image support are not natively supported in Word; you must use the built-in layouts or create custom diagrams using shapes and manual formatting.
Integrating pictures into SmartArt graphics in Word streamlines how you present visual information, making your documents more organized and engaging. Experiment with different SmartArt layouts to find the best fit for your content and design needs.