
Microsoft Word offers powerful features that allow you to create interactive, fillable forms using the Developer tab. By enabling this tab, you gain access to tools for adding text boxes, checkboxes, drop-down lists, and more to your documents.
Add developer tab to Microsoft Word
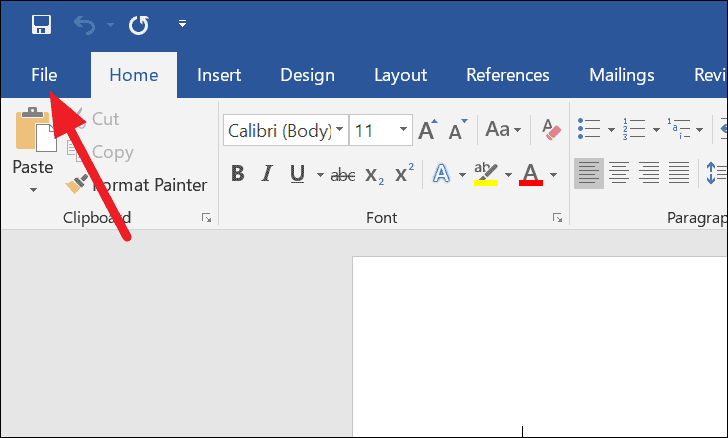
To start creating fillable forms, you first need to enable the Developer tab in Word. Open Microsoft Word on your computer and click on the File tab located in the ribbon at the top of the window.
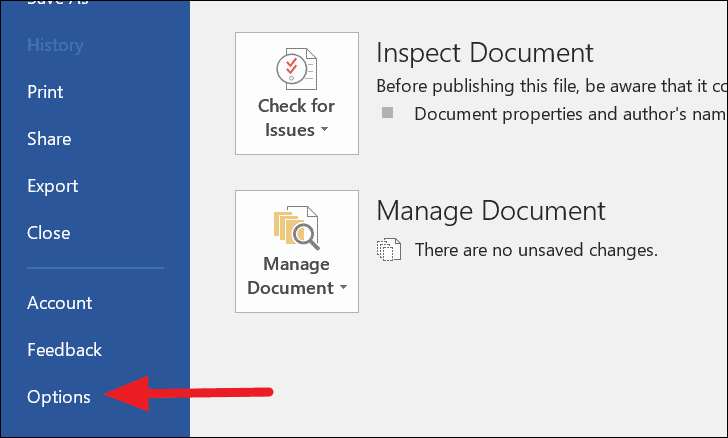
In the menu that appears, scroll down and select Options at the bottom of the left-hand sidebar.
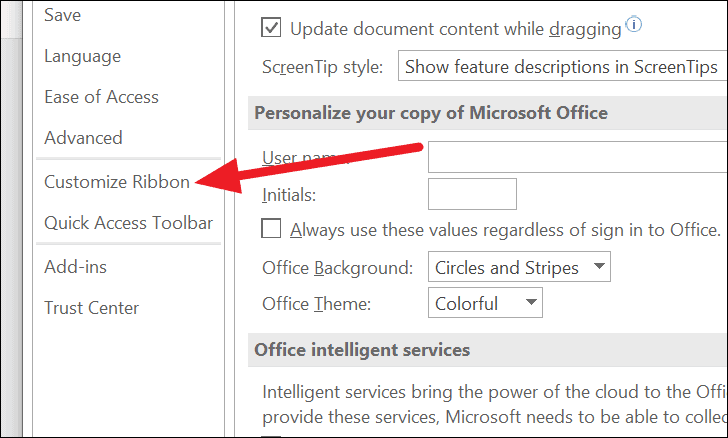
The Word Options dialog box will open. From the list on the left, choose Customize Ribbon to access settings for the ribbon and keyboard shortcuts.
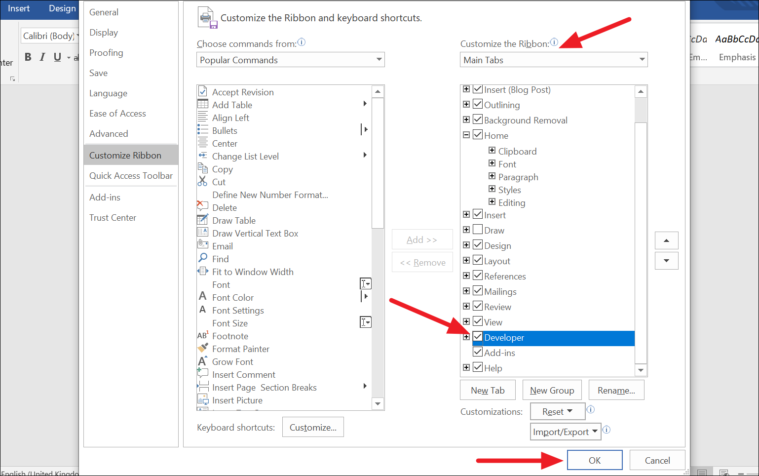
In the Customize the Ribbon section on the right, scroll through the list of main tabs until you find Developer. Check the box next to Developer, then click OK to add it to the ribbon.
The Developer tab will now appear in the main menu ribbon, providing access to various form controls.
How to create a fillable form in Word
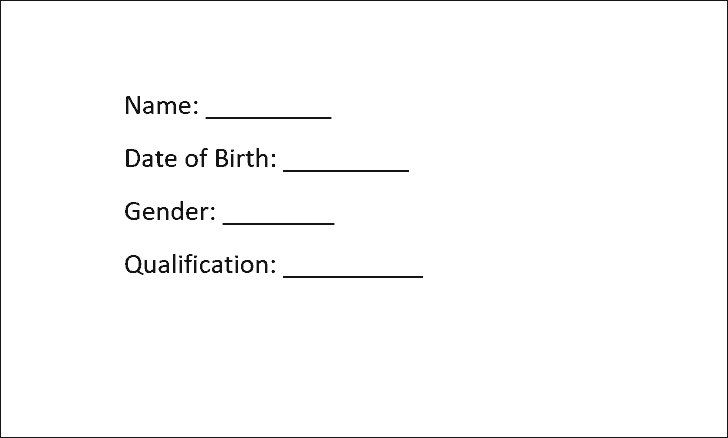
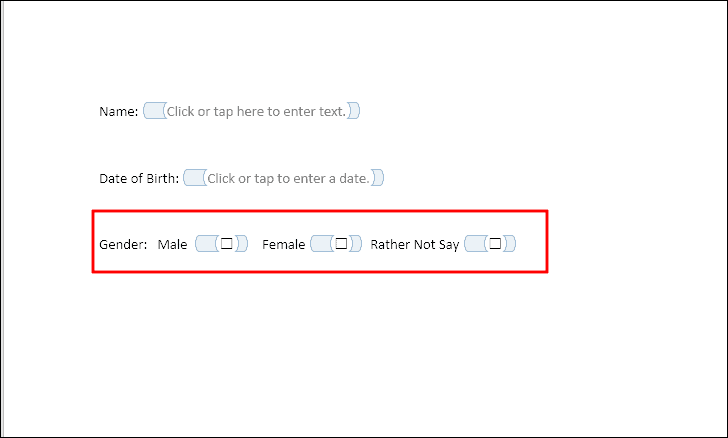
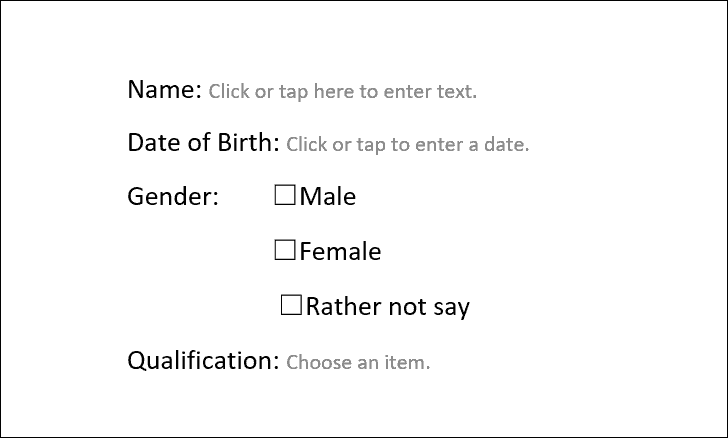
With the Developer tab enabled, you can start building a fillable form. Let’s create a simple form that includes:
- A text box for the name.
- A date picker for the date of birth.
- Checkboxes for the gender.
- A drop-down list for qualification.
Inserting a text box in the form
Developer tab in the ribbon.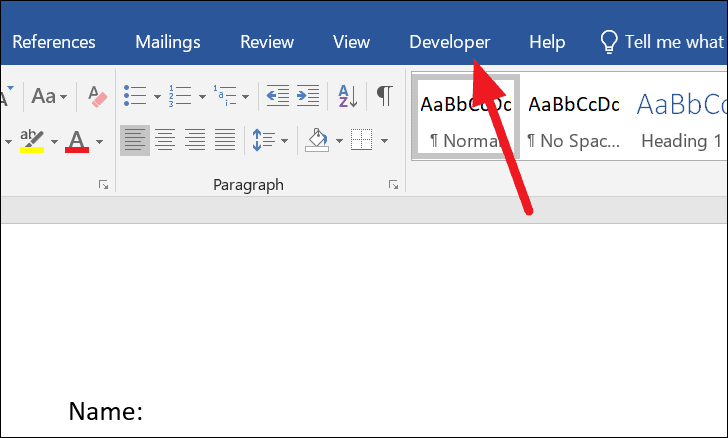
Controls group, click on the Plain Text Content Control icon. This icon is represented by a document with the letters “Aa” and is located next to the bolded “Aa” icon.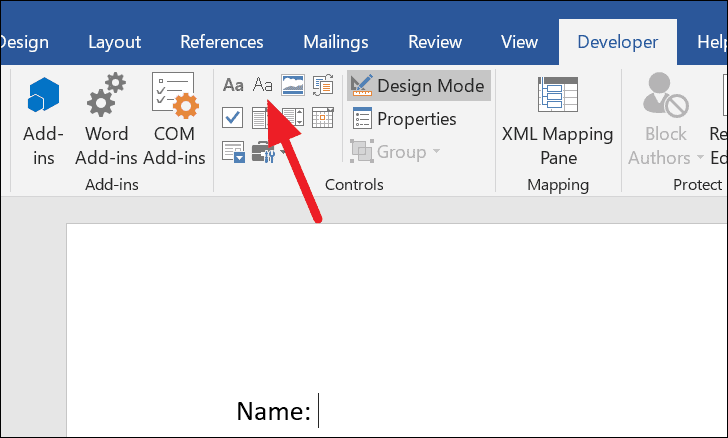
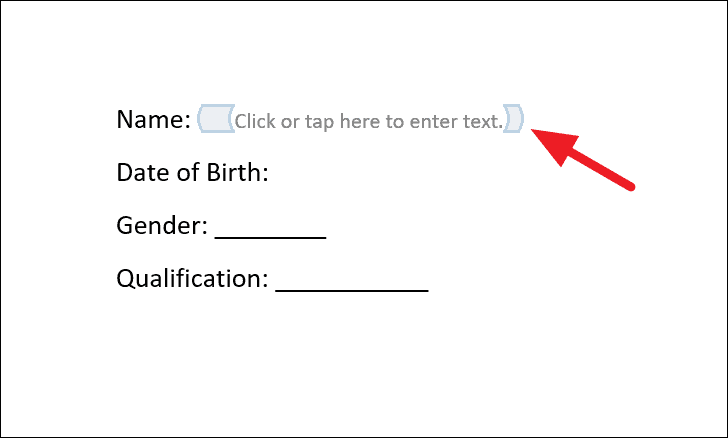
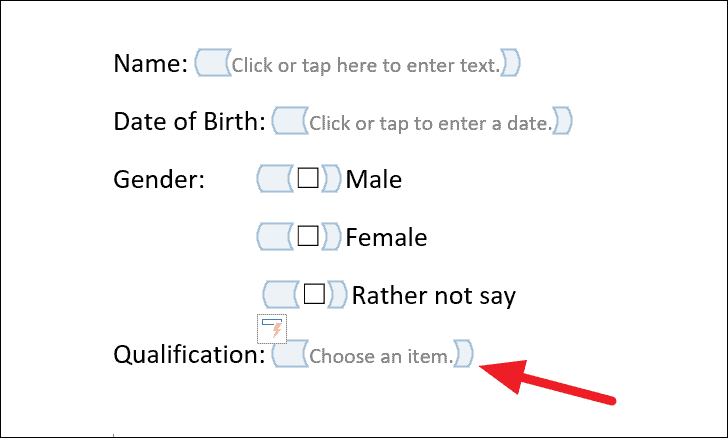
The text box will be inserted next to the Name label, allowing users to enter their names into the form.
Inserting a date picker in the form
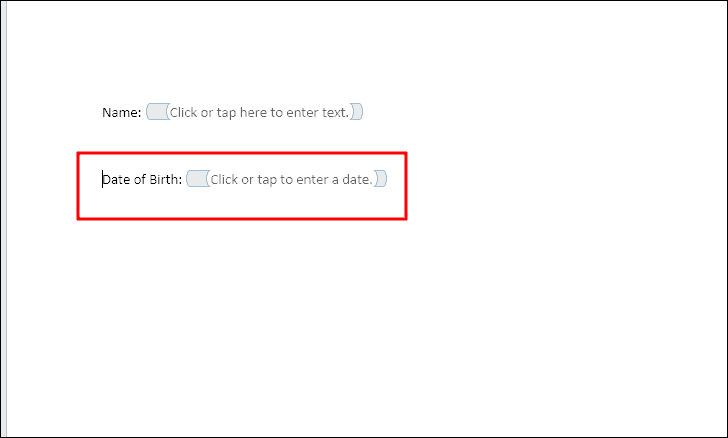
Developer tab, within the Controls group, click on the Date Picker Content Control icon, which resembles a calendar.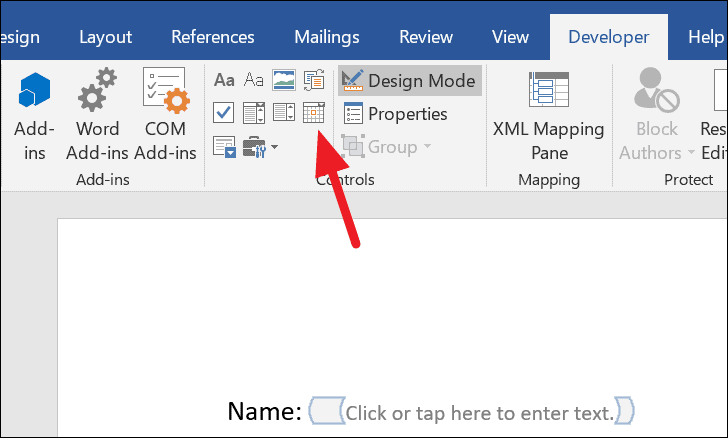
The date picker field will be inserted, allowing users to select a date from a calendar.
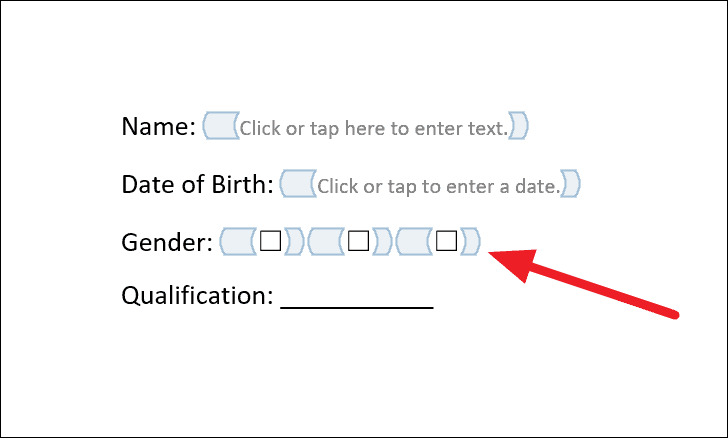
Inserting checkboxes in the form
Developer tab, click on the Check Box Content Control icon.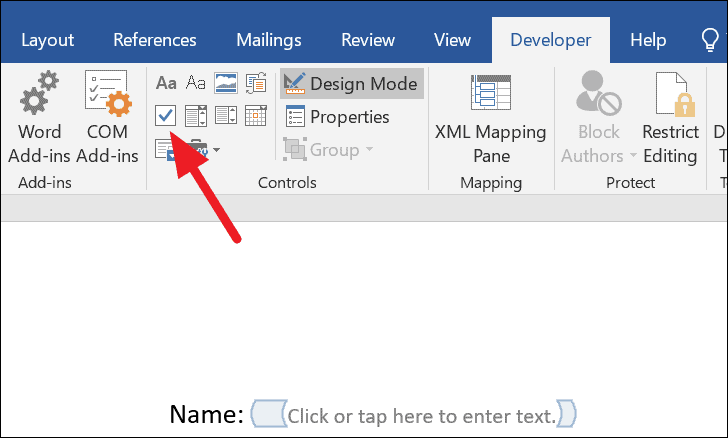
Inserting a drop-down menu
Developer tab, click on the Drop-Down List Content Control icon, which is located next to the calendar icon.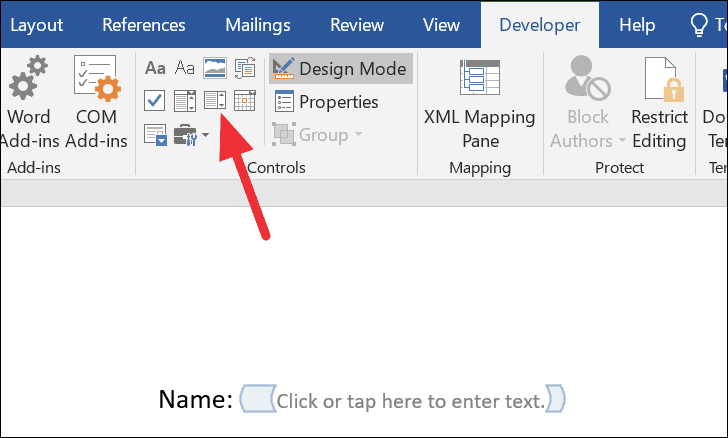
The drop-down list control will be inserted next to Qualification.
Properties in the Developer tab.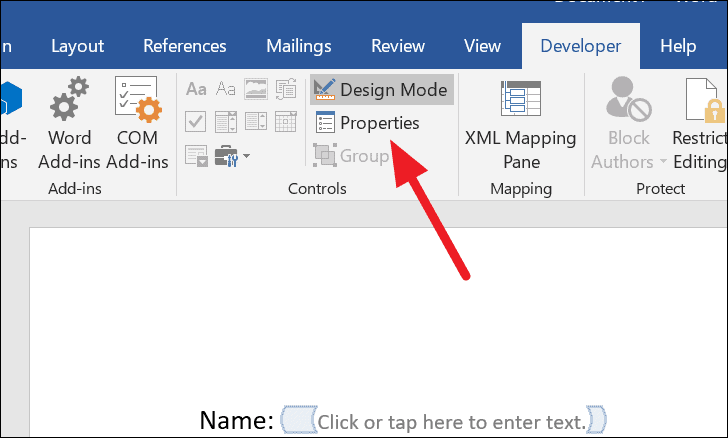
Content Control Properties dialog box, click on the Add button under the Drop-Down List Properties section.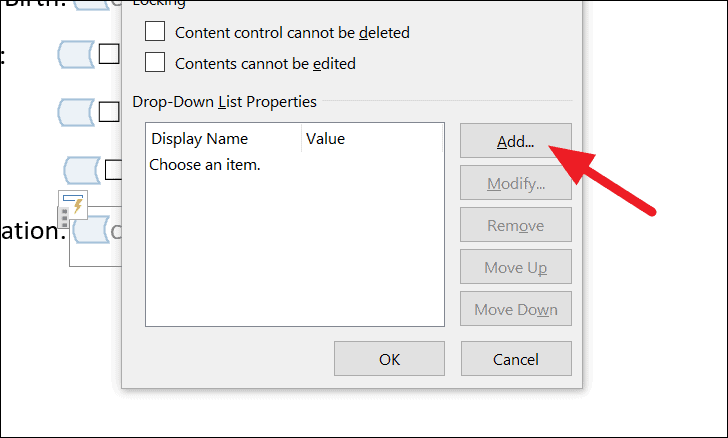
Add Choice dialog box, enter Post-Graduate in the Display Name field. The Value field will auto-populate. Click OK to add the option.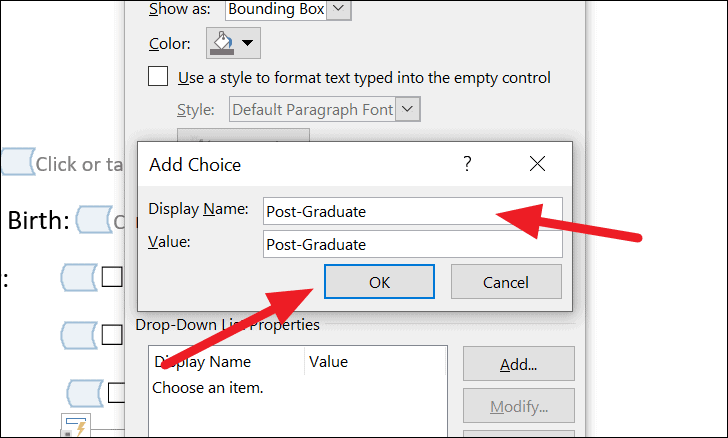
OK in the Content Control Properties dialog box.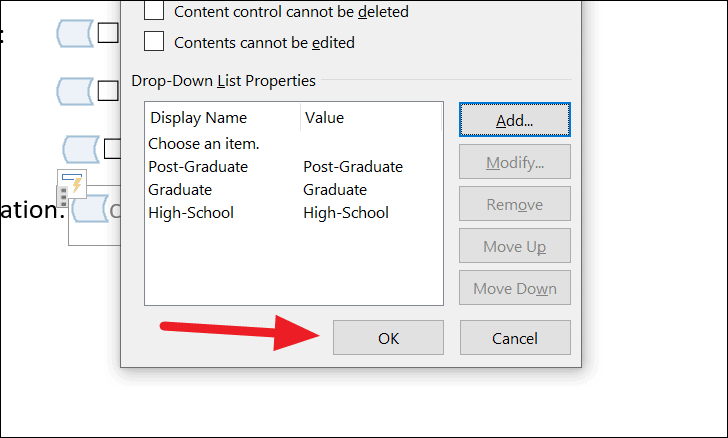
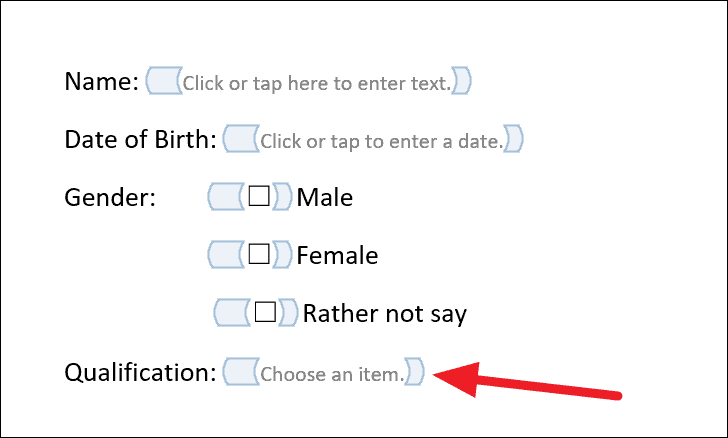
The drop-down menu for Qualification will now display all the options you have added.
Finalizing the form
By default, the form is in design mode, which allows you to edit and arrange the content controls. To test the form as a user would see it, you need to exit design mode.
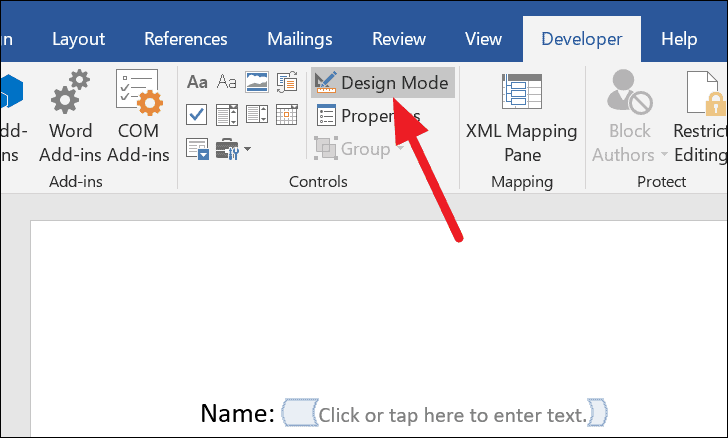
With design mode disabled, your fillable form is ready for use. Users can now fill in the form fields you’ve created.
Creating fillable forms in Microsoft Word enhances the interactivity of your documents, making data collection easier and more efficient. With practice, you’ll become proficient in customizing forms to suit various needs.