
Radial lists in PowerPoint transform standard bullet points into compelling visuals that clarify relationships and focus attention on key ideas. When you need to display items radiating from a central concept—such as categories, process steps, or related themes—a radial list offers a clean, memorable format that’s easy for audiences to interpret. PowerPoint provides several effective methods for making radial lists, ranging from SmartArt graphics to custom shape construction. Here’s how to create a radial list using the most effective approaches.
Method 1: Using SmartArt Graphics for Radial Lists
PowerPoint’s SmartArt feature streamlines the process of building radial lists, leveraging built-in templates that automatically arrange your items around a central point. This method is the fastest way to achieve a polished, consistent radial design with minimal manual adjustment.
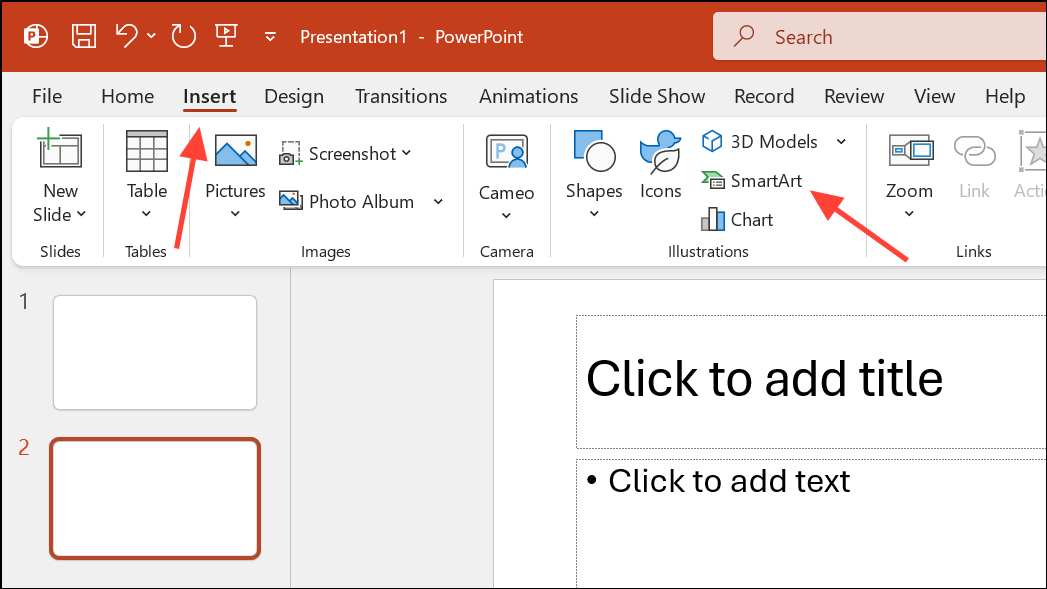
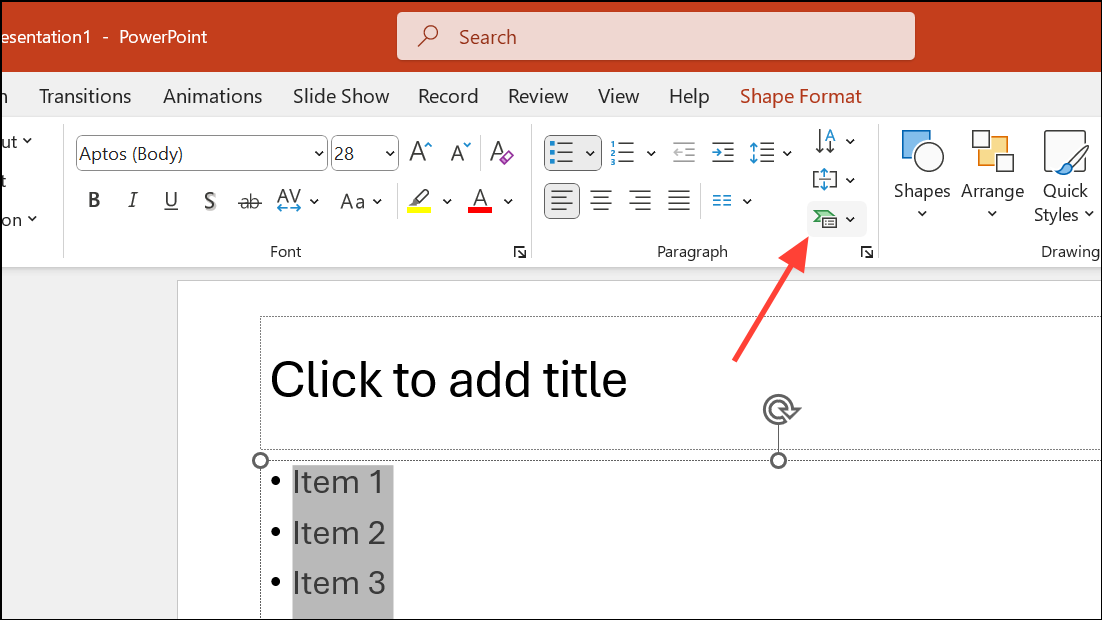
Step 1: Select the slide where you want to insert your radial list. Go to the Insert tab, then click SmartArt in the Illustrations section. This opens the SmartArt Graphic gallery.
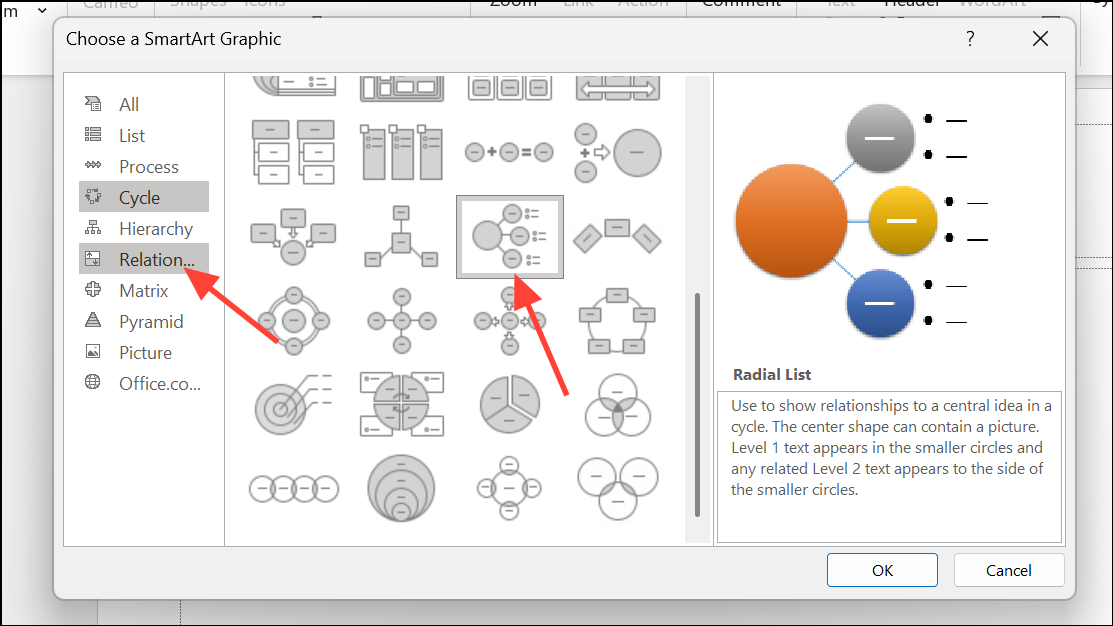
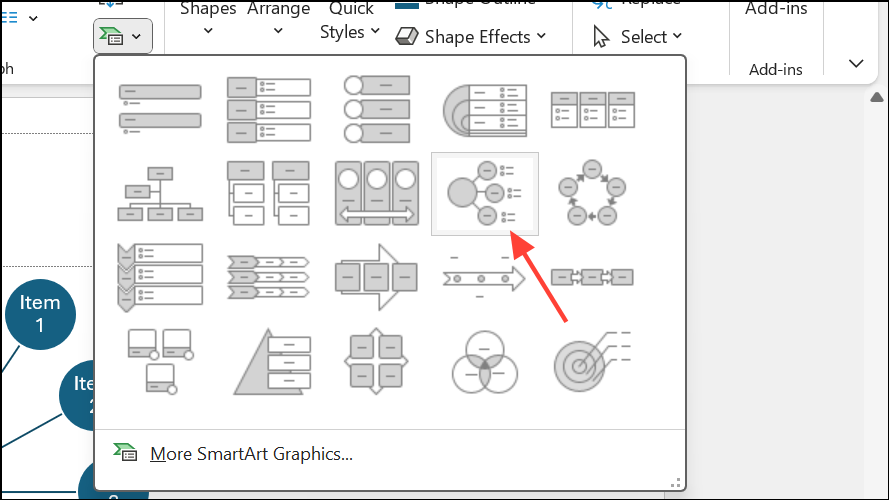
Step 2: In the SmartArt dialog, choose Relationship from the left-hand menu. Scroll to find Radial List or similar layouts like Basic Radial, Radial Cycle, or Radial Cluster. Click your preferred option and select OK.
Step 3: Enter your central idea in the main (center) shape. Add your list items in the surrounding circles. You can do this by clicking directly into each shape or using the text pane that appears to the left of the SmartArt graphic.
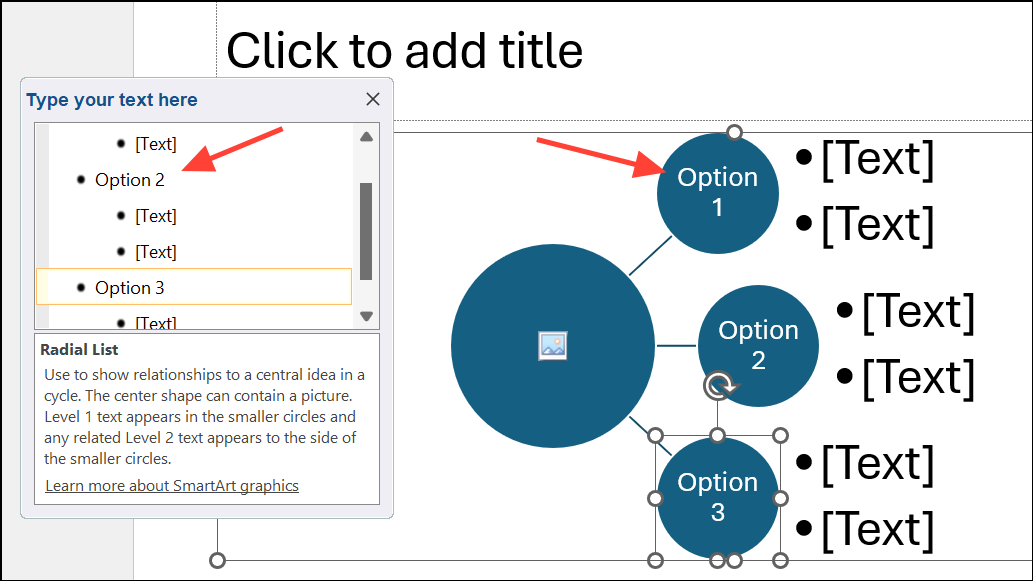
Step 4: To add or remove items, use the + and - buttons in the text pane or right-click shapes to add more.
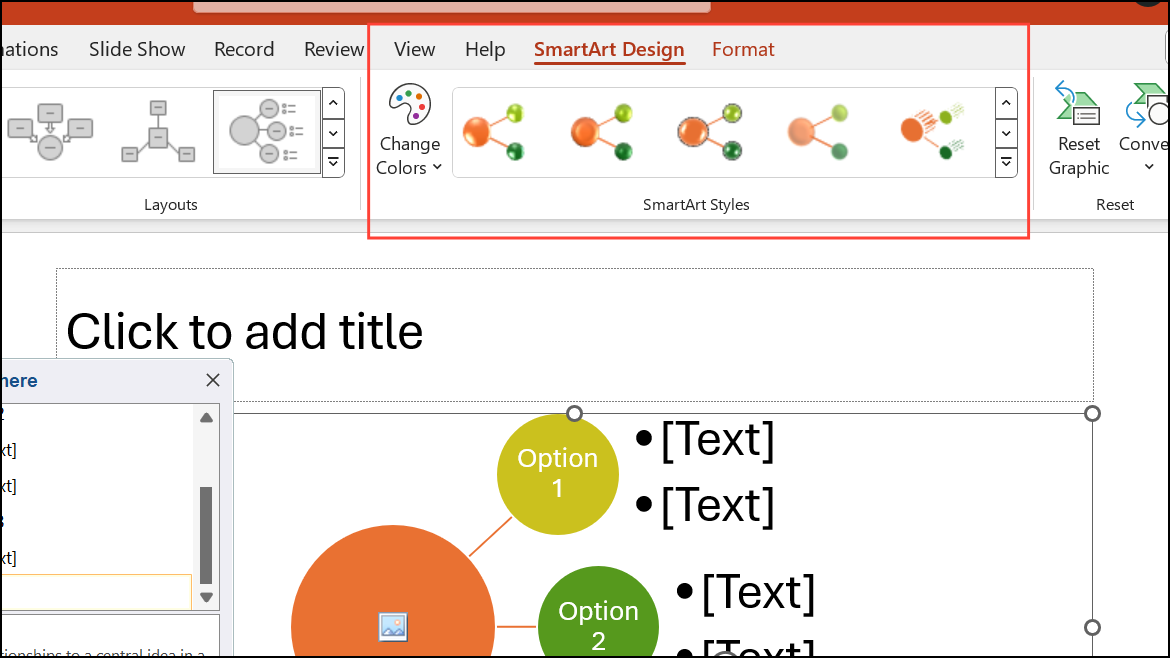
Step 5: Customize the appearance by using the SmartArt Design and Format tabs. Here, you can change colors, adjust layouts, and apply styles for a tailored look.
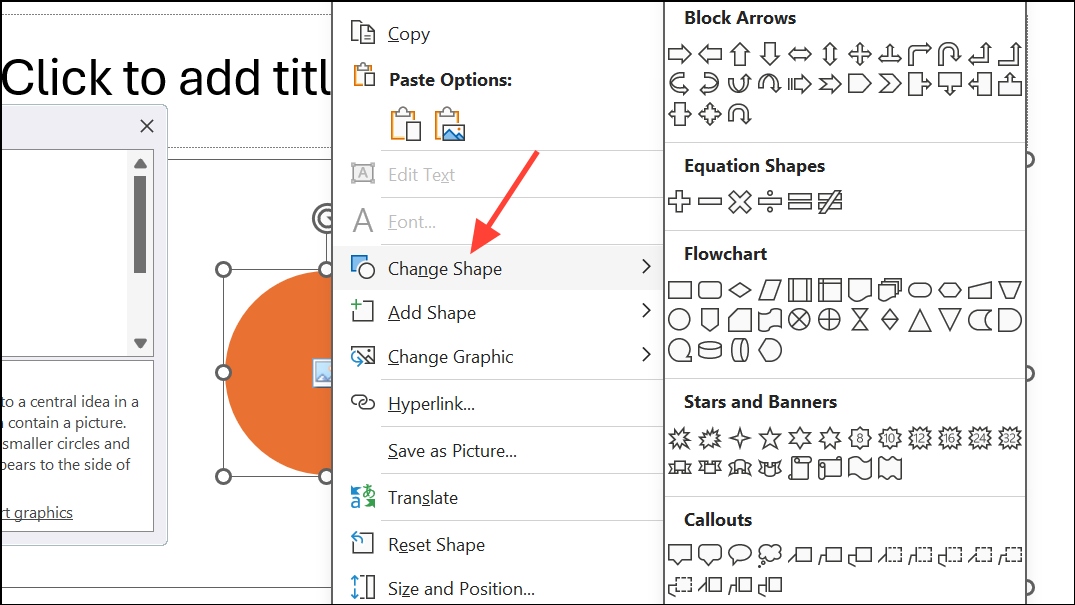
Step 6: If you want to further edit individual shapes, right-click the SmartArt and choose Change Shape. This allows you to manipulate each piece as a standard PowerPoint shape, giving you more flexibility for advanced customizations.
SmartArt’s radial list templates are ideal for most use cases, offering a balance of speed and flexibility. However, there are some limitations—such as restricted options for removing picture placeholders in certain layouts or customizing the center bubble’s content. If you need more granular control, consider the manual shape method below.
Method 2: Building a Custom Radial List with Shapes
For unique visual effects or when SmartArt doesn’t meet your needs, constructing a radial list manually using PowerPoint’s shape tools provides maximum creative control. This approach is especially useful for complex diagrams or when you need precise placement or styling.
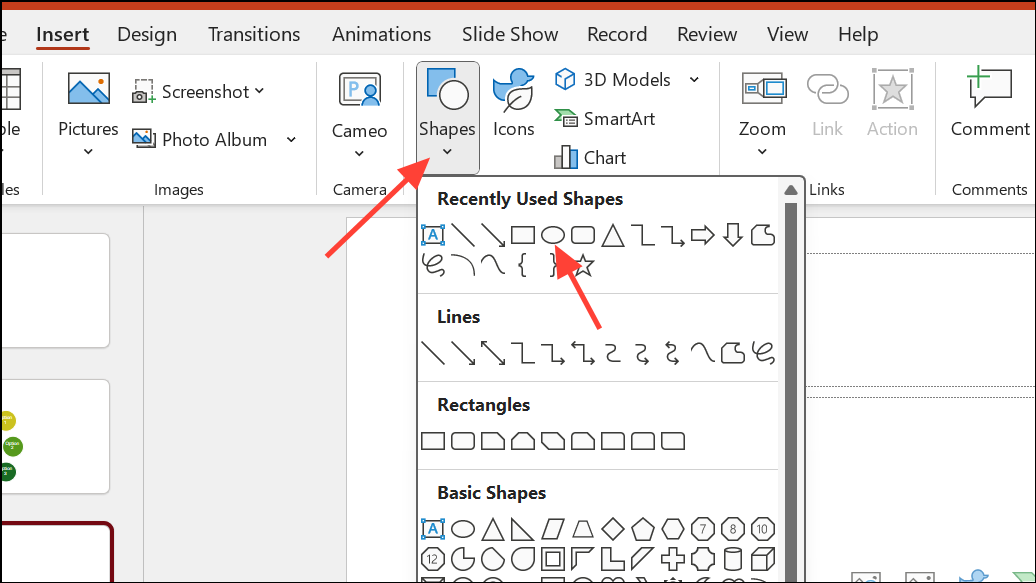
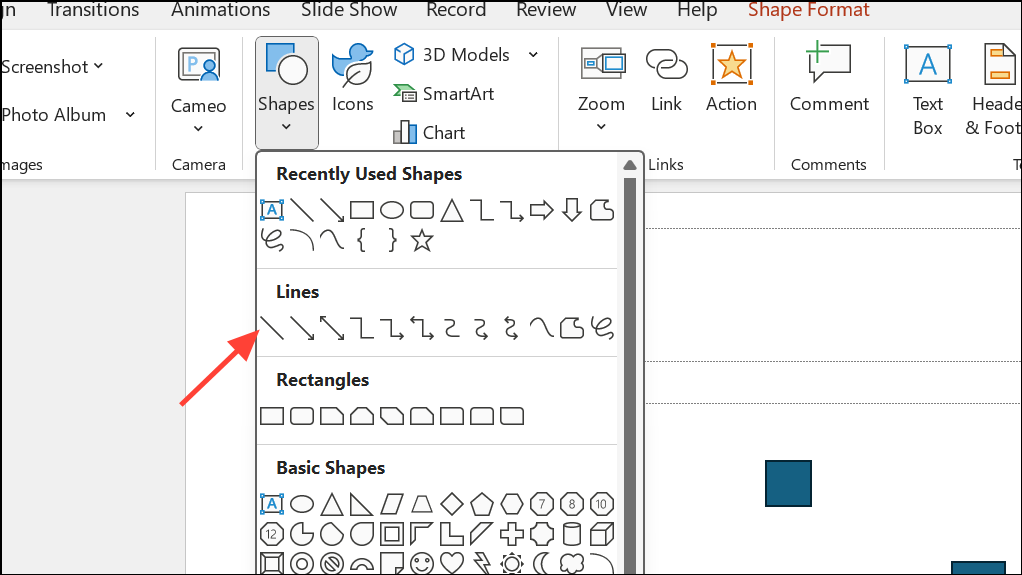
Step 1: Insert a blank slide and go to the Insert tab. Choose Shapes, then select Oval for the central item. Hold Shift while dragging to create a perfect circle.
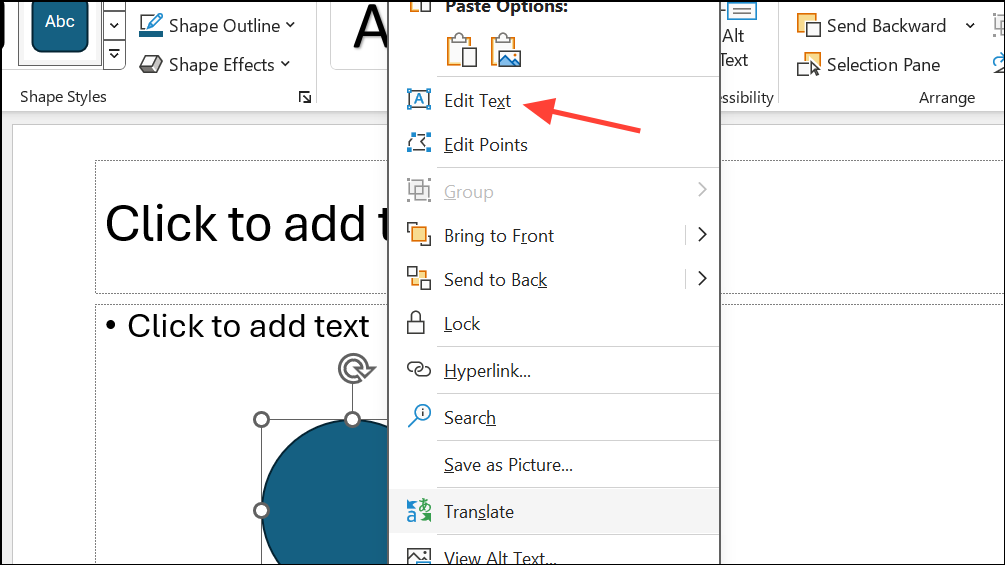
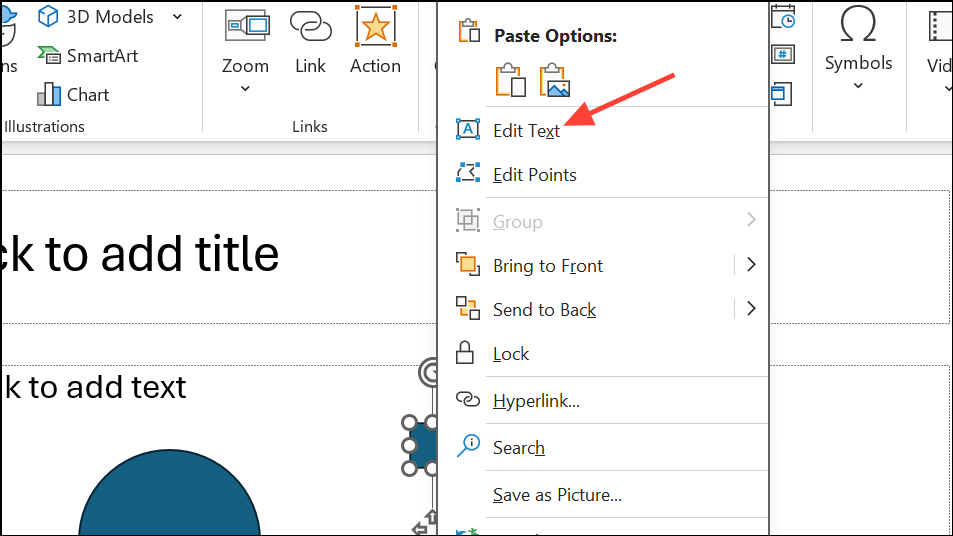
Step 2: Add your central concept text to the circle by right-clicking and choosing Edit Text. Adjust font size and style as needed for visibility.
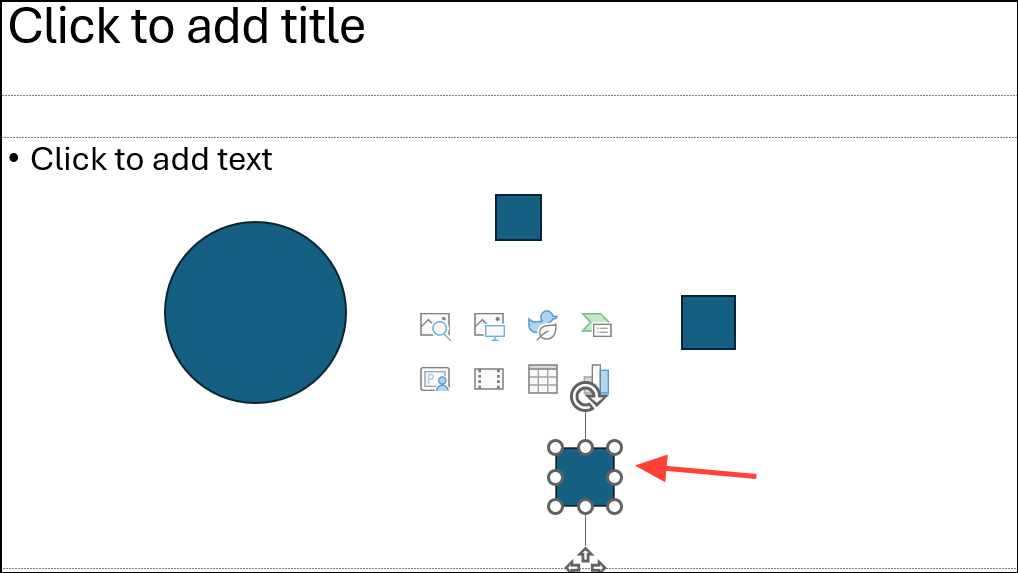
Step 3: To create the radial branches, insert additional shapes (such as smaller circles or rectangles) for each list item. Position them evenly around the central circle. Use PowerPoint’s alignment and distribution guides for precise placement.
Step 4: Draw connecting lines from the central circle to each outer item. Go to Insert > Shapes > Line or Connector. Hold Shift for straight lines. Attach one end to the center and the other to a list item shape.
Step 5: Enter text for each outer item by right-clicking the shape and selecting Edit Text. Adjust colors, outlines, and effects for clarity and visual separation.
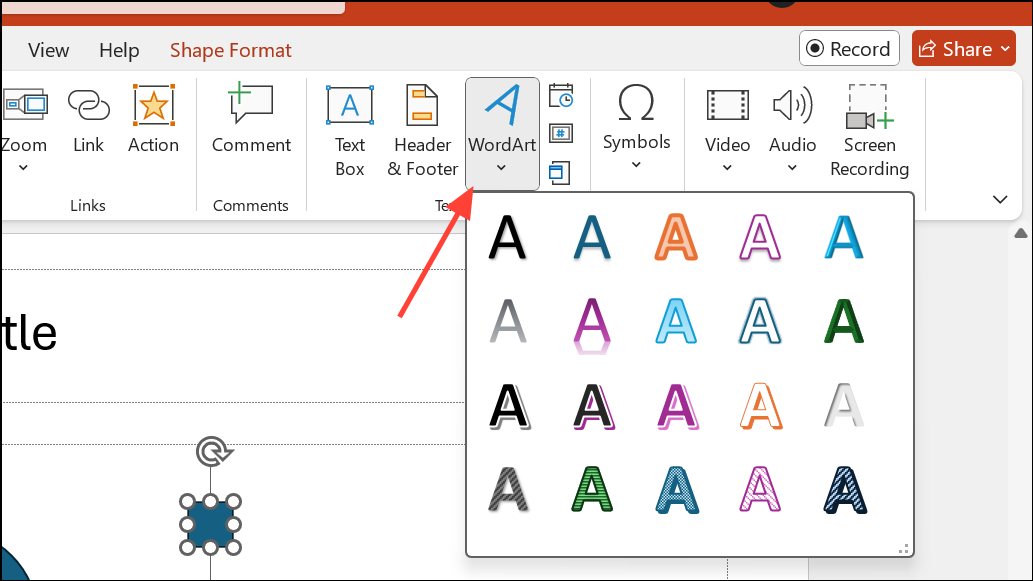
Step 6: For curved or arched text (such as labels following the edge of a circle), use Insert > WordArt, then apply Text Effects > Transform > Follow Path to curve the text along a circular path. This method helps when creating more advanced radial diagrams, such as annual cycles or timelines.
Step 7: Group all elements by selecting them and pressing Ctrl + G. This ensures the entire radial list moves as a single unit when repositioning or copying.
Manual shape construction is more time-consuming but allows for infinite customization, including unique iconography, advanced color schemes, and creative layouts that go beyond SmartArt’s built-in options.
Method 3: Converting Text Lists to SmartArt
When you already have a bullet list in your slide, PowerPoint allows you to instantly convert it into a SmartArt radial list, streamlining the upgrade from plain text to a visually organized diagram.
Step 1: Highlight the bullet list or text you want to convert.
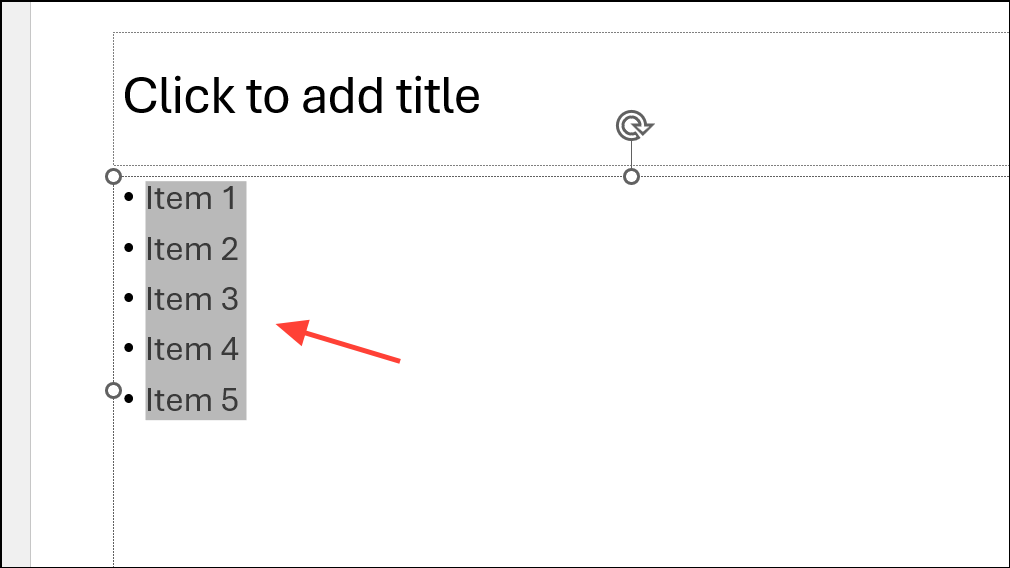
Step 2: Go to the Home tab and click Convert to SmartArt in the Paragraph section.
Step 3: In the SmartArt gallery, select a radial layout—such as Radial List, Basic Radial, or Radial Cycle—and apply it. Your list items will automatically arrange around a central shape.
Step 4: Use the SmartArt Design tools to adjust colors, layout, or add additional items as needed.
This approach rapidly transforms existing content into a radial format, saving time for quick presentation upgrades.
Troubleshooting and Customization Tips
Some SmartArt radial templates, like the default Radial List, place a picture placeholder in the central bubble. If you want to remove this, there are a few workarounds:
- Set the fill and outline of the central shape to
None, then overlay your own text or shape. - Convert the SmartArt to shapes by right-clicking and choosing
Convert to Shapes, then delete or modify the unwanted parts.
For advanced radial diagrams (such as annual cycles with curved boxes), combine concentric circles and lines using shapes, and use WordArt with Transform effects to curve text along paths. This manual approach is more involved but supports detailed, custom layouts.
Switching from plain lists to radial diagrams in PowerPoint clarifies relationships and draws attention to your main ideas. Whether you use SmartArt for speed or build from shapes for flexibility, these methods help you create professional, visually engaging radial lists that make your message stand out.