A table might be a very simple way to organize data, especially now when there are so many options to choose from. But sometimes, simple is all you need. But if you use Notion, you’d know that keeping things simple wasn’t an option before.
It isn’t that Notion didn’t have anything to organize data in a structured way till now. The case is quite the opposite, to be honest. It didn’t have anything as simple as a table. You could always turn to a database to organize your data, though. But databases can be overly complicated sometimes; hence, the need for a table.
What is a Table in Notion?
Notion has finally delivered this simple feature upon request from users! A table keeps things really simple: you can organize data in rows and columns or have header rows and columns to highlight data. But that’s about it. You can navigate the table using the tab key.
You can also include tables side-by-side with other blocks when you need to provide more context about the data inside the table. Since simple tables only store text and not any other data types like databases, Notion’s collaboration tools like inline comments still work. You can comment and mention other team members, and even have full-fledged discussions right there.
The simple table will appear different from database tables when creating a block, which now have the word “database” in their name along with “table”. At any point, if you feel like your data need the bells and whistles of a database, you can convert the table into a database. It’s as simple as that.
Creating a Table
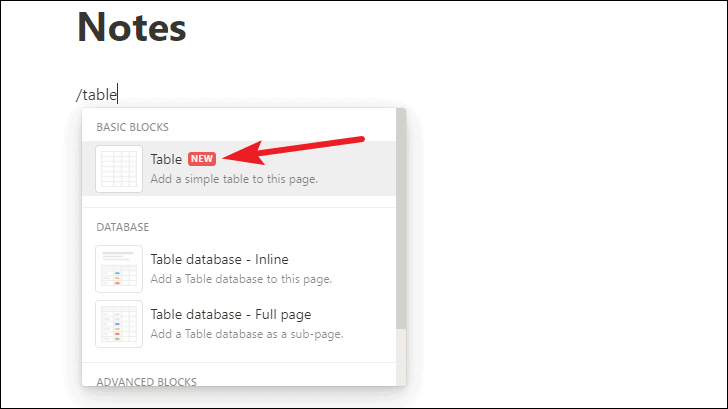
To create a table, use the / command. Type /table and select the first suggestion from the blocks.
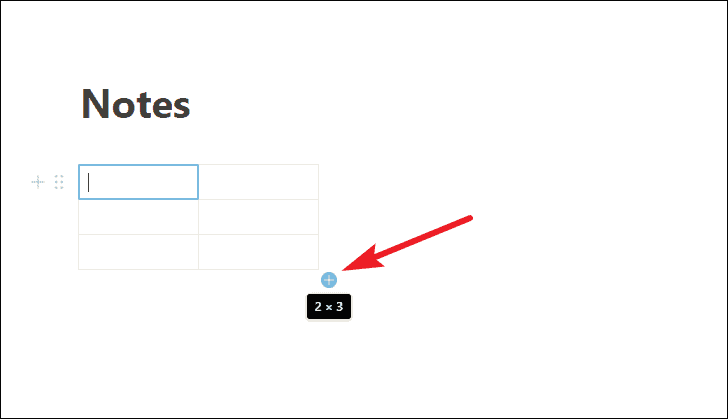
A 2×3 table will be created. To add more rows and columns, drag the bottom-right corner of the table outward diagonally.
To add just columns, drag outward to the right and drag towards the bottom to add just more rows.
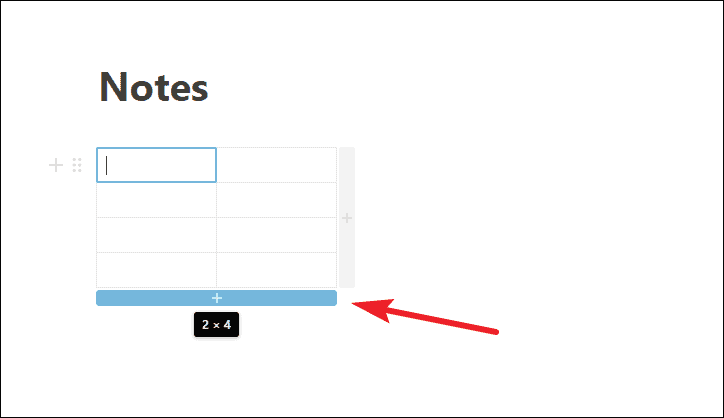
You can also click the ‘+’ icons that appear at the bottom, right, and the bottom-right corner to add a row, column, or both one at a time.

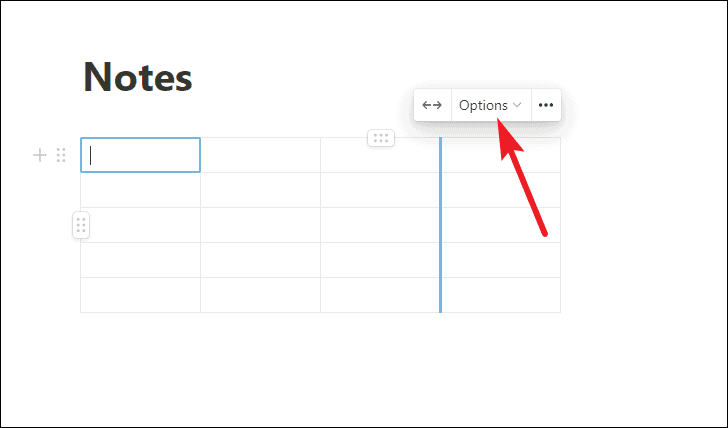
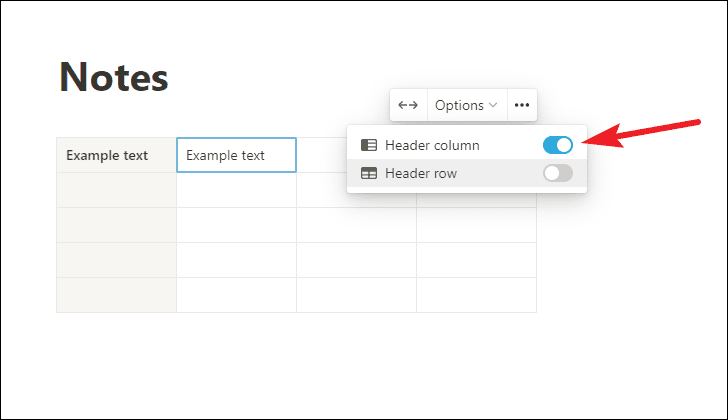
To make a column or row header, click ‘Options’.
Then, enable the toggle for ‘Header Column’ or ‘Header Row’ or both depending on your requirement. Header columns and rows have darker shading in the background and bolder letters to highlight them from simple columns and rows.
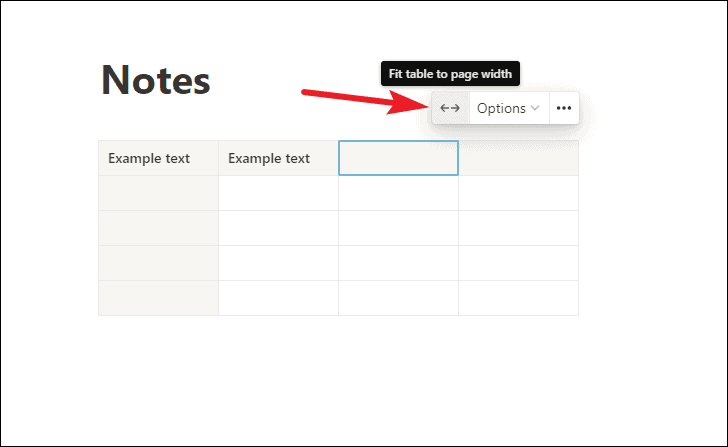
There’s also an option to fit the table to the page width. The option is especially useful when you add another column to the table. Clicking the option resets the width of the entire table and you won’t have one odd-looking column separate from the rest of them. To fit the table to the page, click the two arrows pointing away from each other.
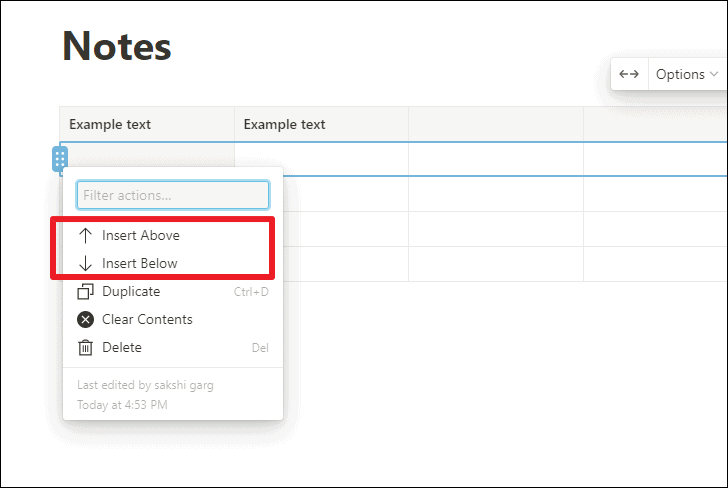
You can also insert columns or rows in the middle of an existing table. To insert a row, go to the first cell of the row where you want to insert the new row. Then, click the ‘row handle’ icon (6 dots).
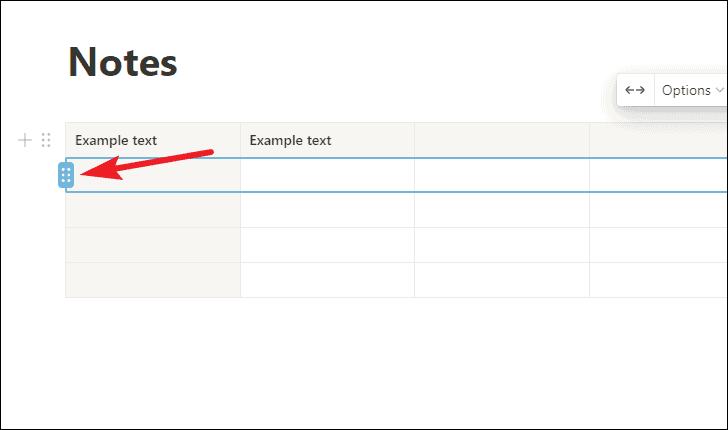
Then, select ‘Insert above’ or ‘Insert below’ from the menu.
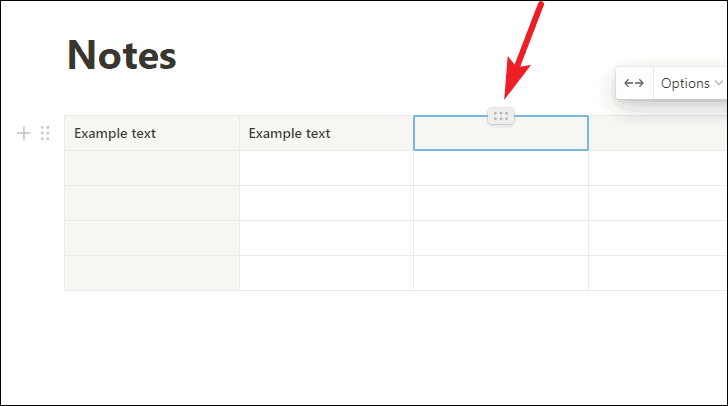
To insert a column, go to the first cell of the column to whose left or right you want to insert the new column. Click the ‘column handle’ (6 dots).
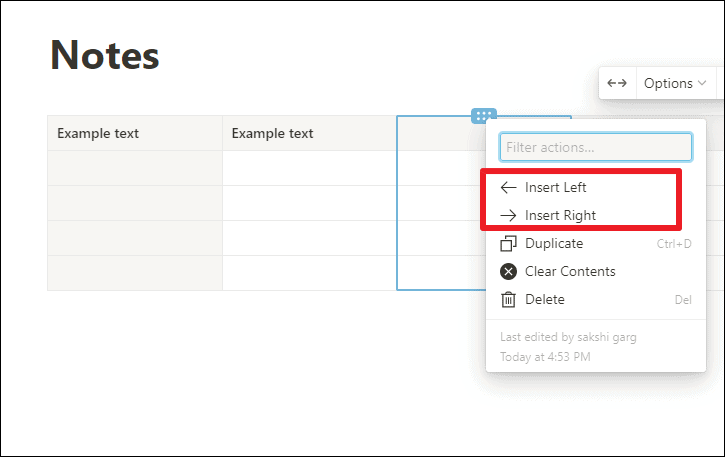
Then, select ‘Insert left’ or ‘Insert right’ from the menu.
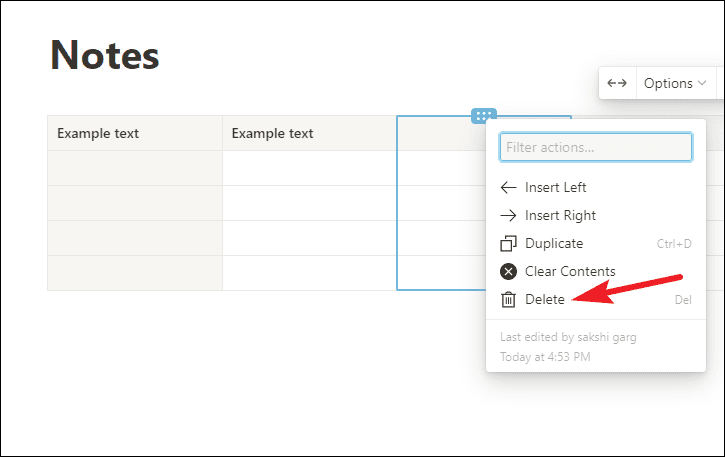
You can also delete entire rows or columns. Go to the row or column you want to delete and click its handle. Then, click ‘Delete’ from the menu.
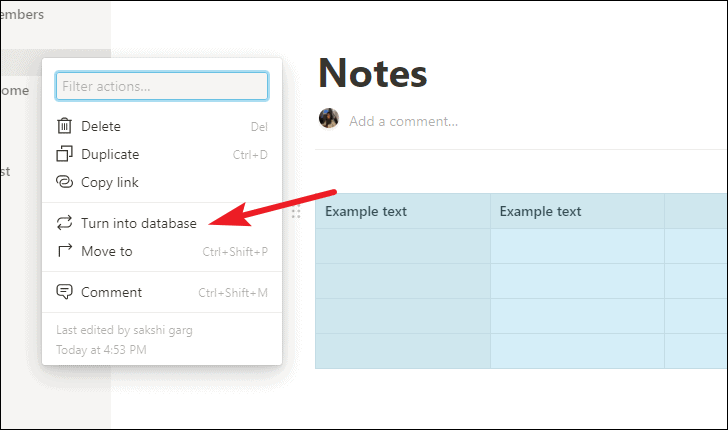
At any point, if you feel like you need the additional functionality of a database to accurately represent the information, you can simply convert to a database. To convert a table into a database, click the ‘table handle’ (six dots) to the left of the table.

Then, click the ‘Turn into database’ option from the menu that opens.
That’s all there is to know about tables in Notion. We weren’t lying when we said that tables keep things simple.


