To create a Contact Poster on iPhone with iOS 17, open the Phone app and select your name. Choose between Photo, Memoji, or Monogram styles, then edit the image and typography to your liking. Save changes, configure sharing settings, and you’re done!
iOS 17 is full of new features, but one that caused the most intrigue among users certainly has to be Contact Posters. Contact Posters bring personalization to calls, something that has steadily had the same old interface.
If you, too, are dying to use this shiny new feature, gear up. We’ve covered everything you need to know to use them like a pro.
What are Contact Posters in iOS 17?
Personalization has been a steady theme for the past few years of iOS releases; first, the Home Screen, then the Lock Screen, and this year, it’s Phone Calls turn. But the personalization will be on the receiving end.
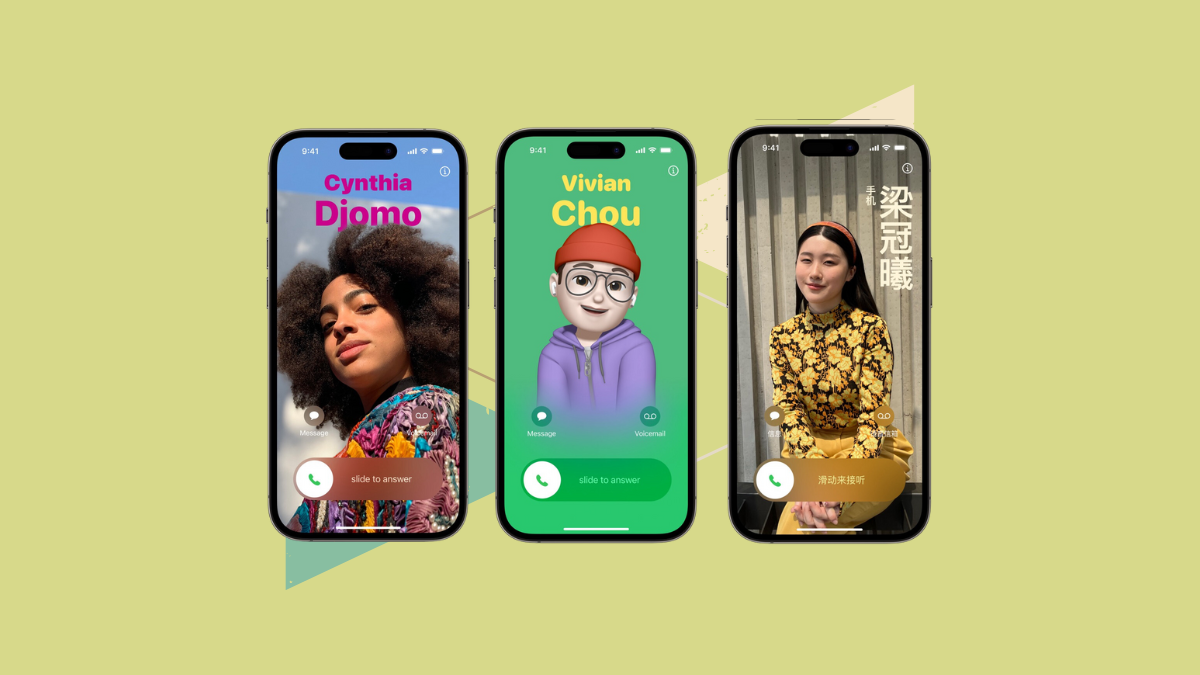
Contact Posters are the new way to jazz up your iPhone calls, but all the jazzing will happen when you call someone. Think of them as your personal calling card but with a whole lot more flair. Gone are the days of boring old caller IDs. Now, whenever you call someone, you can showcase your style with a custom image that pops up on the receiver’s screen.
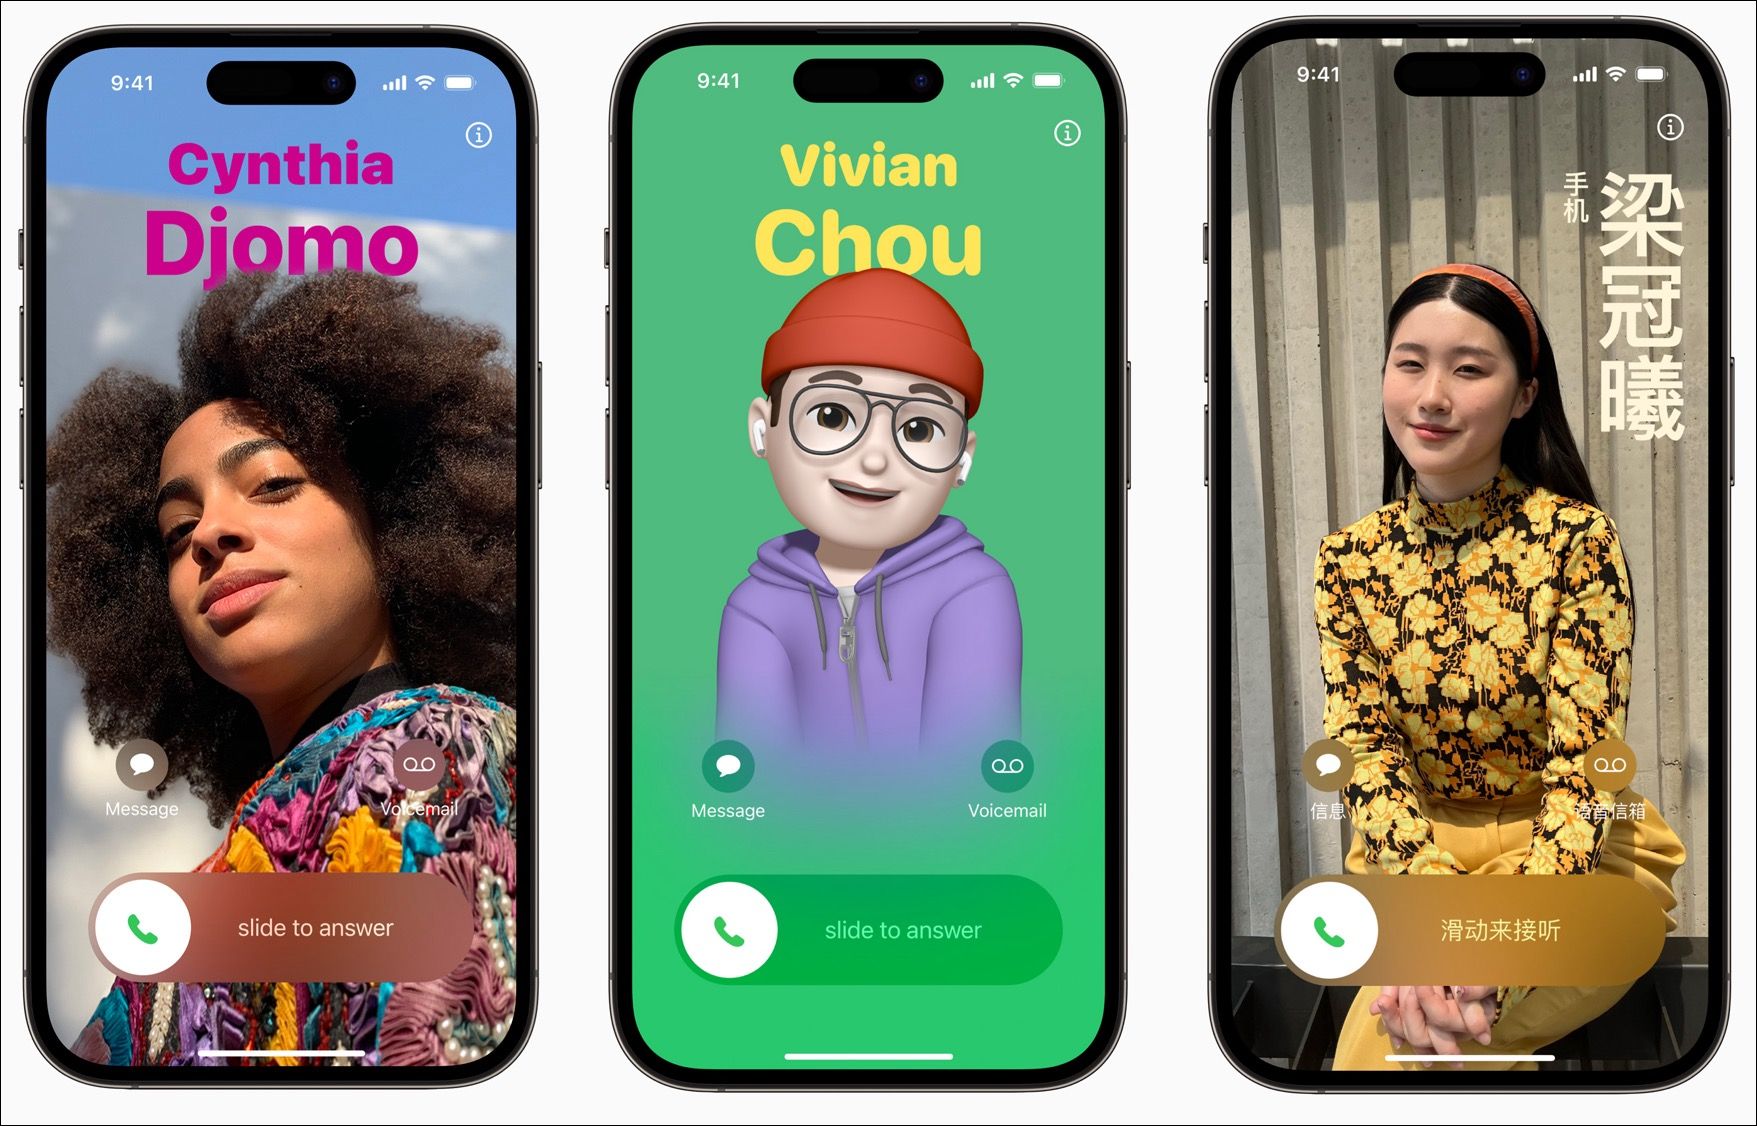
These posters can be personalized with photos or memojis and paired with typography of your choice. With the new update, you’ll be able to create your own custom contact poster with your photos or Memoji. And when I say custom, I mean custom. You can choose your image, font, and color, much like you would when personalizing your iPhone’s lock screen. Contact Posters will also support a vertical layout for names in languages like Chinese and Japanese.
Contact Posters will also be accessible for third-party developers via the CallKit API. So, if a developer chooses to implement it, they will also appear when you place a call to someone via a third-party VoIP app.
How to Create the Contact Poster in iOS 17
Now, for the part you’ve all been waiting for – the how. The personalization experience offered is similar to personalizing lock screens in iOS 16, so you’ll get it right away.
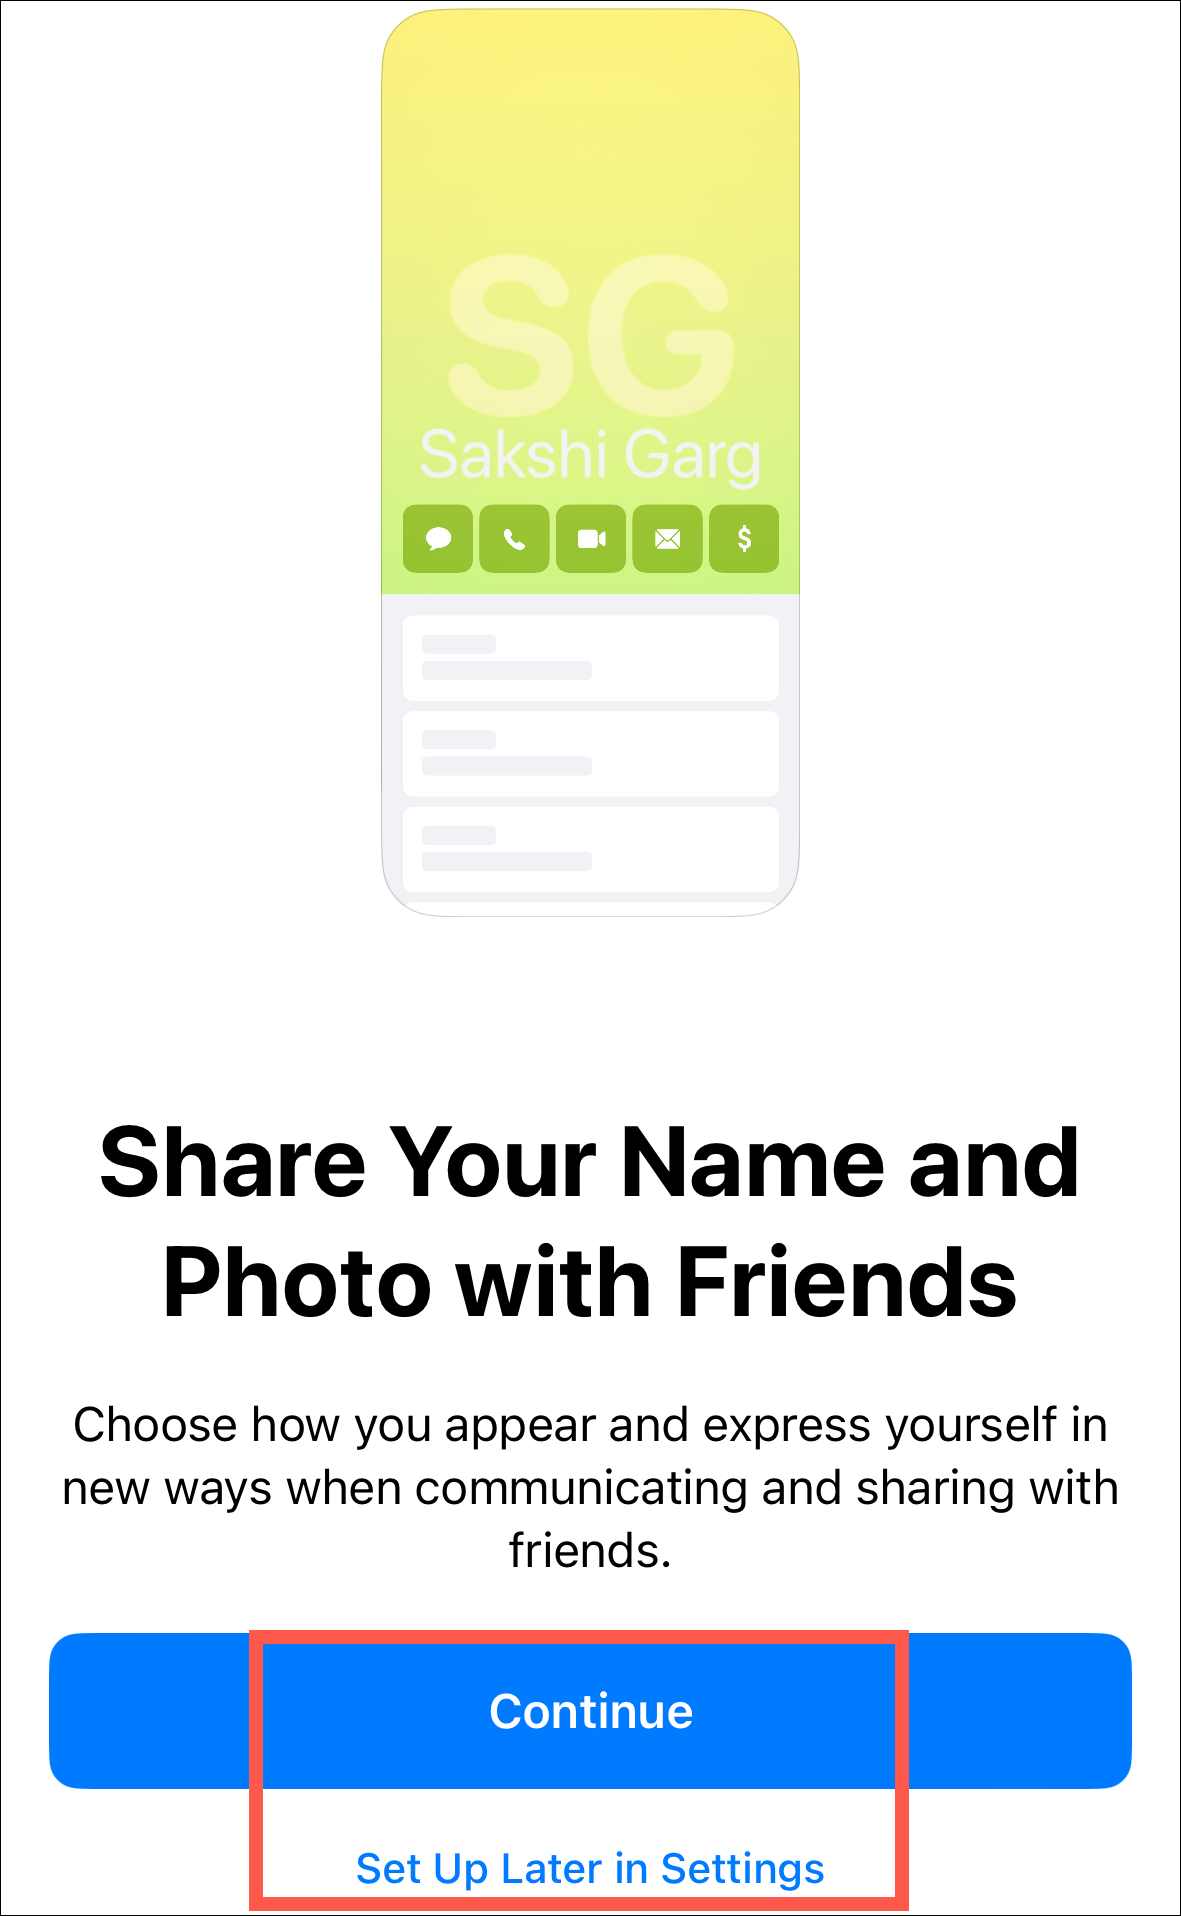
After upgrading to iOS 17, open your iPhone’s ‘Phone’ app. When you open the app for the first time, the screen to share your photo and name with friends will pop up. You can tap ‘Continue’ to set it up now or ‘Set Up Later in Settings’.
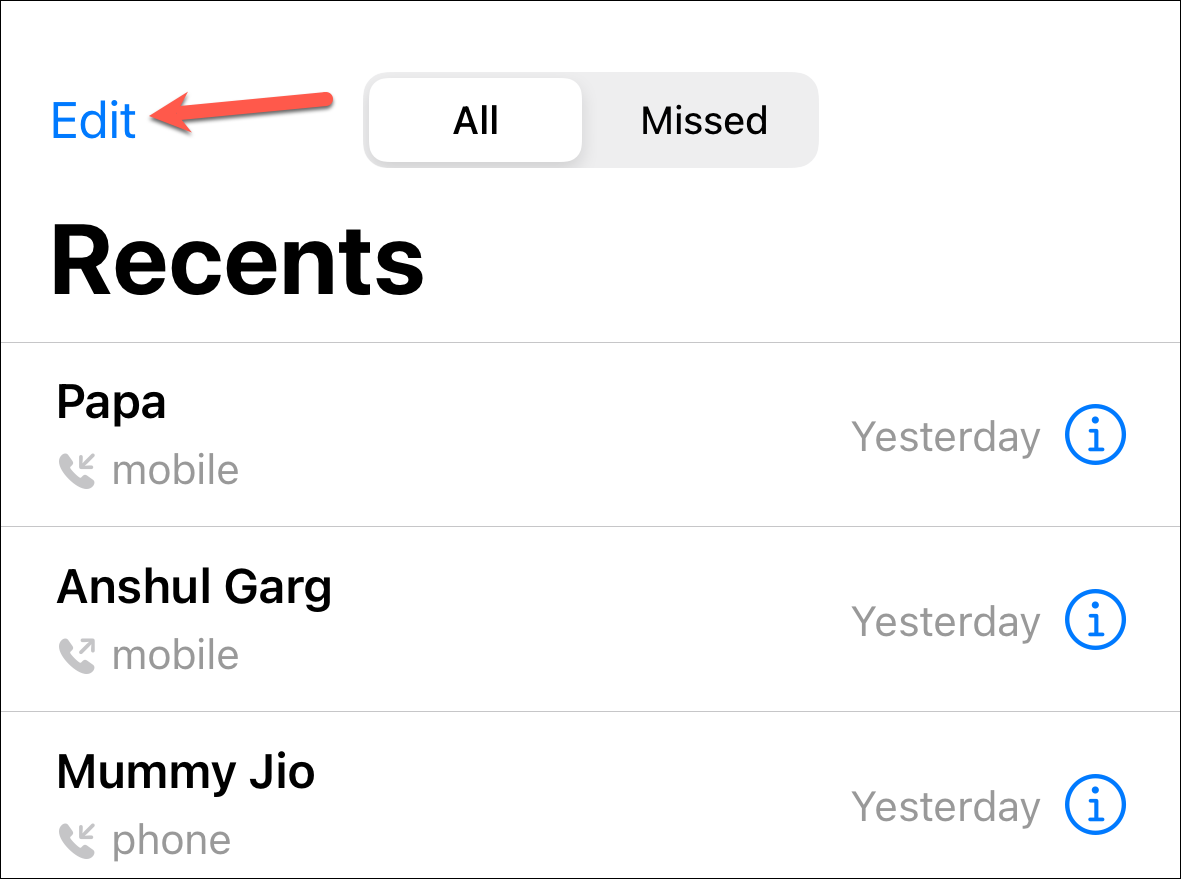
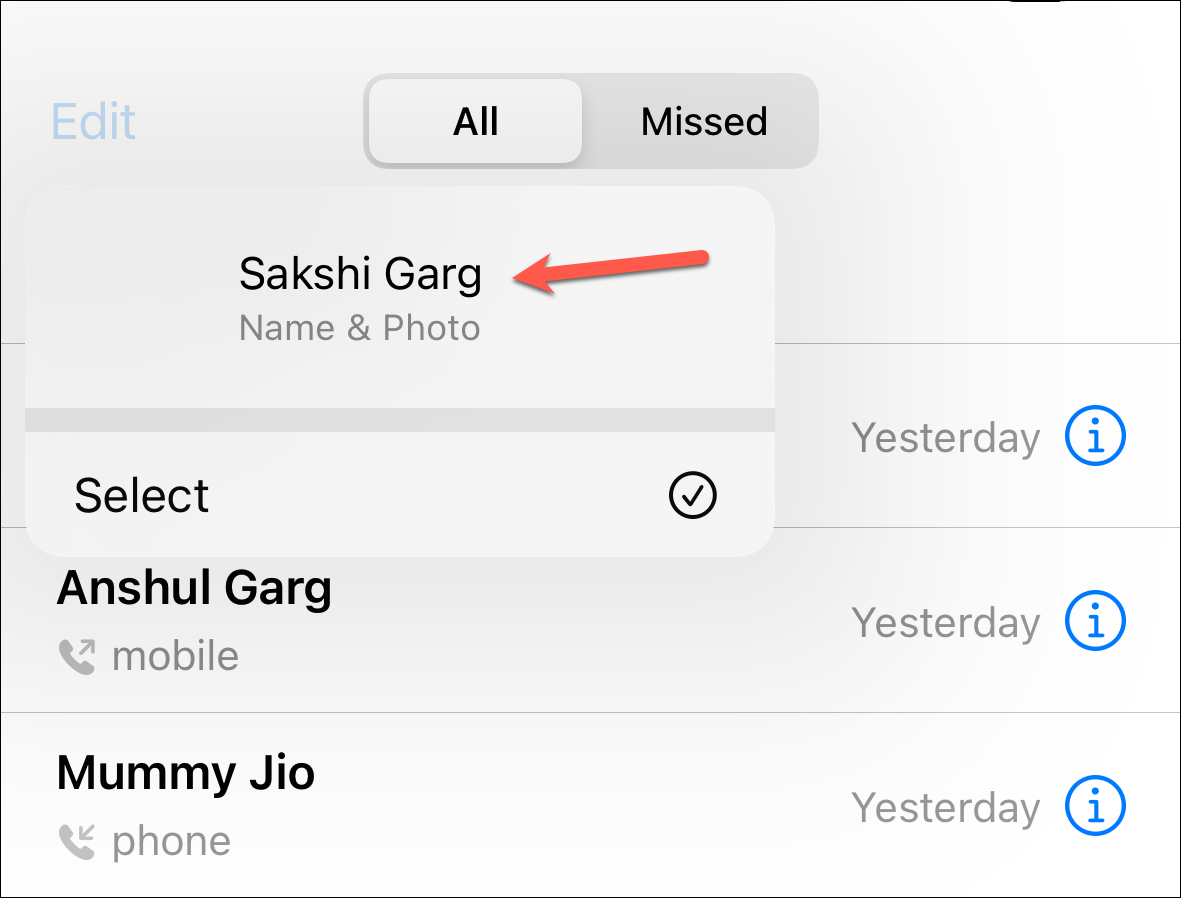
If you chose the latter, tap the ‘Edit’ button on the top-left corner of the screen in the Phone app.
Then, tap your name from the options that appear.
You’ll reach the same screen as above; this time, tap ‘Continue’.
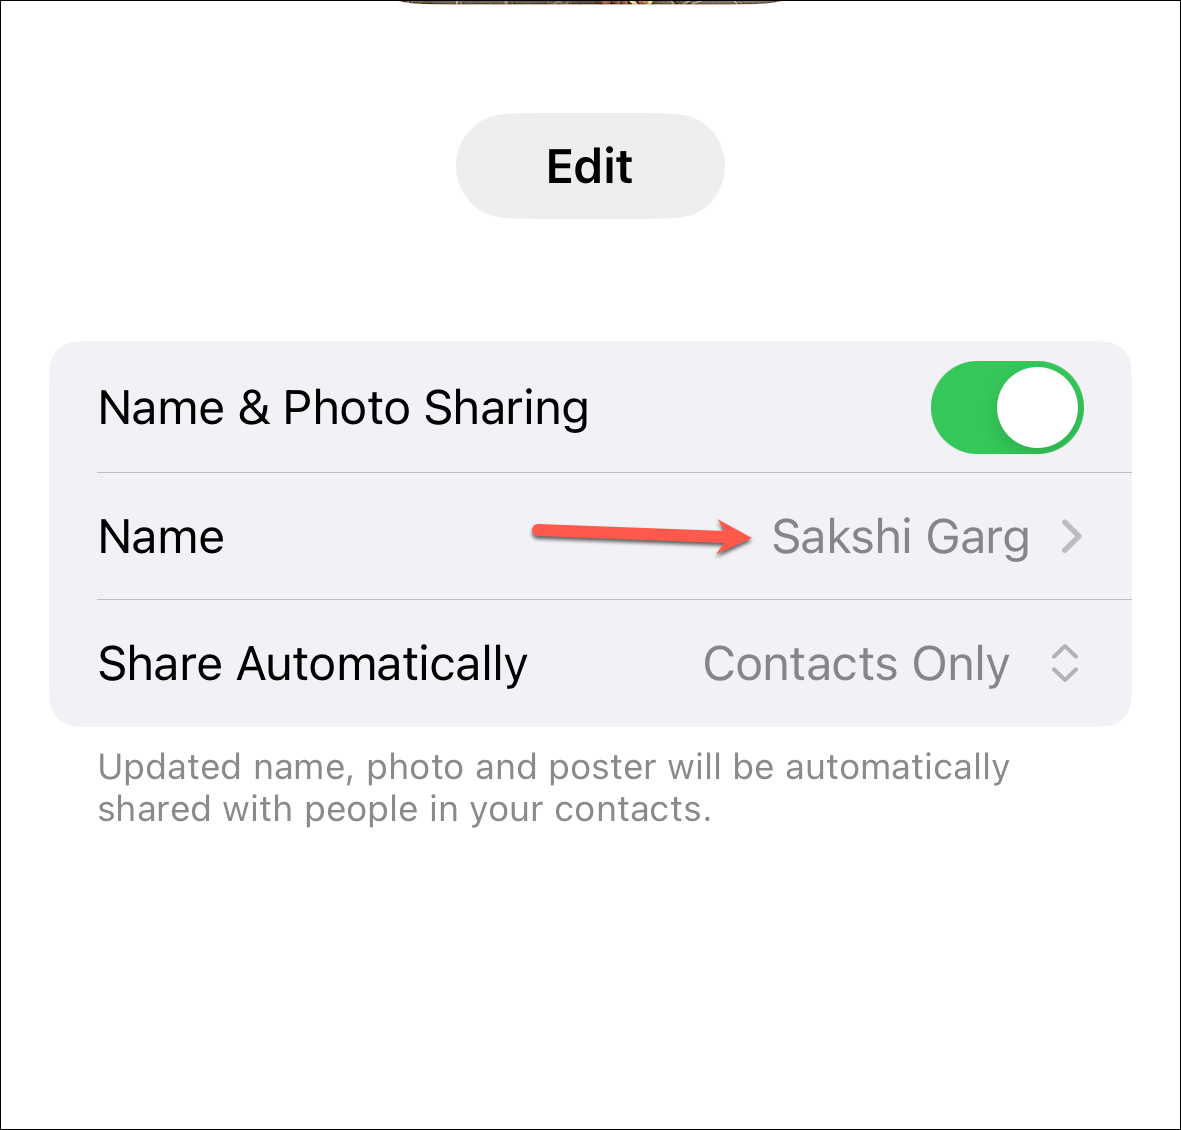
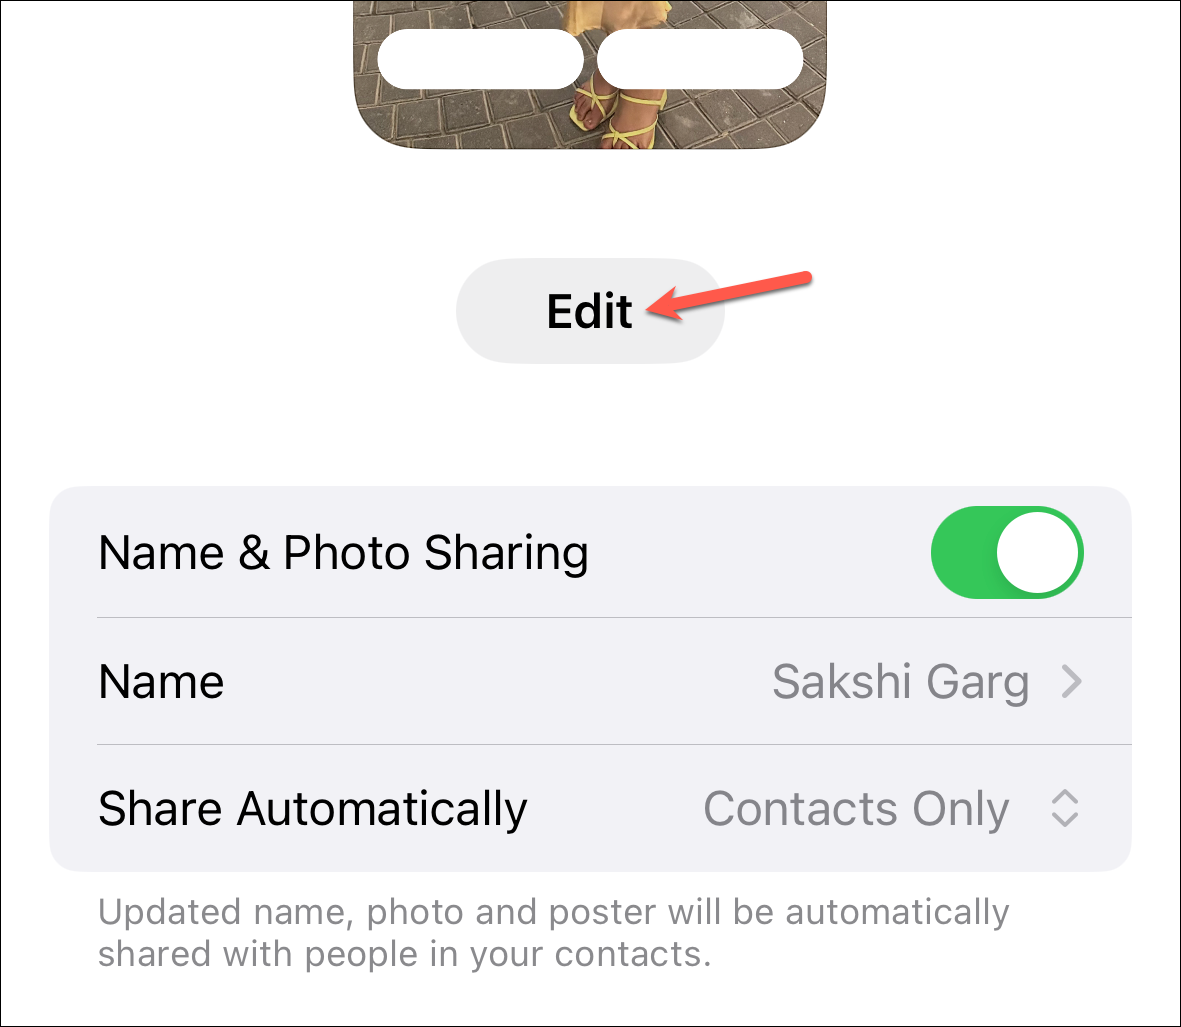
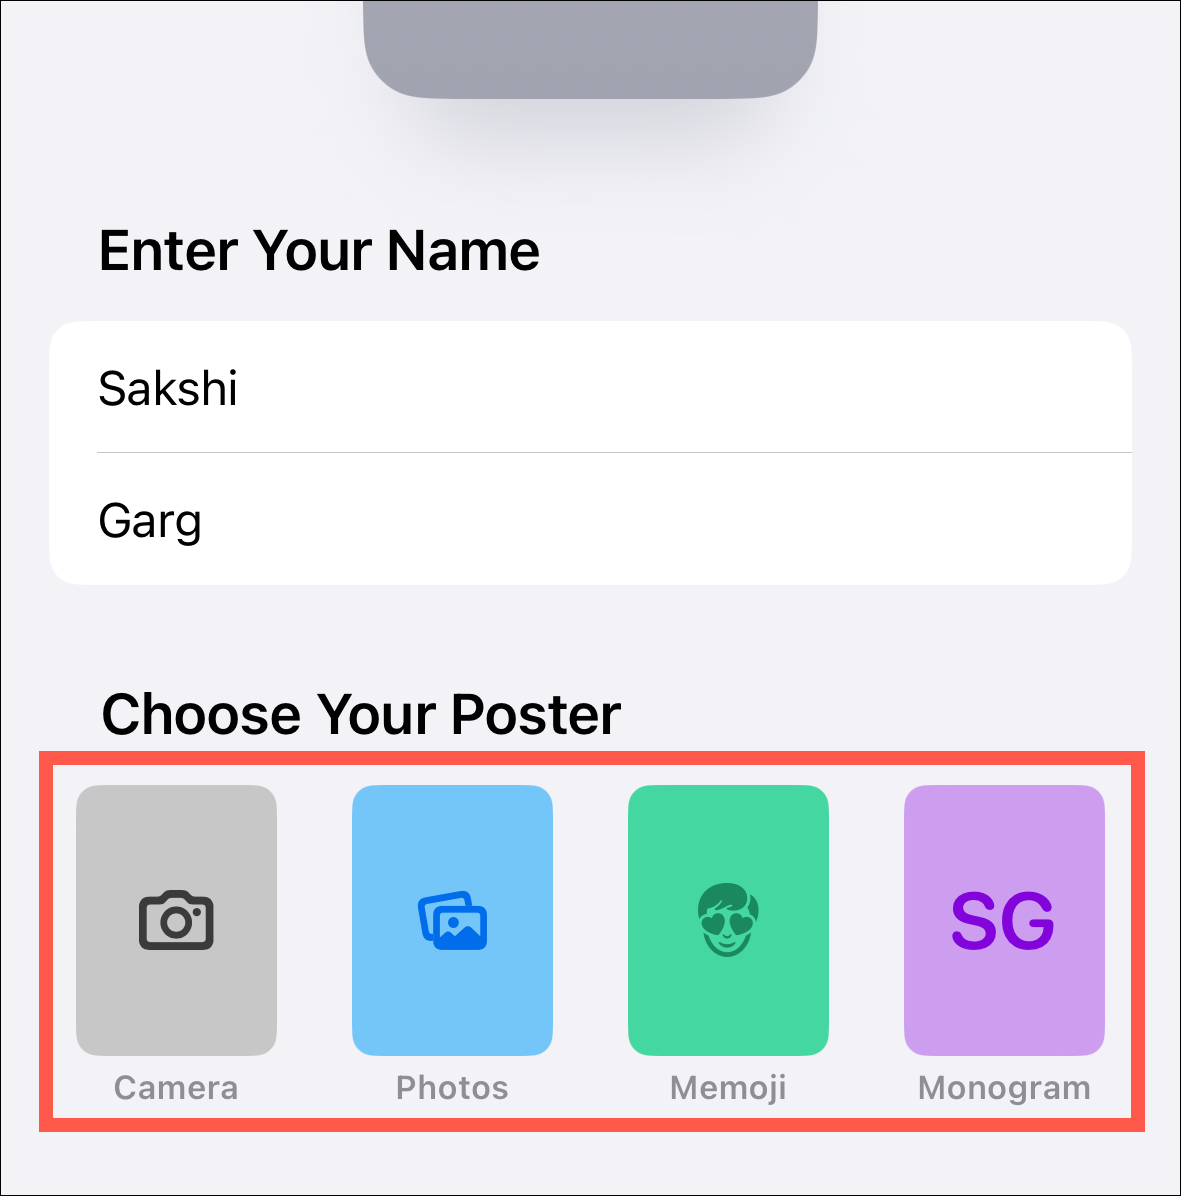
Now, you can personalize your Contact Poster. To change how your name will appear, tap the ‘Name’ option.
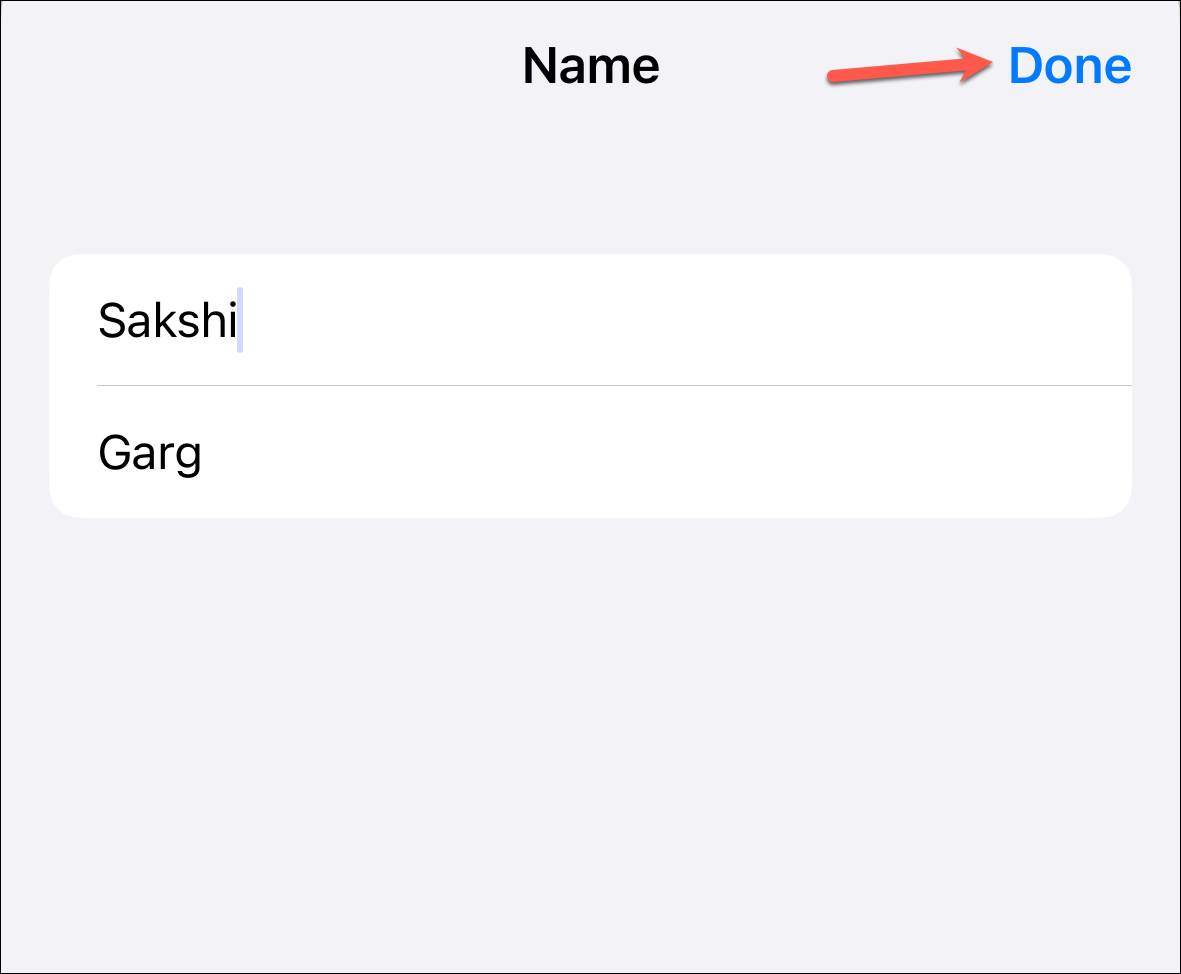
Then, enter how you want your name to be displayed and tap ‘Done’.
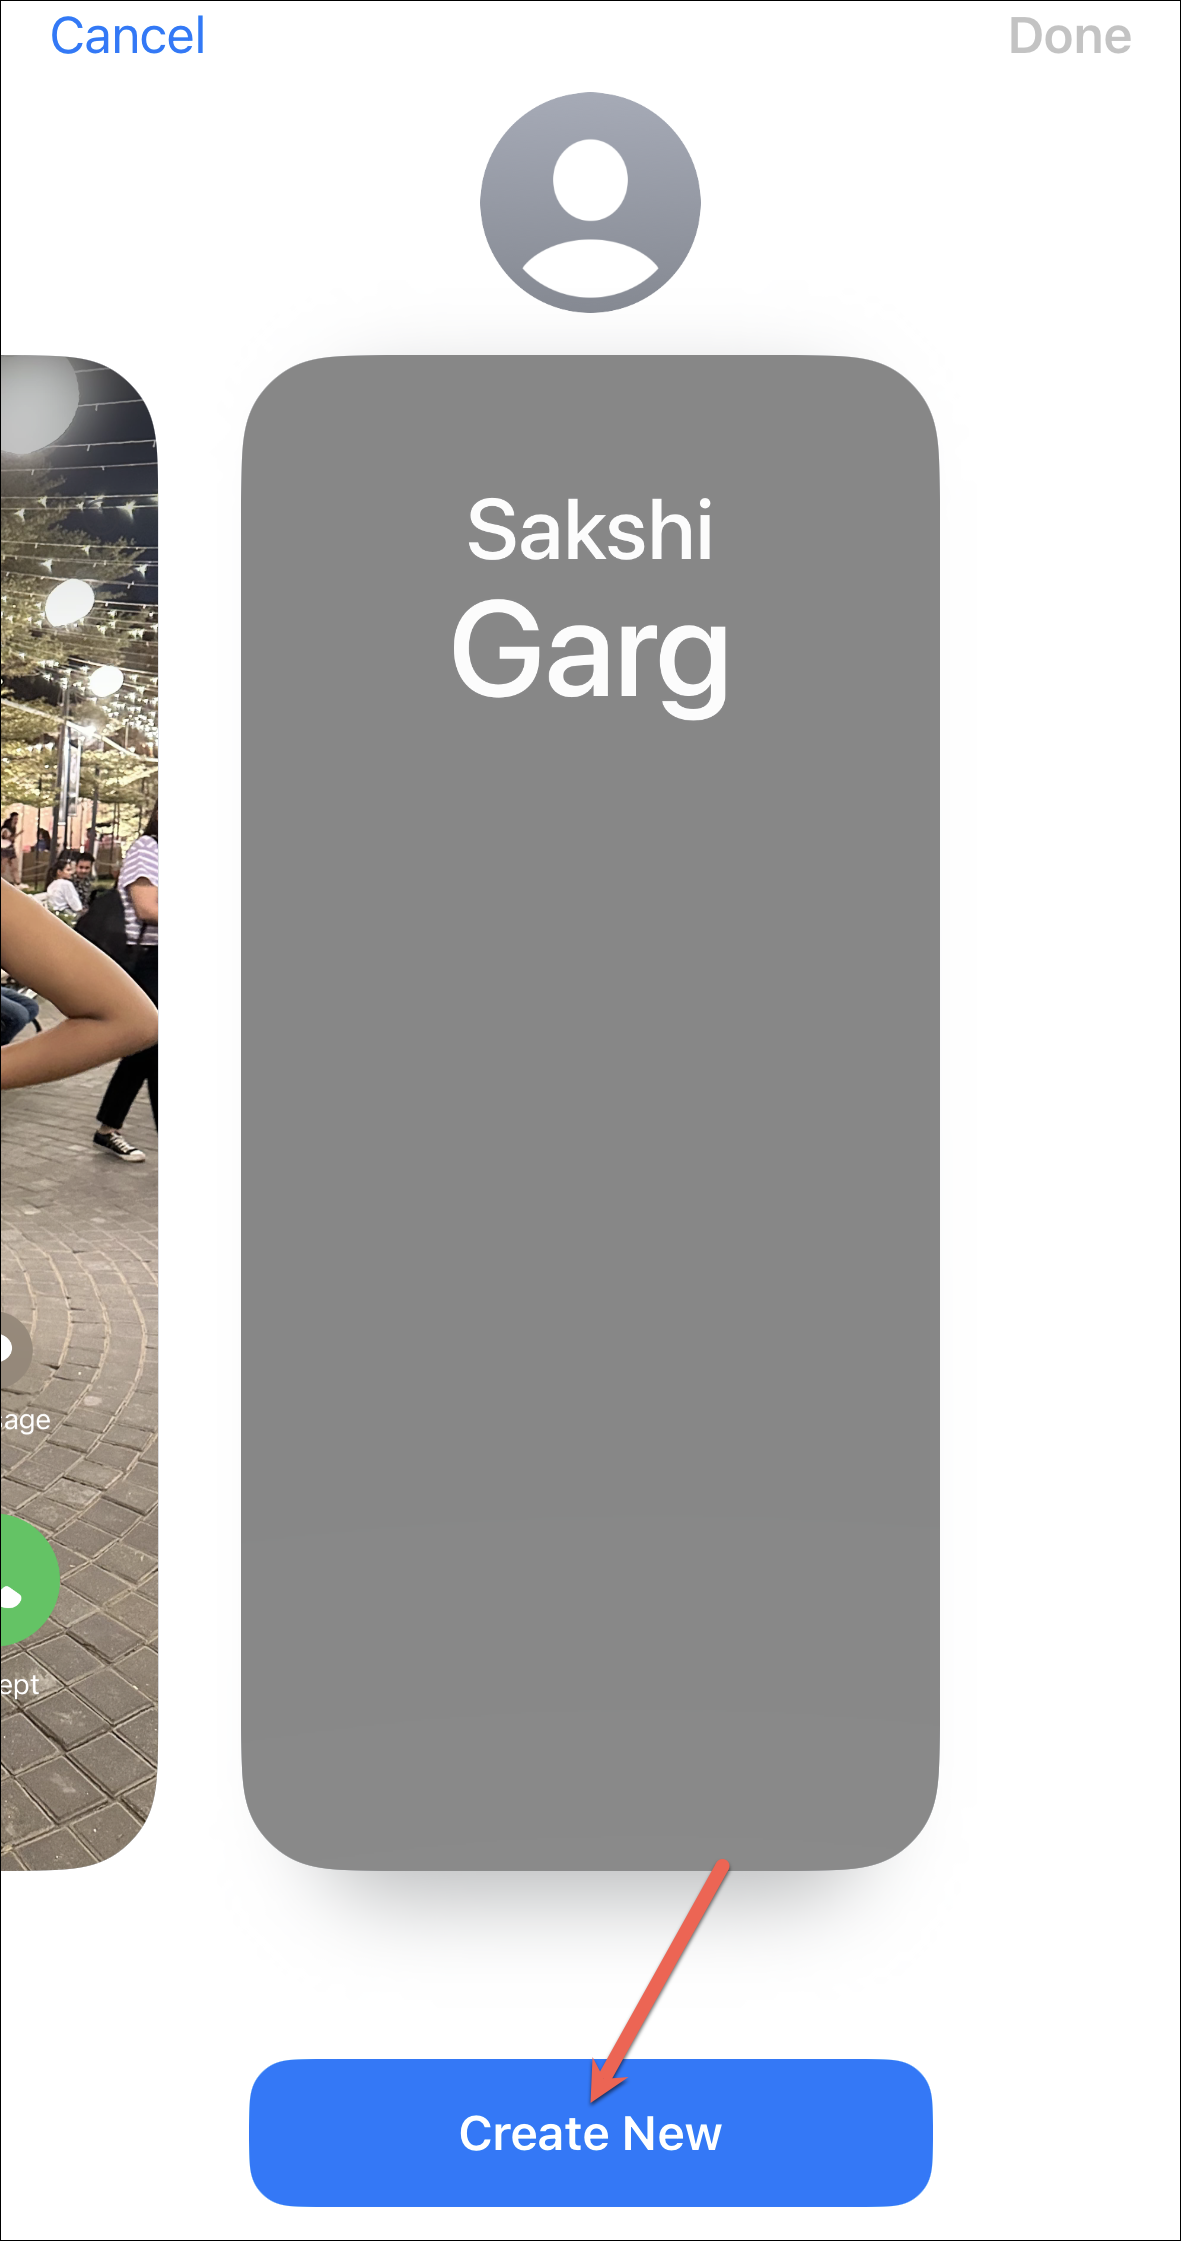
Next, you can edit the poster itself. Tap ‘Edit’ from the screen.
Then, tap the ‘Create New’ button to create a new poster (much like creating lock screens). While you can create multiple contact posters, you cannot create than with separate names.
Then, there are three different styles you can choose from: Photo, Memoji, and Monogram. You can also click a new photo for the Contact Poster using the Camera. Choose what you want your Contact Poster to display.
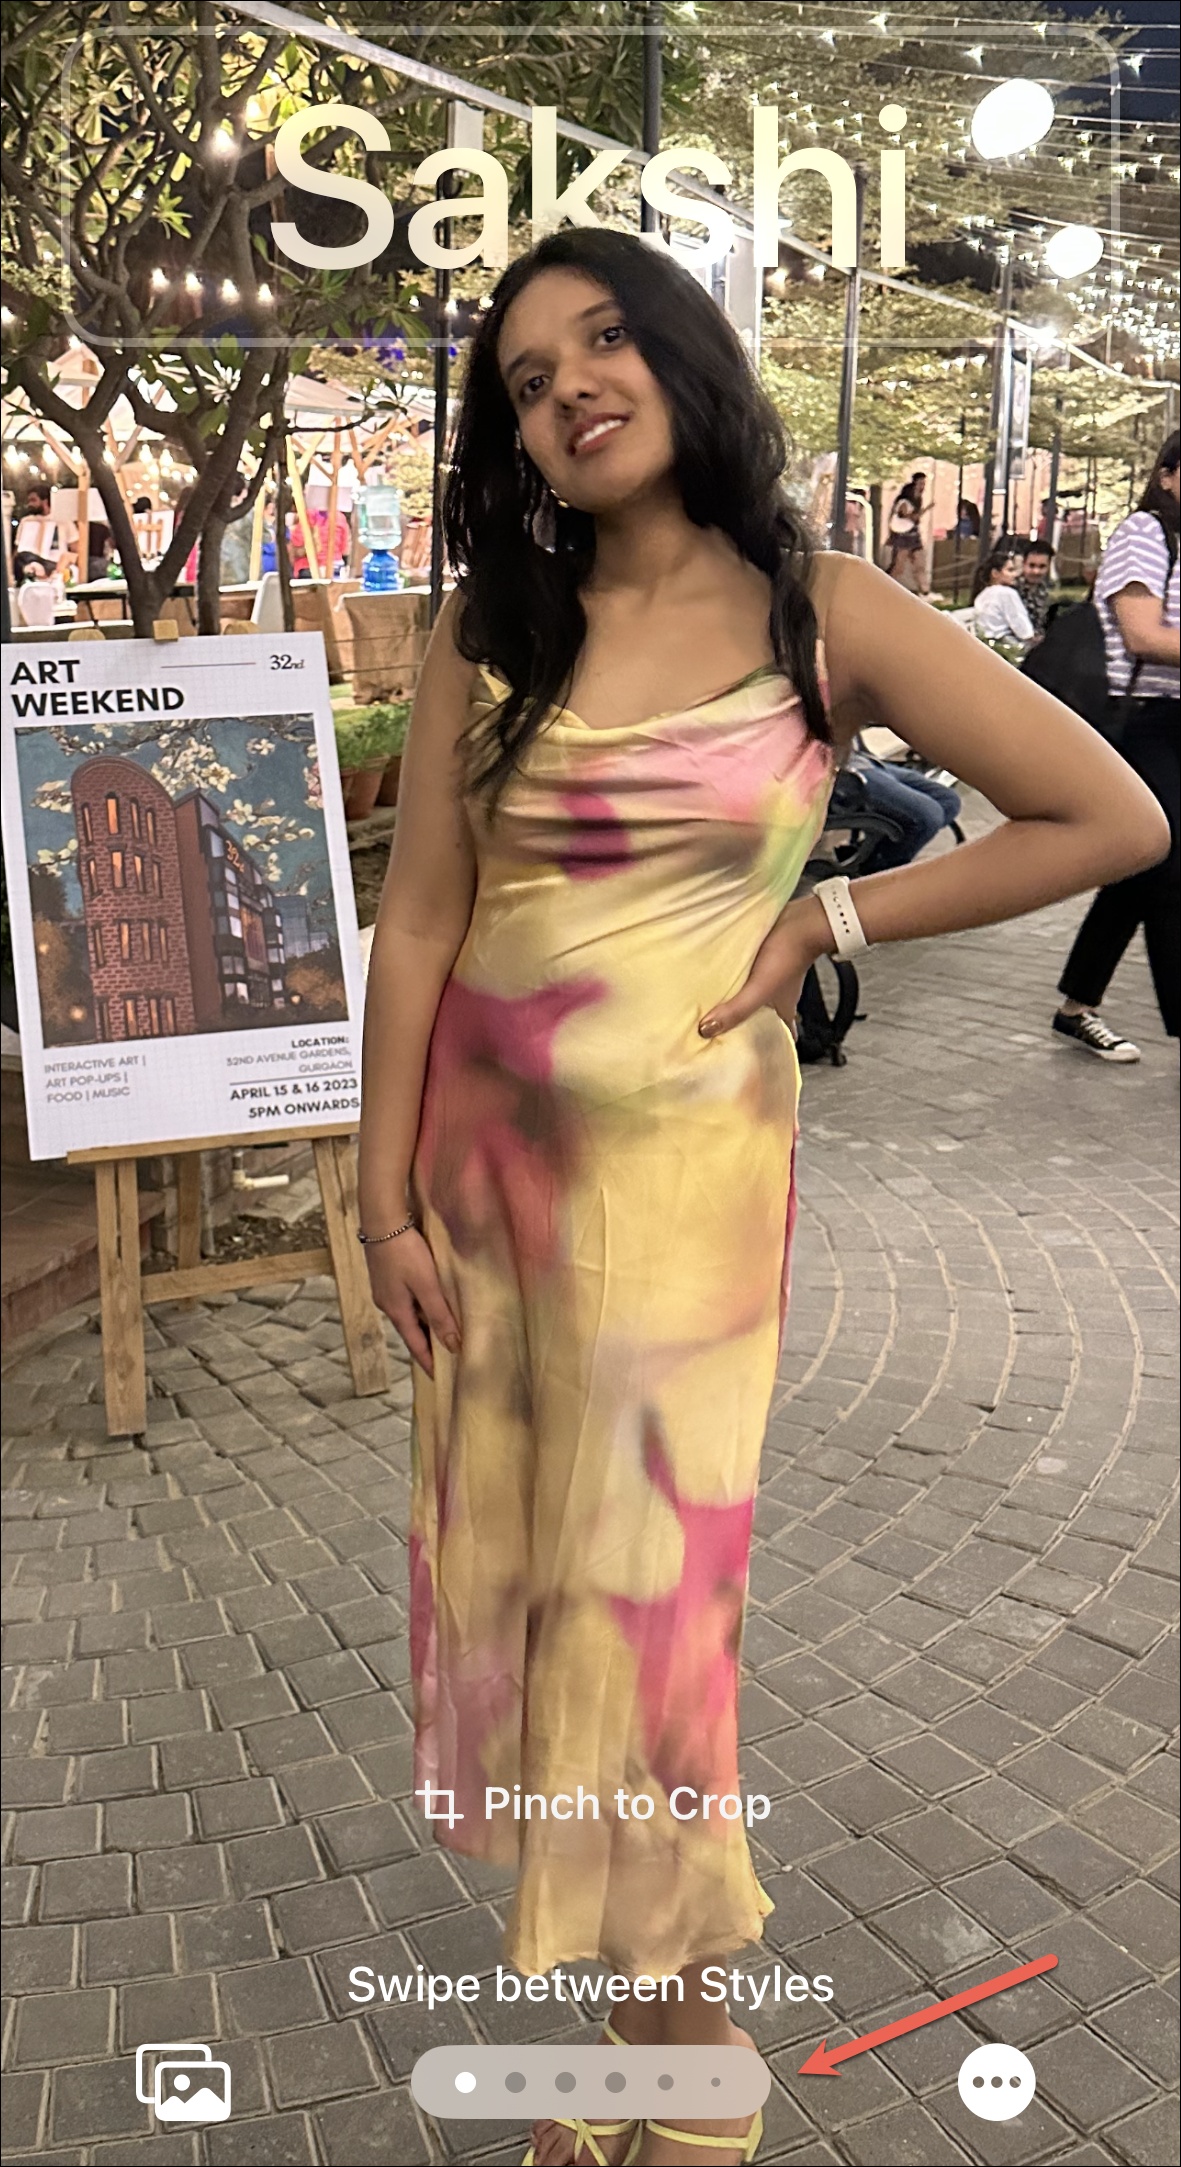
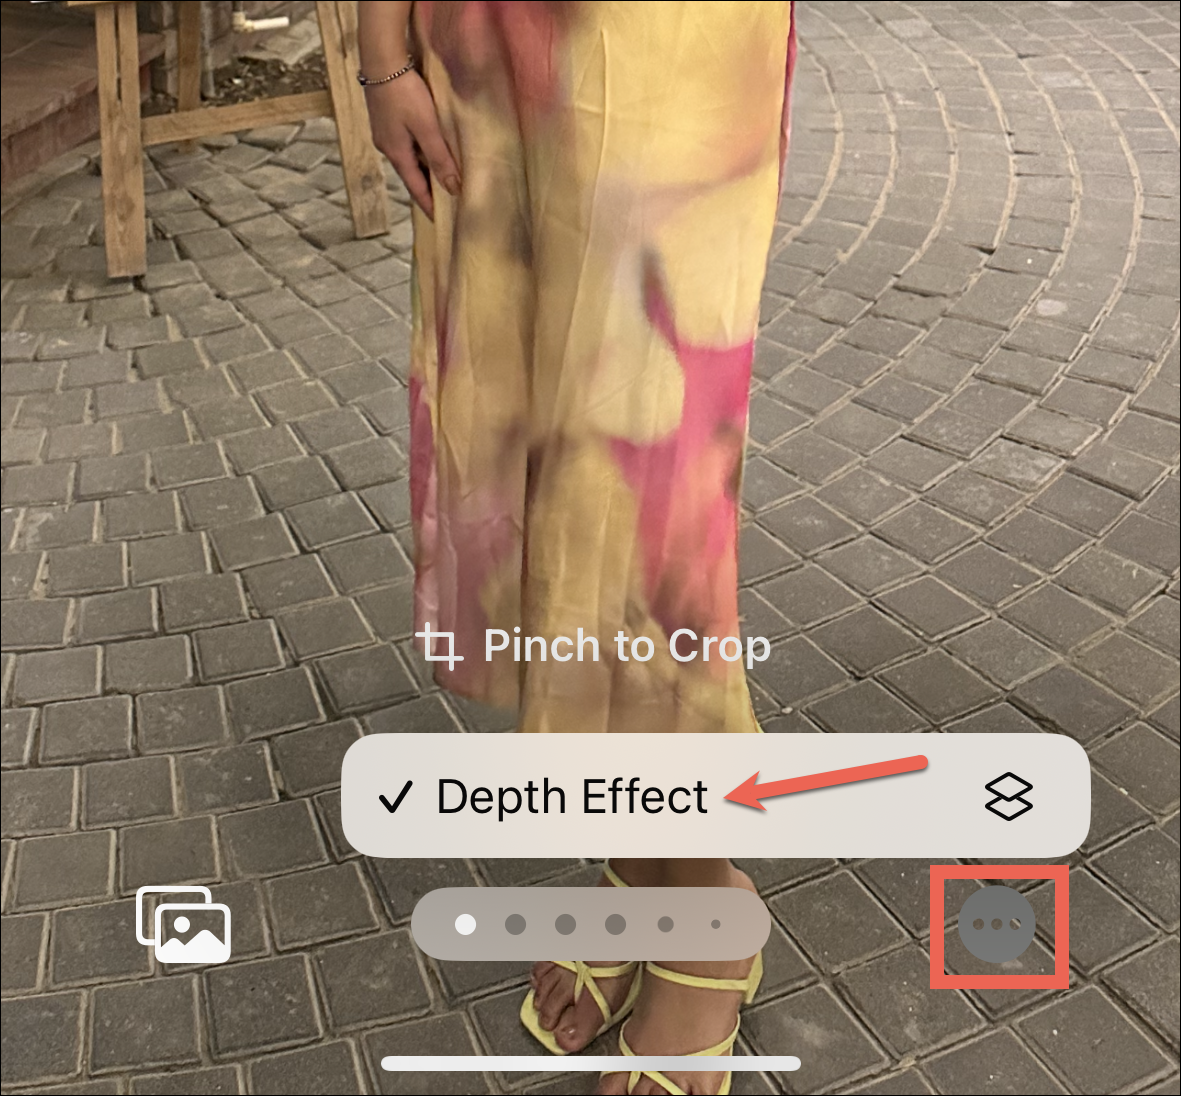
Whether you choose a photo or a memoji, Contact Poster gives them a beautiful treatment, pairing them with a Depth Effect and eye-catching typographies.
For a photo, swipe left to choose between different styles such as Natural Gradient, Seamless Background, Poster, Studio, Colour Backdrop, etc.
These effects can be further personalized by tapping the circle in the bottom menu. For Memojis and Monograms, there are no styles to choose from; you can only change the background color.
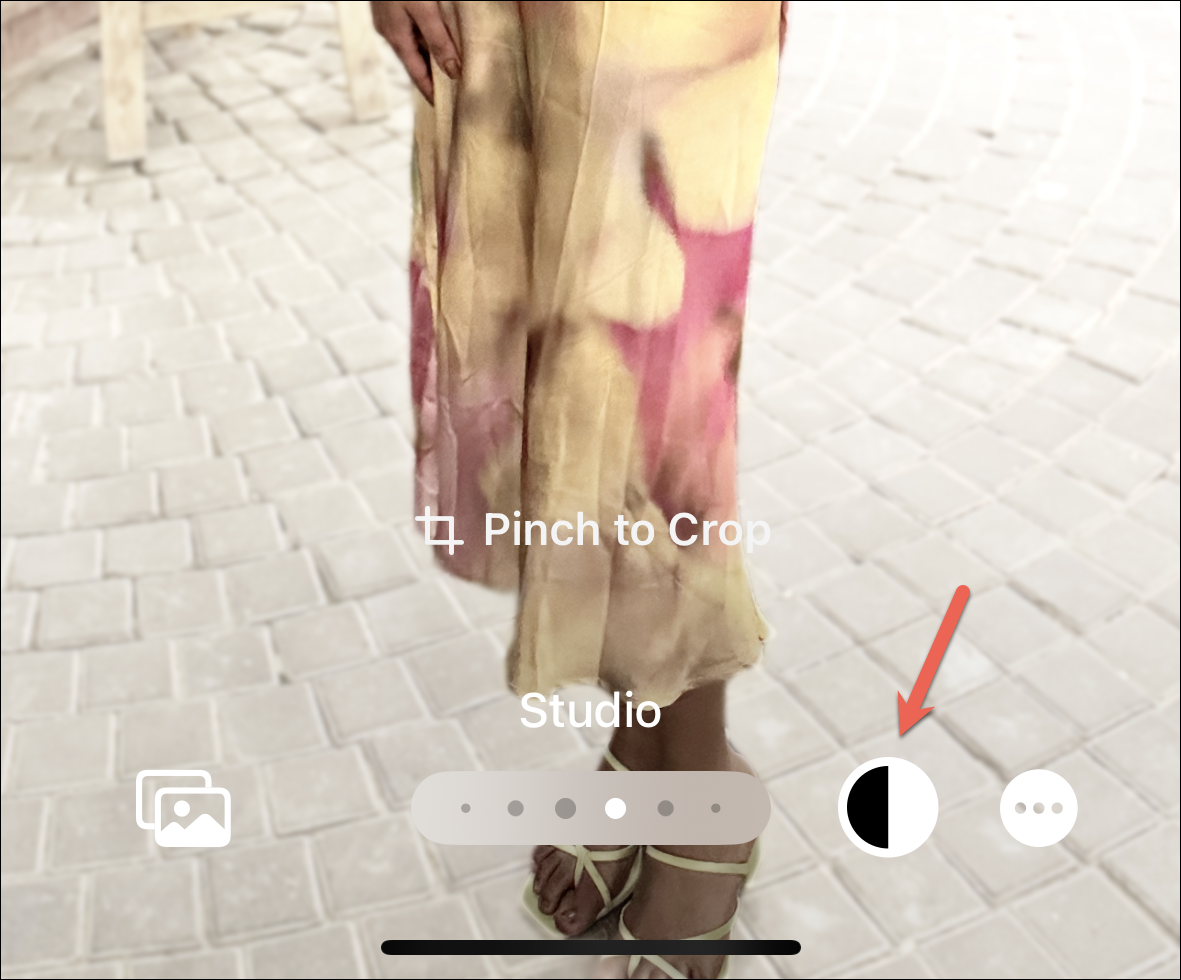
You can also turn off the Depth Effect by tapping the ‘three-dot menu (…)’ and deselecting ‘Depth Effect’.
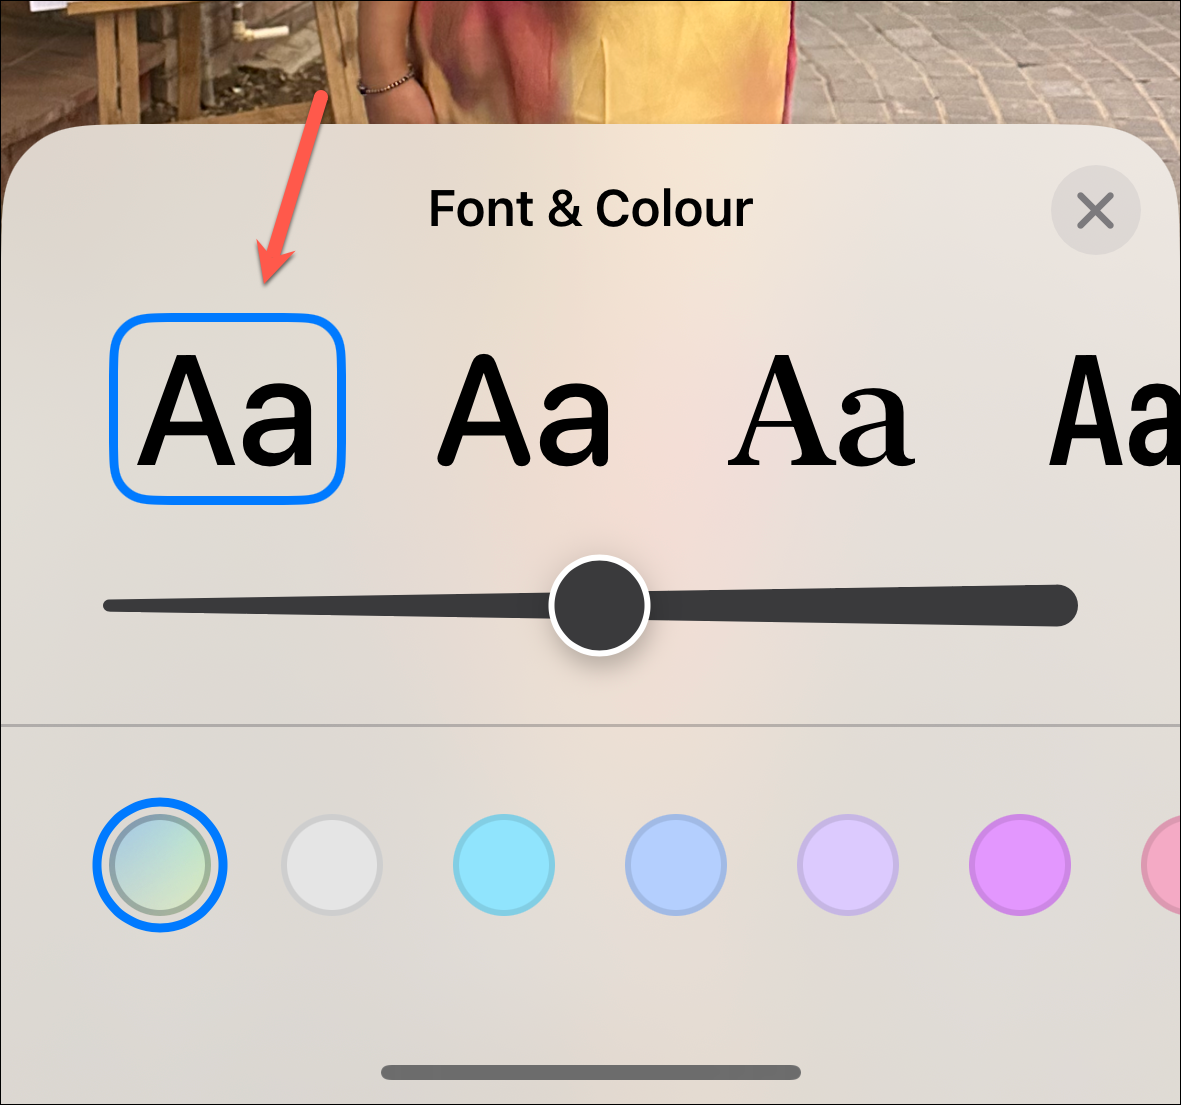
You can edit the typography for your name by tapping it.
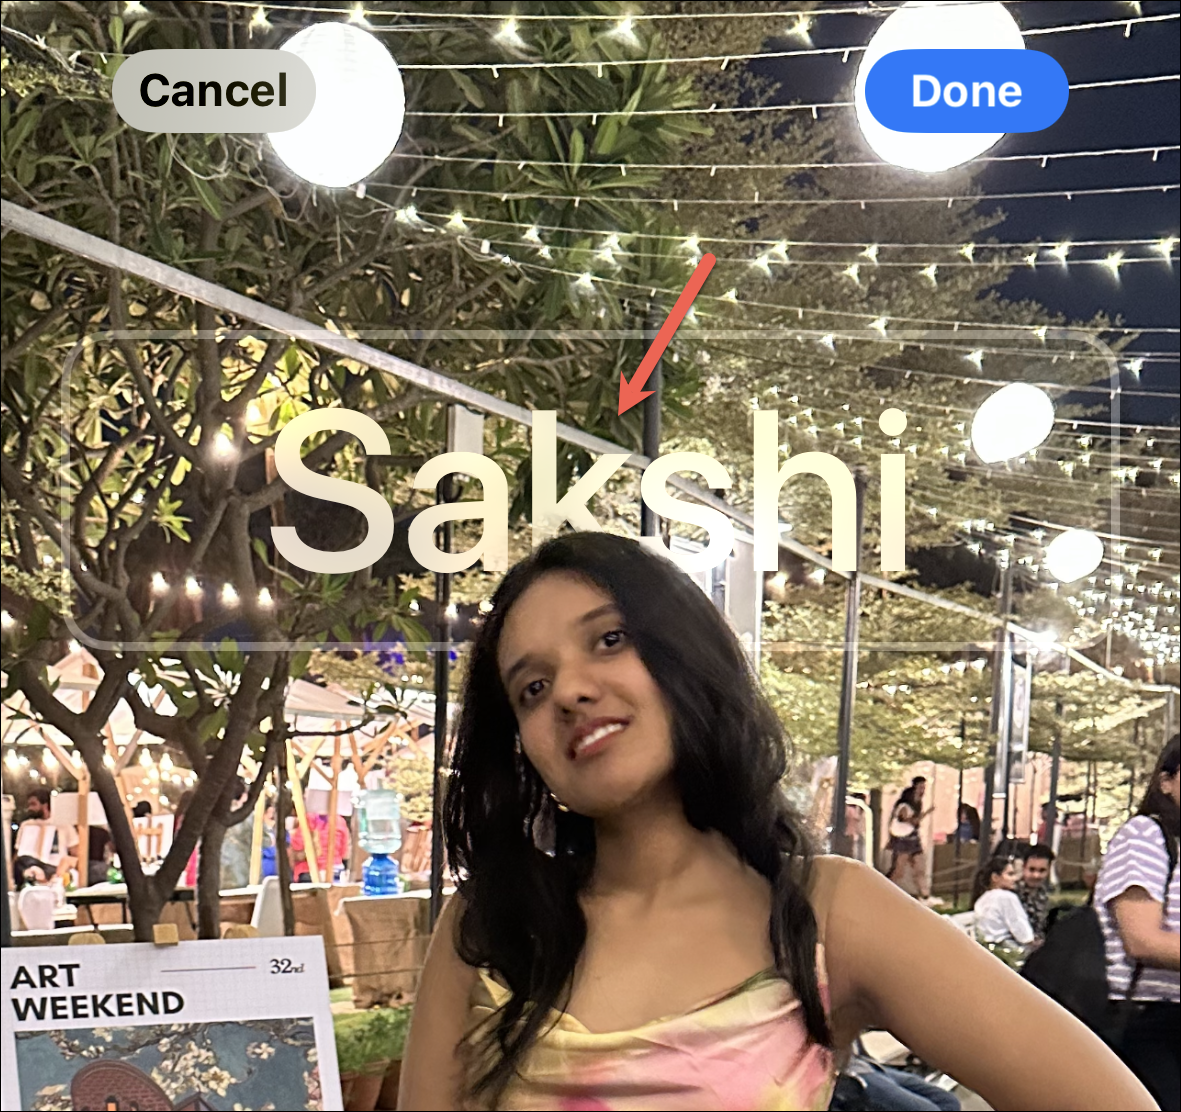
From the overlay menu, you can change the name’s font, color, and thickness.
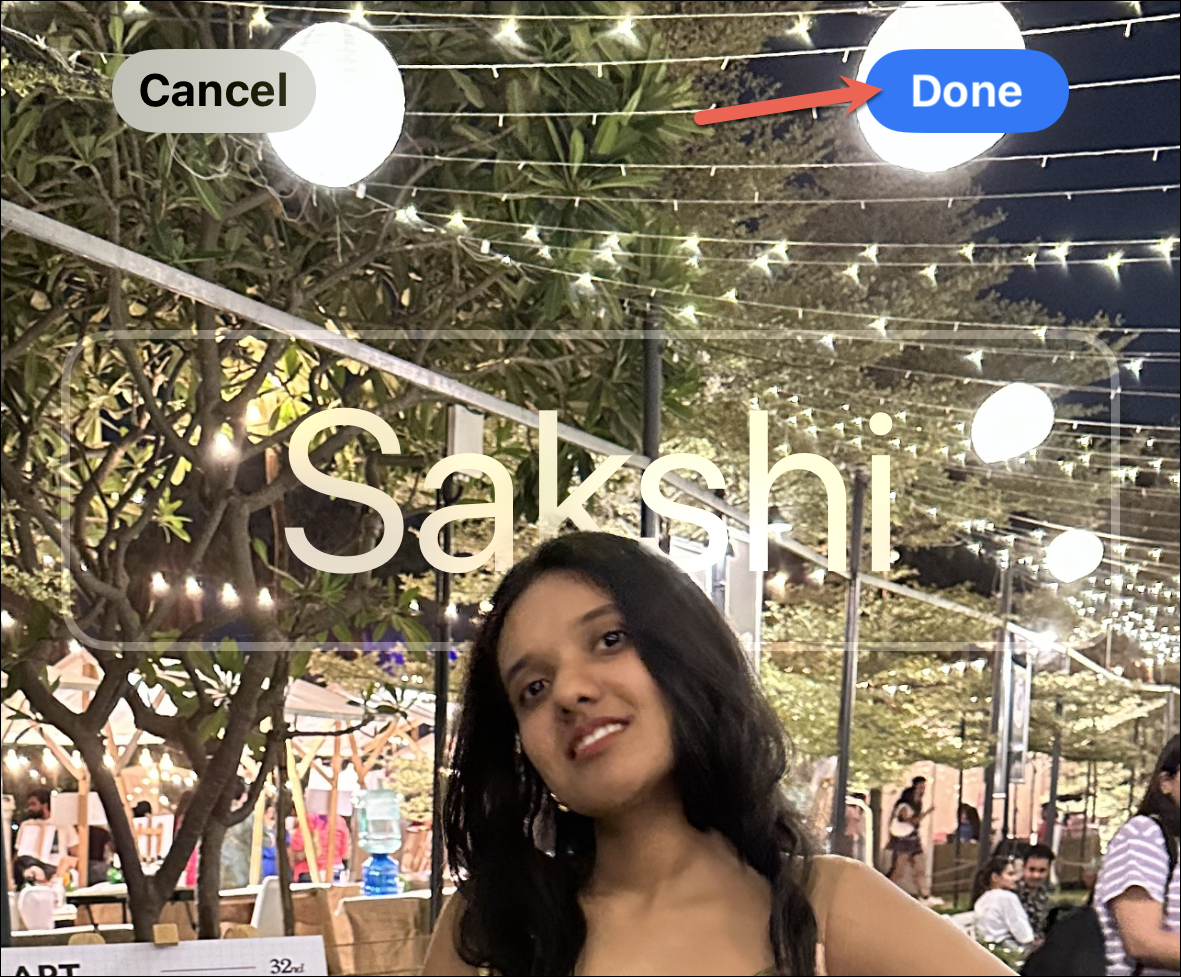
Once you’re done editing, tap ‘Done’ in the top-right corner to save the changes.
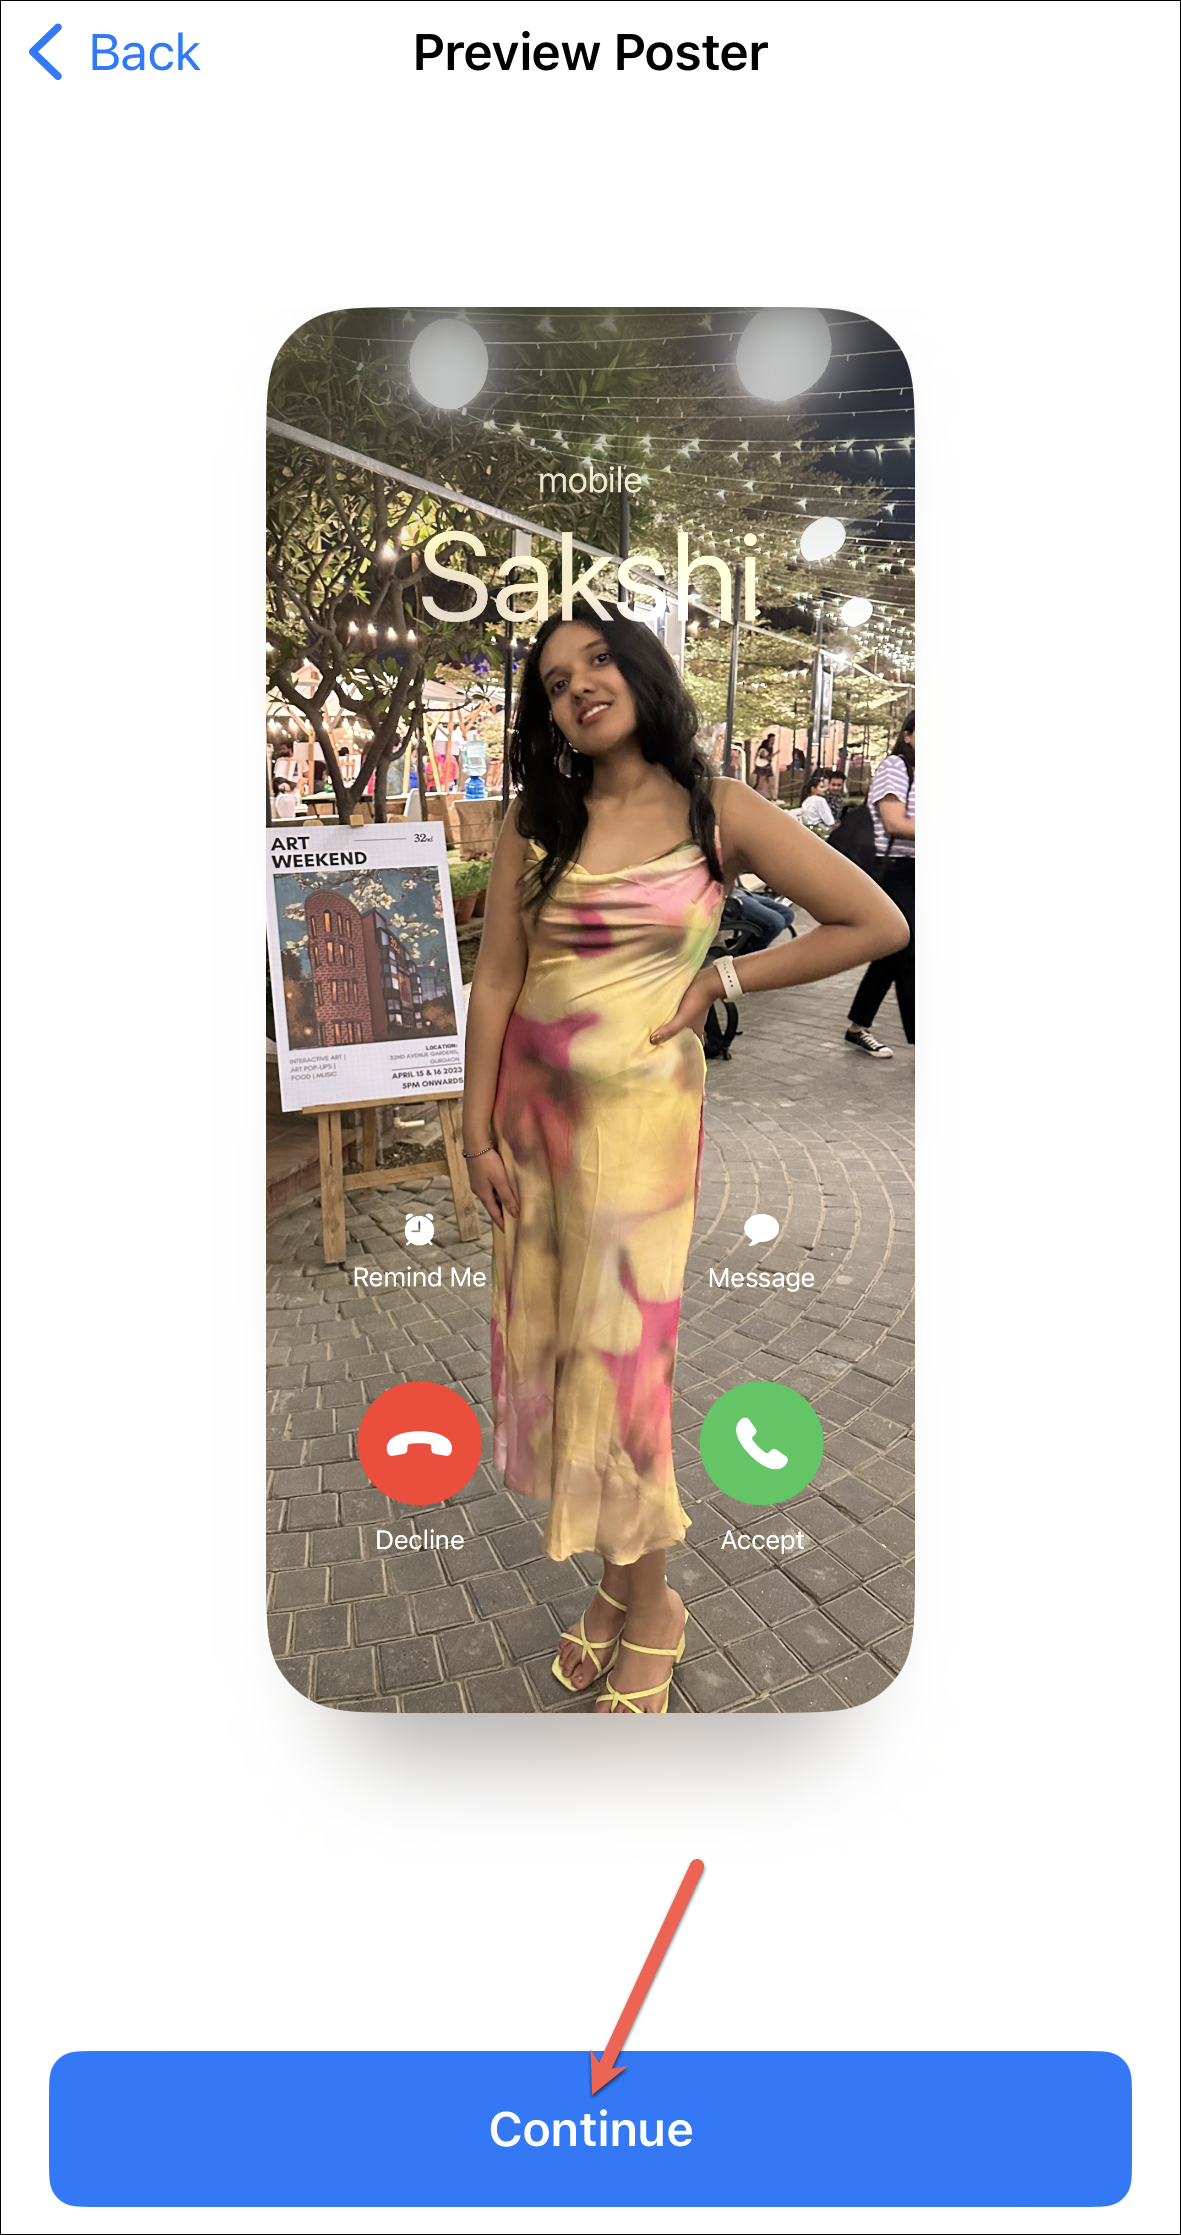
A preview of the poster will appear; tap ‘Continue’ to proceed, or the ‘Back’ arrow to customize it again.
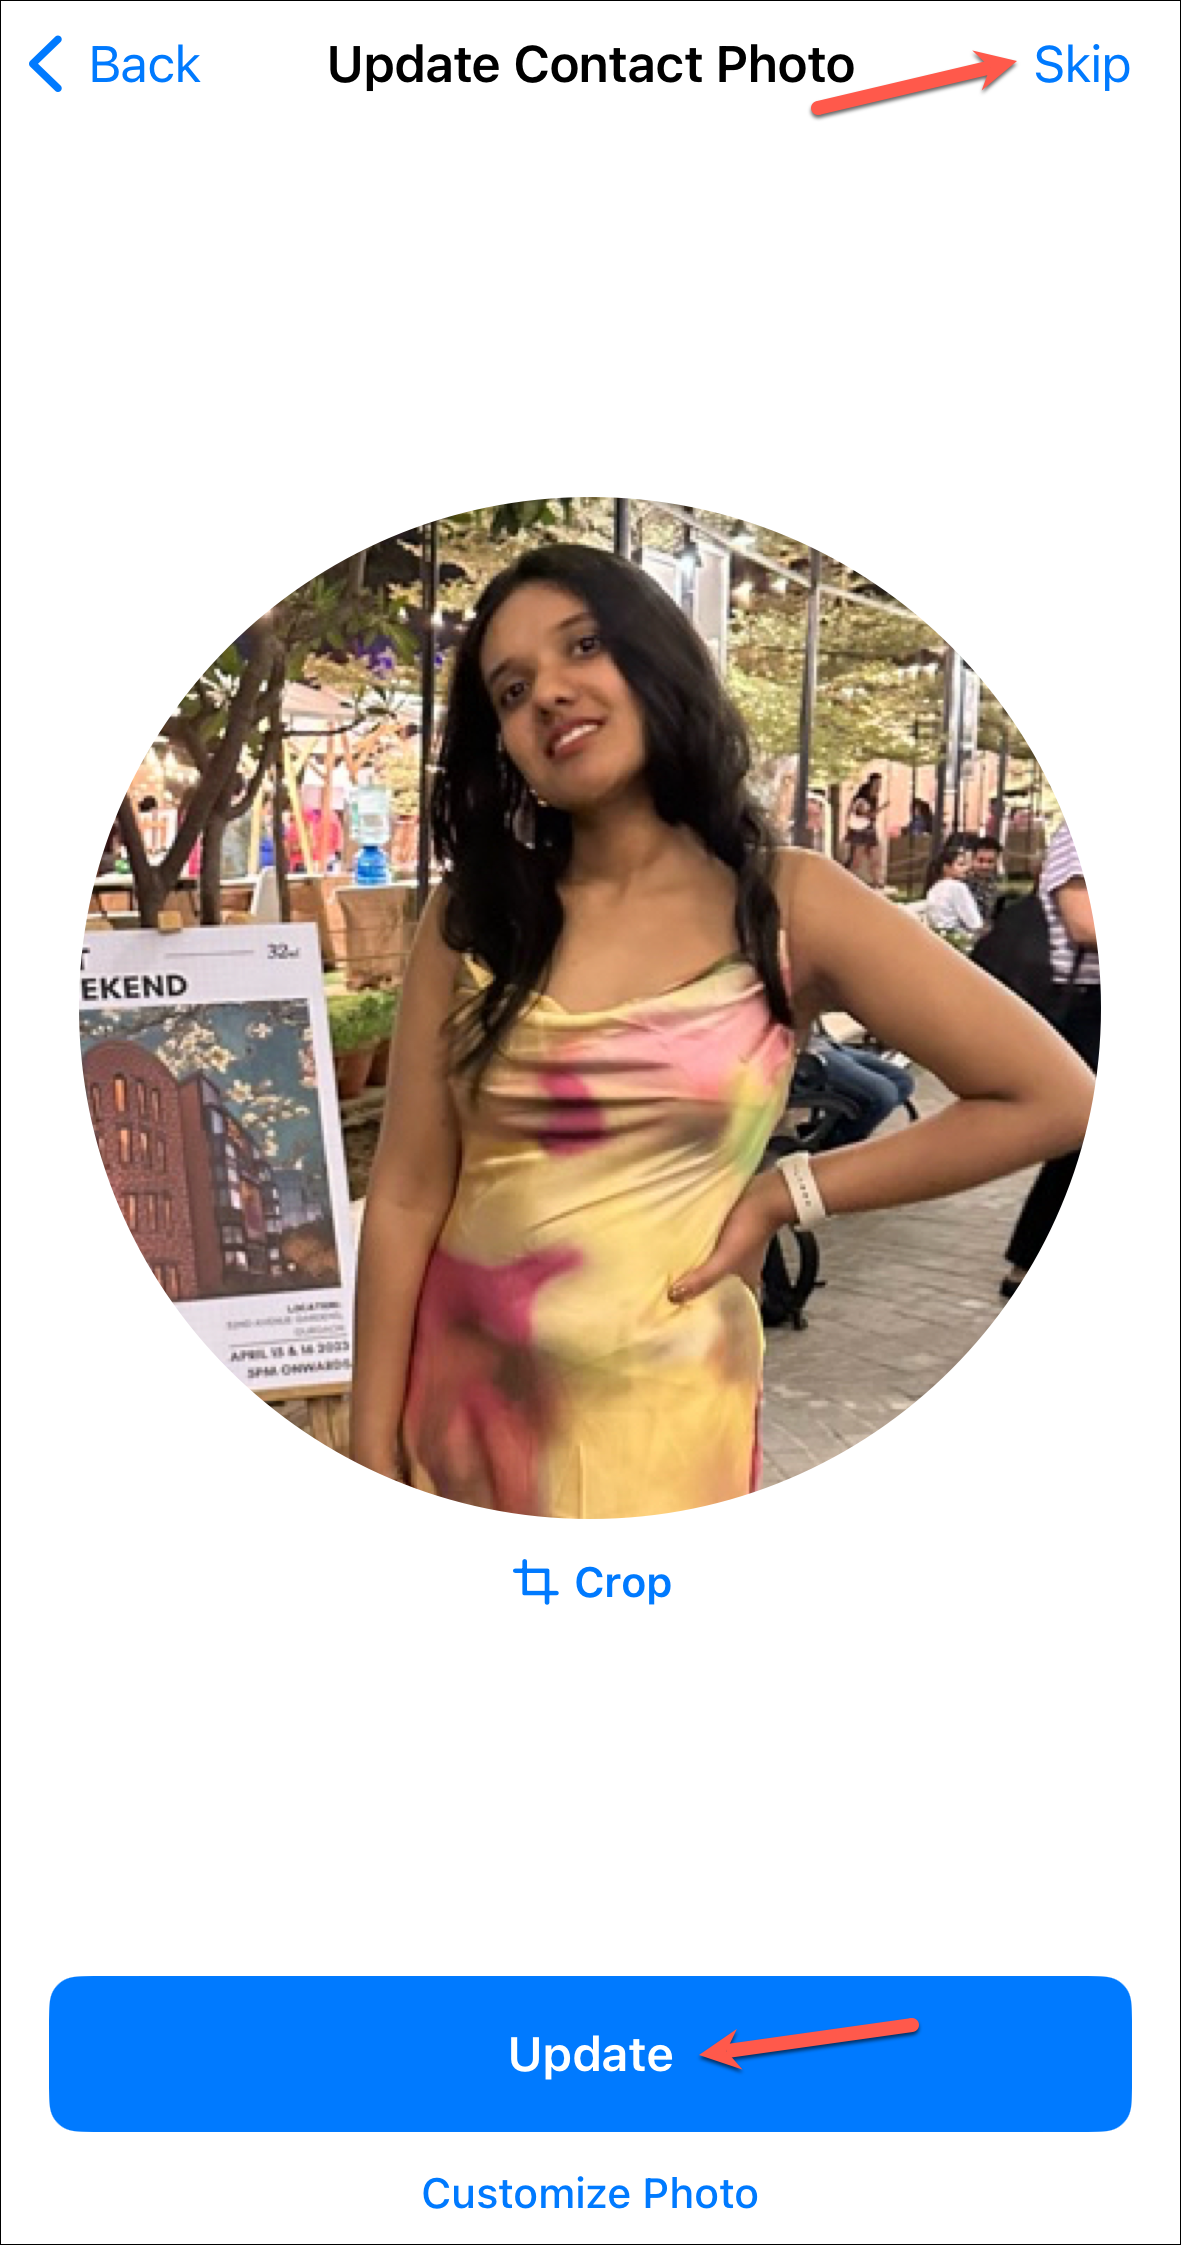
If the photo/ memoji you chose is different than your current contact photo, you will see a screen asking if you want to update it. You can choose to update or skip it for now.
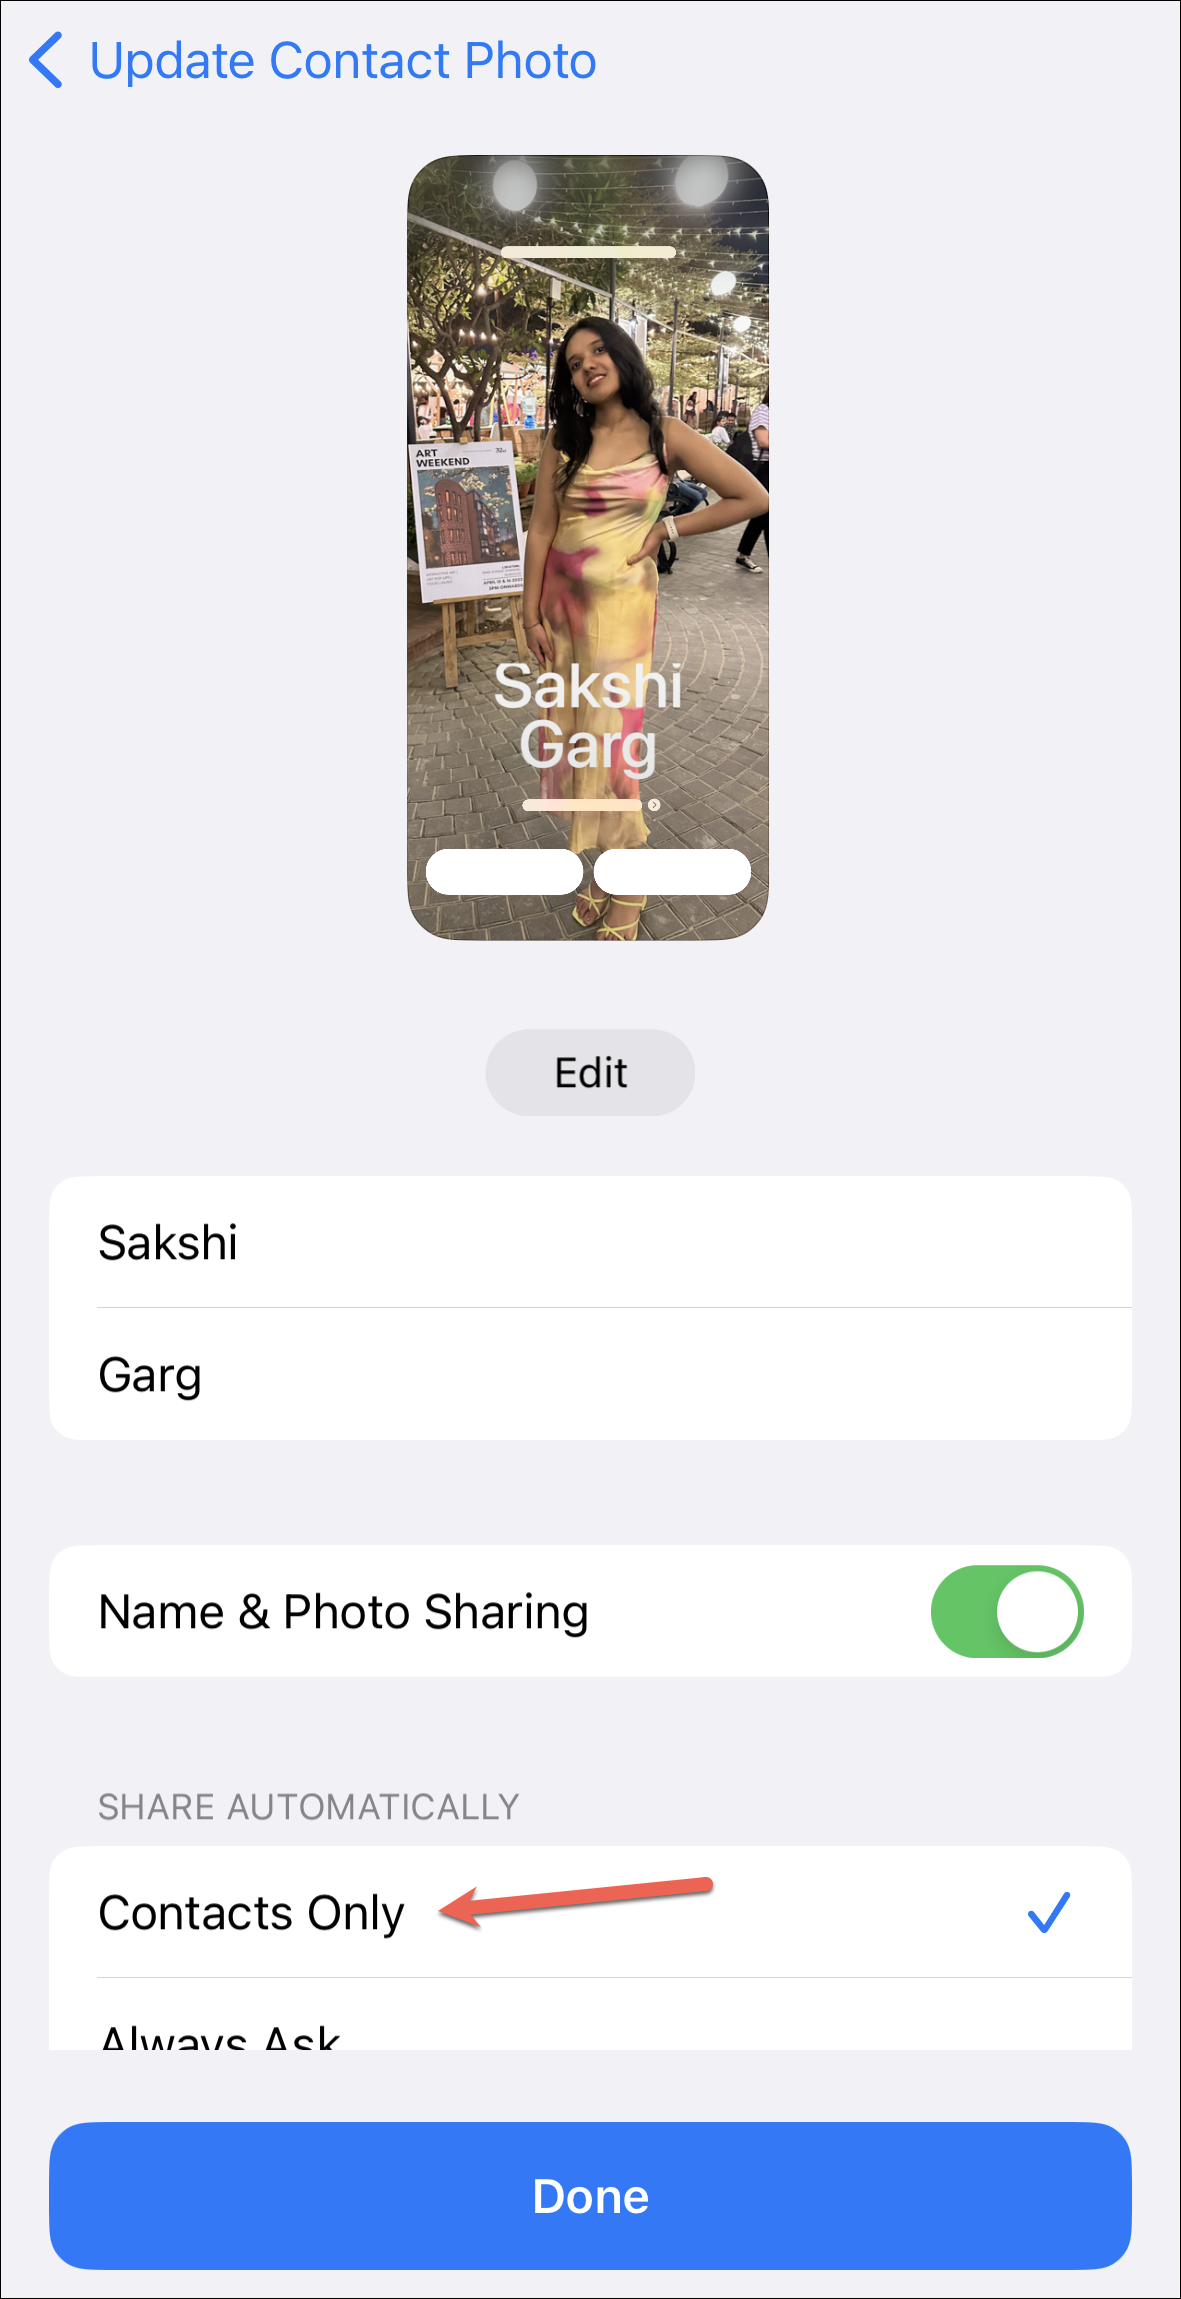
Then, you’ll see a preview of your contact poster with additional settings. Here, you can configure whether you want to share your poster with your contacts automatically or you want iOS to ask for permission for it each time. Select according to your preference and tap ‘Done’.
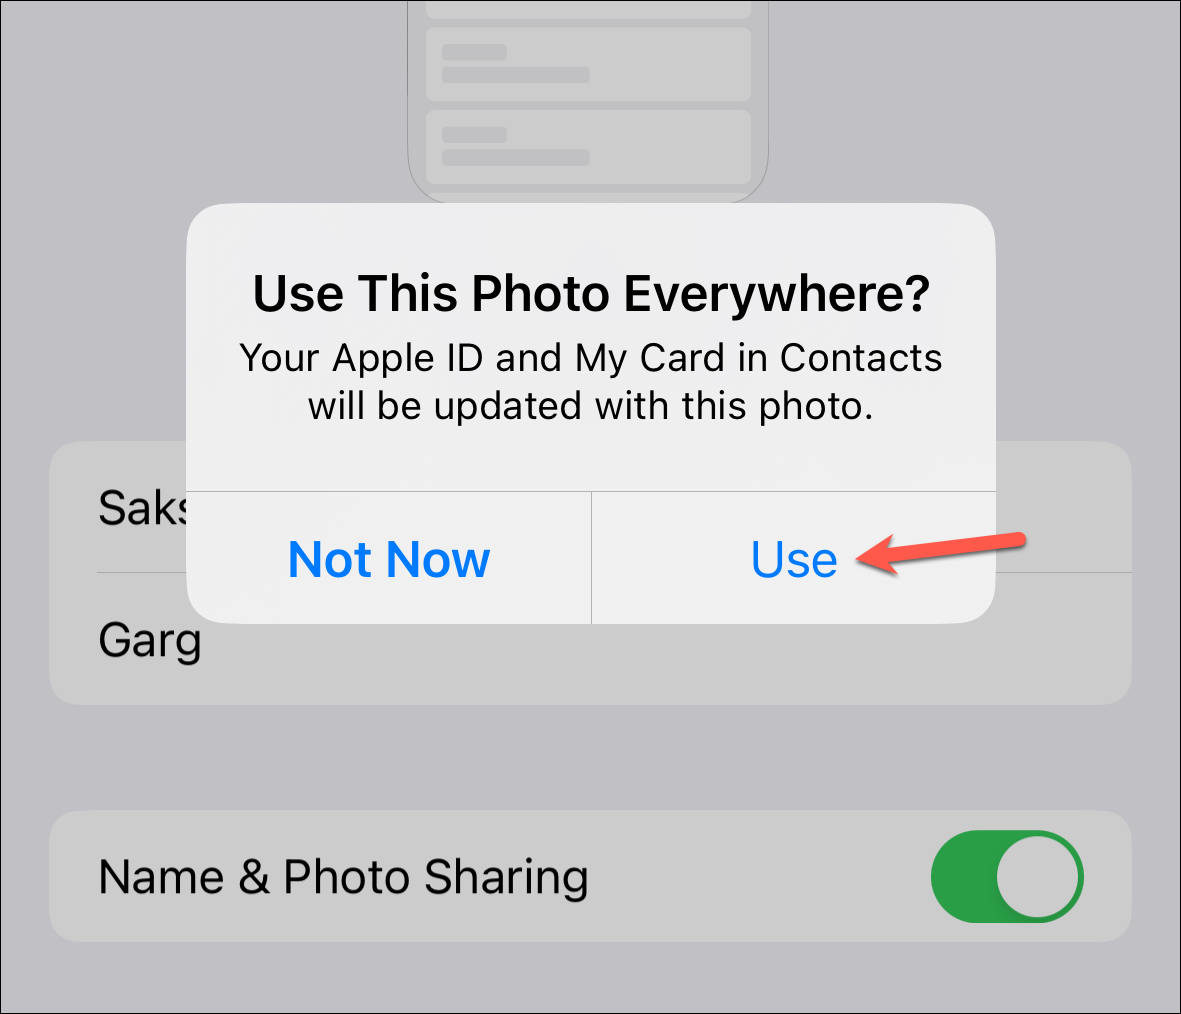
Finally, if you want to use your photo in your Apple ID and My Card in contacts, tap ‘Use’ on the prompt on the screen; otherwise, tap ‘Not Now’.
Your personalized contact poster will be set up. Now, when you call someone in your contacts (they also need to be on iOS 17), they will be able to see the beauty you have whipped up!
That’s all it takes to create a contact poster in iOS 17. Whether you love this new update or not, it can be said without a doubt that the option to create a personalized contact poster is a hit.


