Apart from being a fantastic streaming platform, Twitch has features that improvise on its purpose. Although not a direct part of the streaming community, viewers are never left out of the streaming loop. They can clip streams, publish them, and help get more traction for their favorite streamers.
Twitch enables the ‘clip creation’ feature for all users. As promising as the ‘clip creation’ feature is, it’s not always done in the best interest. Viewers may maliciously clip streams – violating copyright and a bunch of other moral codes. Hence, Twitch also has the option to disable clip creation. This option is available only on the desktop app.
Open Stream Settings on Creator Dashboard to Disable Clip Creation
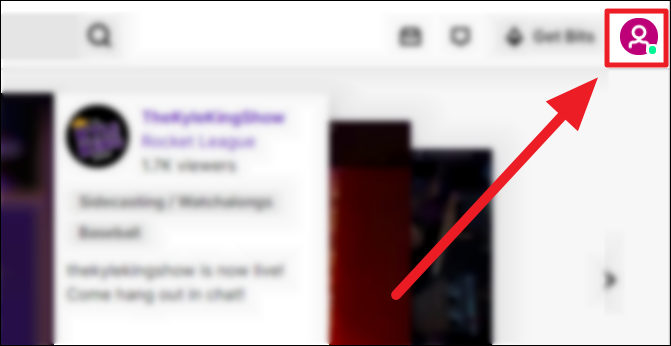
To disable ‘Clip Creation’, you must reach ‘Stream Settings’. For this, first, launch Twitch on your computer and click the user profile button to the top right corner of the screen.
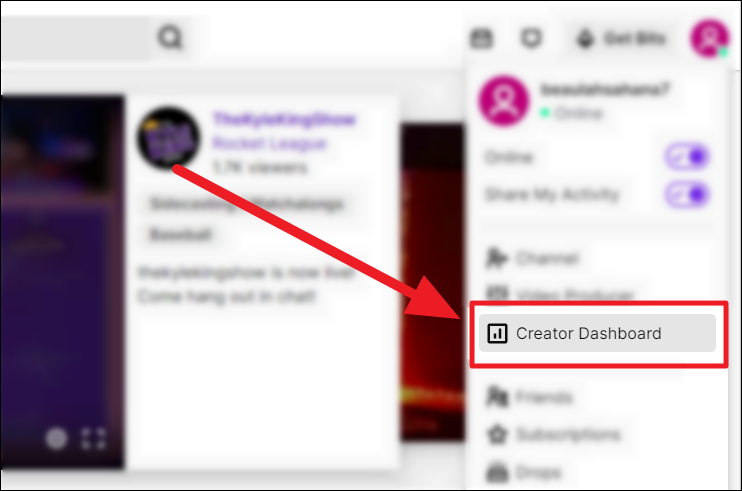
Select ‘Creator Dashboard’ from the drop-down menu.
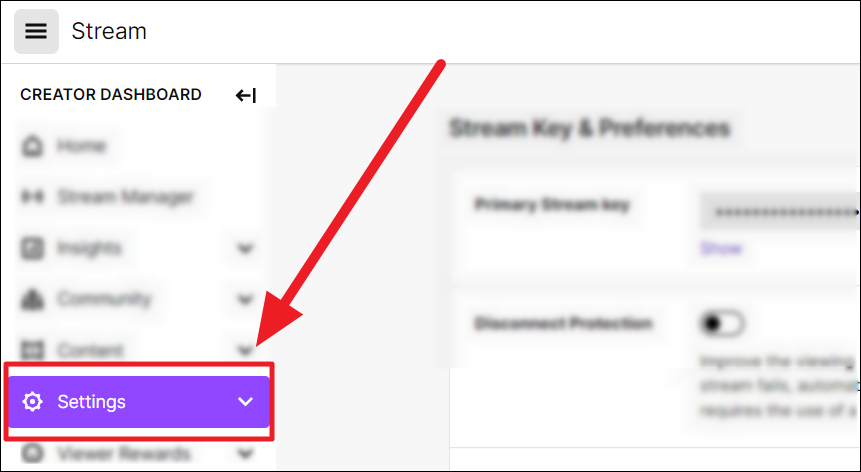
Your ‘Creator Dashboard’ will now open on your browser. Click on the ‘Settings’ drop-down option on the left list of the options.
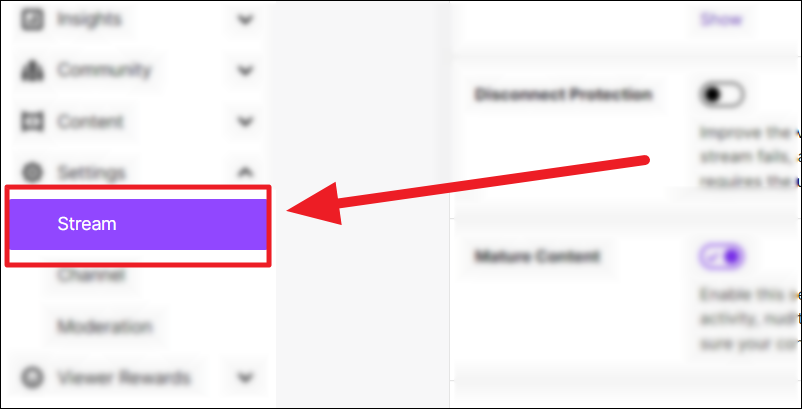
Select ‘Stream’ in the ‘Settings’ drop-down menu.
Disable Clip Creation For Everyone
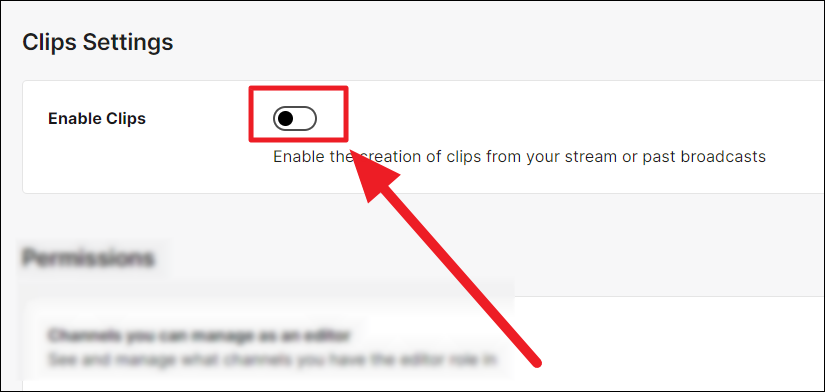
If you do not want anyone clipping your streams regardless of their stance – follower, friend, mod, viewer, etc., then you must disable all clip creation. Scroll through the ‘Stream’ settings on the right to find the ‘Clips’ section.
Click the purple toggle next to ‘Enable Clips’ to turn it black and white. Thus disabling clips.

This will disable clip creation on your channel, entirely. It will also remove other clip settings.
Disable Clip Creation on Certain Categories
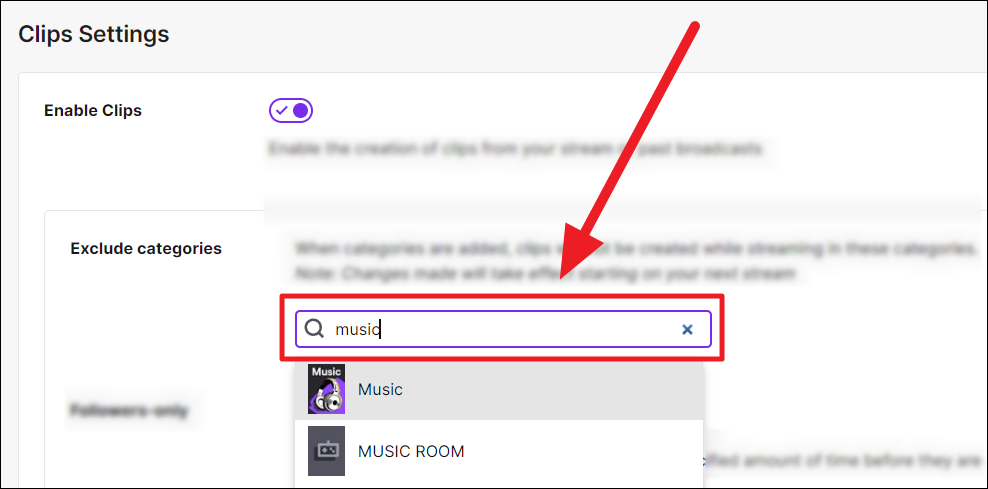
If you don’t mind viewers creating clips on your streams except in particular categories, this option is for you. First, ensure the ‘Enable Clips’ toggle is purple — this suggests the feature is ON. If it is disabled, click the toggle to turn it purple.
Now, enter your category in the ‘Exclude categories’ text box. Click to select your category in the context menu.
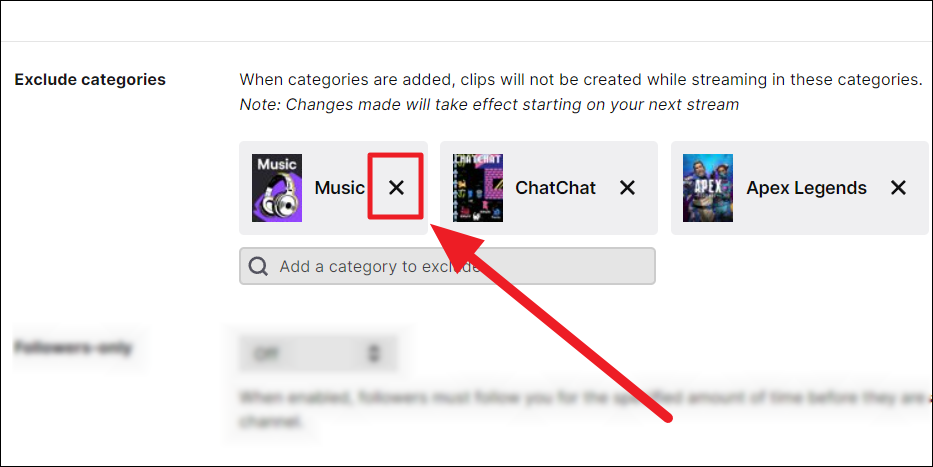
You have as many categories as you require. To remove a category, click the ‘X’ mark on the particular category box.
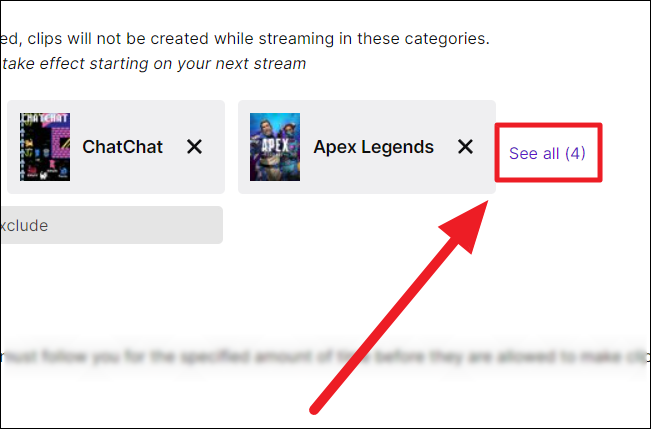
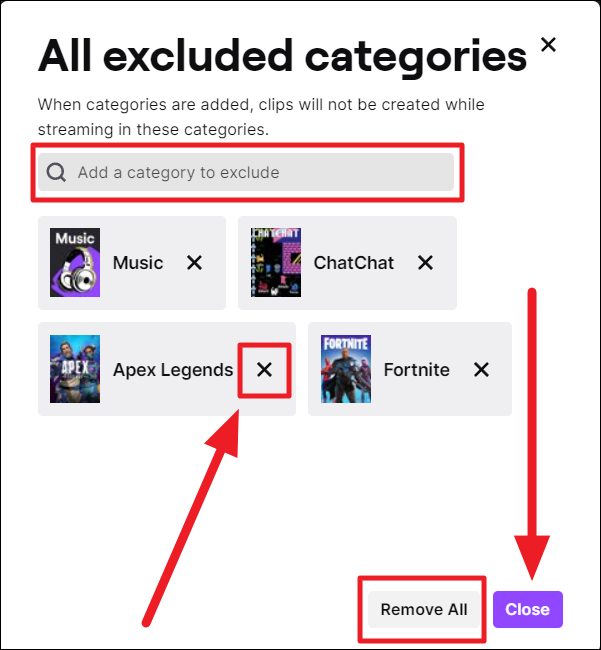
If you created more than 4 categories, click the ‘See All’ button at the end of the horizontal list of 3 categories to view all your categories
You will now see a ‘Add excluded categories’ box. You can include categories by entering them in the ‘Add a category to exclude’ text box and choosing the respective category in the drop-down menu.
If you want to erase all your categories, click the ‘Remove all’ button. If not, click the ‘X’ button on individual category boxes to remove them. Hit the ‘Close’ button once done.
Disable Clip Creation Except For Followers
This can be a safe and reassuring way to allow for clip creation. You can choose to allow all your followers to create clips and make clip creation exclusive to followers who’ve followed you for a specific time.
Click the ‘Off’ drop-down box next to ‘Followers only’ under ‘Clip Settings’. Choose the duration a viewer must follow you to be permitted to make clips of your stream.
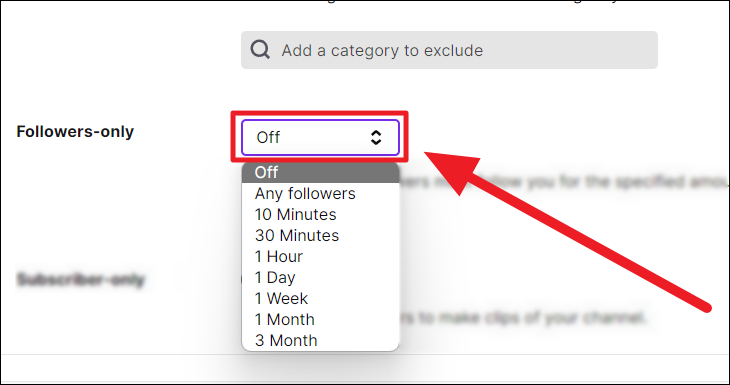
Your channel viewers will now need to follow you for your set period to create clips.
Disable Clip Creation Except For Subscribers
If you want to narrow your circle of viewers allowed to create clips of your streams, you can choose the ‘Subscribers’ Only’ option. This is an added security measure by itself. Followers/viewers need to subscribe to your channel to make stream clips.
Click the toggle next to the ‘Subscriber-only’ option below ‘Clip Settings’ to turn it purple.
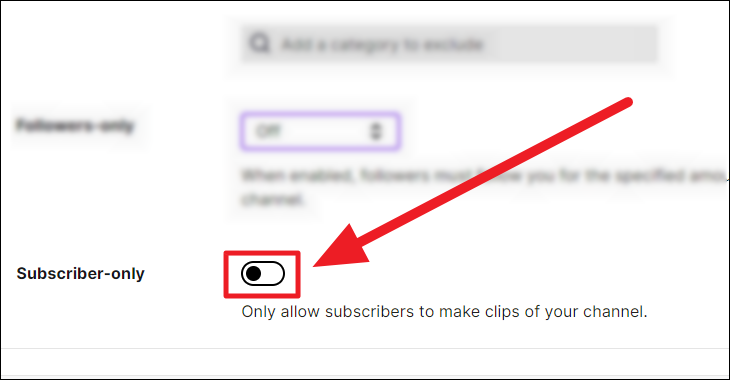
Now, only your channel subscribers can create clips of your streams.
This is how you can restrict access to clip creation and safeguard your streams. We hope you found our guide useful!


