
"To skip disk checking, press any key within 8 seconds" typically appears during Windows startup when the system detects possible disk errors or improper shutdowns. Although intended to help maintain disk health, frequent appearances of this message can become disruptive, especially if the disk checks are not necessary. Disabling this automatic check can streamline your boot process and save valuable startup time.
Method 1: Using Command Prompt to Disable Automatic Disk Checking
The most effective way to disable automatic disk checking is by using the Windows Command Prompt. This method directly modifies the system's disk checking settings and ensures the message no longer interrupts your boot process.
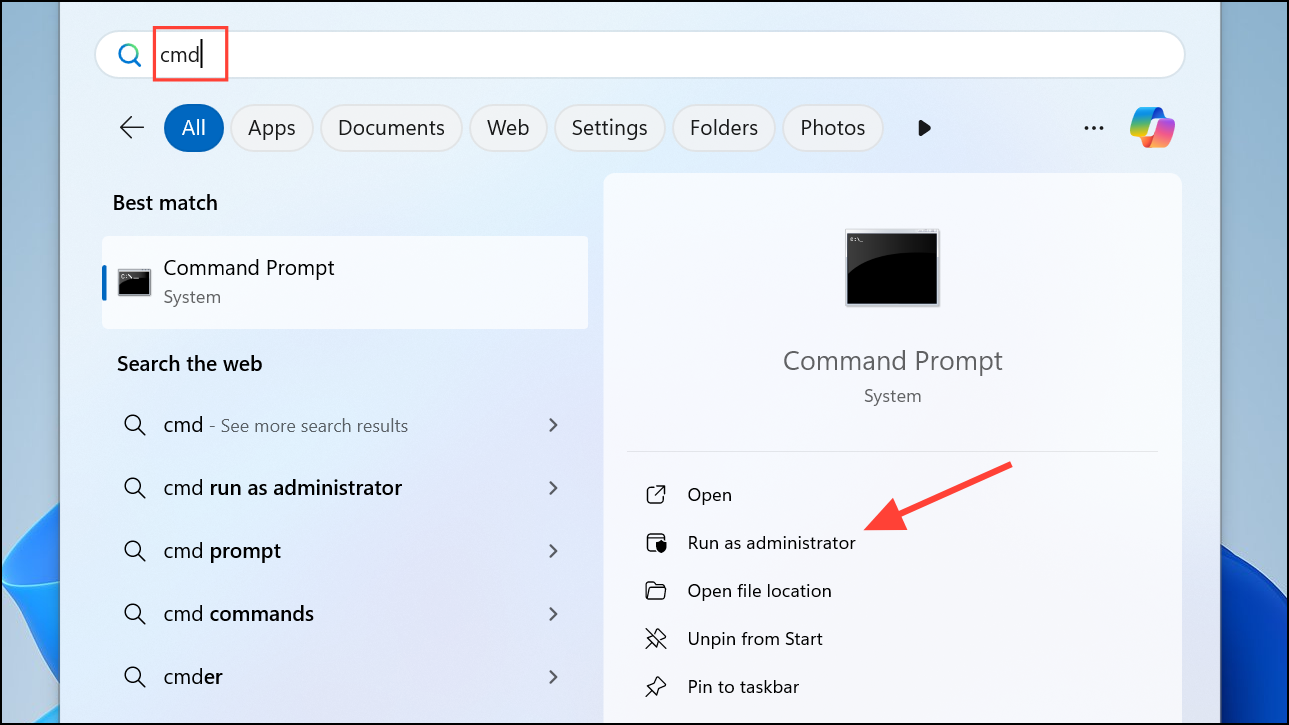
Step 1: Launch Command Prompt with administrative privileges. To do this, press Windows Key + S, type cmd, right-click on "Command Prompt," and select "Run as administrator."
Step 2: In the Command Prompt window, type the following command and press Enter:
chkntfs /x C: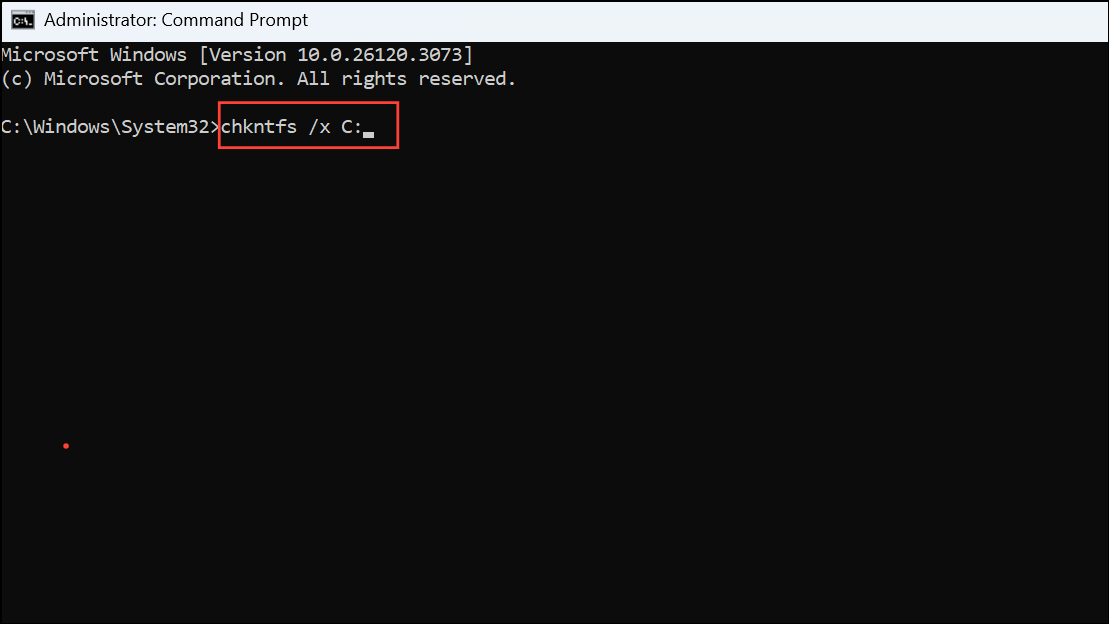
This command instructs Windows to exclude drive C: from automatic disk checking at startup. If you have additional drives (like D: or E:), include them in the command separated by spaces, for example: chkntfs /x C: D:.
Step 3: After entering the command, close the Command Prompt and restart your computer. The "To skip disk checking" message should no longer appear during startup.
To re-enable automatic disk checking in the future, simply run the following command in an elevated Command Prompt:
chkntfs /d
This resets disk checking behavior to the default settings.
Method 2: Editing the Windows Registry to Disable Disk Checking
If the Command Prompt method doesn't work or you're comfortable editing Windows Registry settings, you can disable automatic disk checking through Registry Editor. Note that modifying the registry incorrectly can cause system instability, so proceed carefully and consider creating a backup before making changes.
Step 1: Press Windows Key + R, type regedit, and click "OK" to open the Registry Editor.

Step 2: Navigate to the following registry path:
HKEY_LOCAL_MACHINE\SYSTEM\CurrentControlSet\Control\Session Manager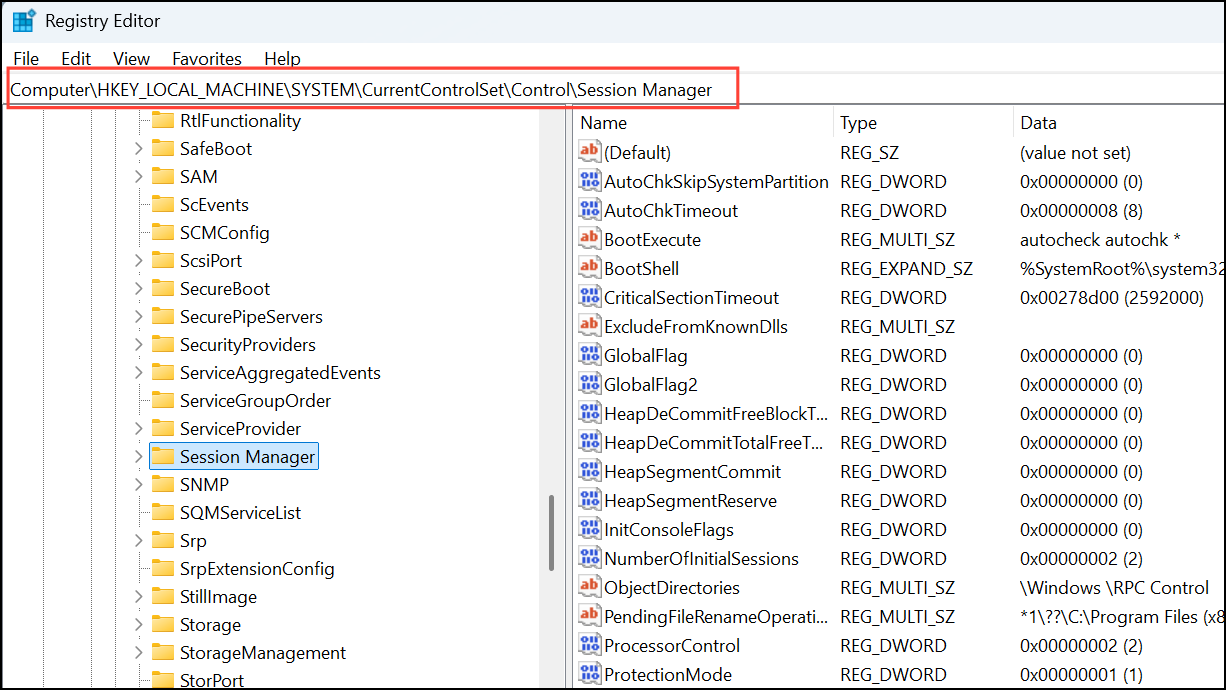
Step 3: In the right pane, locate and double-click the entry named BootExecute.

Step 4: You will see a value similar to autocheck autochk *. To disable automatic disk checking completely, change this value to simply:
autocheck autochk /k:C *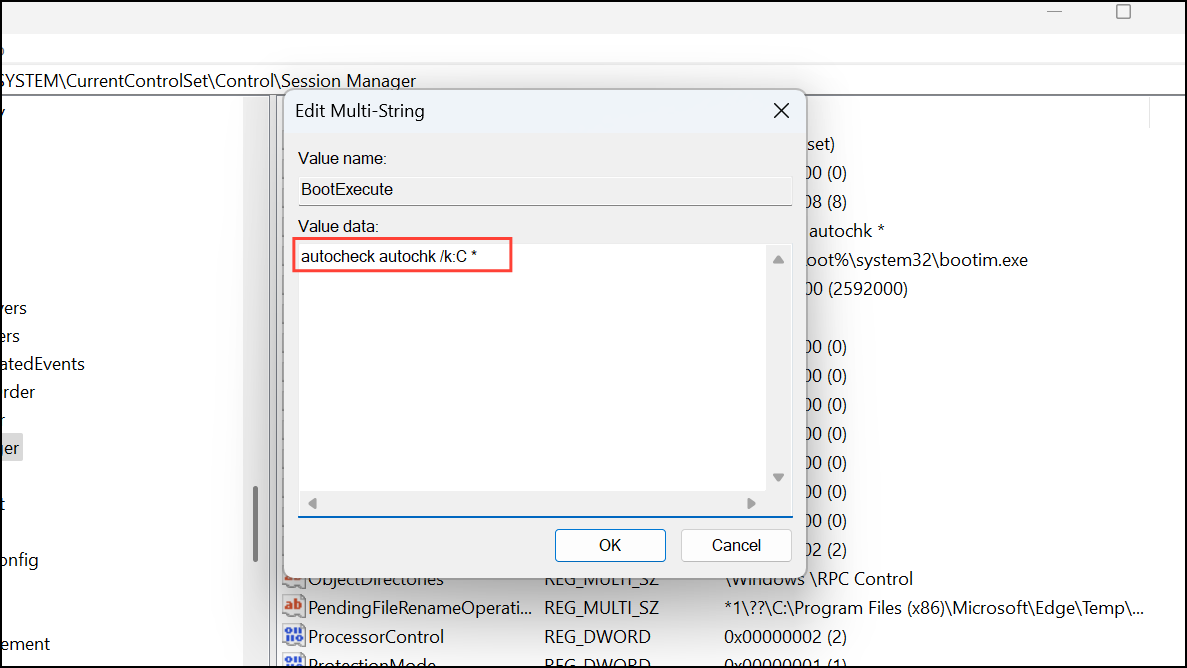
This modification disables automatic disk checking specifically for drive C:. If you have other drives, add them similarly, separated by spaces (e.g., autocheck autochk /k:C /k:D *).
Step 5: Click "OK" to save the changes, close Registry Editor, and restart your computer. Automatic disk checking should now be disabled.
If you later decide to revert this change, simply restore the original value to autocheck autochk *.
Method 3: Checking Disk Health and Fixing Errors Manually
If the disk check message appears frequently, your drive might have underlying issues. Instead of disabling the automatic check, you may want to run a manual disk check and repair any potential errors before disabling the feature. This ensures your drive remains healthy and your data secure.
Step 1: Open Command Prompt as administrator by pressing Windows Key + S, typing cmd, right-clicking on "Command Prompt," and selecting "Run as administrator."
Step 2: Enter the following command and press Enter:
chkdsk C: /f /r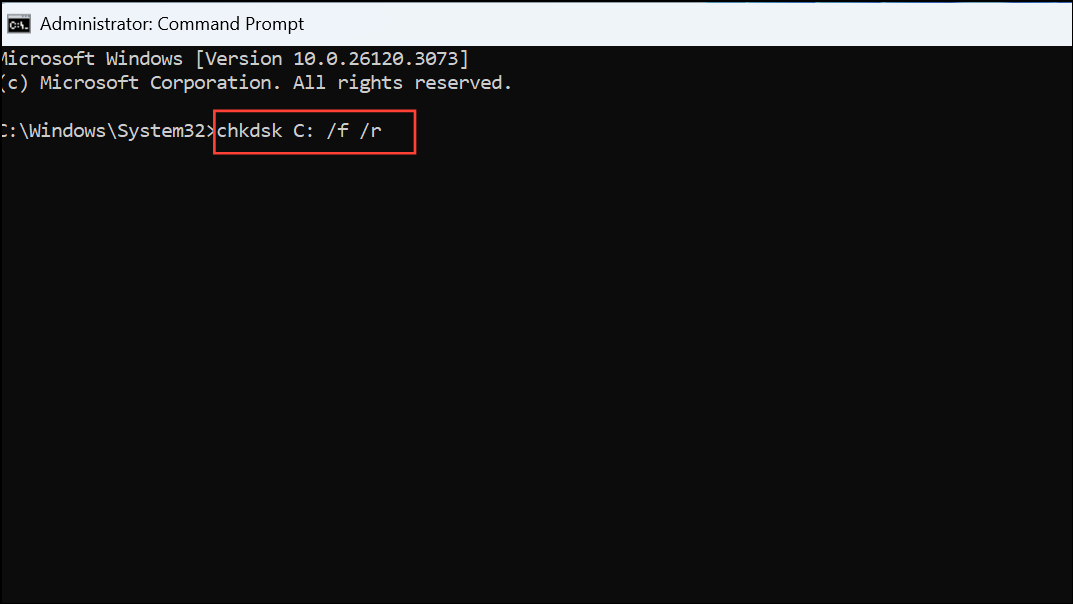
This command scans your drive C: for errors, fixes them, and attempts to recover readable information from bad sectors. You might be prompted to schedule this check for the next reboot, as the process requires exclusive disk access.
Step 3: Restart your computer and allow the disk check to complete fully. After this, the frequent automatic disk check prompts should significantly reduce or disappear altogether.
Once you've ensured your disk is healthy, you can proceed to disable the automatic check using Method 1 or Method 2 above if desired.
With these methods, you can easily disable or manage the automatic disk checking feature during Windows startup. Your boot times will improve, and you'll no longer need to press a key every time you restart your computer.