Google Photos is certainly a favorite when it comes to storing your photos. One of its biggest selling points used to be the unlimited storage it offered its users. But as the past tense indicates, things are no longer the same. Google Photos doesn’t offer free unlimited storage anymore. Starting from June 1, 2021, all users are entitled to only 15 GB of free storage.
For additional storage, you need to subscribe to one of their paid storage plans. iCloud – another cloud storage service popular with Apple users – offers only 5 GB of free storage. But many of you might already be paying for the service. And it doesn’t make sense to pay for two cloud services.
Also, it could be that you’ve exceeded 15 GB of your storage and want to invest in a service. Now, you can decide to go either way. But if you factor in the Apple One bundle, iCloud would again make more sense than Google Photos for most Apple users.
Now, whether you want to shift to iCloud for this reason or you’re shifting to an iPhone from Android and want to start using iCloud – whatever your reason may be, it’ll require you to transfer photos from Google Photos to iCloud.
Unfortunately, there isn’t a direct option in either service that’ll export your photos in just one click. You’d have to go through some hoops to achieve your goal here.
Use Google Photos App or Website to Transfer Your Photos
You can transfer photos from Google Photos to iCloud from either your PC/ Mac or your iPhone/ iPad by first downloading them.
Downloading Photos from the Desktop
On your PC/ Mac, go to photos.google.com to open Google Photos and sign in to your Google account.
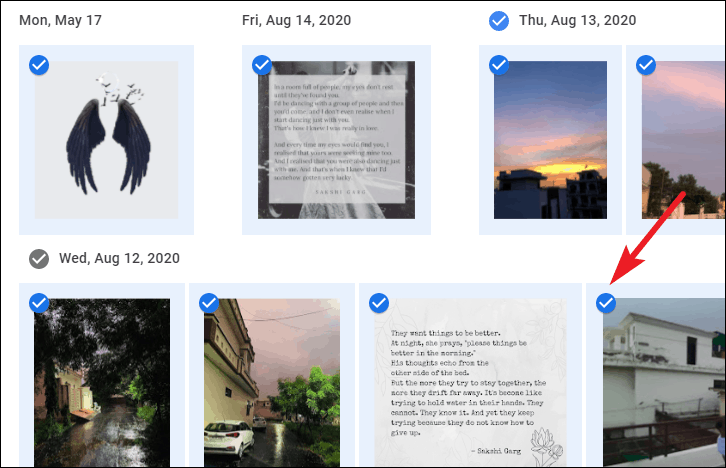
Now, select the photos you want to transfer or export. In Google Photos, your photos are categorized according to data. You can select all photos from a particular date in one fell swoop. But selecting more photos can be time-consuming. One quick way is to select a single photo. Then, scroll all the way down if you want to select all photos. Or go to the photo till which you want to transfer the photos. Then, press the ‘Shift’ key. You’ll see that all the photos will appear highlighted in blue.
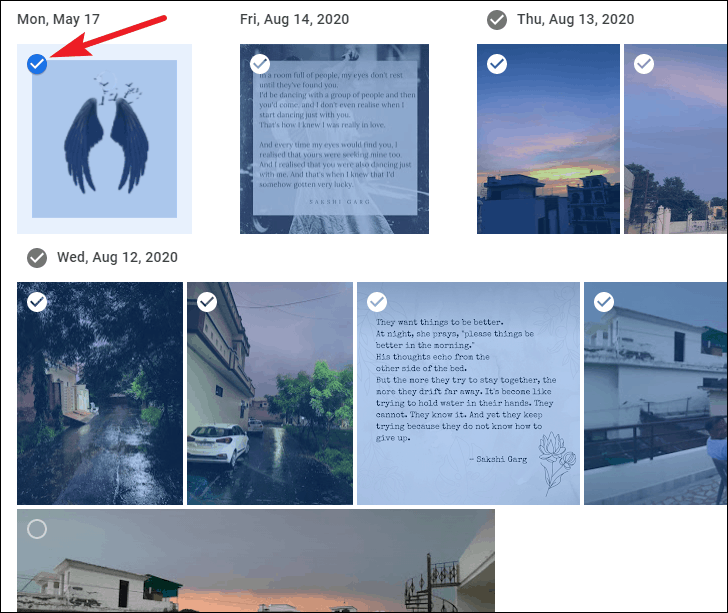
Click that last photo and all photos will be selected. You can also download only specific photos by individually selecting them.
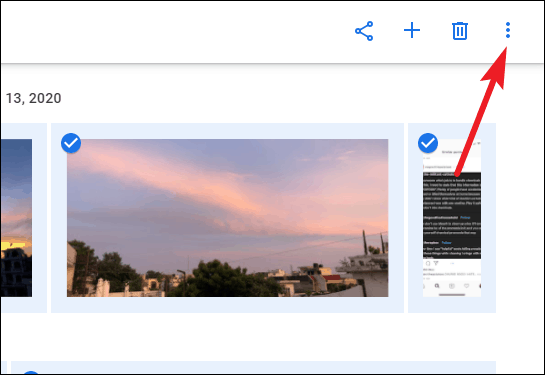
Then, click the ‘More options’ icon (three-dot menu) on the top-right corner.
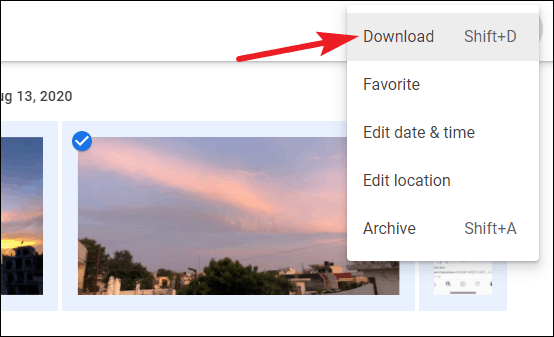
Select ‘Download’ from the options. You can also use the keyboard shortcut ‘Shift + D’ to download the photos.
Downloading Photos from iPhone
Open the Google Photos app on your iPhone or iPad.
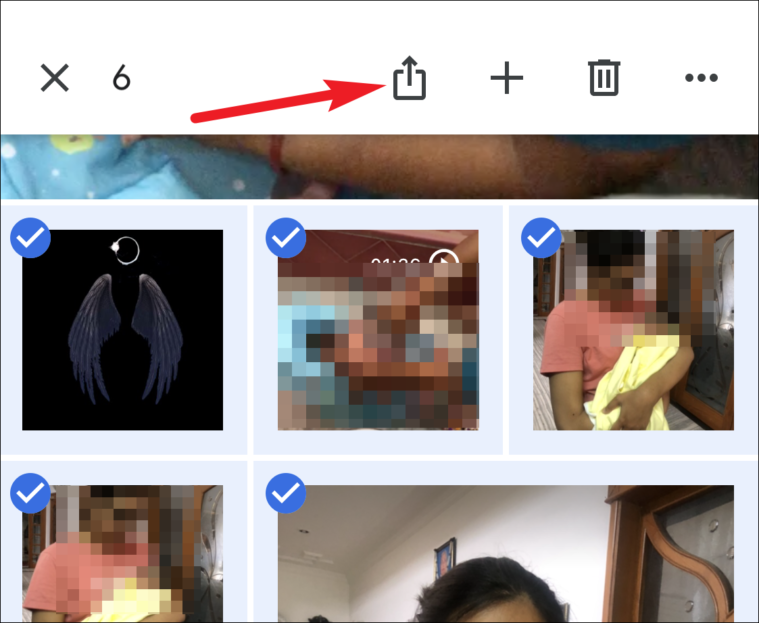
Then, select the photos/ videos you want to download on your phone. To select a photo, tap and hold. The photo will be selected. To select multiple consecutive photos, long-tap a photo and don’t lift your finger once it’s selected. Drag your finger over the photos you want to select. To scroll while selecting, drag your finger to the lower corner of the last photo strip visible. The photos will start scrolling downwards while getting selected.
Then, tap the ‘Share’ icon from the options on the top.
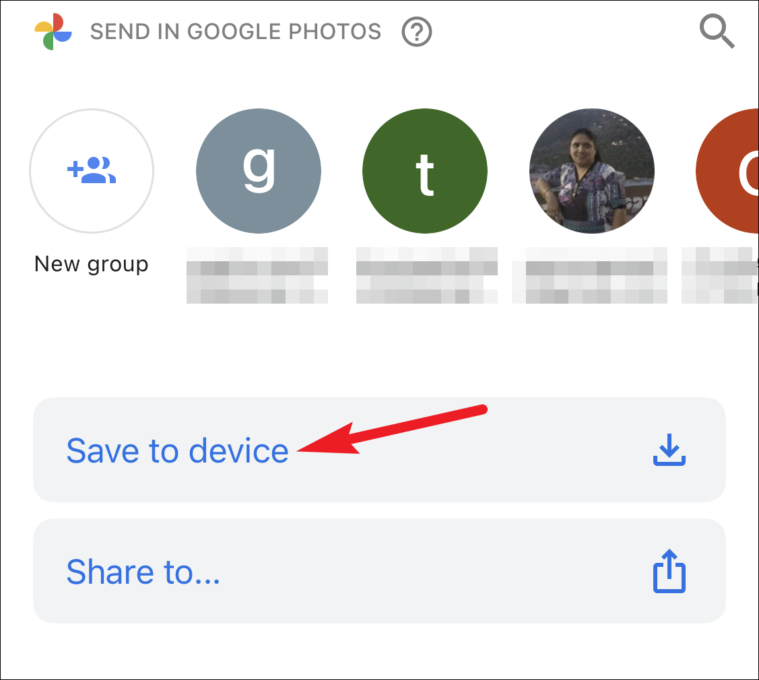
Select ‘Save to device’ from the menu that appears. The option to save the photo on the device won’t appear if the photos you want to download are already on your device.
Use Google Takeout to Transfer your Photos
Google Photos can have years worth of memories for some people. And manually selecting all of them can be a task too daunting and laborious. Instead of wasting all the time selecting your photos to download them, you can use Google Takeout for a one-click download.
Go to takeout.google.com from your web browser. Log in to your Google account if you haven’t. But if your account is logged in to the browser, it’ll automatically log in, just like other Google services.
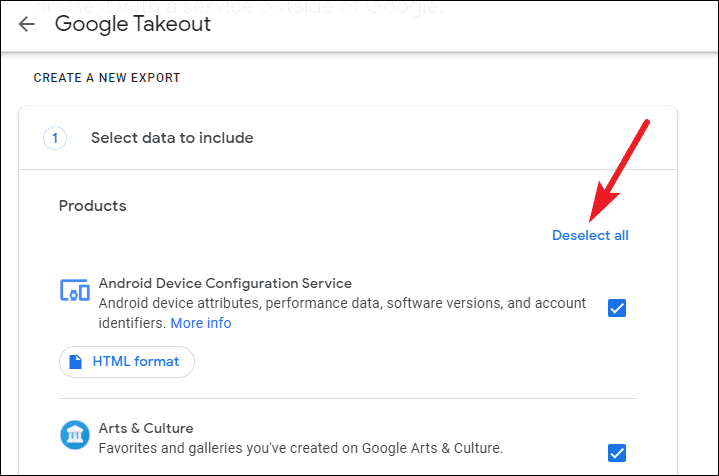
Now click the ‘Deselect All’ button under the first step, i.e., select data to include.
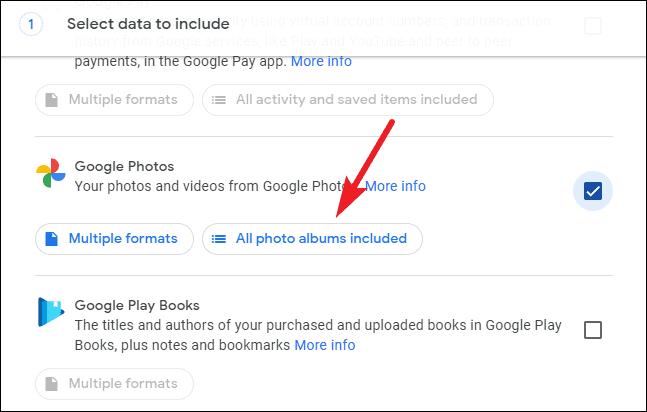
Scroll down and find Google Photos from the list of services. Click the checkbox to select Google Photos.
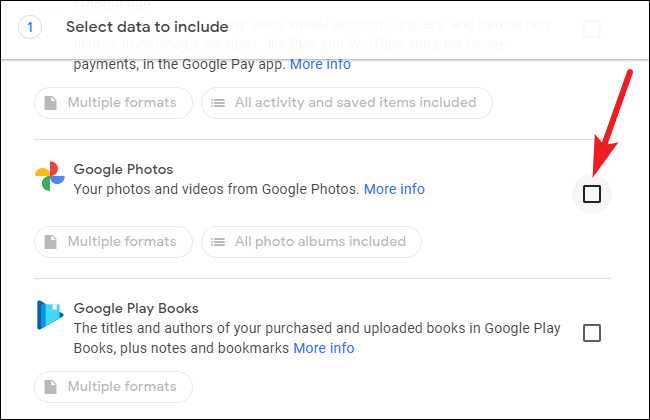
By default, it’ll include all your data from Google Photos. Click the ‘All Photo Albums Included’ button to change that.
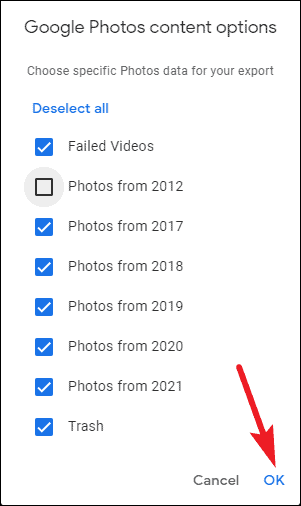
Then, deselect the albums you don’t want to export and click ‘Ok’.
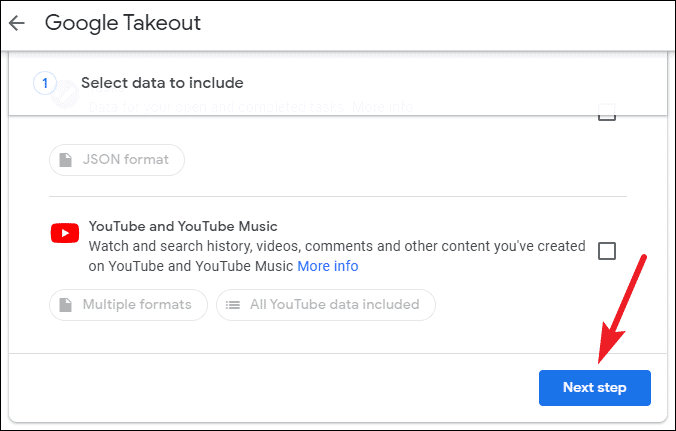
Scroll to the bottom again, and click ‘Next Step’ to proceed to the second step.
The second step involves choosing the file type, frequency, and destination of your download.
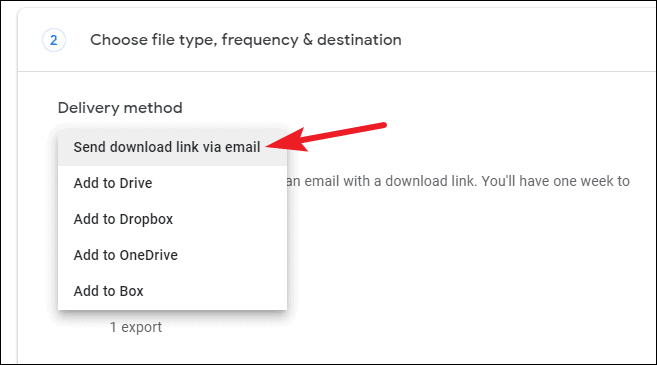
Under the delivery method, select how or where you want to download the photos. You can choose to get the download link via email or add the photos directly to cloud storage services like Dropbox, Drive, OneDrive, or Box. Unfortunately, iCloud isn’t a part of this lineup that allows you to directly export your images from Google Photos to another service. The best course of action is to select ‘Send download link via email’.
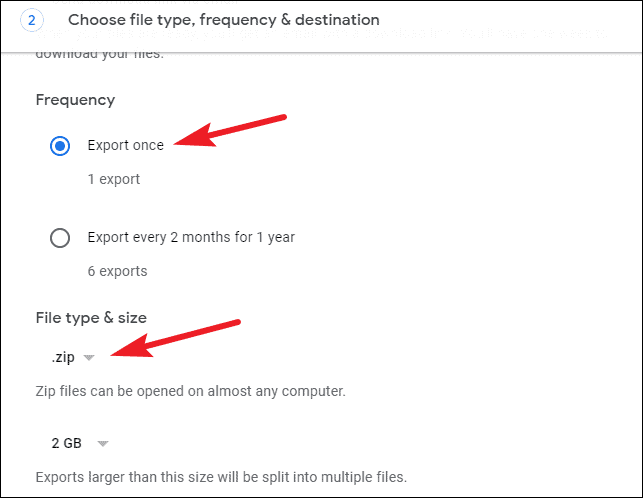
Under Frequency, select ‘Export once’ to get all your photos now. Then, select the file type and size for your downloads.
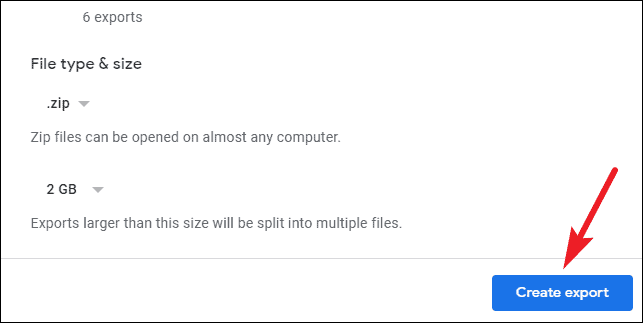
Once all the settings are in place, click the ‘Create Export’ button.
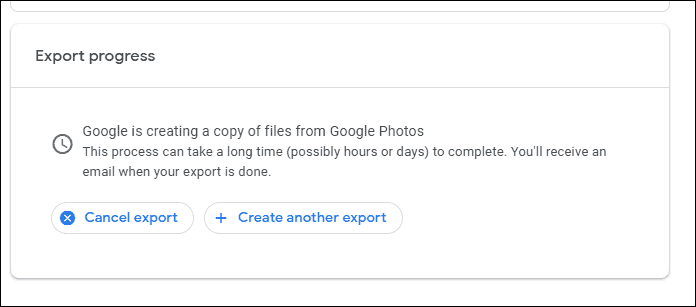
Depending on the size of your library, the export can take hours or even days to complete. You’ll see the ‘Export Progress’ option o your Google Takeout page.
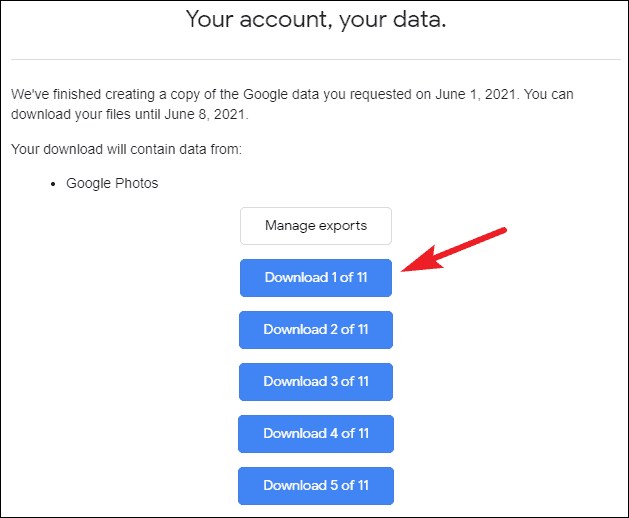
You’ll receive an email when the export is complete. If you open the Google Takeout page, a ‘Download’ option will appear there too after the export is complete. Google Takeout gives you 7 days to download your data.
Importing your Google Photos to iCloud
Whether you’ve downloaded the pictures from Google Photos on your PC or iPhone, you can export them to iCloud from both. But to do either, you should first have iCloud Photos enabled on your iOS/macOS device.
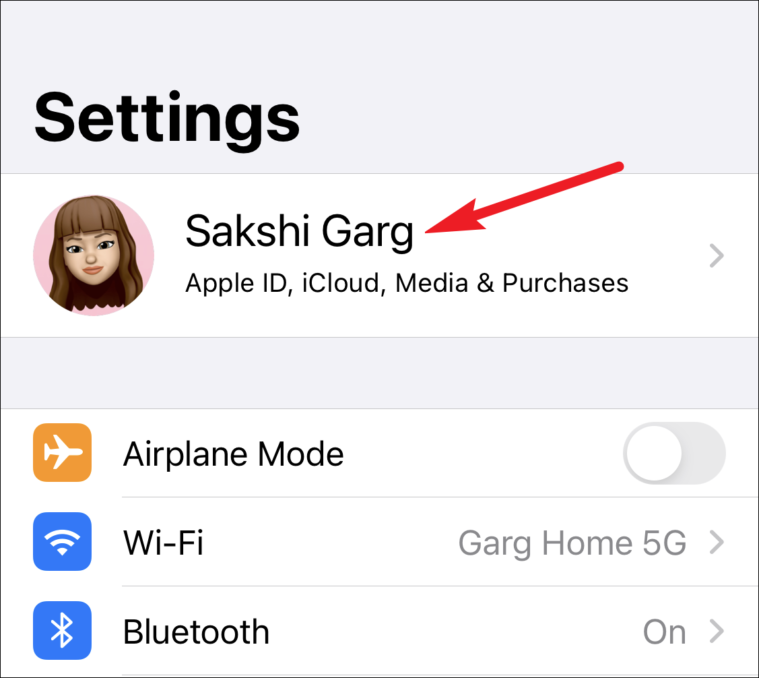
From your iPhone or iPad, open the Settings app and tap your name card at the top.
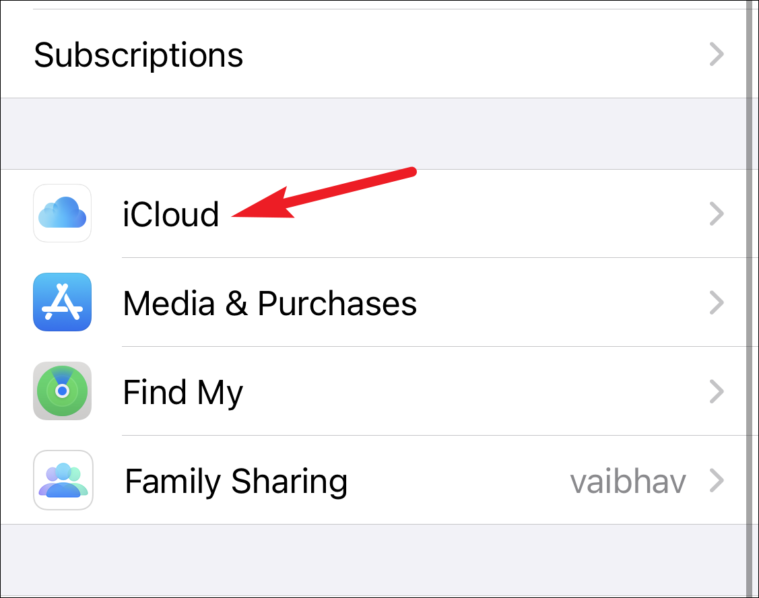
Then, tap ‘iCloud’ to go to iCloud settings.
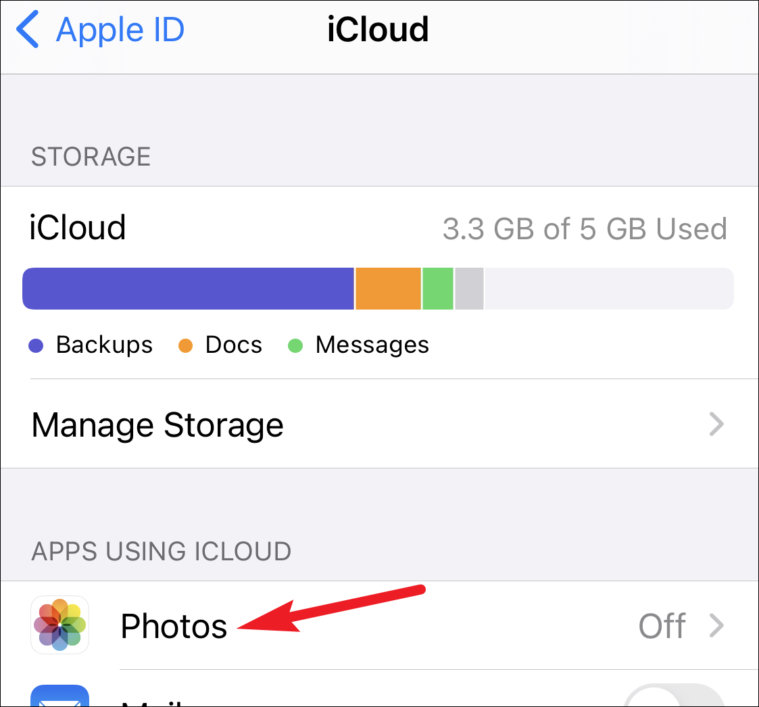
Tap ‘Photos’ from the list of apps using iCloud.
Then, turn on the toggle for ‘iCloud Photos’.
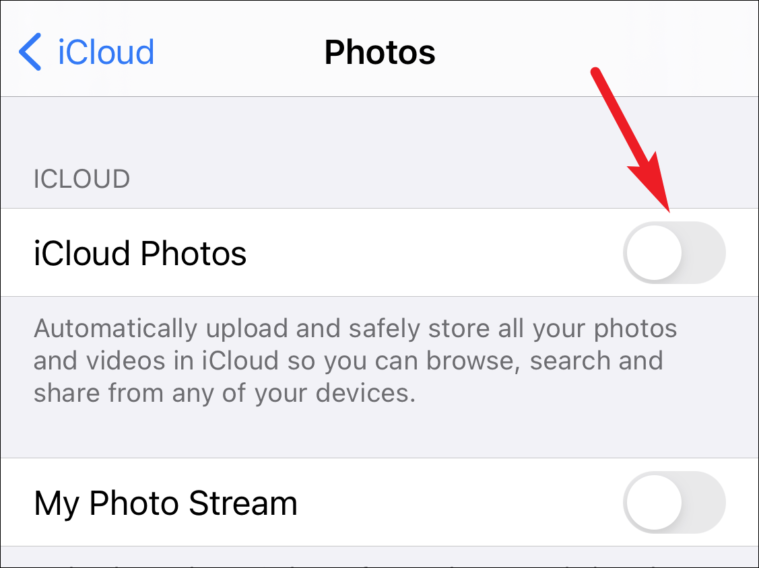
When iCloud Photos is on, if you have enough space in your iCloud storage, all photos on your device will be automatically uploaded to iCloud. And that’ll include the photos you downloaded from Google Photos.
If your iCloud Photos was already on, then you don’t need to do anything after downloading photos from Google Photos to your iPhone. They’ll automatically be uploaded to iCloud.
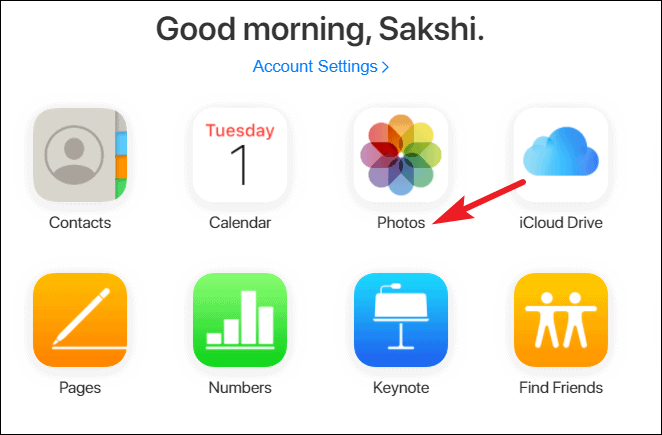
To upload photos from your PC, go to icloud.com and sign in to your Apple account.
Then, go to ‘Photos’.
Click the ‘Upload’ button (cloud icon) and upload the photos you’ve previously downloaded to iCloud.
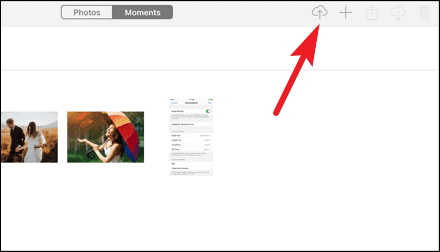
Once the upload is complete, you would have successfully transferred your Google Photos pictures to iCloud.
Moving from one service to another can be a bit challenging, especially when there’s no straightforward option to move your data from one to the other. But it isn’t impossible. And using this guide, you can easily move your photos and videos from Google Photos to iCloud.

