
Video conferencing has become the new normal for the last year and the trend is likely to continue. Professionals attend meetings through video conferencing while students have their classes on these platforms. Ever since these platforms became mainstream, they have been adding various user-friendly features.
‘Live captions’ or ‘Closed captions’ by Zoom is one such feature that has sort of enhanced the accessibility and widened its reach. For instance, if you are unable to understand someone’s accent or are suffering from a hearing impairment. This is where ‘Live Captions’ come into the picture.
Zoom also creates a transcript of the whole conversation when the live caption is enabled. These transcriptions come in handy if you missed a certain part of the conversation and want to revisit it.
Request Access to Live Transcription through Google Form
Zoom automatically provides live captions in real-time using Artificial Intelligence (AI). However, you first have to fill out a Google Form and wait for Zoom to accept your request. Due to the high amount of requests, it may take a while for them to process yours.
After you have filled out the form, check your mails for an acknowledgment of acceptance of the request. After the feature is available for your account, proceed to the next step.
Enabling Live Caption in Zoom
Once the feature is available for your account, you will have to enable it from the account settings on the Zoom website. This is a one-time process and after you have enabled it, you can easily start ‘Live Caption’ during a Zoom meeting.
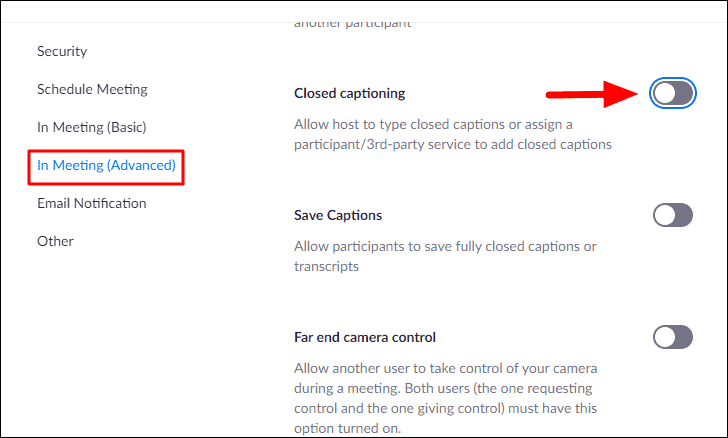
To enable, go to zoom.us/profile/setting and navigate to the ‘In Meeting (Advanced)’ under the ‘Meeting’ tab. Locate the ‘Close captioning’ option and then click on the toggle next to it to enable the feature.
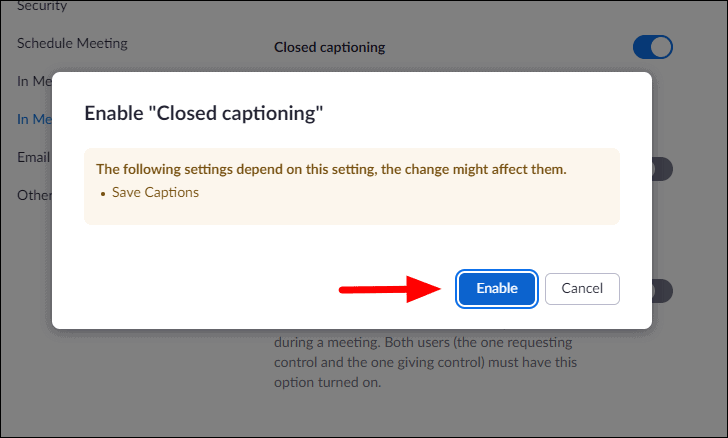
You will now receive a prompt asking if you want to enable it, click on ‘Enable’ to confirm and proceed.
Next, select the “Enable live transcription service to show transcript on the side panel in-meeting” option and click on ‘Save’ under it.

The ‘Live Caption’ and ‘Live Transcription’ feature has been enabled for your account. You can organize a meeting and start the ‘Live Captions’ anytime you want.
Starting Live Captions in Zoom on Desktop
The process is fairly simple and the live caption can be started anytime during the meeting. Although, only the host can start live captions.
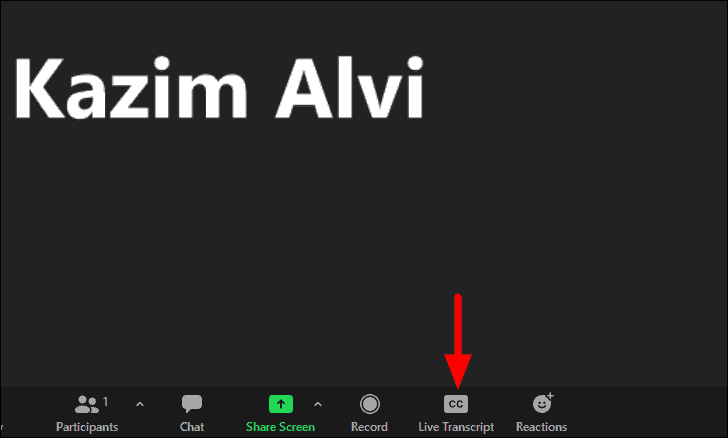
Once in a Zoom meeting, you will find the ‘Live Transcript’ option at the bottom, click on it.
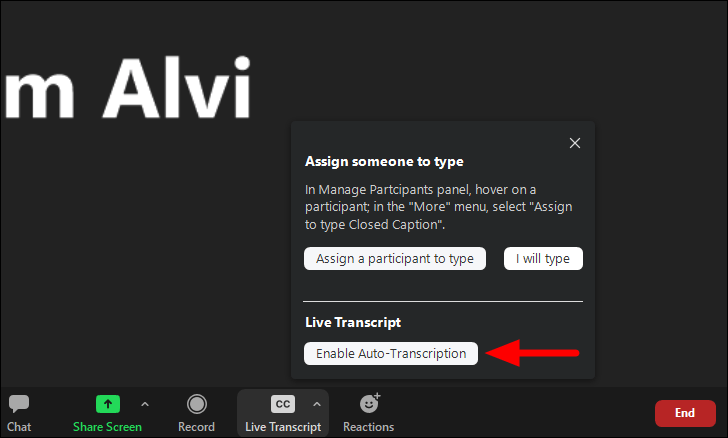
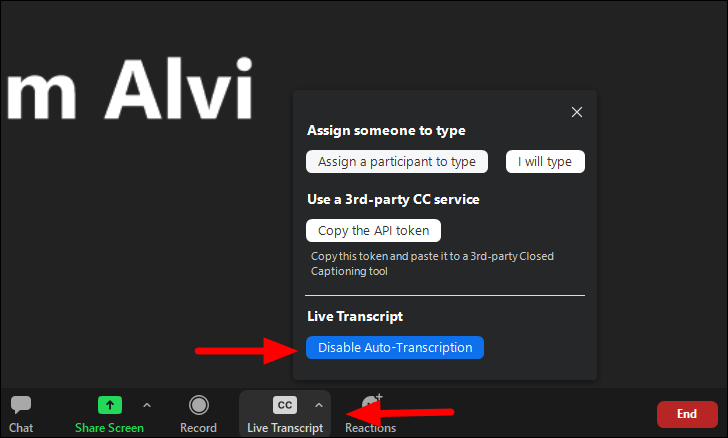
You will now find three options in the box that appears, either to assign someone to manually type the captions, type yourself, or enable auto-transcription.
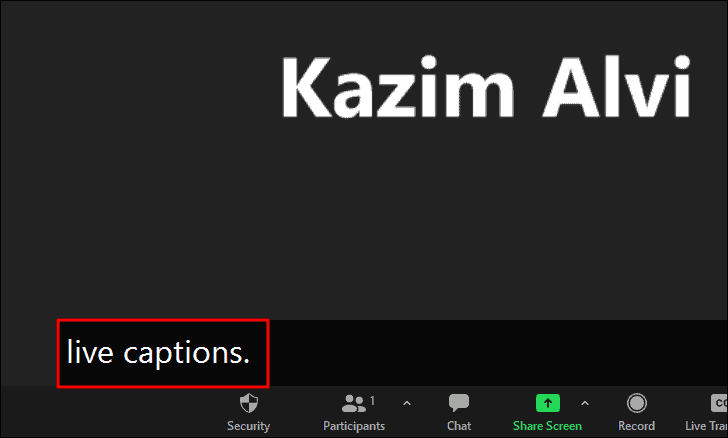
To enable Live Captions, click on ‘Enable Auto-Transcription’ under ‘Live Transcript’.
The captions will now appear on the screen in real time as the members speak.
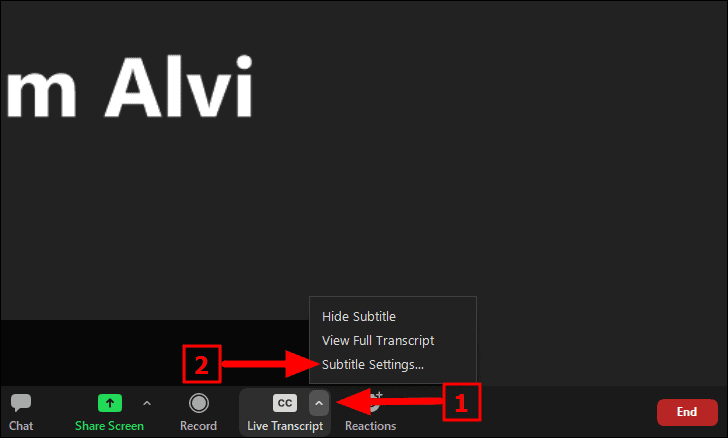
However, you might want to change the caption/subtitle settings, maybe to change the font size for better readability. To do so, click on the arrow that appears when you hover the cursor over ‘Live Transcript’ and select ‘Subtitle Settings’ from the menu.
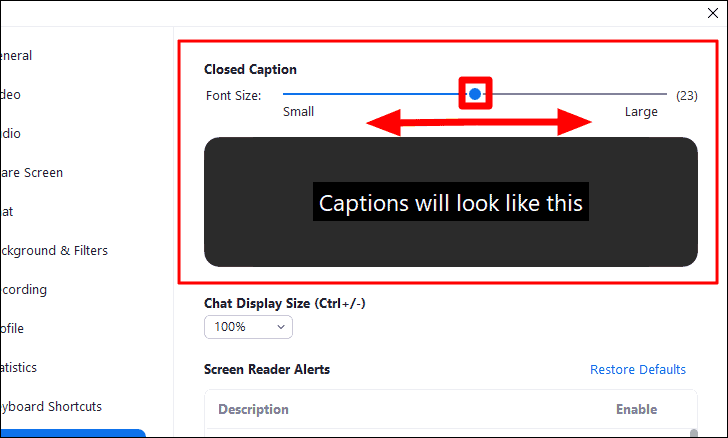
You can now drag the slider on either side to change the font size. Moving it to the right will increase the size while moving the slider to the left will decrease it. Also, you get a preview of how the captions will look under the different font sizes.
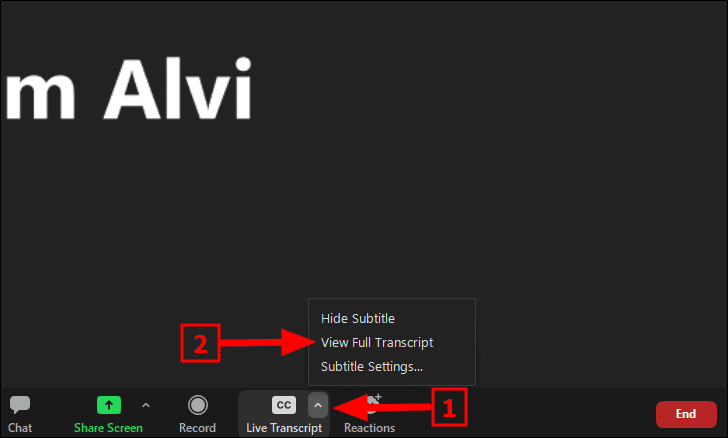
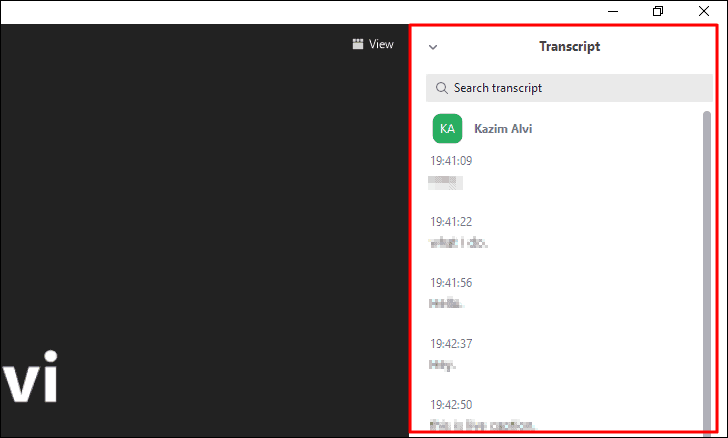
To view the full transcript, again hover the cursor over ‘Live Transcript’, click on the arrow at the top-right corner of the option, and then select ‘View Full Transcript’.
The conversation that happened after enabling live captions will now be visible in the ‘Transcript’ window that appears on the right.
Also, you can disable Live Captions any time you want during the course of the meeting.
To disable Live Captions in Zoom, click on the ‘Live Transcript’ option, and then select ‘Disable Auto-Transcription’ from the box that appears.
Starting Live Captions in Zoom on Phone
Many users operate Zoom on their phones owing to the ease of accessibility. The live captions feature is available on the mobile app as well, given, your request has been accepted and the feature enabled from the account settings.
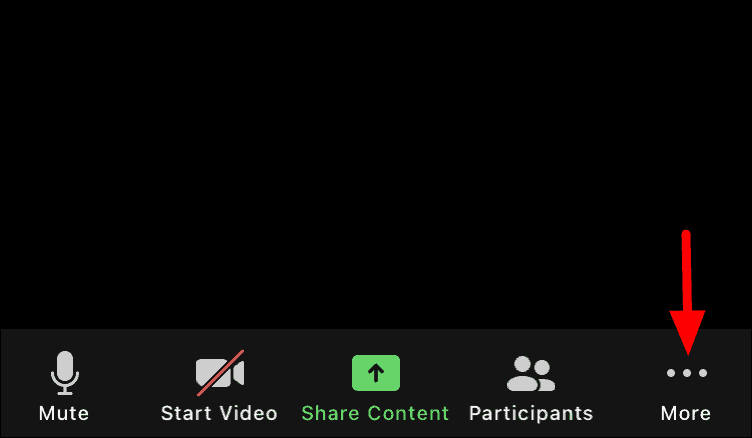
In a Zoom meeting, tap on the ‘More’ option at the bottom-right corner.
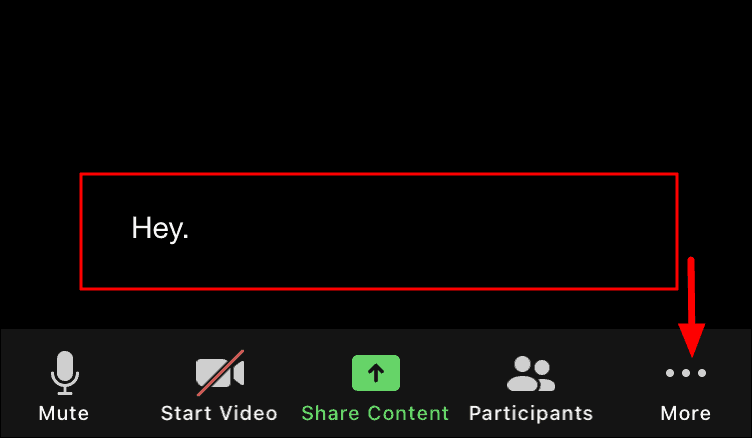
To enable Live Captions, tap on ‘Enable Live Transcript’ from the list of options in the menu.

The live captions will now be displayed on the screen just above the menu at the bottom.
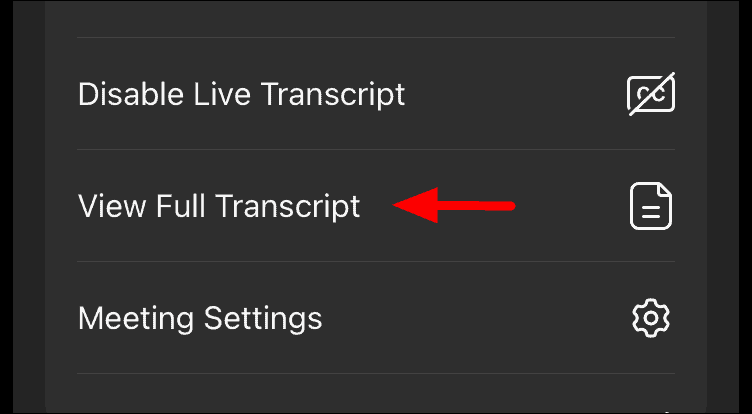
To view the Full Transcript, again click on the ‘More’ option.
Next, select ‘View Full Transcript’ from the options in the menu.
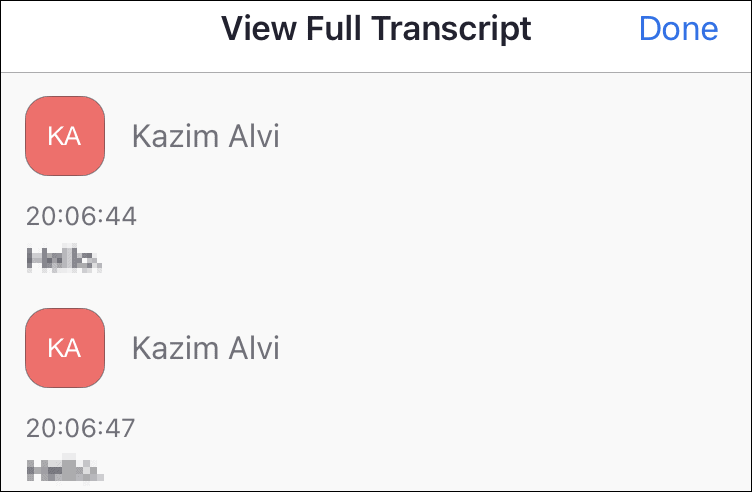
The transcript of the conversation will now be displayed on the screen with the speaker’s name mentioned.
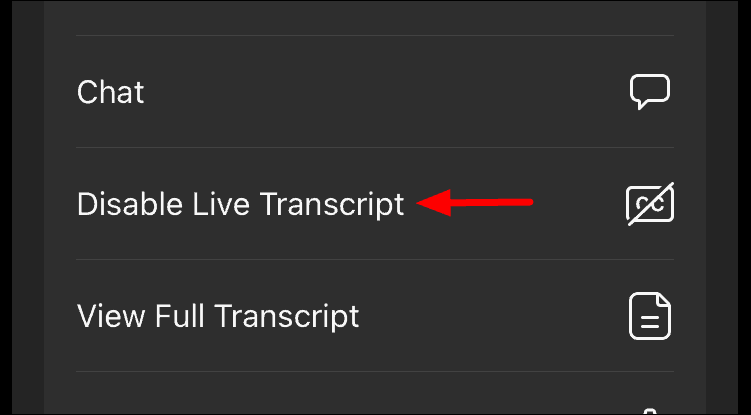
To disable Live Captions, all you have to do is tap on the ‘More’ icon to view the list of options and then select ‘Disable Live Transcript’.
That’s all there is to know about ‘Live Captions’ in Zoom. Live captions currently support only the ‘English’ language. Also, it is not entirely effective and there might be some errors while transcripting.


