Google Chrome's high memory consumption can significantly impact your computer's performance, especially when multiple tabs and extensions are active. This excessive RAM usage may cause other applications to slow down or become unresponsive due to limited available resources.
To address this issue, Chrome offers the Memory Saver feature, which helps reduce memory usage by deactivating inactive tabs. This ensures that active tabs and other applications have enough memory to function smoothly.
What is Chrome's Memory Saver Feature?
The Memory Saver feature in Chrome conserves RAM by putting inactive tabs to sleep. These tabs are temporarily deactivated and freed from memory usage. When you return to an inactive tab, Chrome automatically reloads it, allowing you to pick up where you left off. This optimization not only enhances browser performance but also improves the efficiency of other programs running on your computer.
Additionally, reduced memory consumption can lead to better battery life on laptops and other portable devices. The feature is available starting from Chrome version 110, so ensure your browser is up to date to take advantage of Memory Saver.
According to Google, using Memory Saver can result in up to 40% less memory usage, freeing up to 10 GB of RAM for other tasks.
Activities That Prevent Tab Deactivation
Certain activities keep tabs active and prevent them from being deactivated by Memory Saver. These activities include:
- Audio or video playback, including calls.
- Screen sharing sessions.
- Active downloads from the website.
- Partially filled forms.
- Interactions with USB or Bluetooth devices.
- Website notifications.
How to Enable or Disable Memory Saver in Chrome
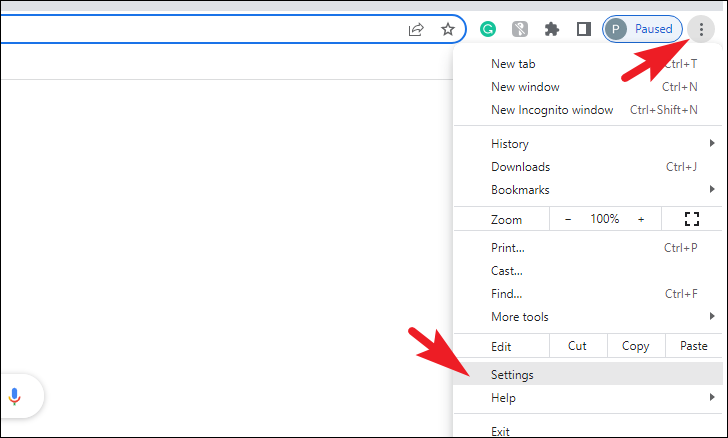
Step 1: Open Google Chrome on your computer. Click on the three-dot menu (ellipsis icon) located at the top-right corner of the browser window. From the dropdown menu, select Settings.
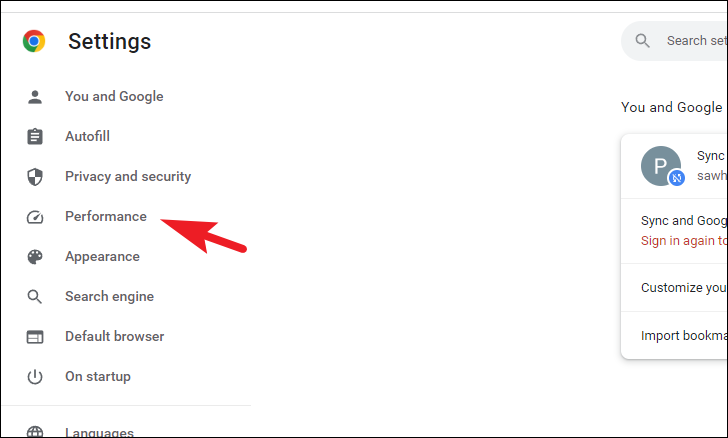
Step 2: In the Settings menu, look at the left sidebar and click on Performance. This section contains settings related to optimizing Chrome's performance.
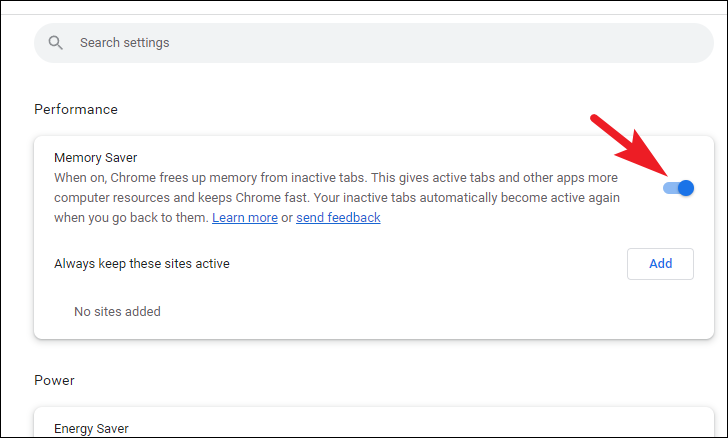
Step 3: To enable Memory Saver, locate the Memory Saver option and click the toggle switch to turn it on. If you wish to disable the feature, click the toggle switch again to turn it off.
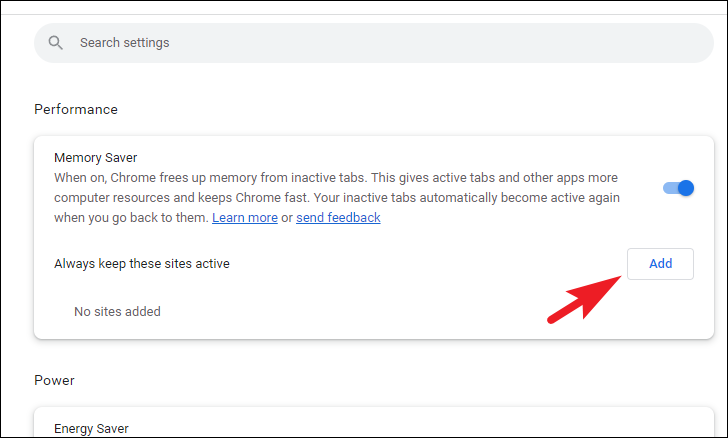
Step 4: If certain websites are affected by Memory Saver and you want them to remain active, you can add them to the exemption list. Click on the Add button next to the "Always keep these sites active" option.
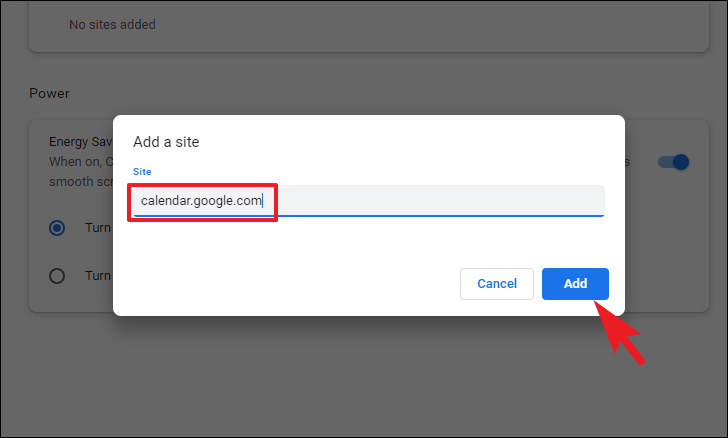
Step 5: In the dialog that appears, enter the URL of the website you want to keep active. You can specify domains, subdomains, or specific pages. For example:
To keep all subdomains of Google active, enter google.com. This will include sites like drive.google.com and calendar.google.com.
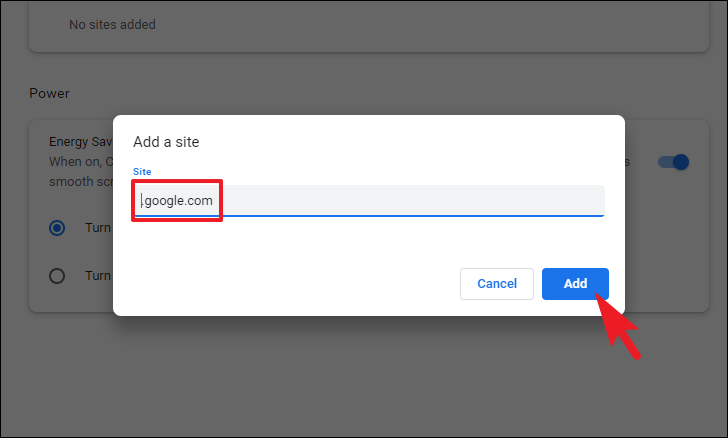
To keep only the main domain active and not its subdomains, add a dot before the domain: .google.com. This excludes subdomains but keeps www.google.com active.
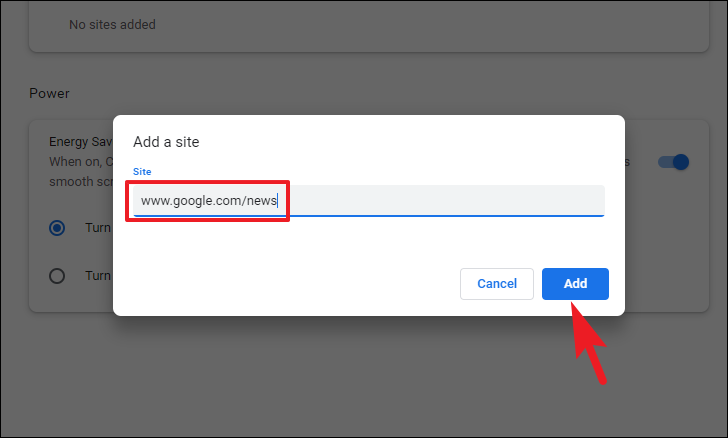
For specific subdirectories, include the full path. For instance, entering www.google.com/news will keep only the news section active while allowing other sections to be deactivated.
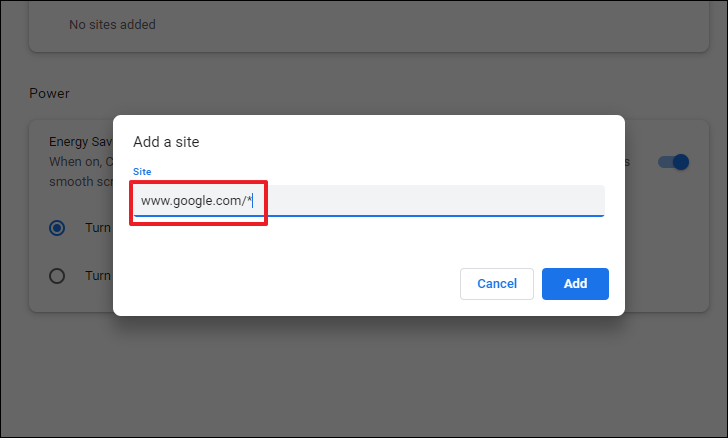
Step 6: To use wildcards for patterns in URLs, you can include an asterisk (*). For example, entering www.youtube.com/watch?v=* ensures that all YouTube video pages remain active.
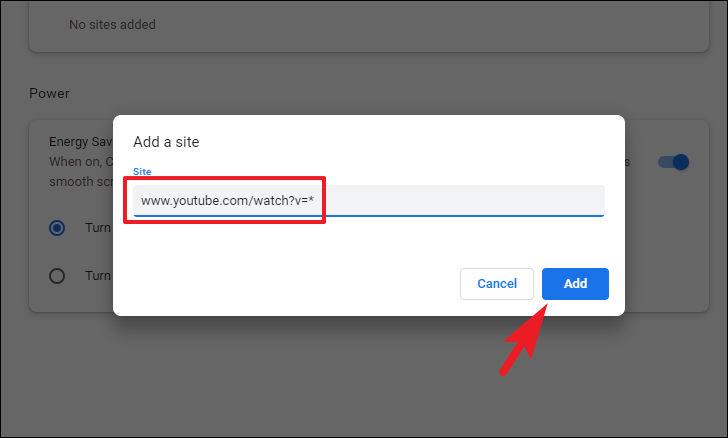
Note that wildcards can only be used in specific parts of the URL and not in the hostname or subdomain. For example, patterns like *oogle.com or www.google.com/* are not valid and will not prevent deactivation.
By managing the Memory Saver feature and customizing which sites remain active, you can optimize Chrome's performance and reduce its memory footprint, leading to a smoother experience on your computer.


