Trusted Platform Module (TPM) 2.0 is a critical hardware-based security feature required for Windows 11 compatibility. TPM securely stores encryption keys, passwords, and certificates, significantly strengthening your device's protection against unauthorized access and attacks. If your Asus laptop supports TPM 2.0 but it's currently disabled, enabling it through BIOS is straightforward and essential for security compliance and Windows 11 installation.
Checking Your Laptop's TPM 2.0 Compatibility
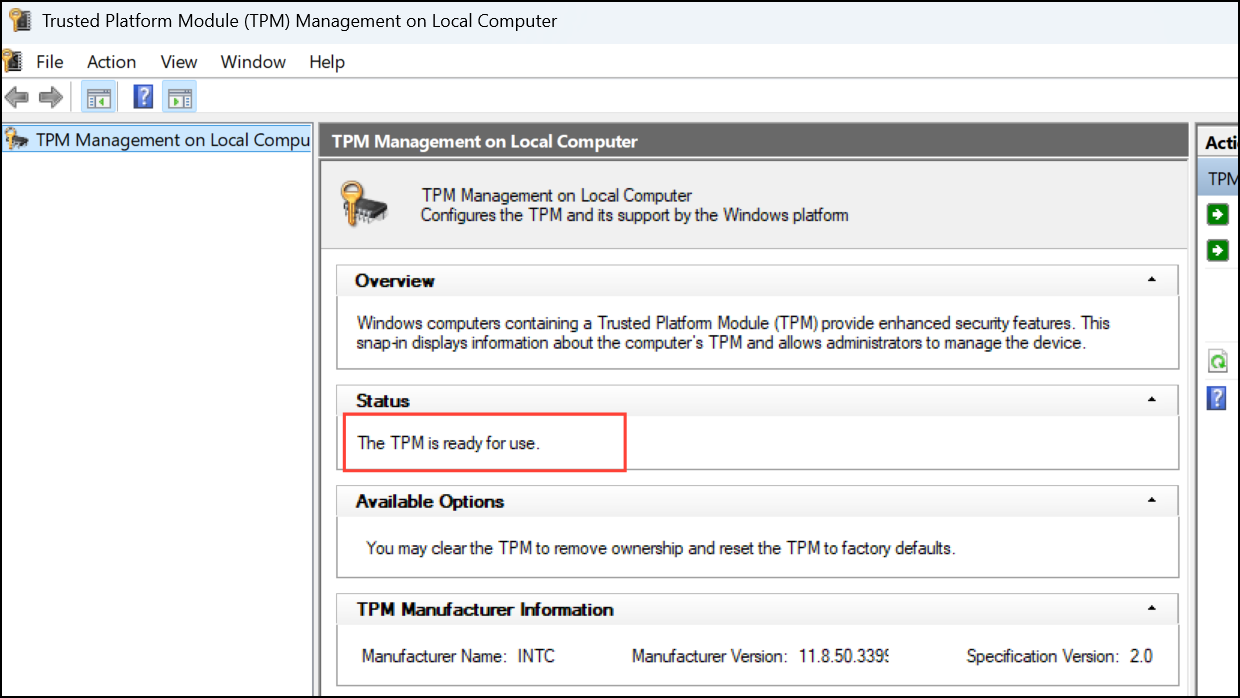
Before enabling TPM 2.0, confirm your Asus laptop supports it. Press Win + R, type tpm.msc, and press Enter. The TPM Management tool will open. If TPM is available, you'll see the status as "The TPM is ready for use," along with the specification version (ideally 2.0). If TPM is unavailable, you'll see "Compatible TPM cannot be found," indicating that TPM is disabled or not supported.

Enabling TPM 2.0 in BIOS on Asus Laptop
Step 1: Restart your Asus laptop and enter the BIOS setup. Typically, you can access BIOS by repeatedly pressing the F2 key during startup. Some Asus models may use the DEL or F9 keys instead. If you're unsure, refer to your laptop manual or the official Asus support page for BIOS entry instructions specific to your model.
Step 2: Once inside BIOS settings, switch to Advanced Mode by pressing F7 if you're initially in EZ Mode. Advanced Mode provides more detailed configuration options necessary for enabling TPM.
Step 3: Navigate to the "Advanced" tab in the BIOS. Look for "Trusted Computing" or "Security" settings. The exact wording may differ slightly depending on your laptop model and BIOS version.
Step 4: Within the "Trusted Computing" or "Security" menu, find the option labeled "Security Device Support." Set this option to "Enabled." This action activates TPM functionality on your device.
Step 5: If your Asus laptop uses an Intel processor, navigate to Advanced > PCH-FW Configuration and enable "PTT" (Platform Trust Technology). For AMD processors, select Advanced > AMD fTPM Configuration and set "TPM Device Selection" to "Firmware TPM." These options represent Intel's and AMD's firmware-based TPM implementations, respectively, and must be enabled to activate TPM 2.0.
Step 6: Save your BIOS settings by pressing F10 and confirm by selecting "OK." Your laptop will reboot automatically, applying the new TPM settings.
Verifying TPM 2.0 is Enabled
After rebooting, verify your TPM 2.0 activation by reopening the TPM Management utility. Press Win + R, type tpm.msc, and hit Enter. Confirm the status now shows "The TPM is ready for use," and ensure the specification version is 2.0.
If TPM still appears inactive, double-check your BIOS settings to ensure you correctly enabled "Security Device Support" and either "PTT" (Intel) or "Firmware TPM" (AMD).
Common Issues and Troubleshooting
If you encounter issues enabling TPM 2.0, here are a few quick troubleshooting tips:
- Ensure your BIOS firmware is updated to the latest version. Outdated BIOS versions may lack TPM 2.0 support or have compatibility issues. Visit the official Asus support site to download and apply the latest BIOS update.
- If the "Trusted Computing" menu or TPM options are missing entirely from BIOS, your laptop may not support TPM 2.0. Confirm your laptop's specifications on the Asus website or user manual.
- If your laptop supports discrete TPM hardware, ensure the TPM module is properly seated and installed. However, most Asus laptops use firmware-based TPM, eliminating the need for separate hardware.
Enabling TPM 2.0 on your Asus laptop is a quick and essential step toward improved security and compatibility with modern Windows operating systems. Once activated, TPM provides significant protection benefits, safeguarding your sensitive data effectively.


