Bookmarks are essential for quick access to frequently visited websites or pages you plan to revisit soon. They save time and effort when navigating the web, making browsing more efficient.
To prevent the loss of these valuable bookmarks—which could lead to increased time spent searching or even significant setbacks if they’re work-related—it’s wise to export them or create a backup. Additionally, you can use the backup file to import Chrome bookmarks into another browser if needed.
Before proceeding, ensure you’re signed into Chrome with your Google account. This not only helps in backing up your bookmarks but also synchronizes your data across all devices where you use the same account.
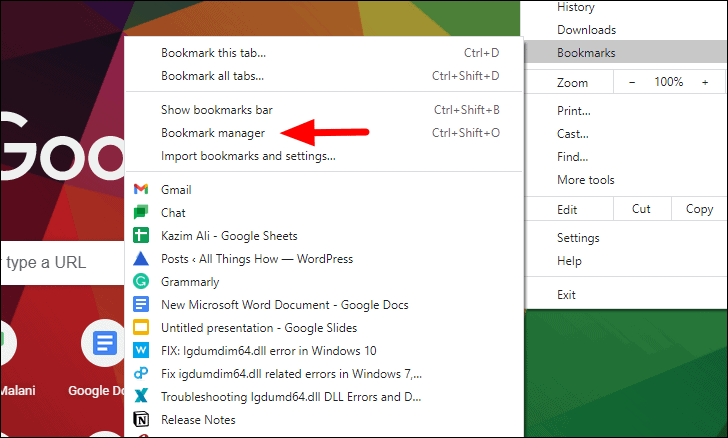
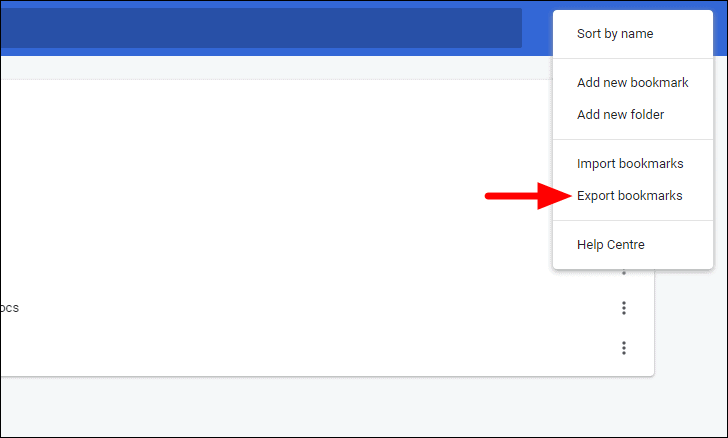
Exporting bookmarks in HTML format

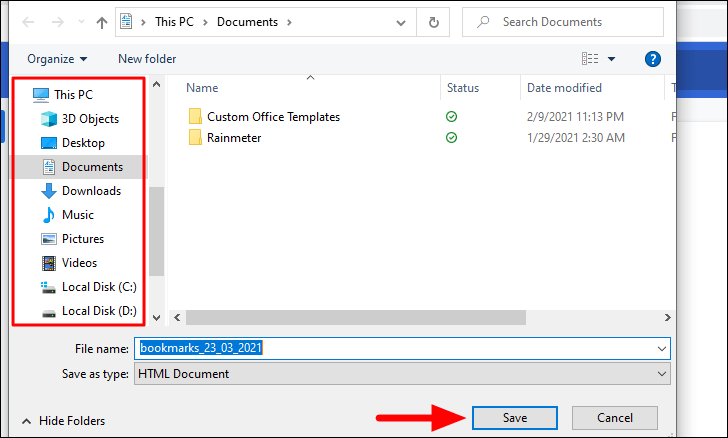
The bookmark file will be saved in HTML format on your computer.
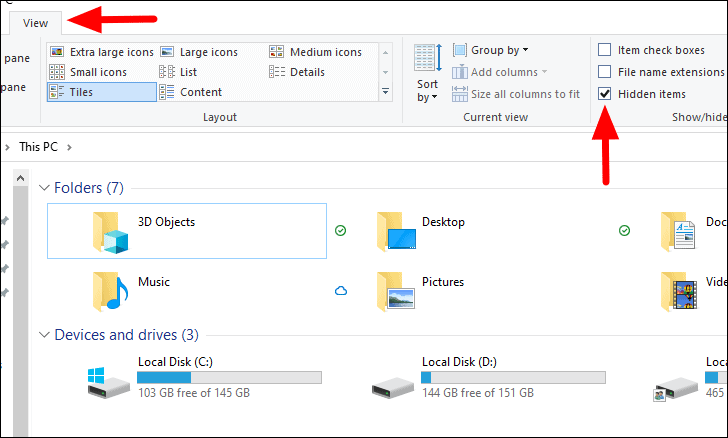
Finding the existing bookmark file
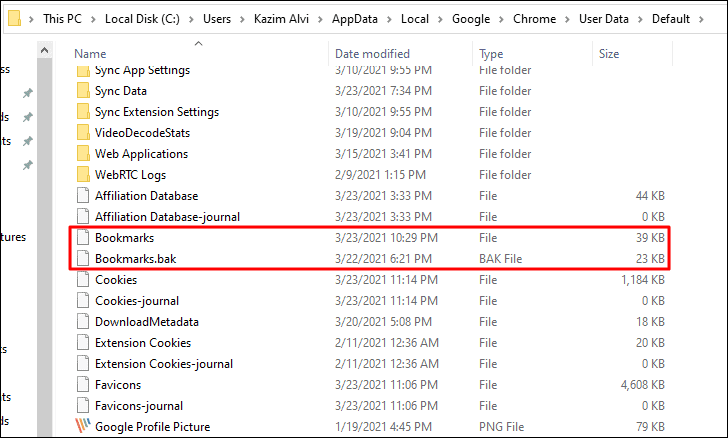
Chrome automatically saves your bookmarks in a file on your computer, and you can create a backup by simply copying this file. In the same folder, there’s also a backup file named Bookmarks.bak, which Chrome updates every time you close the browser.
To view these files, you need to enable the option to show hidden items in your file explorer. Open File Explorer and click on the View tab at the top. In the Show/hide section, check the box next to Hidden items to reveal hidden files and folders.
Once hidden files are visible, navigate to the following directory in File Explorer, replacing <Username> with your actual user profile name:
C:\Users\<Username>\AppData\Local\Google\Chrome\User Data\DefaultIn this folder, locate the file named Bookmarks. This is where Chrome stores your current bookmarks. You can copy this file to another location to create a backup. Just below it, you’ll find Bookmarks.bak, the backup file. If your primary Bookmarks file becomes corrupted or deleted, you can restore your bookmarks by renaming Bookmarks.bak to Bookmarks, effectively removing the .bak extension.
Knowing how to access these files ensures you can always have a backup of your bookmarks ready to restore if necessary.
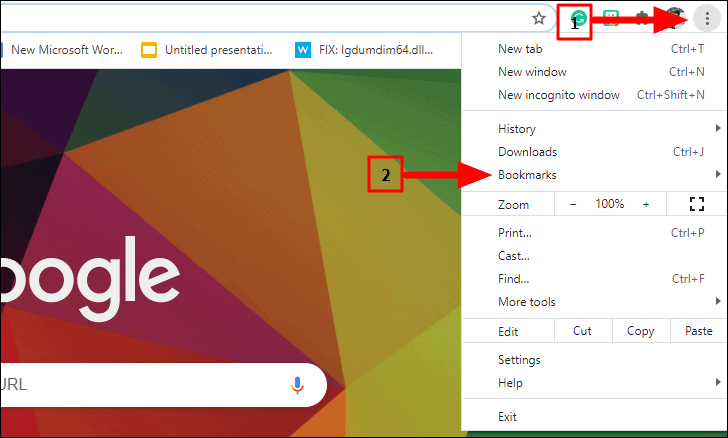
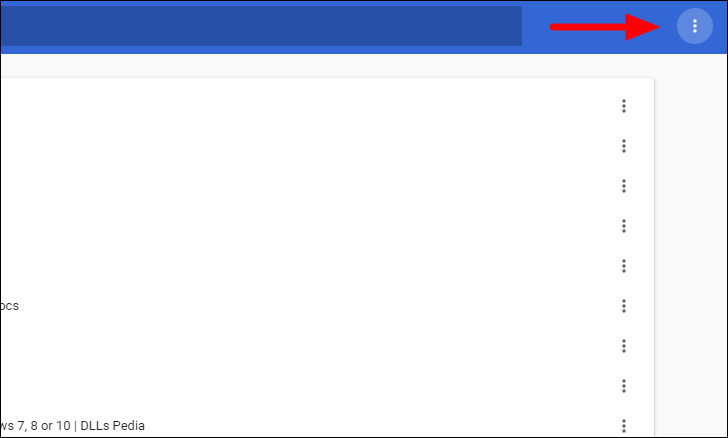
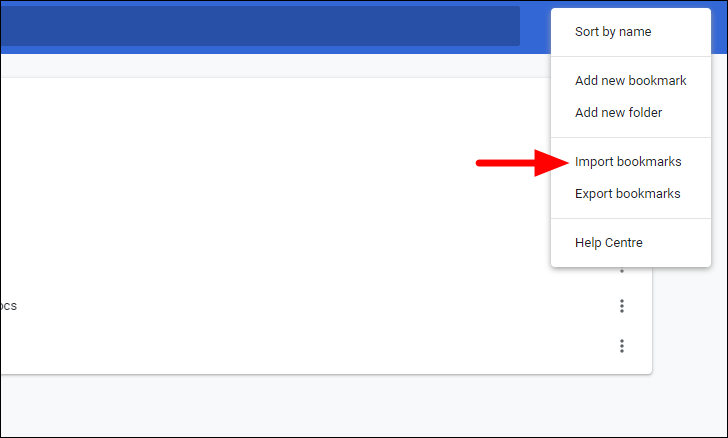
Importing bookmarks into Google Chrome
If you’ve lost your bookmarks or want to add bookmarks from another browser or backup, you can easily import them into Chrome.
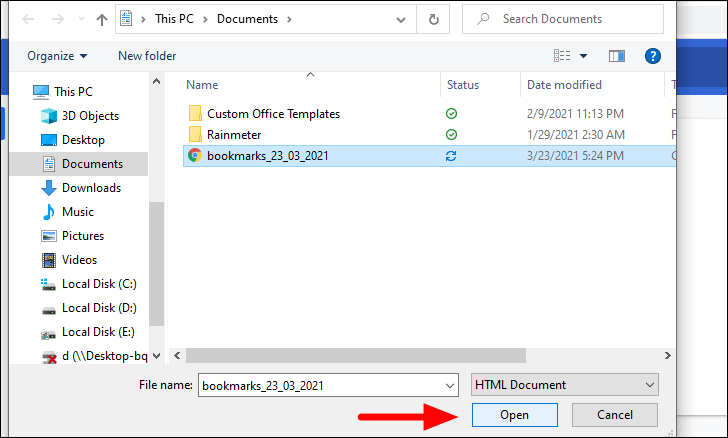
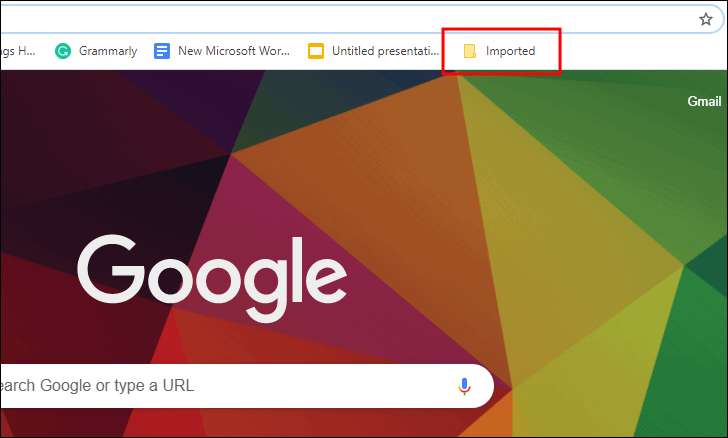
The imported bookmarks will appear in the Bookmark Manager under a new folder named Imported. You can click on this folder to expand it and view all your imported bookmarks.
By regularly backing up your Chrome bookmarks, you ensure that your important web pages are always accessible, even if something goes wrong. Whether you’re switching devices or just want peace of mind, exporting and importing bookmarks is a straightforward process that keeps your browsing experience seamless.