
Large PowerPoint files often include embedded media such as videos, audio clips, or high-resolution images, which can complicate sharing or editing presentations. Extracting these media files not only reduces file size but also allows you to repurpose the content elsewhere or troubleshoot storage issues. Several approaches are available, ranging from built-in PowerPoint features to manual extraction and free online tools.
Extracting Media Using PowerPoint’s Built-In “Save Media As” Feature
Step 1: Open your presentation in PowerPoint and navigate to the slide containing the media file you want to extract. This method works for both audio and video files embedded in the slide.

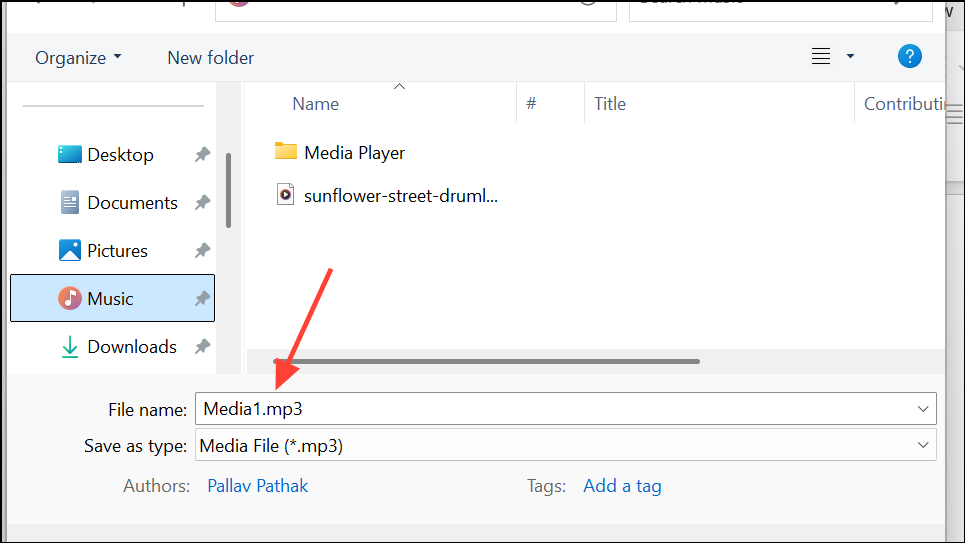
Step 2: Right-click (or Control-click on macOS) directly on the audio or video object. Select Save Media As from the context menu. This option saves the original media file (such as .mp4 or .m4a) to your computer.

Step 3: In the dialog box that appears, choose your destination folder and enter a file name for the media file. Click Save to store the file locally.
If the Save Media As option is unavailable or grayed out, you may be using an older version of PowerPoint or a version without full feature access (such as some free or web-based variants). In these cases, try one of the alternative methods below.
Extracting All Media by Renaming the PowerPoint File Extension
Since PowerPoint files (.pptx) are essentially compressed archives, you can manually extract all embedded media—videos, audio, and images—by treating the file as a ZIP archive. This method is particularly useful for extracting multiple files at once or when the built-in export option is unavailable.
Step 1: Make a backup copy of your PowerPoint file before proceeding to avoid accidental data loss.
Step 2: Ensure that your file extensions are visible in your file manager. On Windows, open File Explorer, go to the View tab, and check File name extensions. On macOS, file extensions are typically visible by default, but you can adjust this in Finder preferences if needed.

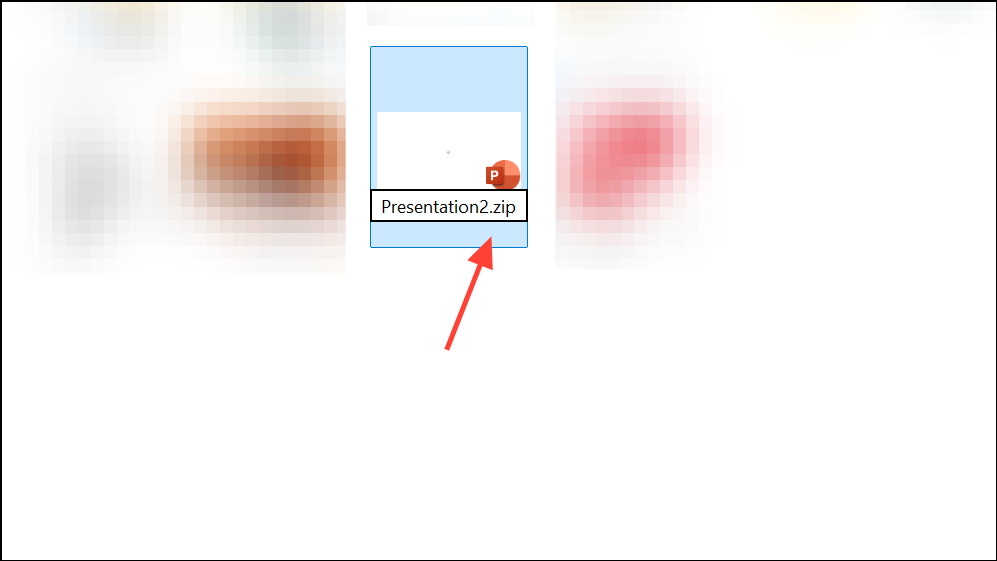
Step 3: Right-click the PowerPoint file and select Rename. Change the extension from .pptx to .zip. Confirm any warning prompts about changing the file type.
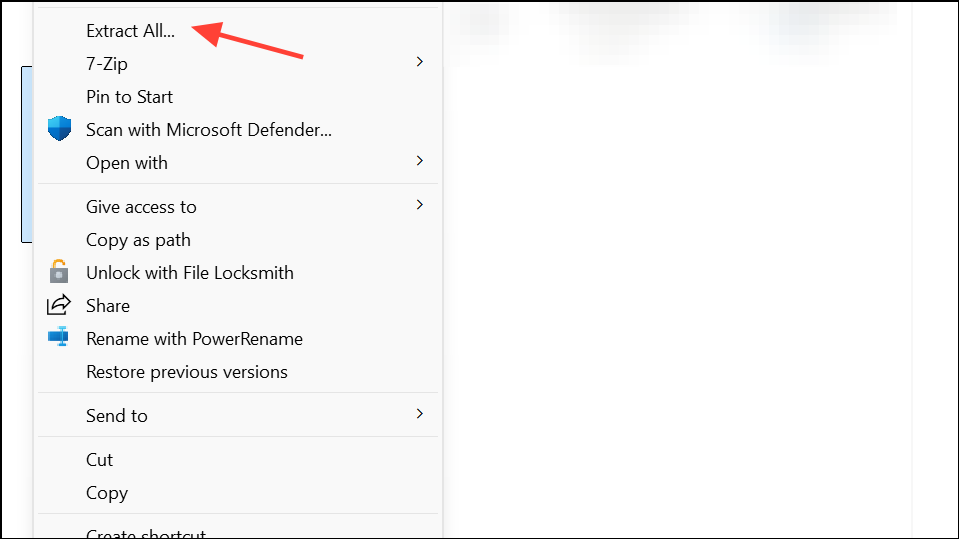
Step 4: Open the renamed ZIP archive using your preferred compression utility (such as Windows Explorer, WinRAR, WinZip, or Keka for macOS). If the default archive utility fails to extract the contents, try a different tool, as some macOS versions have compatibility issues with this method.
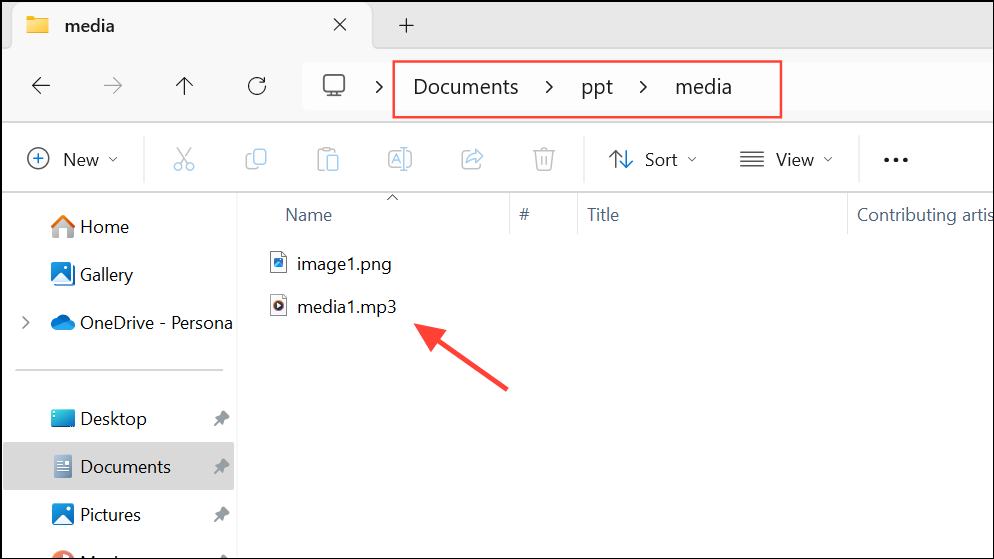
Step 5: Within the extracted folder, navigate to ppt → media. Here you will find all embedded media files, including videos, audio, and images, in their original formats. Copy or move these files to your desired location for reuse or further processing.
This process is especially effective for bulk extraction and when you need to identify large files that contribute to the overall presentation size. You can sort the files by size to quickly locate the largest assets.
Using Free Online Tools for Media Extraction
If you prefer an automated approach or do not have access to PowerPoint’s full desktop features, free online tools can extract videos and images from your presentation with minimal effort. These tools are especially helpful when you want to extract all media at once and avoid manual steps.
Step 1: Visit a reputable online media extraction service, such as SlideSpeak’s PowerPoint Video Extractor or its Image Extractor.
Step 2: Upload your .pptx or .ppt file to the tool. The service will process your file and present a download link for all extracted media, typically packaged in a ZIP archive. Most tools support common video formats such as .mp4, .mov, and various image formats.
Step 3: Download the ZIP archive and extract the contents to access your media files. These services often preserve the original resolution and quality of your files. For privacy, verify the service’s data handling and deletion policies before uploading sensitive presentations.
PowerPoint Add-Ins and Programming Approaches
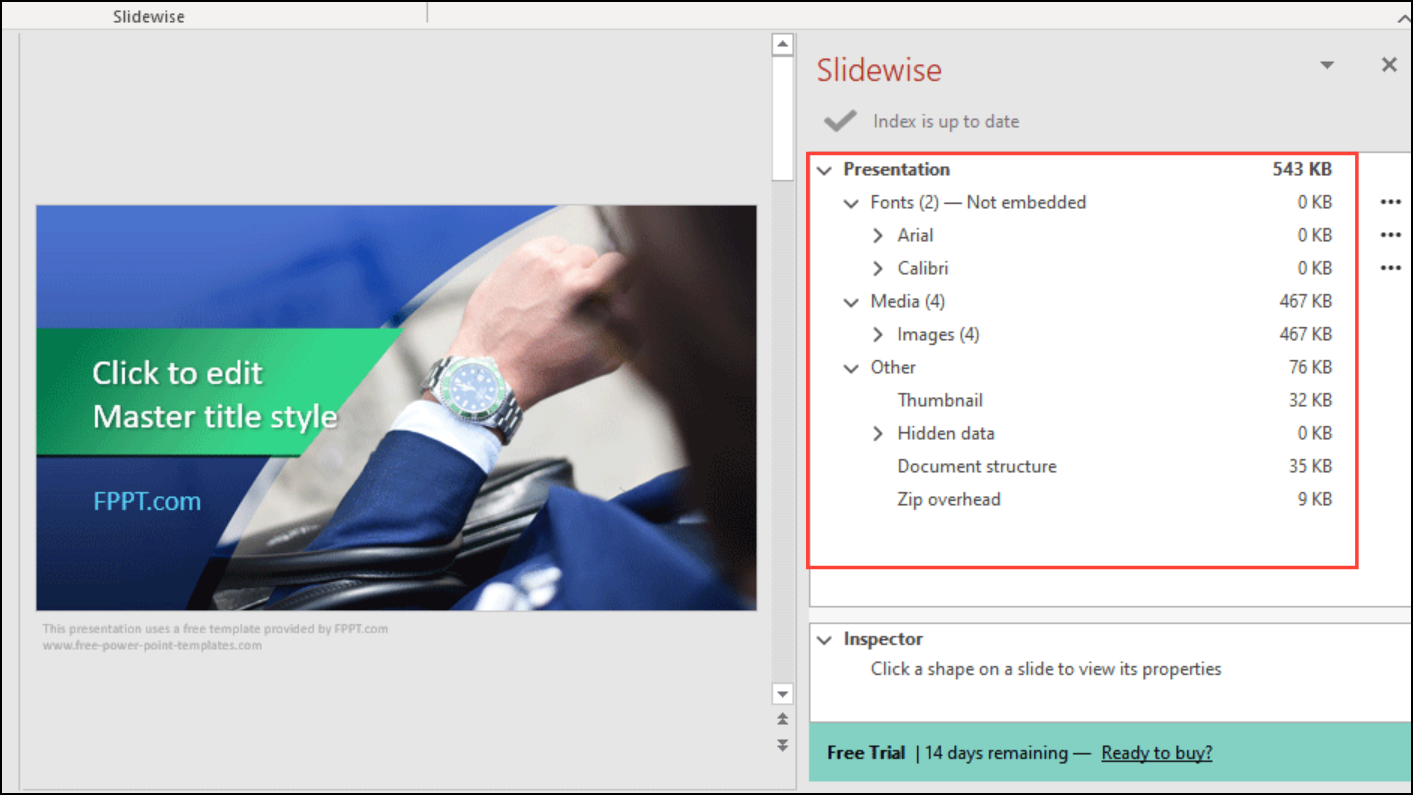
Dedicated PowerPoint add-ins like Slidewise provide advanced options for inspecting, exporting, and managing embedded media. These tools display detailed information about each asset—including file size, type, and usage—allowing you to quickly identify and export large or redundant files. Some add-ins also support batch operations, saving time when handling many files.
For technically inclined users, programming libraries such as the R package officer enable scripted extraction of media from PowerPoint files. This is useful for automating large-scale tasks or integrating with data workflows. For example, using officer::media_extract in R allows you to programmatically extract images or other media into separate files.
Extracting media from PowerPoint presentations streamlines content reuse, reduces file sizes, and simplifies troubleshooting. Choose the method that best fits your workflow and software access—whether that’s PowerPoint’s built-in tools, manual extraction, online services, or specialized add-ins.