If your Windows 11 computer is experiencing persistent issues and you're unable to resolve them through standard troubleshooting, performing a factory reset from boot may be your best option. This process will restore your operating system to its original state, similar to a fresh installation.
Accessing the advanced startup options
From startup
If you're unable to access the Windows sign-in screen or your PC is stuck in a boot loop, you can enter the advanced startup options directly from startup.
Step 1: Press and hold the power button to turn off your computer completely.
Step 2: Press the power button to turn on your PC. As soon as you see the manufacturer's logo or Windows logo, press and hold the power button again to force a shutdown.
Step 3: Repeat this process two or three times. Windows should automatically boot into the Windows Recovery Environment (WinRE) after multiple unexpected shutdowns.
Step 4: Once in the WinRE, click on the 'Troubleshoot' option.
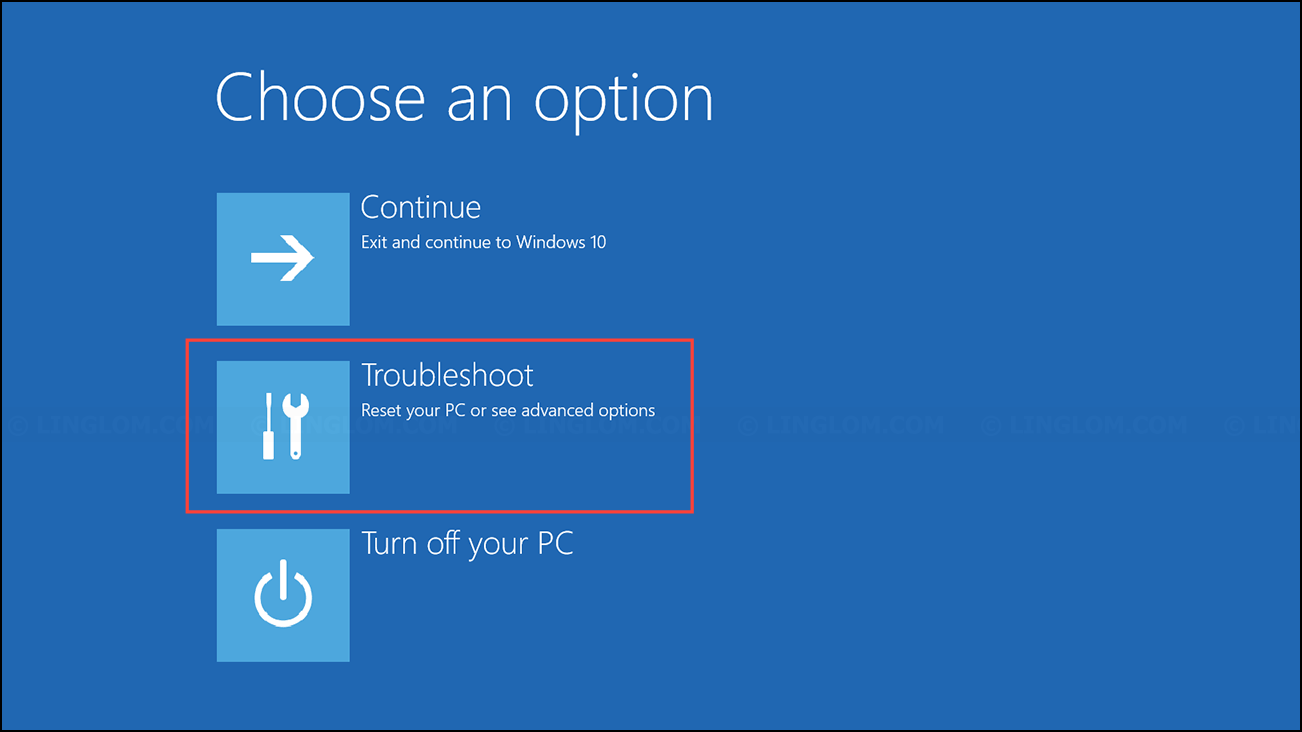
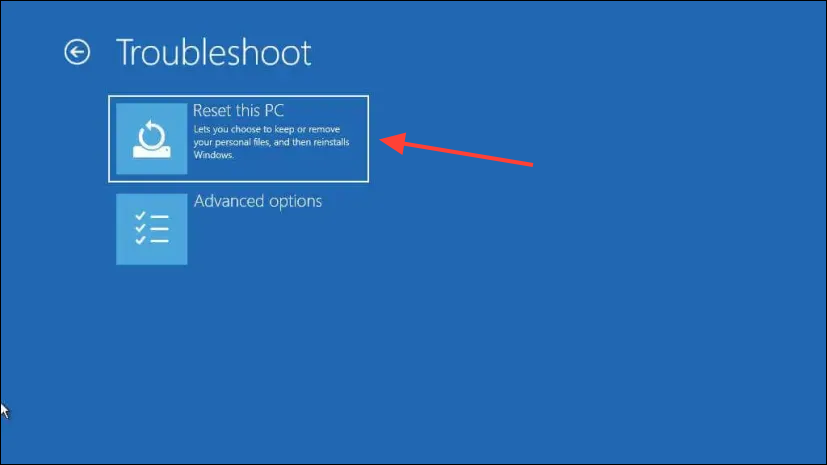
Step 5: On the next screen, select 'Reset this PC' to begin the reset process.
From the sign-in screen
If you can reach the Windows 11 sign-in screen, you can access the advanced startup options from there.
Step 1: On the sign-in screen, click the Power icon in the lower right corner.
Step 2: Hold down the Shift key and click on 'Restart'.
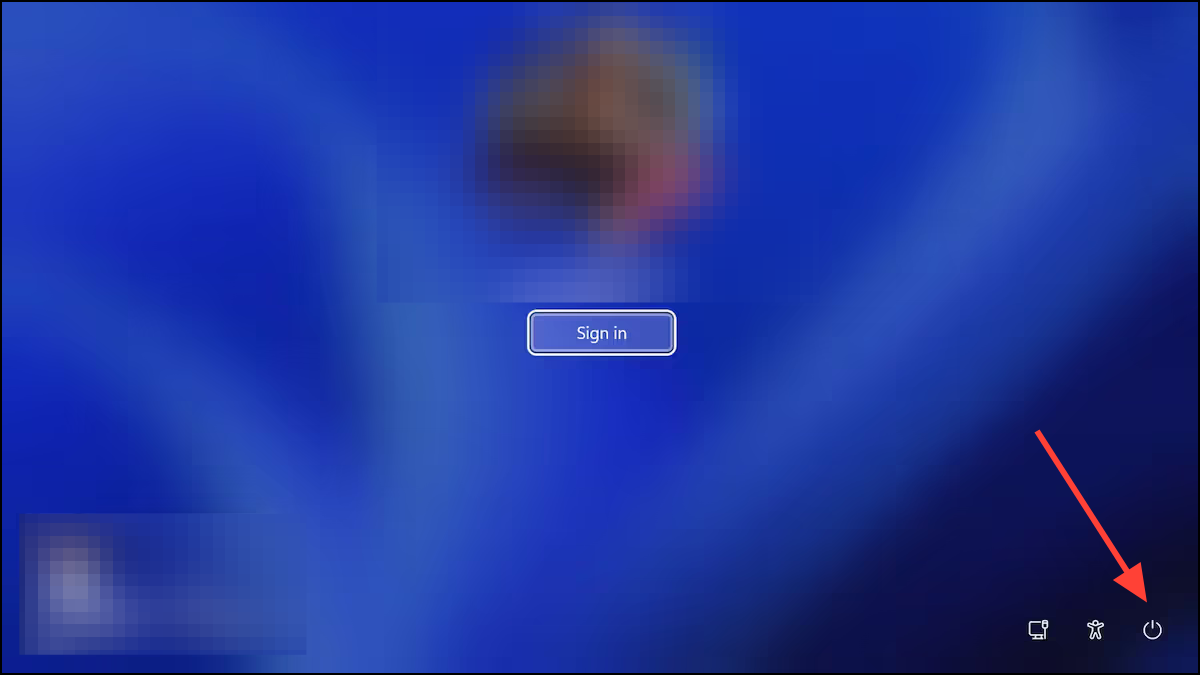
Step 3: Your PC will restart and load the WinRE. Choose the 'Troubleshoot' option.

Step 4: Select 'Reset this PC' to start the reset process.

Using a bootable recovery drive
If you have a bootable recovery drive, you can use it to access the advanced startup options.
Step 1: Insert the recovery drive into your computer and restart the PC.
Step 2: As the computer boots up, press the appropriate key to access the boot menu. This key varies by manufacturer but is typically F11, F12, Esc, or Delete.
Step 3: In the boot menu, use the arrow keys to select the recovery drive and press Enter.
Step 4: The computer will boot into the WinRE. Click on 'Troubleshoot'.
Step 5: Choose 'Reset this PC' to initiate the reset process.
Resetting your Windows 11 PC
Once you've accessed the 'Reset this PC' option through one of the methods above, follow these steps to reset your computer.
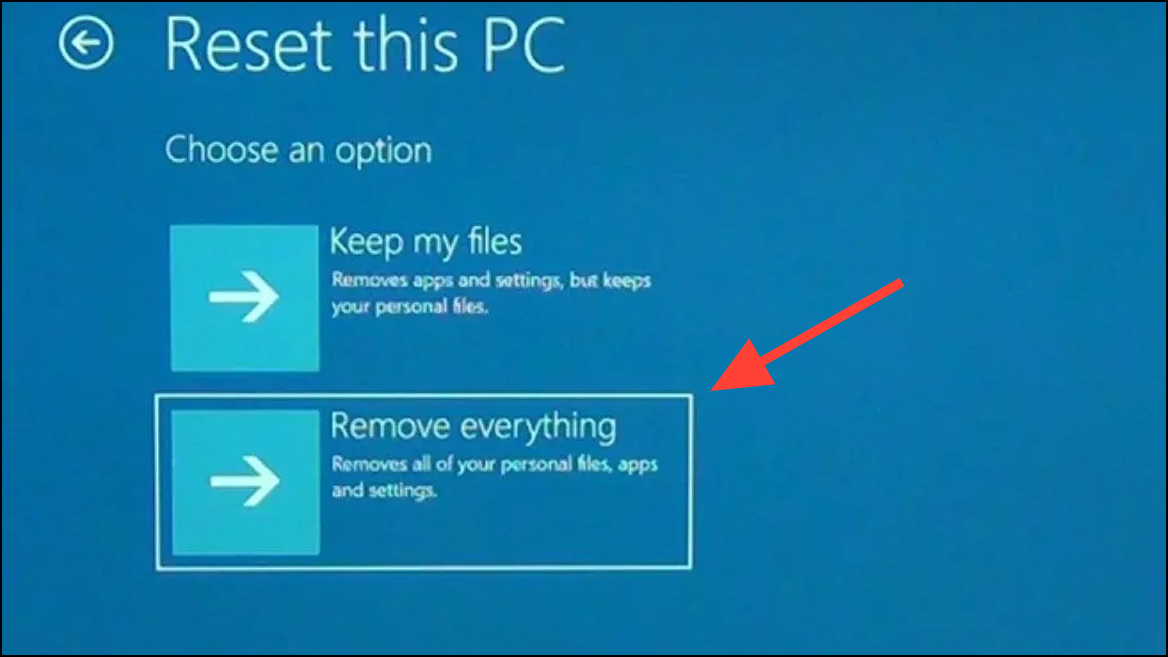
Step 1: You'll be presented with two options: 'Keep my files' and 'Remove everything'. Select 'Remove everything'. In some cases, only the 'Remove everything' option may be available, especially if there are significant issues with the operating system.
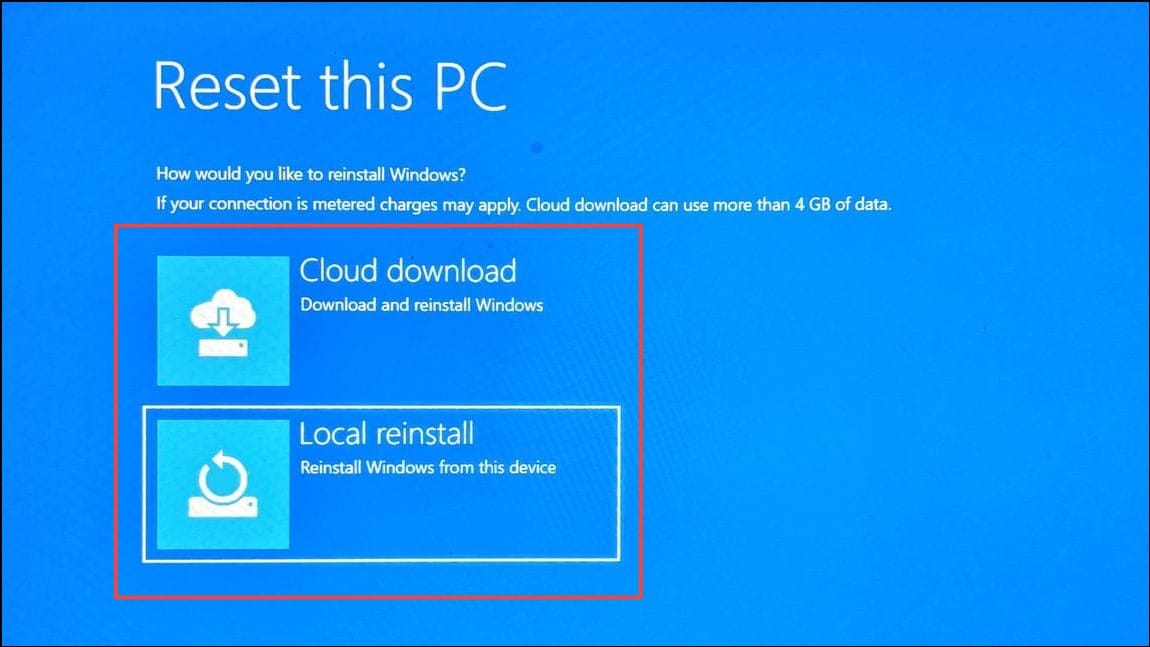
Step 2: Choose whether you want to reinstall Windows from the cloud or use the local installation. Select the option that best suits your situation.
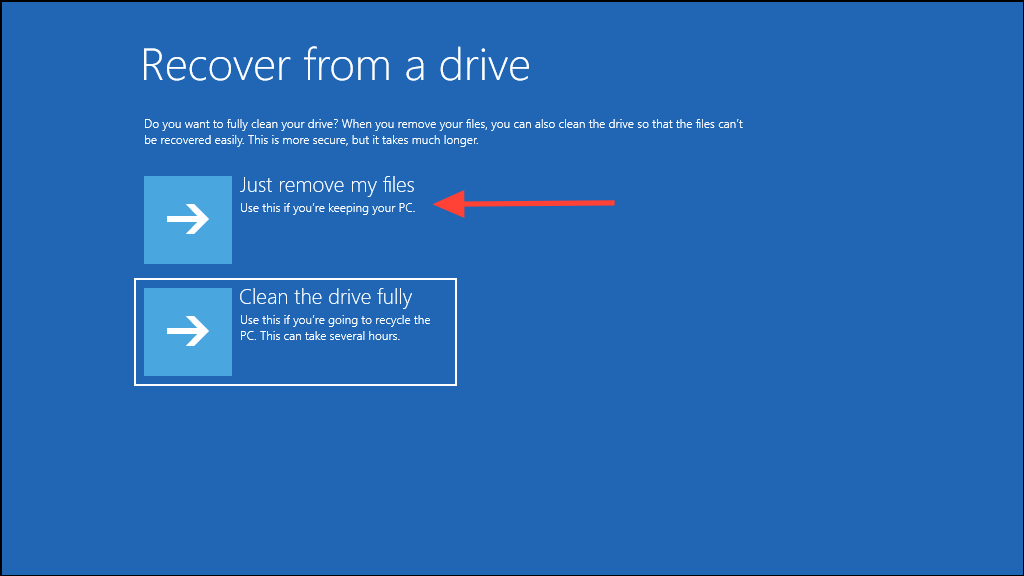
Step 3: Next, decide how you want to remove your files. Click on 'Just remove my files' to quickly delete your data. The other option, 'Fully clean the drive', takes longer and is more secure if you plan to give away or sell your PC.
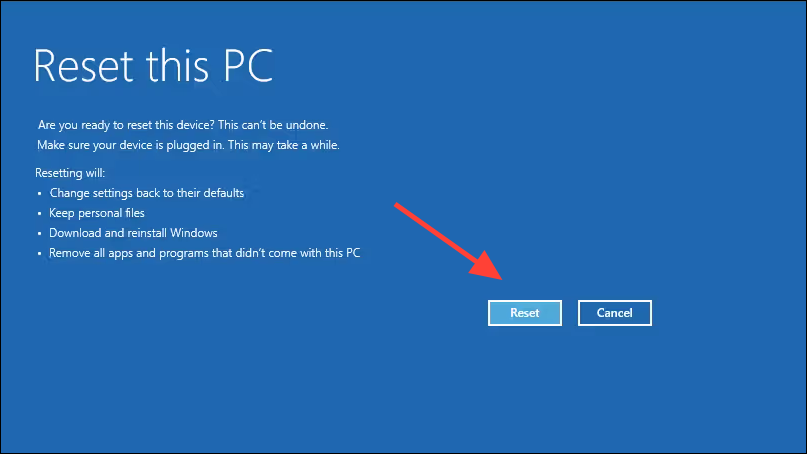
Step 4: Finally, click on 'Reset' to start the reset process. This may take some time, depending on your hardware and internet speed. Ensure your computer is plugged in and do not interrupt the reset process.
Your computer will restart multiple times during the reset. It's normal for the process to appear to pause or take a long time. Be patient and allow it to complete without interference.
After the reset is finished, your Windows 11 PC will reboot to the setup screen. You'll need to configure your settings and reinstall your applications. If you use cloud backups like OneDrive, you can easily restore your files and preferences.
To prevent future issues, consider creating a system restore point once your PC is set up. This can help you recover from problems without needing to perform a full reset again.


