Duplicate files can accumulate on your Windows 11 PC over time, occupying valuable storage space and making file management more challenging. Eliminating these duplicates not only frees up space but also streamlines your file organization. In this guide, we'll explore several methods to help you find and remove duplicate files from your computer.
1. Use a Third-Party App
If you're looking for a quick and efficient way to detect and delete duplicate files without manual effort, utilizing a third-party application is your best option. One such software is Auslogics Duplicate File Finder, which can scan your entire system or specific folders, providing flexibility in finding duplicates across different file types.
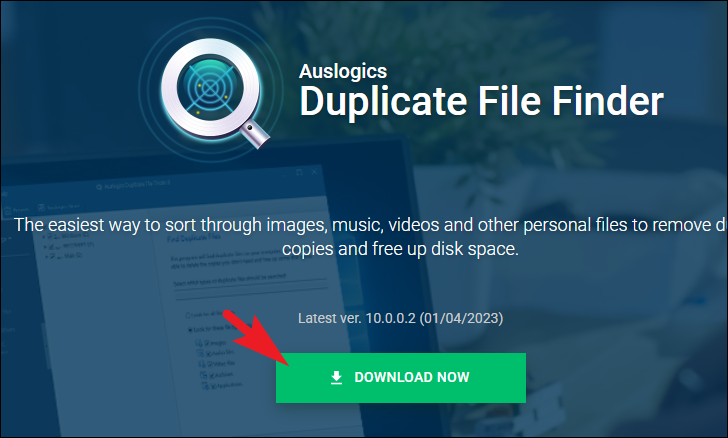
Step 1: To download Auslogics Duplicate File Finder, visit the official website at www.auslogics.com/duplicate-file-finder. Click on the 'Download Now' button to start the download.
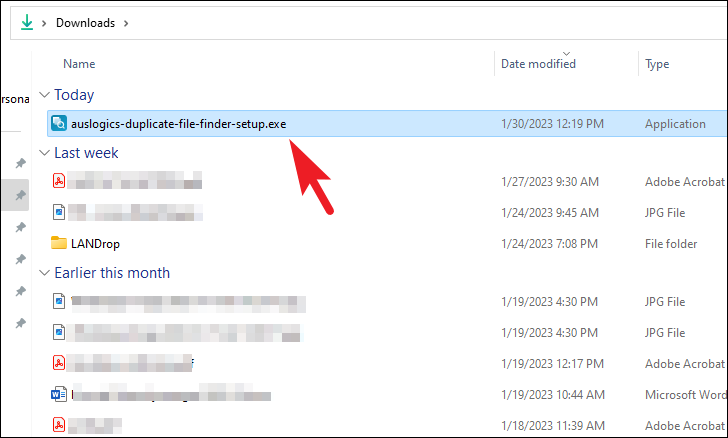
Step 2: Once the download is complete, navigate to the folder where the installer was saved. Double-click on the .exe file to launch the installation.
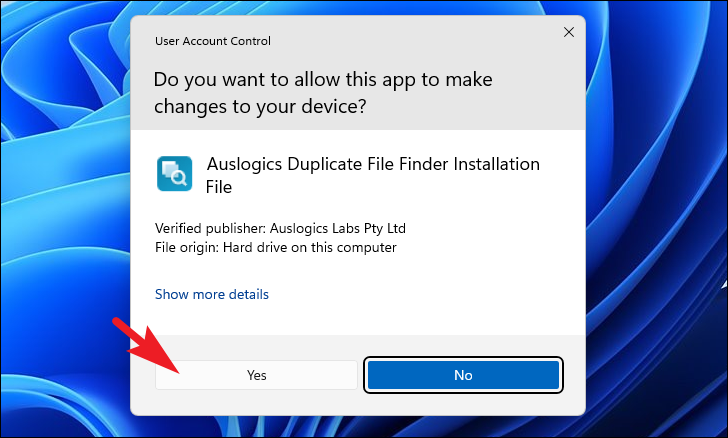
Step 3: A User Account Control (UAC) prompt may appear asking for permission to make changes to your device. If you're not logged in as an administrator, enter the administrator credentials. Otherwise, click 'Yes' to proceed.
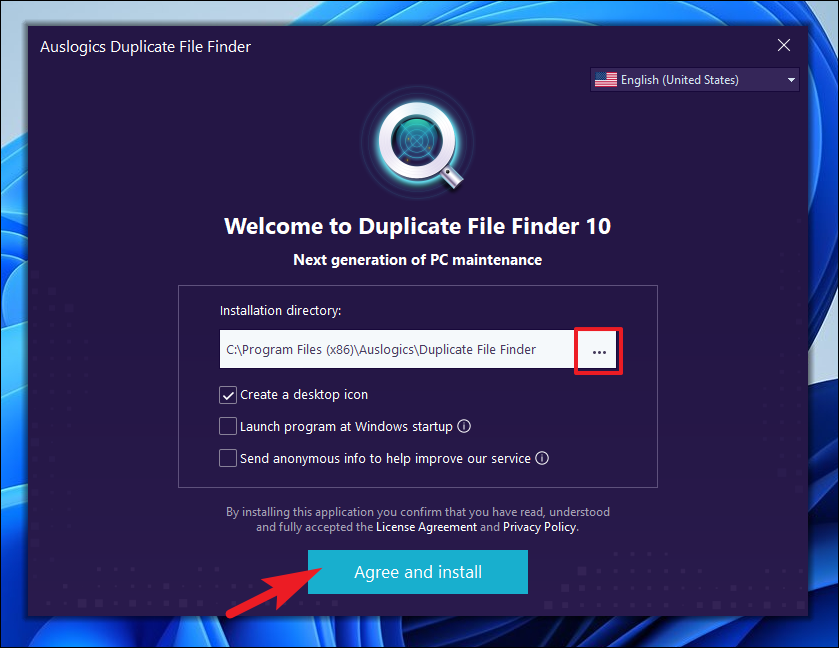
Step 4: In the installation window, click on the 'Agree & Install' button to begin the installation. If you wish to change the installation directory, click on the 'ellipsis' button beside the installation path and select a different folder using File Explorer.
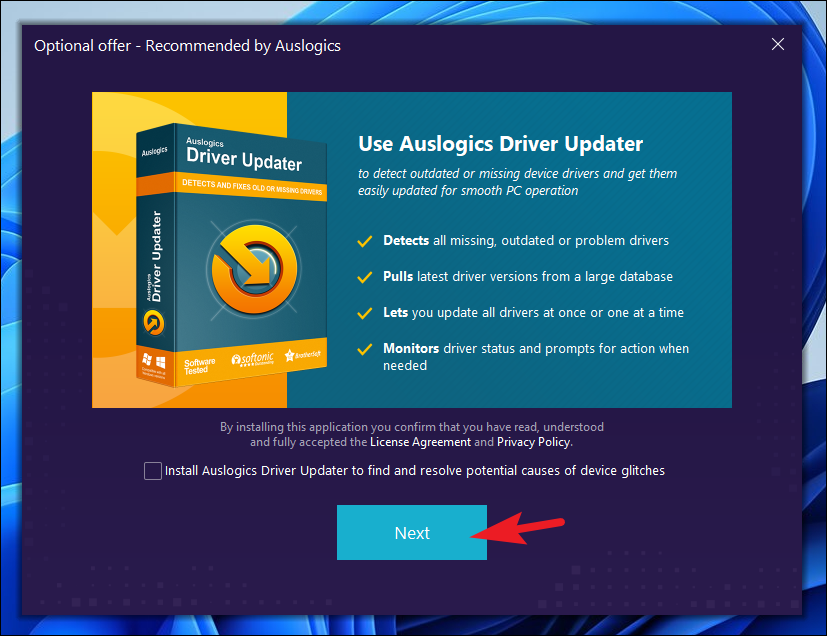
Step 5: Click 'Next' to proceed. The software will now install on your system, which may take a few minutes.
Step 6: Once the installation is complete, click 'Finish' to launch the application.
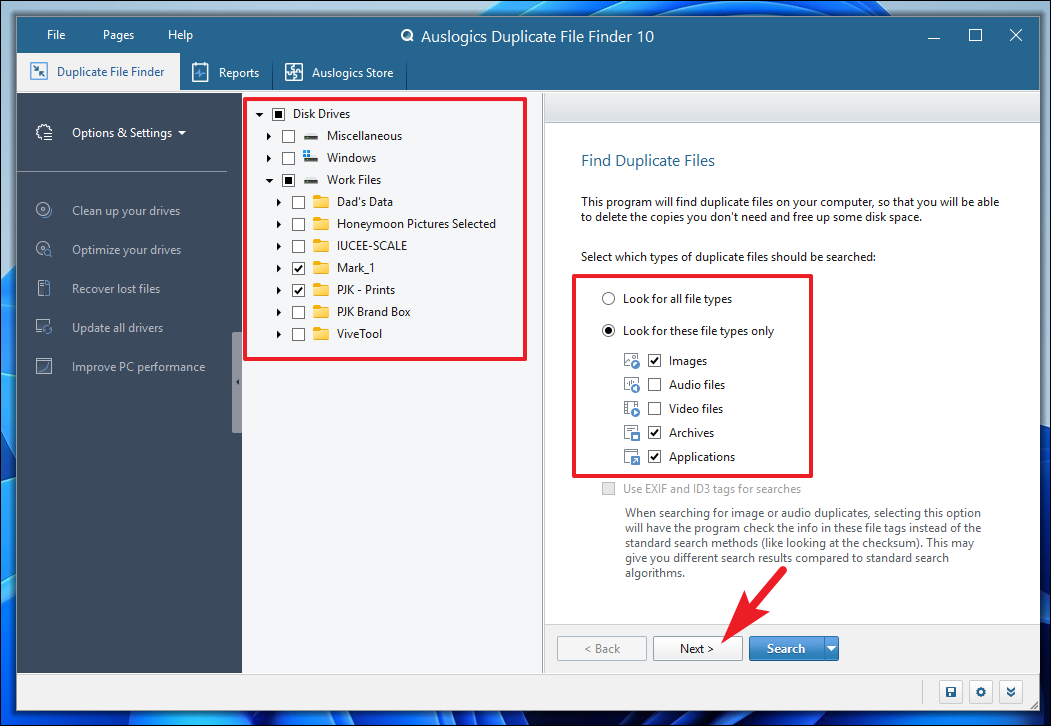
Step 7: On the main screen of the application, you can select the drives or folders you want to scan by checking the boxes next to them. If you wish to scan for specific file types, choose 'Look for these file types only' and select the desired file types. Once you've made your selections, click 'Next'.
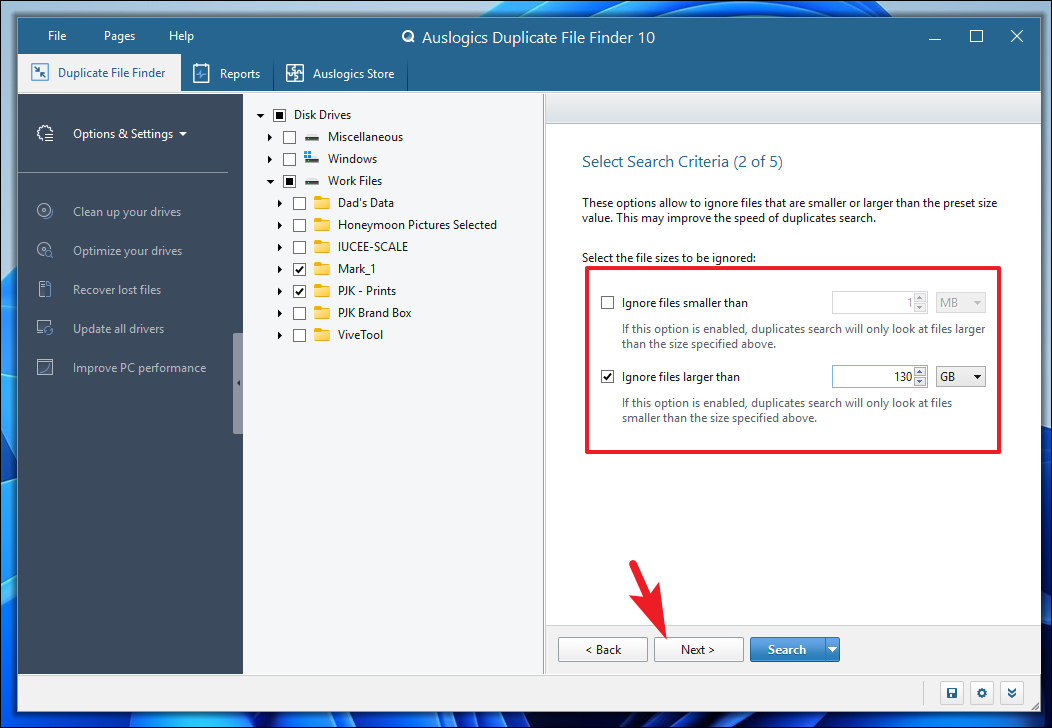
Step 8: By default, the program excludes files smaller than 1 MB. If you want to adjust this setting, you can change the size limit or uncheck the option to include all file sizes. You can also specify a maximum file size if needed. After configuring these options, click 'Next'.
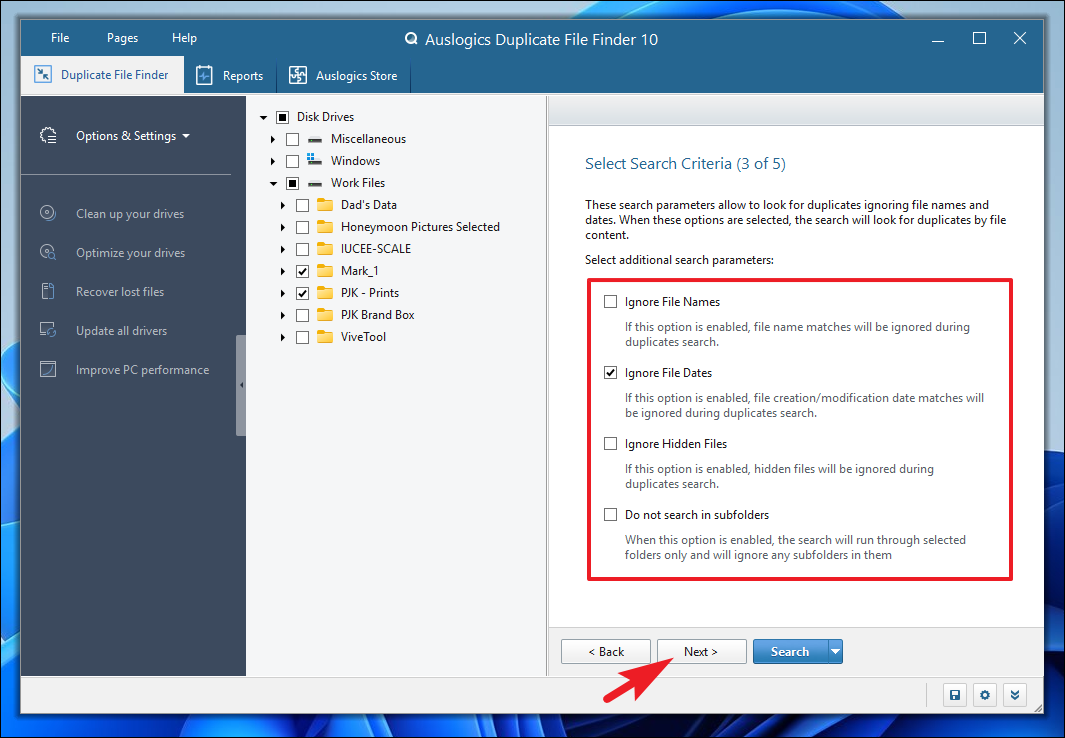
Step 9: In the next step, you can set additional search criteria. You can choose to skip hidden files and folders or skip subfolders within selected directories. Options like 'Ignore File Names' and 'Ignore File Dates' allow you to broaden or narrow your search scope. After adjusting the settings, click 'Next'.
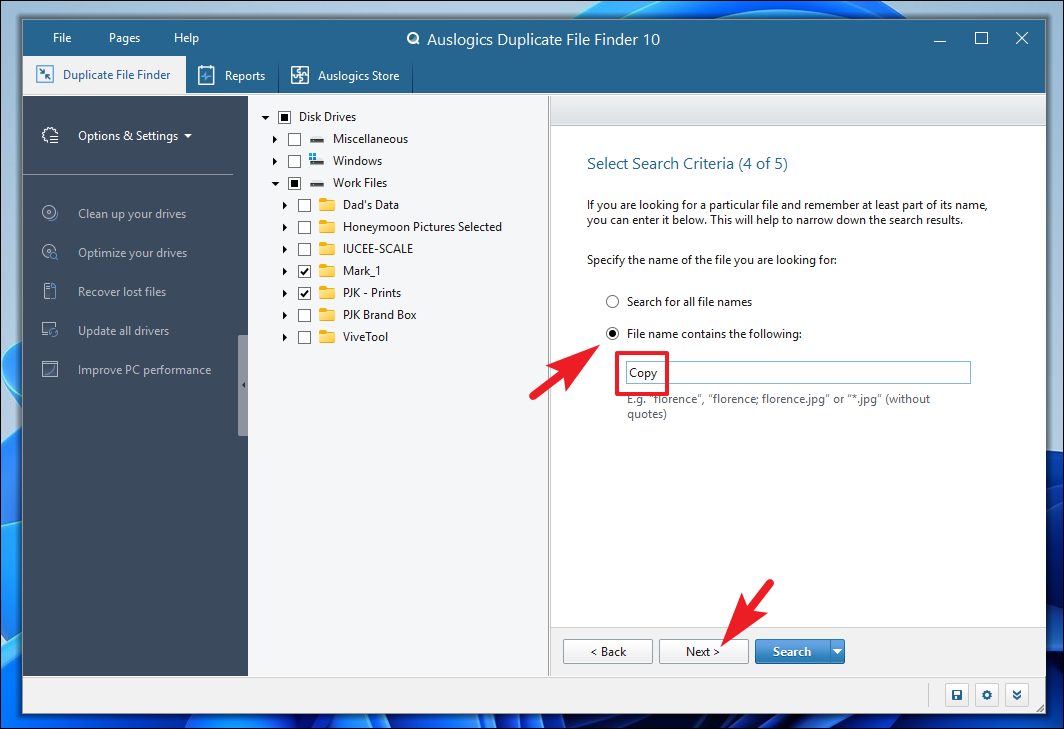
Step 10: If you're searching for duplicates of a specific file, you can enter the file name or part of it in the text box after selecting 'File name contains the following'. Otherwise, you can leave this option and proceed by clicking 'Next'.
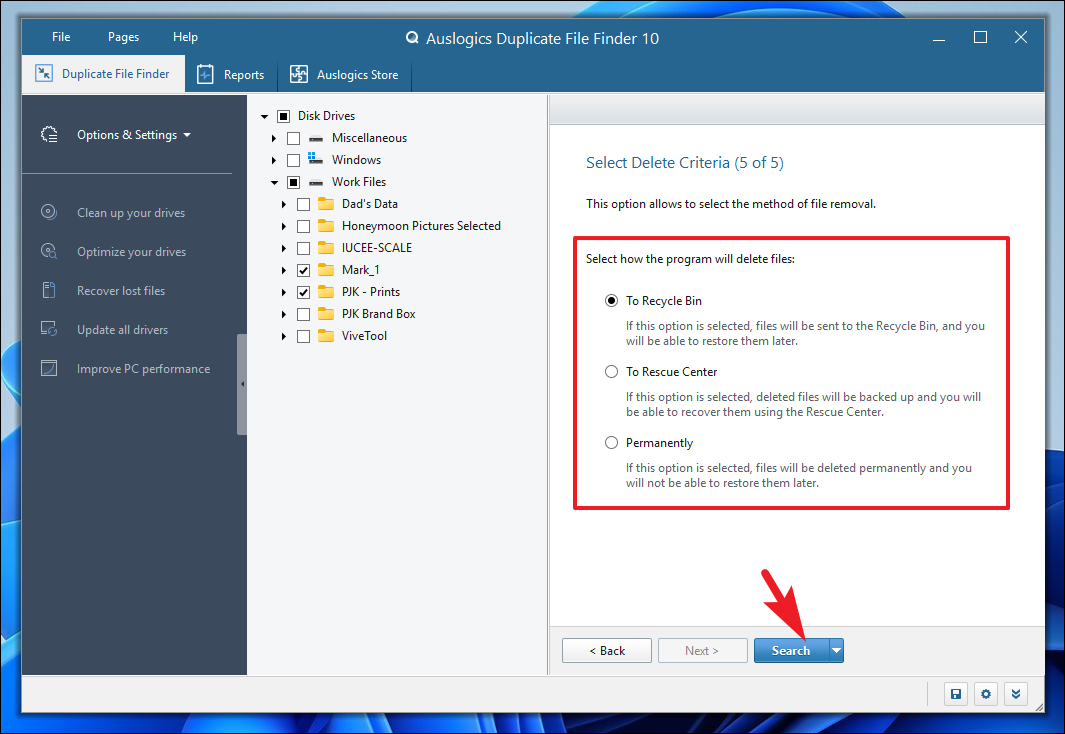
Step 11: Choose what you want to do with the duplicate files found. You can select options like sending them to the Recycle Bin, deleting permanently, or moving them to a specified folder. After making your choice, click 'Search' to begin scanning.
Step 12: Once the scan is complete, the results will be displayed. You can preview files by clicking on them and select the duplicates you wish to delete by checking the boxes next to them. To select all duplicates in each group, click on the 'Select' button, then choose 'Select All Duplicates in Each Group' from the dropdown menu.
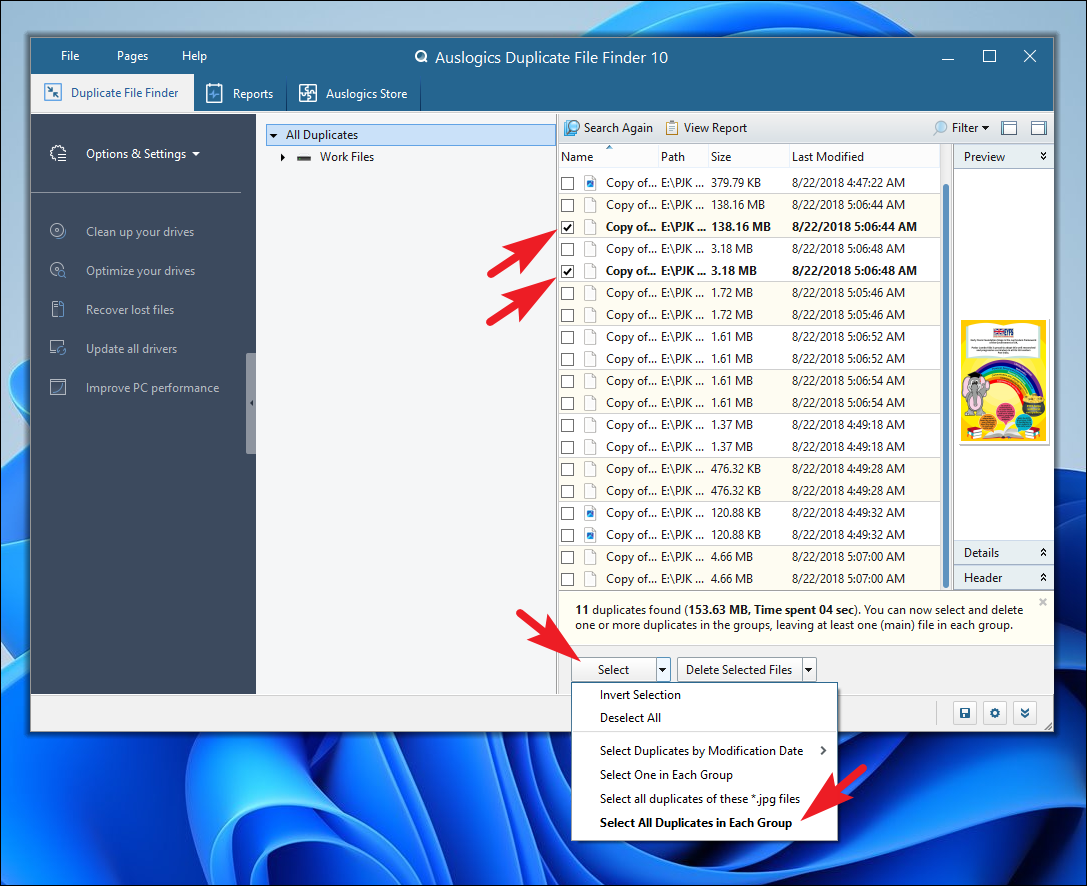
Step 13: Finally, click on the 'Delete Selected Files' button to remove the duplicates. If you wish to change the deletion method, click on the dropdown arrow next to the button and select your preferred option.
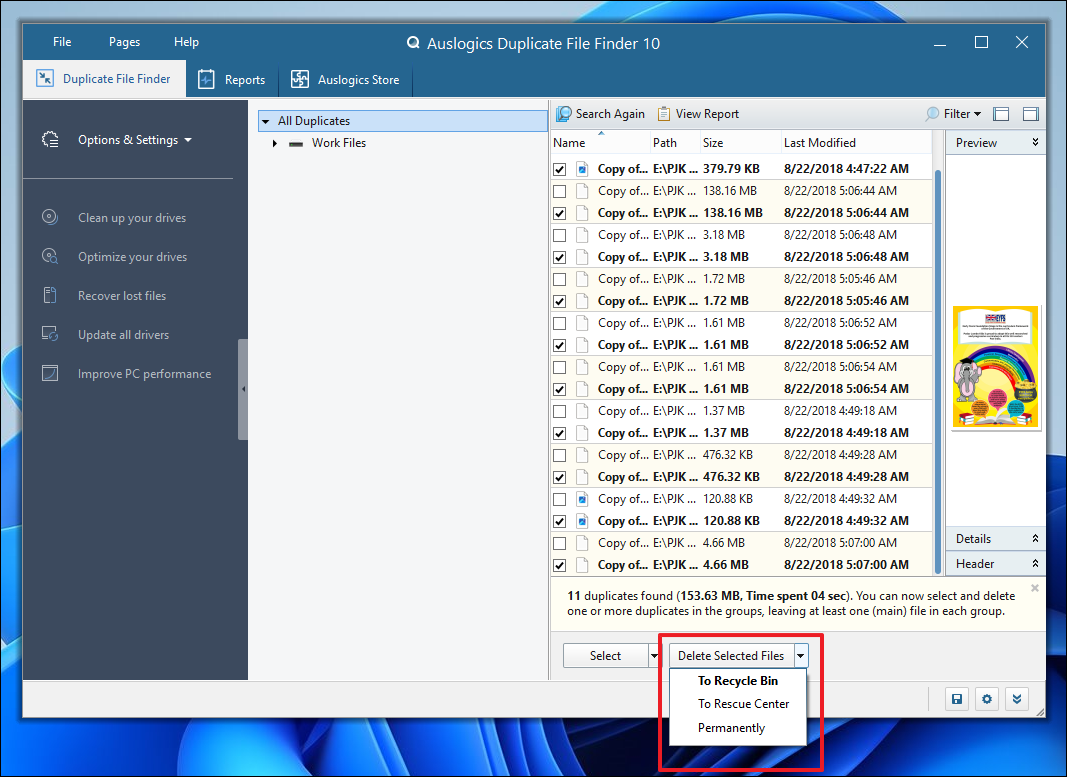
By following these steps, you can efficiently identify and eliminate duplicate files using a third-party application. Auslogics Duplicate File Finder is free to use and doesn't impose any limitations on file deletion, making it a practical choice for managing duplicates.
2. Using Search in File Explorer
If you prefer not to install additional software, you can find duplicate files using the built-in Windows Search feature in File Explorer. While this method might require more manual work, it's straightforward and doesn't involve third-party applications.
Step 1: Open File Explorer by double-clicking on the 'This PC' icon on your desktop or by pressing Windows + E on your keyboard.

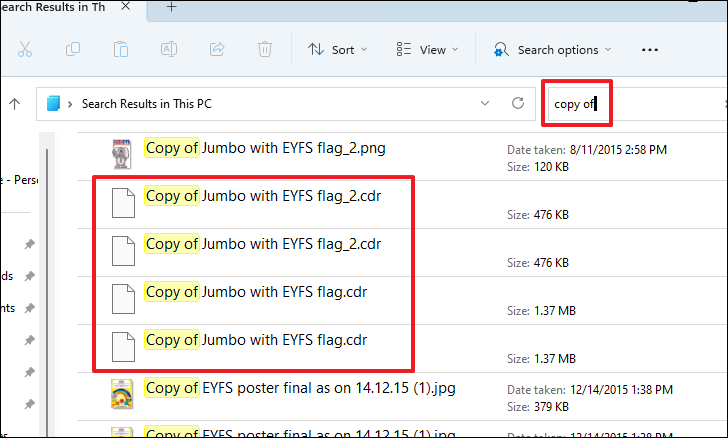
Step 2: To search your entire storage, type the name or part of the name of the file you suspect has duplicates into the search bar at the top-right corner of the window. File Explorer will display all matching results.
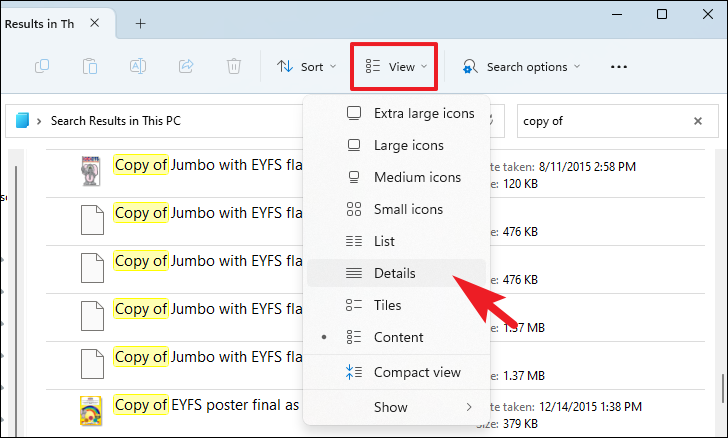
Step 3: To view more details about the files, such as date modified or size, click on the 'View' tab and select 'Details'. This will help you compare files and identify duplicates.
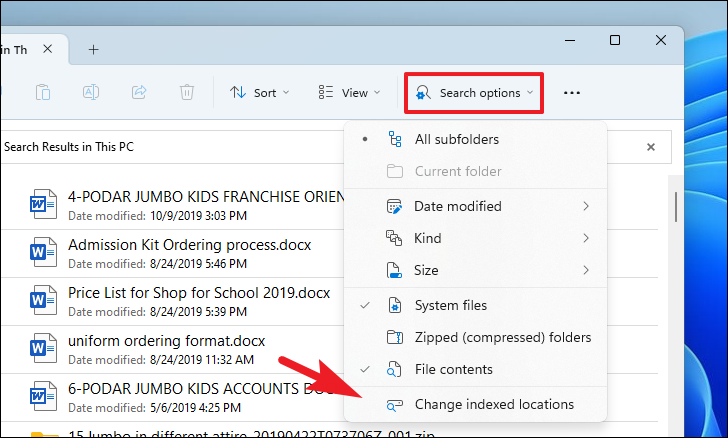
Step 4: If you notice that some folders or drives are not included in the search results, they might not be indexed. To include them, click on 'Search Options' and select 'Change indexed location'.
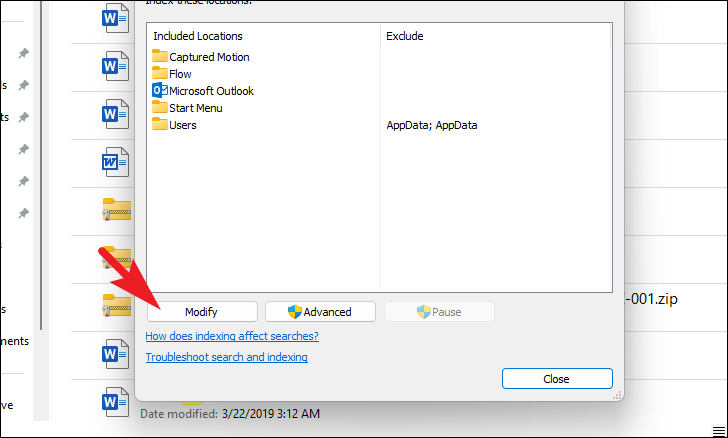
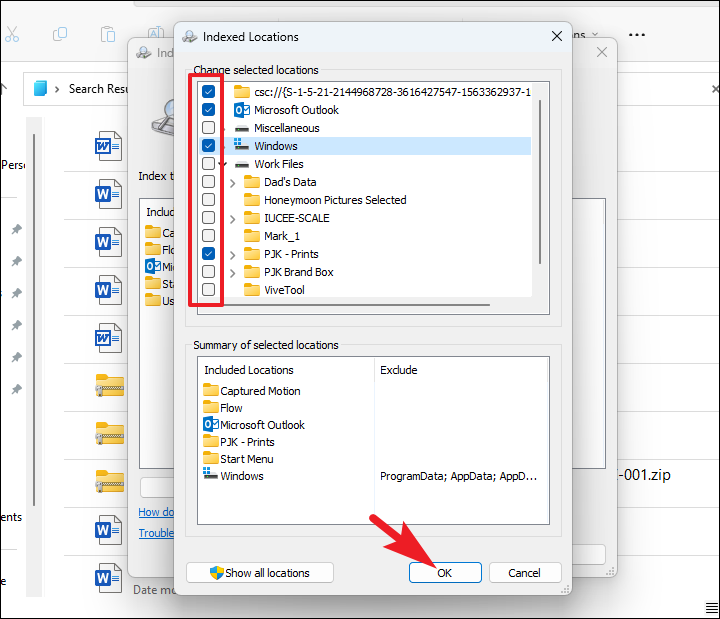
Step 5: In the Indexing Options window, click 'Modify'. A list of folders will appear. Check the boxes next to the drives or folders you want to include in the search index. Click 'OK' to save your changes.
Note: Indexing additional locations may slow down your PC, especially during the initial indexing process. If you experience performance issues, consider narrowing your search to specific folders rather than indexing your entire system.
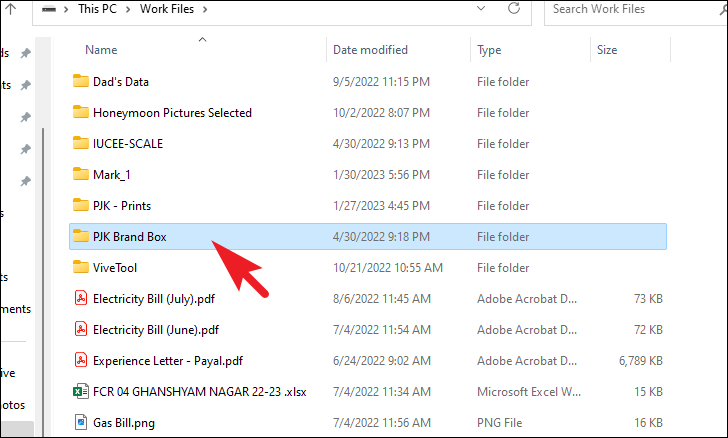
Step 6: For faster results, you can perform a targeted search by navigating to a specific folder and repeating the search process. This reduces the number of files the system needs to sift through.
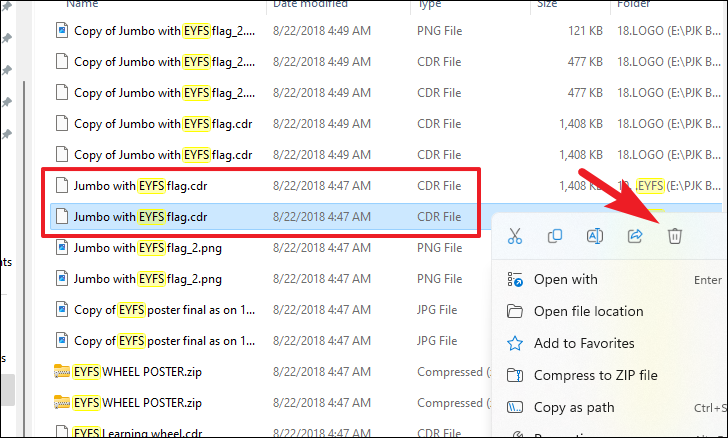
Step 7: Once you've identified duplicate files, right-click on the file you wish to remove and select 'Delete' from the context menu.
3. Using the Command Prompt
For users comfortable with command-line tools, the Command Prompt offers a fast way to delete duplicate files, especially when you know the exact location and part of the file name of the duplicates.
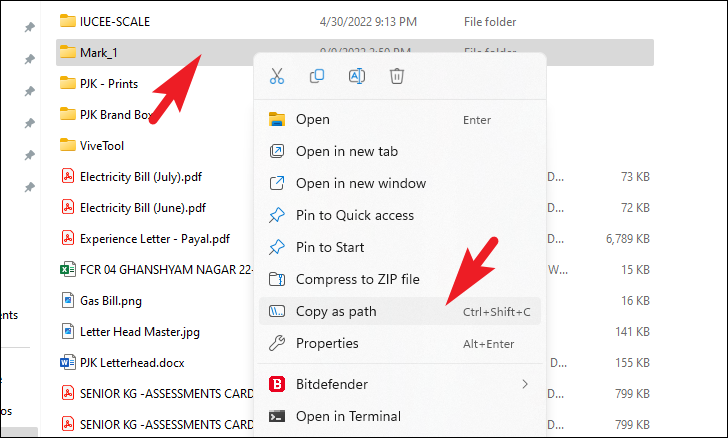
Step 1: Navigate to the folder containing the duplicate files using File Explorer. Right-click on the folder and select 'Copy as path' to copy the folder's path to the clipboard.
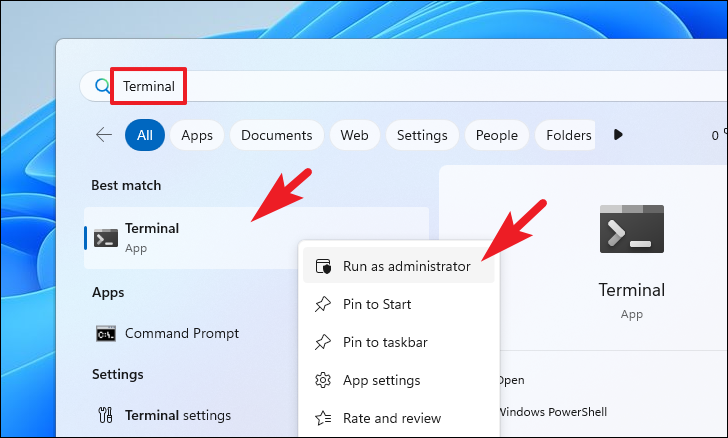
Step 2: Open the Start Menu, type 'Terminal' in the search bar, and right-click on the 'Terminal' app in the results. Choose 'Run as administrator' to open the terminal with elevated privileges.
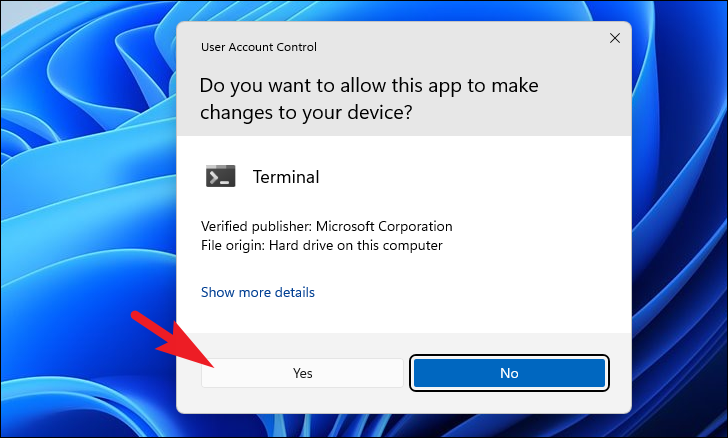
Step 3: If prompted by the User Account Control, click 'Yes' to grant administrative access.
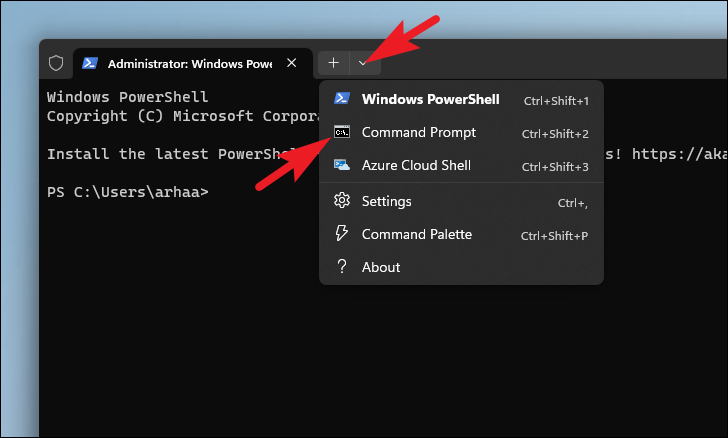
Step 4: In the terminal window, click the dropdown arrow and select 'Command Prompt' to open a new Command Prompt tab.
Step 5: Change the directory to the folder containing the duplicates by typing the following command and pressing Enter:
cd /d <copied folder path>Note: Replace <copied folder path> with the actual path you copied earlier, including the quotation marks.
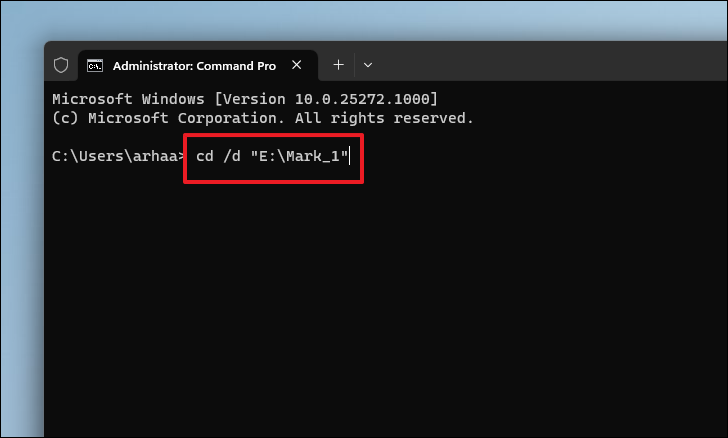
Step 6: To delete files with a specific pattern, use one of the following commands:
del "* - <suffix>.<extension>"del "<prefix> *.<extension>"del "*<pattern>*.<extension>"Replace <suffix>, <prefix>, <pattern>, and <extension> with the appropriate values for your files.
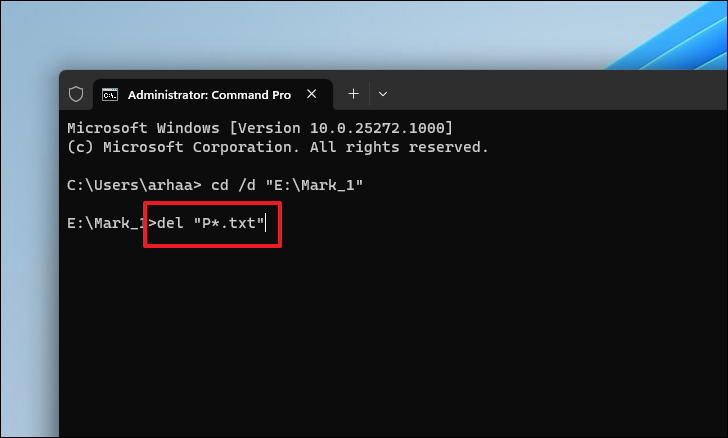
Step 7: Press Enter to execute the command. If prompted for confirmation, type 'Y' and press Enter to delete the files.
By using these methods, you can effectively locate and remove duplicate files from your Windows 11 PC, helping you reclaim storage space and keep your files organized.

