
Audio and video files in PowerPoint sometimes fail to play due to incompatible formats, missing codecs, or system-specific settings. These playback problems can disrupt meetings, lectures, or recorded presentations, making it critical to identify the source and apply the right fix. Below you'll find practical, detailed solutions to restore full multimedia functionality in your PowerPoint presentations.
Check Media File Format Compatibility
Unsupported audio or video formats are a leading cause of playback errors in PowerPoint. The application supports specific media formats—using anything else can result in errors like “Cannot Play Media” or missing sound and video.
Step 1: Verify the format of your audio or video file. PowerPoint for Windows supports video files such as .mp4 (H.264 video, AAC audio), .wmv, and .avi. For audio, supported formats include .mp3, .wav, and .wma.
Step 2: If your file is in an unsupported format, convert it using a reliable media converter. Choose the appropriate output format (for example, .mp4 for video or .mp3 for audio) to ensure compatibility.
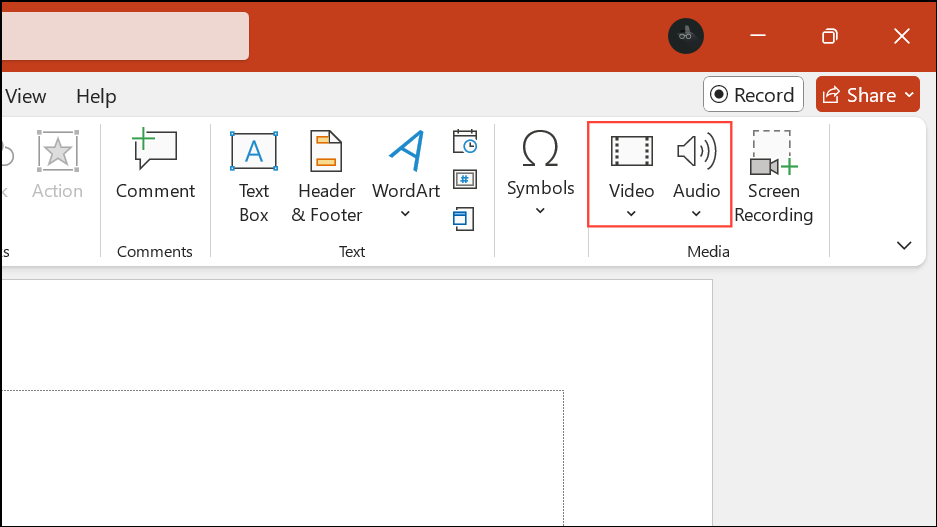
Step 3: Reinsert the converted file into your presentation by going to the "Insert" tab, selecting "Video" or "Audio," and choosing the new file.
Update PowerPoint and Windows
Outdated software can introduce compatibility issues with modern media codecs and cause playback failures.
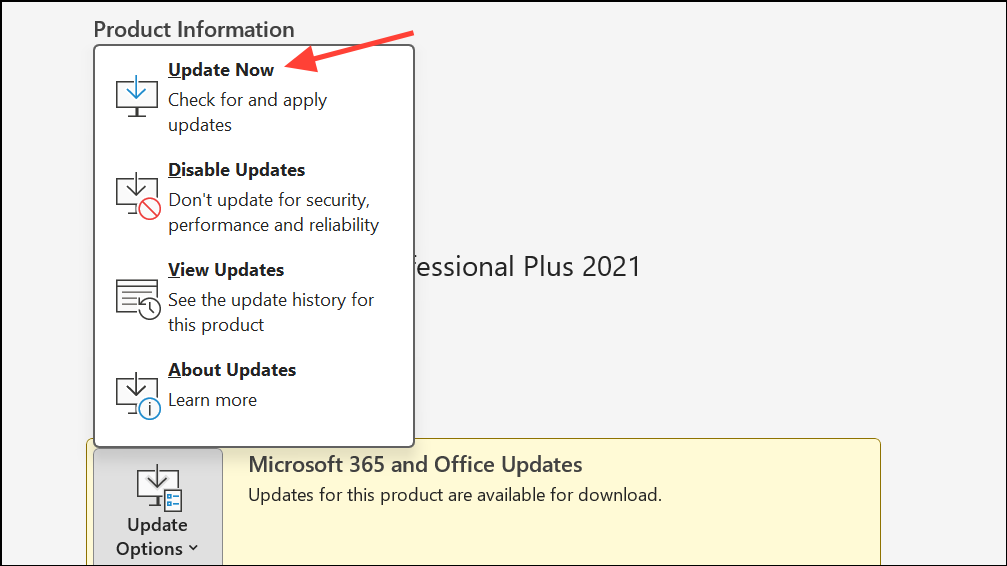
Step 1: Open PowerPoint, go to File > Account > Update Options > Update Now to check for and install the latest updates.
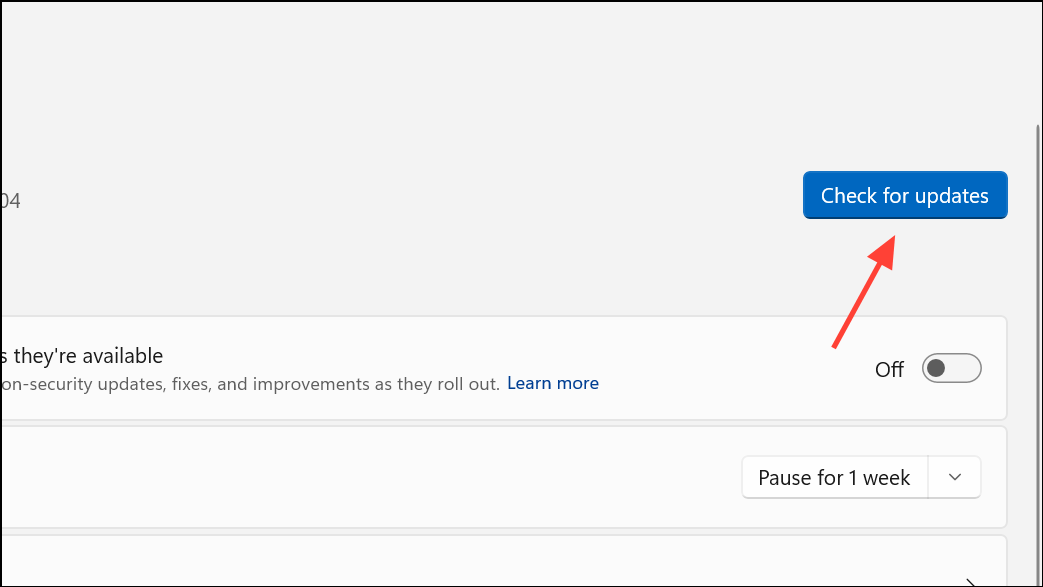
Step 2: Ensure your Windows operating system is also up to date. Go to Settings > Update & Security > Windows Update and install any available updates.
Updating both PowerPoint and Windows improves codec support and addresses bugs that may prevent media playback.
Repair Office Installation
Corrupted Office files or incomplete installations can disrupt media playback in PowerPoint.
Step 1: Close all Office applications.
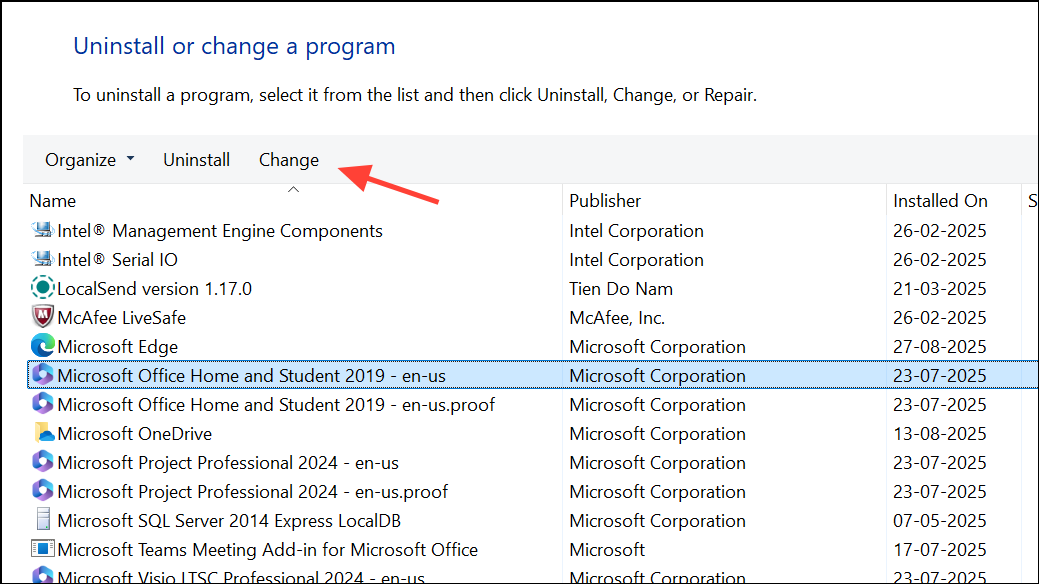
Step 2: Open Control Panel > Programs > Programs and Features, select Microsoft Office, and click "Change."
Step 3: Choose "Quick Repair" and follow the prompts. If issues persist, repeat and select "Online Repair" for a more thorough fix.
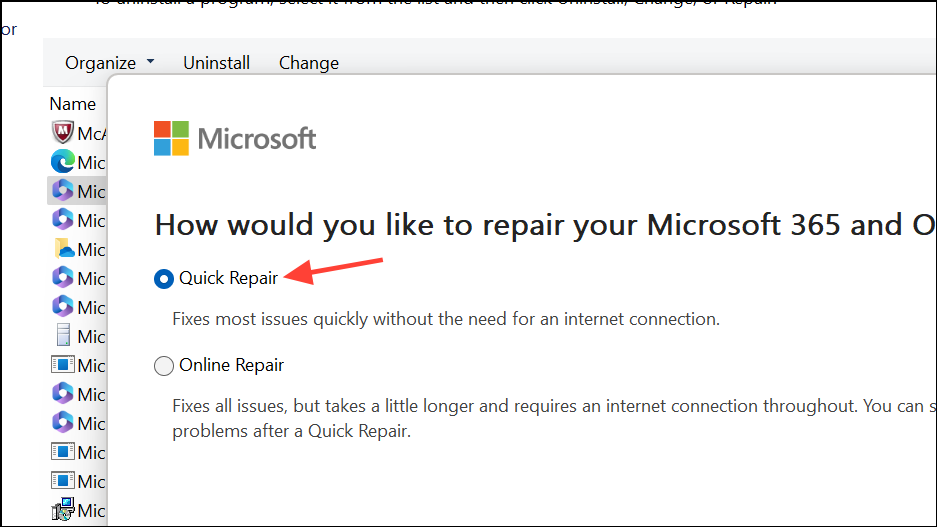
This process restores missing or damaged Office components essential for media playback.
Check Audio and Video Volume Settings
Muted application or system audio settings can make it seem like media isn’t playing, even when files are working correctly.
Step 1: In PowerPoint, select the video or audio object. Use the playback controls to confirm the media isn’t muted and the volume is set appropriately.
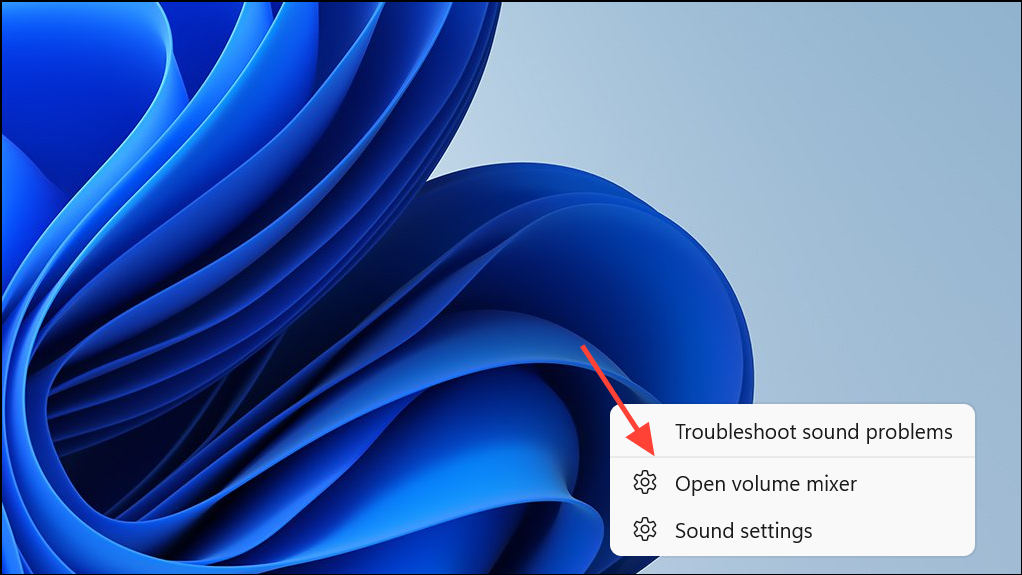
Step 2: On Windows, right-click the speaker icon in the system tray and choose "Open Volume Mixer." Ensure PowerPoint’s volume is not muted or set too low.
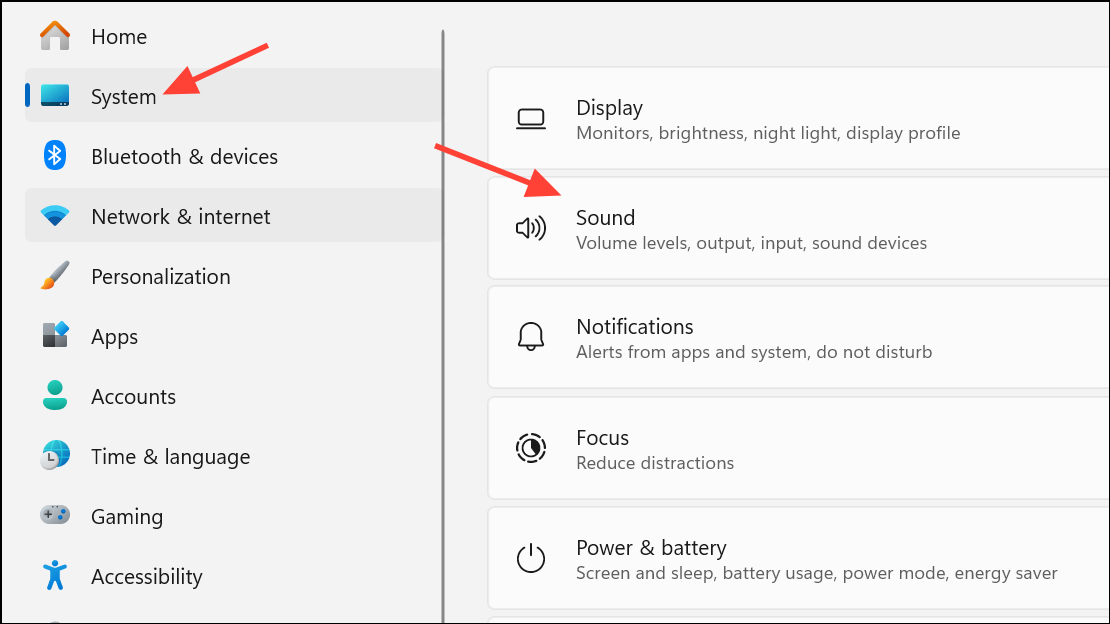
Step 3: Confirm your correct playback device is selected in Settings > System > Sound.
Reinsert Media Files
Sometimes, PowerPoint fails to play media due to file corruption or broken links, especially if files were moved or renamed after insertion.
Step 1: Delete the problematic audio or video from your slide.
Step 2: Go to the "Insert" tab, select "Audio" or "Video," and add the file again from its current location.
Reinserting refreshes the link and can resolve issues caused by path changes or minor file corruption.
Disable Hardware Graphics Acceleration
Hardware acceleration uses your computer’s graphics card to improve playback performance. However, if the graphics driver is incompatible or outdated, this setting can cause videos to stutter or fail to play.
Step 1: In PowerPoint, go to File > Options > Advanced.

Step 2: Scroll to the "Display" section and check "Disable slide show hardware graphics acceleration."
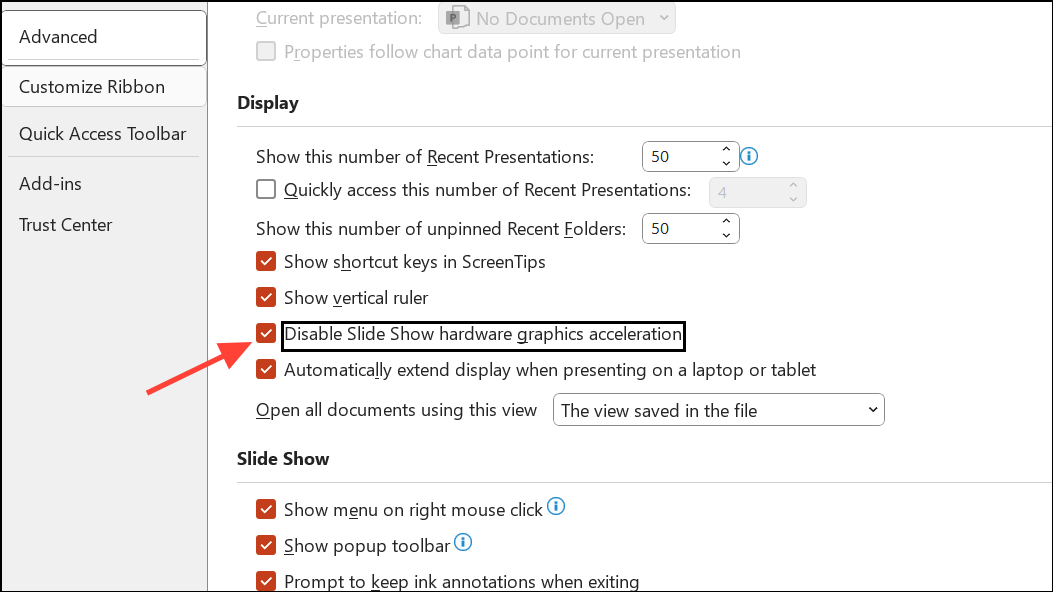
Step 3: Click "OK" and restart PowerPoint to apply the change.
This adjustment often resolves black screens, missing video, or playback lag.
Verify Codec Installation and Update
Codecs are software that encode and decode audio and video files. Missing or outdated codecs prevent PowerPoint from playing certain media types, especially with older installations or after Windows upgrades.
Step 1: Download and install a reputable codec pack, such as K-Lite Codec Pack, to ensure your system can handle all supported media types.
Step 2: After installation, restart your computer and try playing the media in PowerPoint again.
Step 3: If issues persist, check for codec updates or reinstall the codec pack to address any compatibility problems.
Adjust Video Playback Settings in PowerPoint
Incorrect video playback settings can stop media from starting automatically or playing as expected during a slideshow.
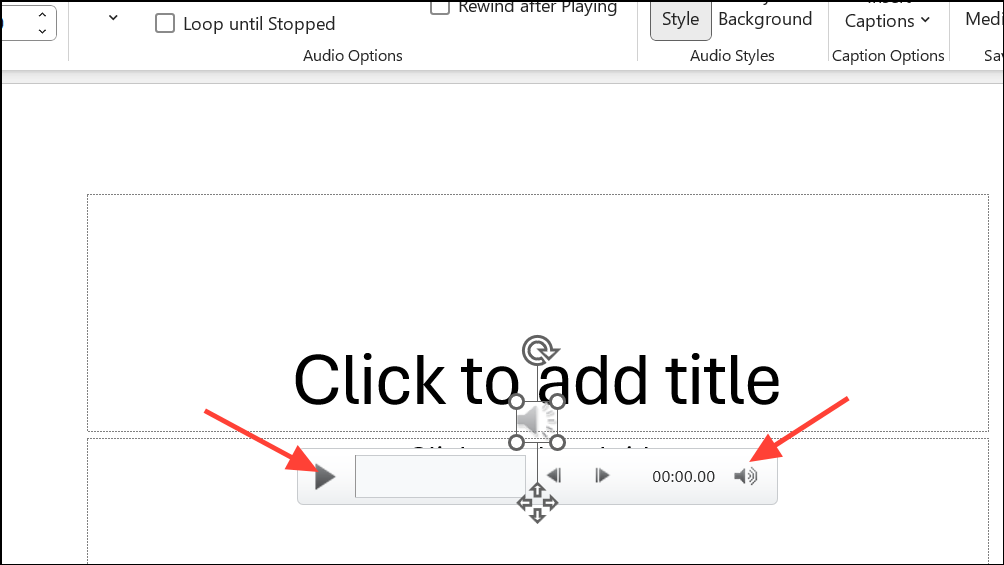
Step 1: Click on the video in your slide. Go to the "Playback" tab in the PowerPoint ribbon.
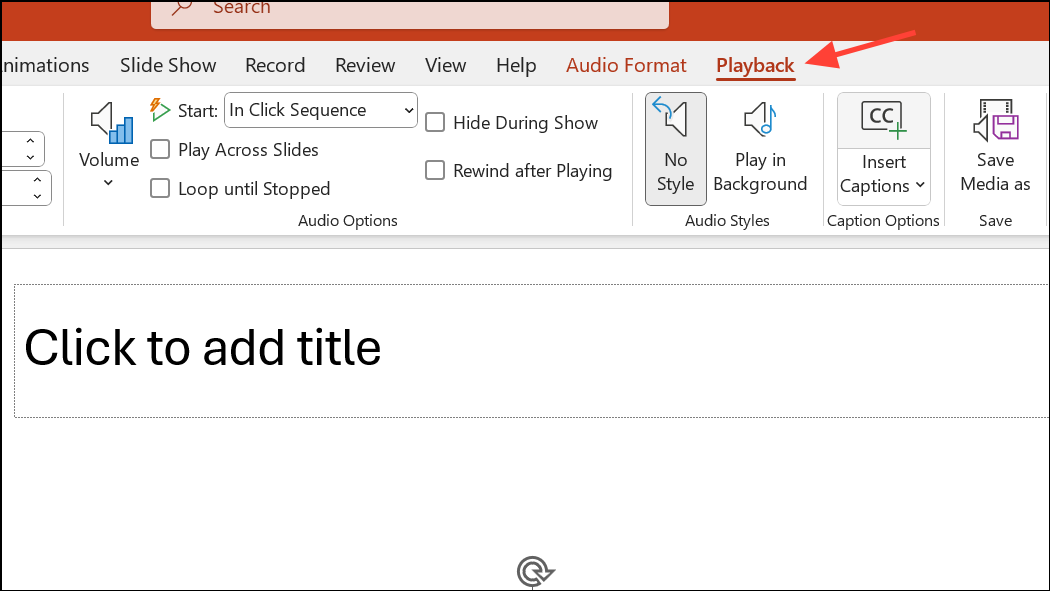
Step 2: Under "Start," select "Automatically" to ensure the video plays when the slide appears.

Step 3: Adjust other settings such as volume, looping, or hiding while not playing, as needed.
Proper configuration of these options streamlines video playback during your presentation.
Clear Temporary Files
Accumulated temporary files on your computer can interfere with PowerPoint’s performance, including media playback.
Step 1: Press Windows + R to open the Run dialog.
Step 2: Type %temp% and press Enter to open the temporary files folder.
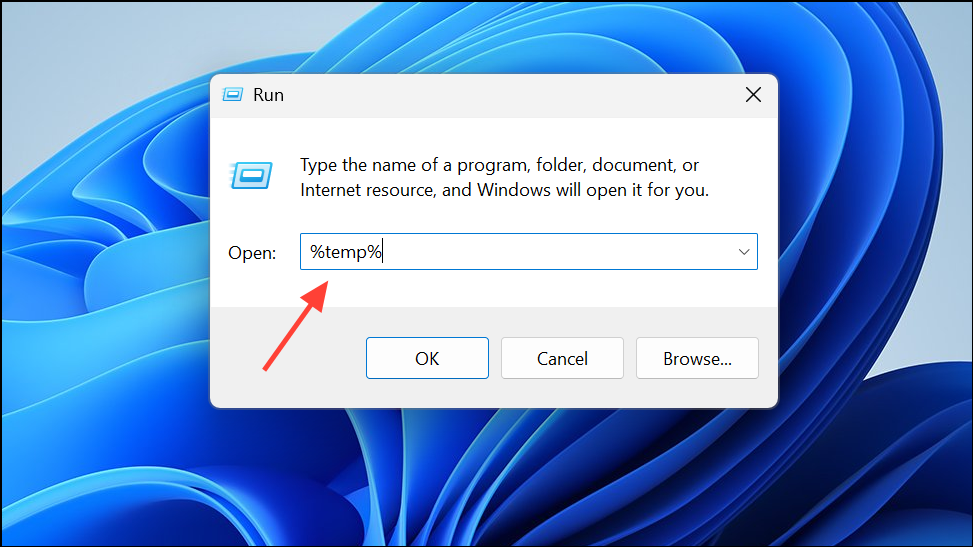
Step 3: Select all files (Ctrl + A) and delete them. Restart your computer before reopening PowerPoint.
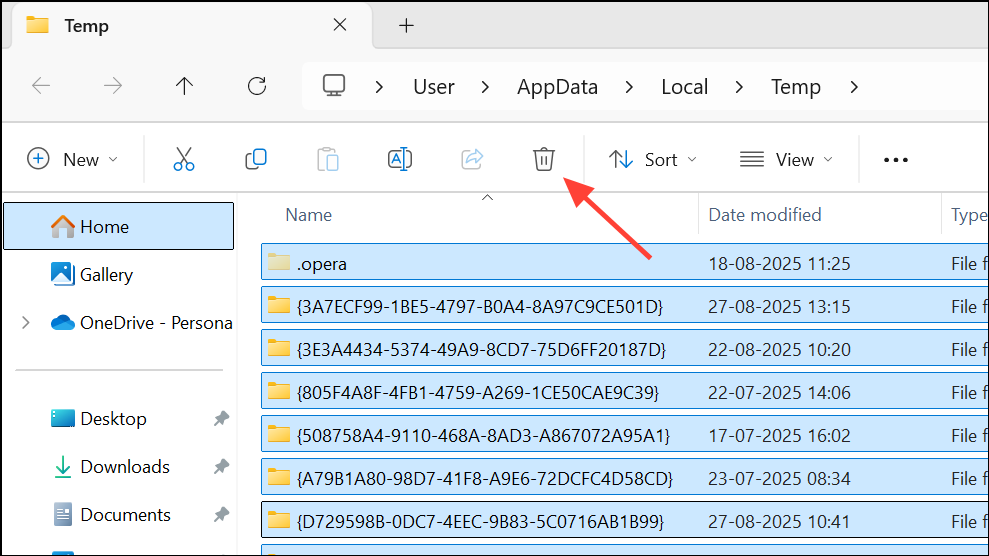
This process frees up resources and can resolve unexplained performance issues.
Troubleshoot Recording Issues with Cameo or Live Video
When recording presentations with PowerPoint’s Cameo feature, missing video or audio is often due to device permissions or software conflicts.
Step 1: Test your camera and microphone in another application to confirm they are working.
Step 2: On macOS, open System Preferences > Security & Privacy > Privacy and ensure PowerPoint has permission to access your camera and microphone.
Step 3: Disable any third-party add-ins by going to File > Options > Add-ins > Manage: COM Add-ins > Go and unchecking all add-ins.
Step 4: Try recording in a new, blank PowerPoint file to rule out file-specific corruption.
These steps help restore full recording functionality for live video and audio in your presentations.
Check File Paths and Locations
Linked (rather than embedded) media files require the original file path to remain unchanged. Moving or renaming media files after insertion will break playback links.
Step 1: Confirm that all linked audio and video files are still in their original locations. If files have been moved, update the links or reinsert the files from their new location.
Step 2: For presentations that will be used on other computers, always embed media files instead of linking, or ensure you copy all linked files along with the presentation.
Applying these targeted troubleshooting steps restores reliable audio and video playback in PowerPoint, so your presentations run smoothly every time.