
The “0xA00F4243” camera error in Windows 11 typically appears with a message indicating another application is using the camera. This issue interrupts video calls, meetings, and other activities that depend on your webcam, often due to background app conflicts, privacy restrictions, or driver problems. Addressing this error requires a methodical approach to identify and resolve the underlying cause.
Close Background Applications Using the Camera
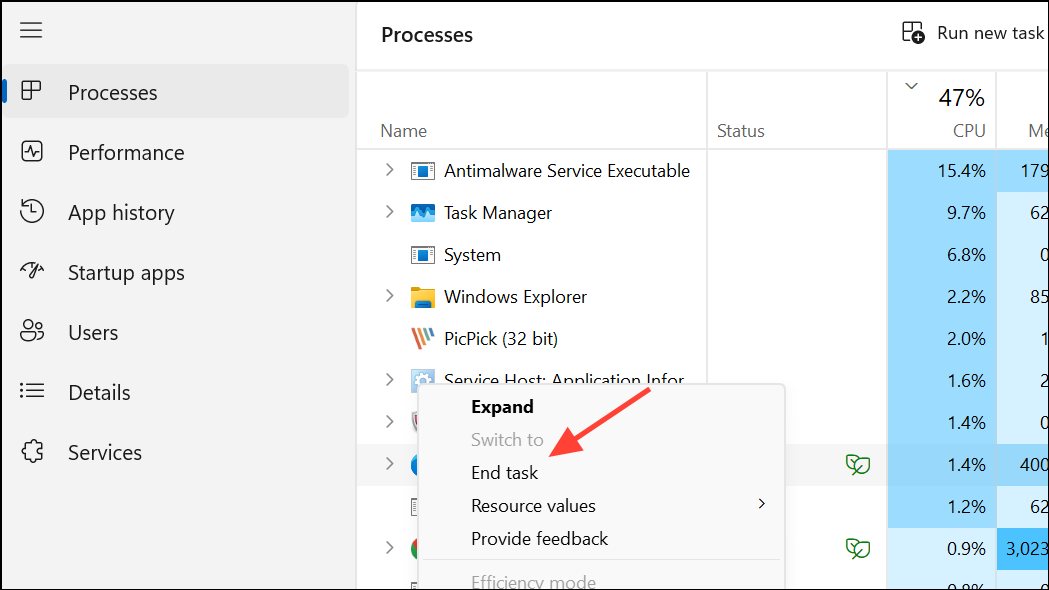
Step 1: Open Task Manager by pressing Ctrl + Shift + Esc. This utility displays all running processes and applications.
Step 2: In Task Manager, look for any apps that might be accessing your camera, such as video conferencing tools (Microsoft Teams, Zoom, Skype), browser windows, or messaging apps. Right-click each suspected app and choose End Task to close it.
Step 3: After closing all potential camera-using apps, reopen the Camera app or your preferred video application to check if the error persists.
Check and Adjust Camera Privacy Settings
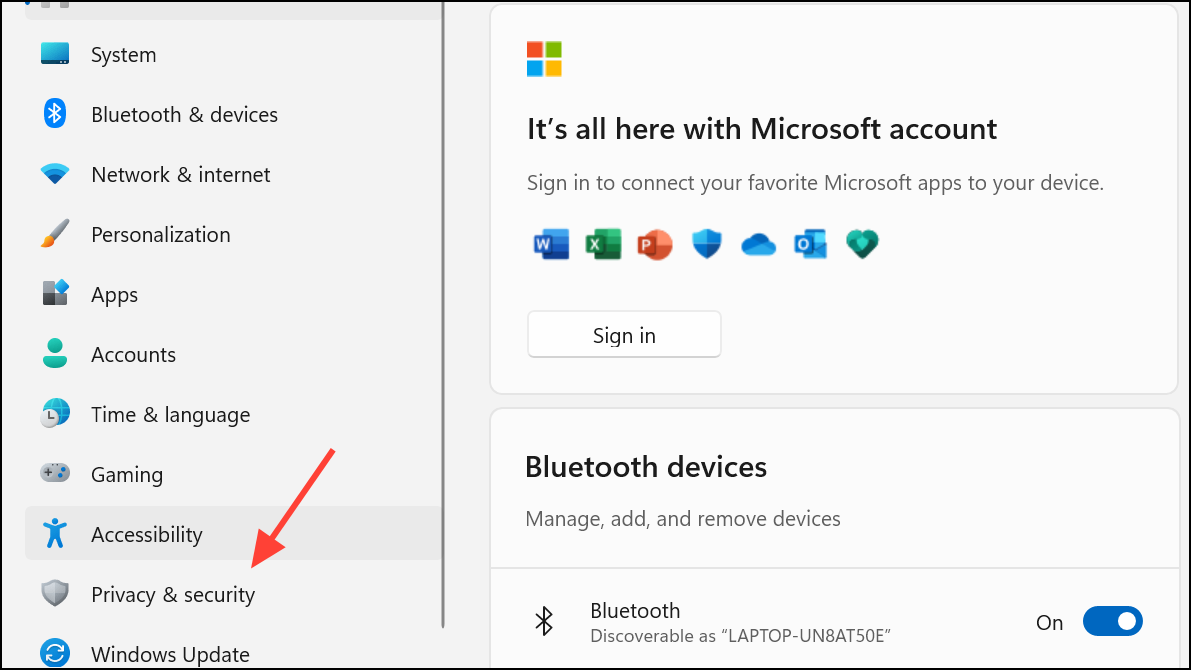
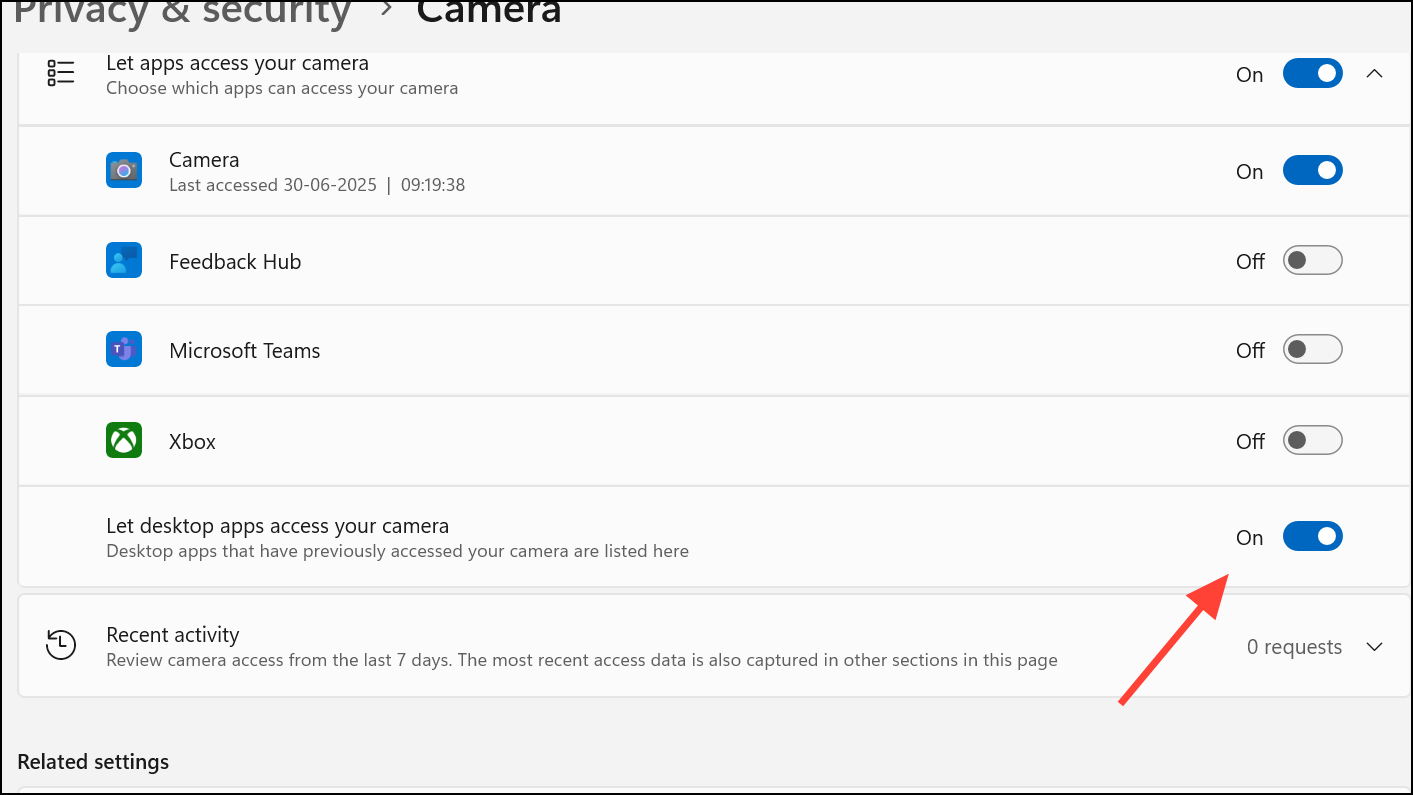
Step 1: Open Windows Settings by pressing Windows + I and select Privacy & security from the sidebar.
Step 2: Click on Camera under the “App permissions” section. Ensure that Camera access is turned on for your device. If the option is greyed out, you may need administrator rights to enable it.
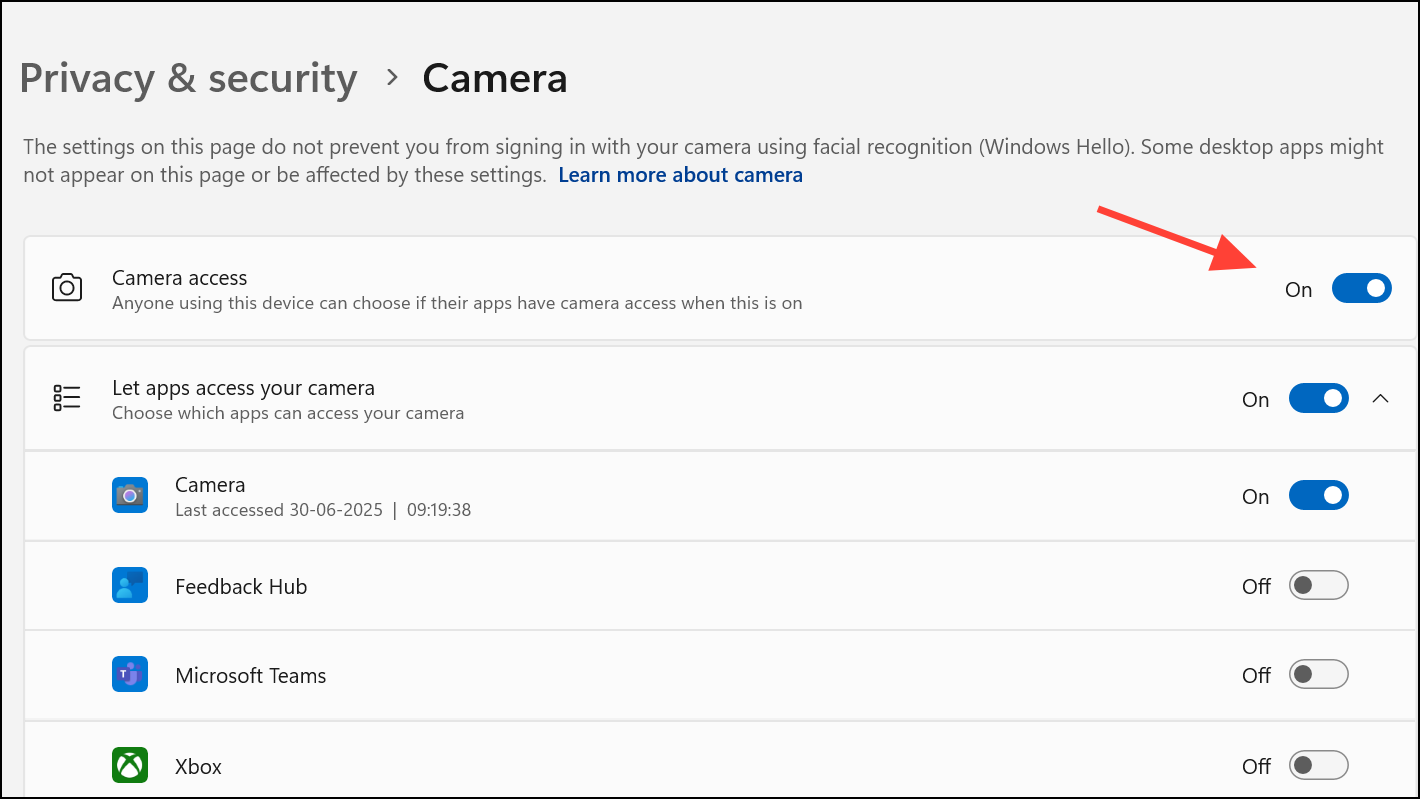
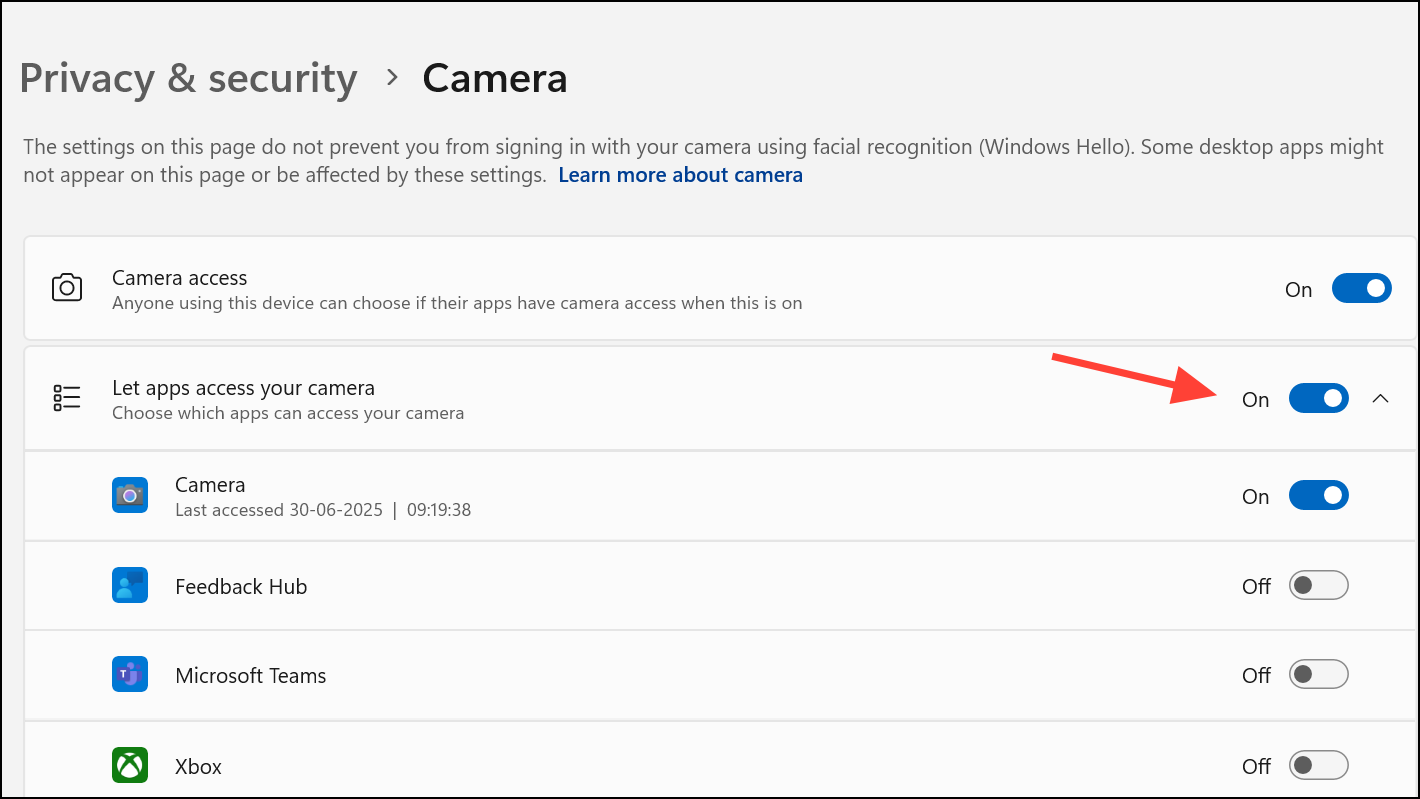
Step 3: Make sure Let apps access your camera is enabled. Review the list of Microsoft Store apps and confirm access for those you want to use with the camera.
Step 4: For desktop applications (like browsers or third-party video apps), scroll down and ensure Let desktop apps access your camera is switched on. This option is necessary for most non-Store apps to function with your webcam.
Update or Reinstall Camera Drivers
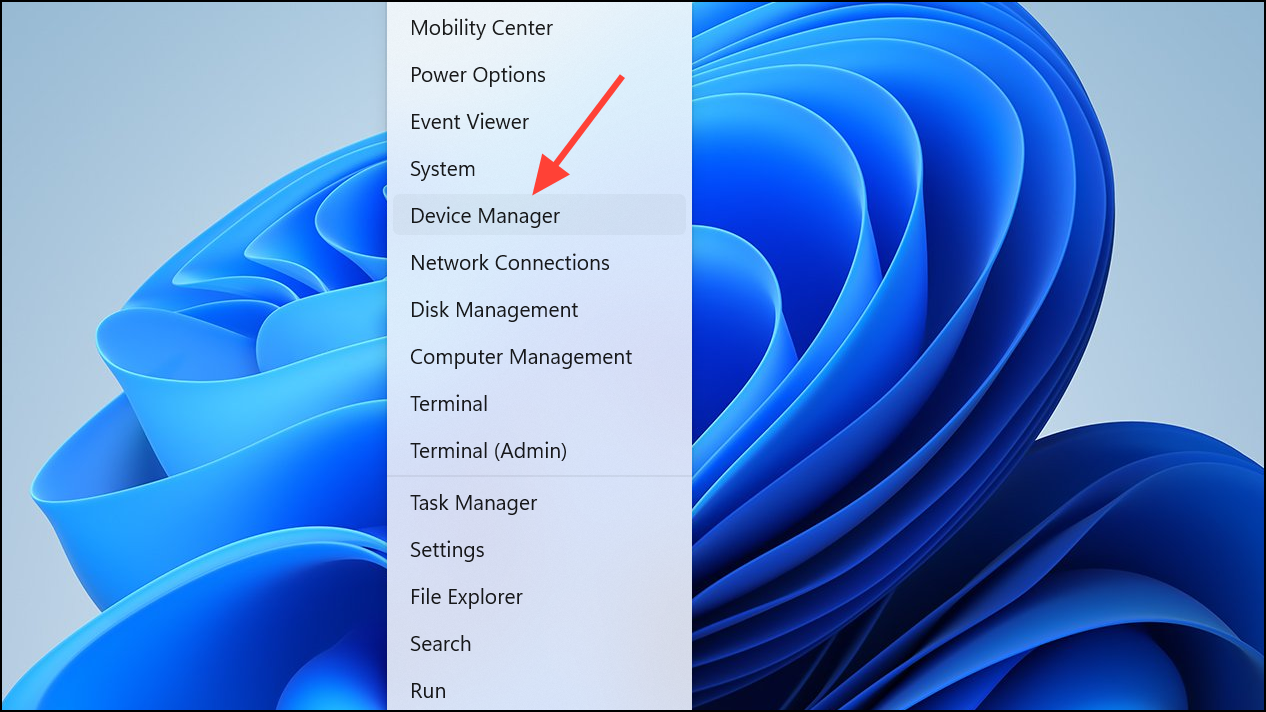
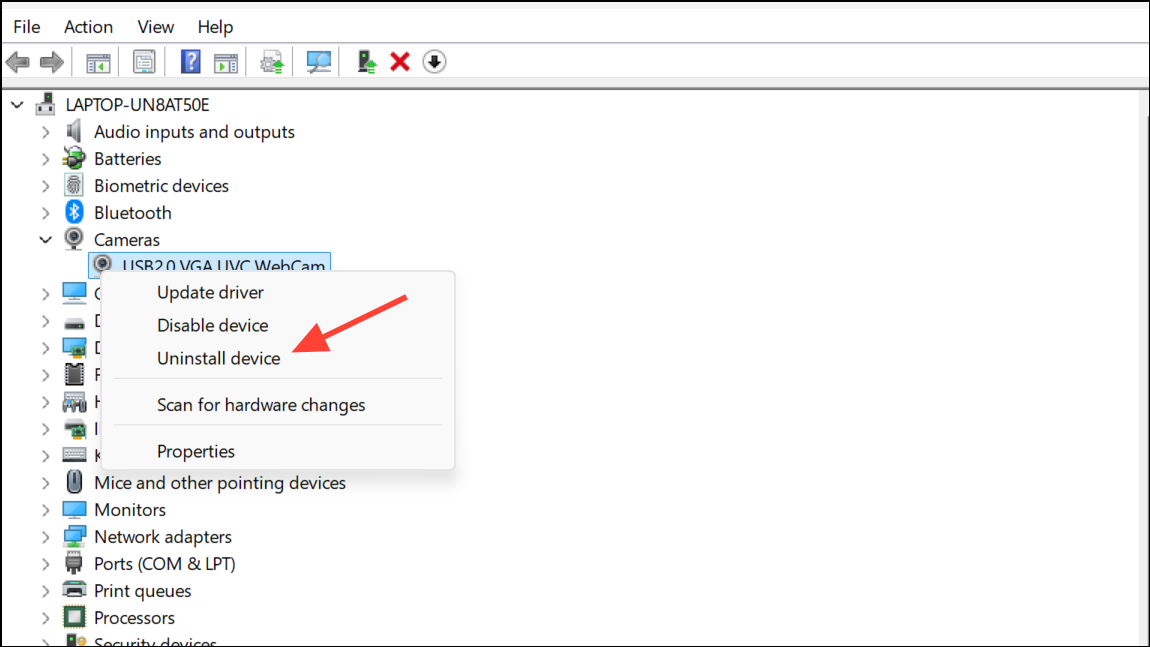
Step 1: Right-click the Start button and select Device Manager.
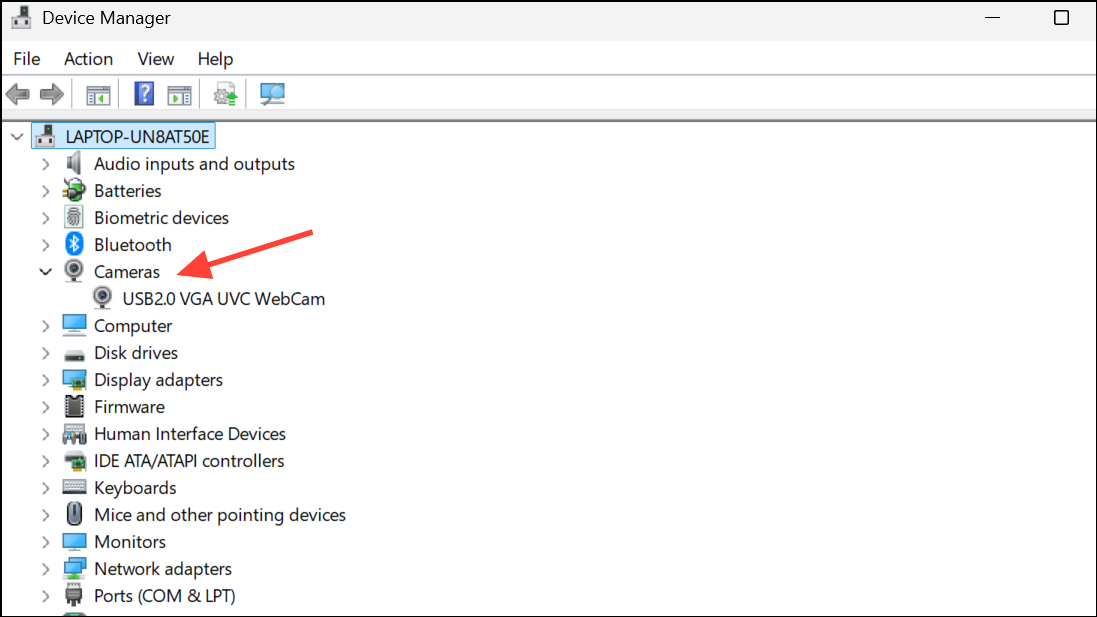
Step 2: In Device Manager, expand the Cameras or Imaging devices section to locate your webcam.
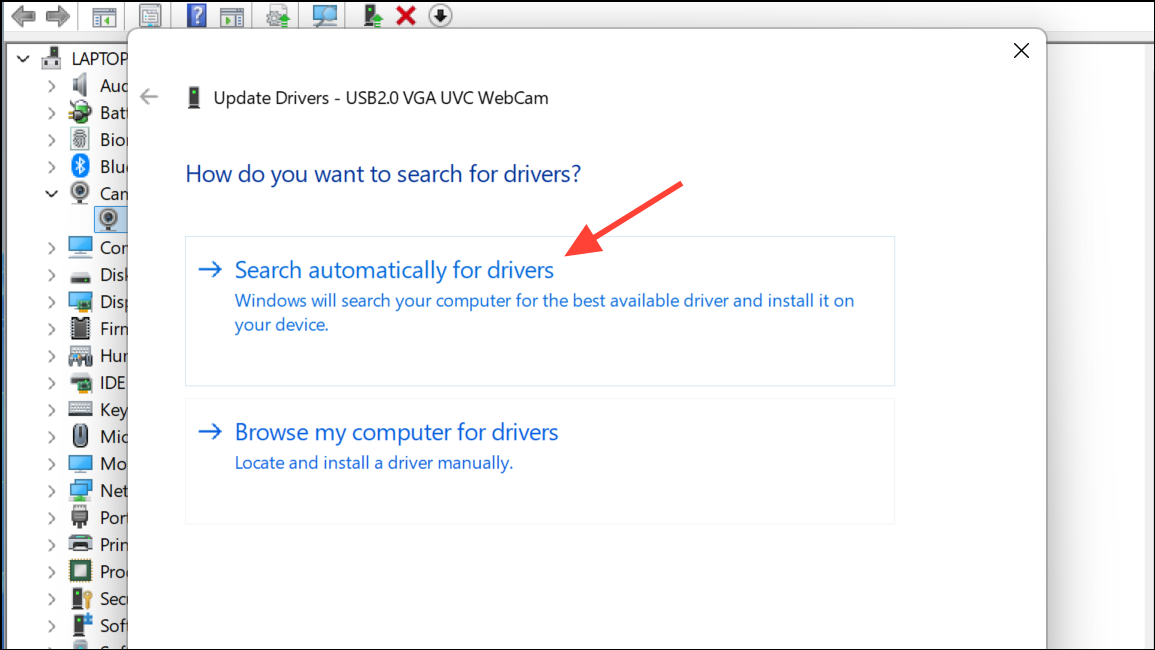
Step 3: Right-click your camera device and choose Update driver. Select Search automatically for drivers to allow Windows to find and install the latest compatible driver.
Step 4: If updating does not resolve the issue, right-click the camera again and select Uninstall device. Confirm the uninstallation and restart your computer. Windows will attempt to reinstall the default driver upon reboot, restoring camera functionality.
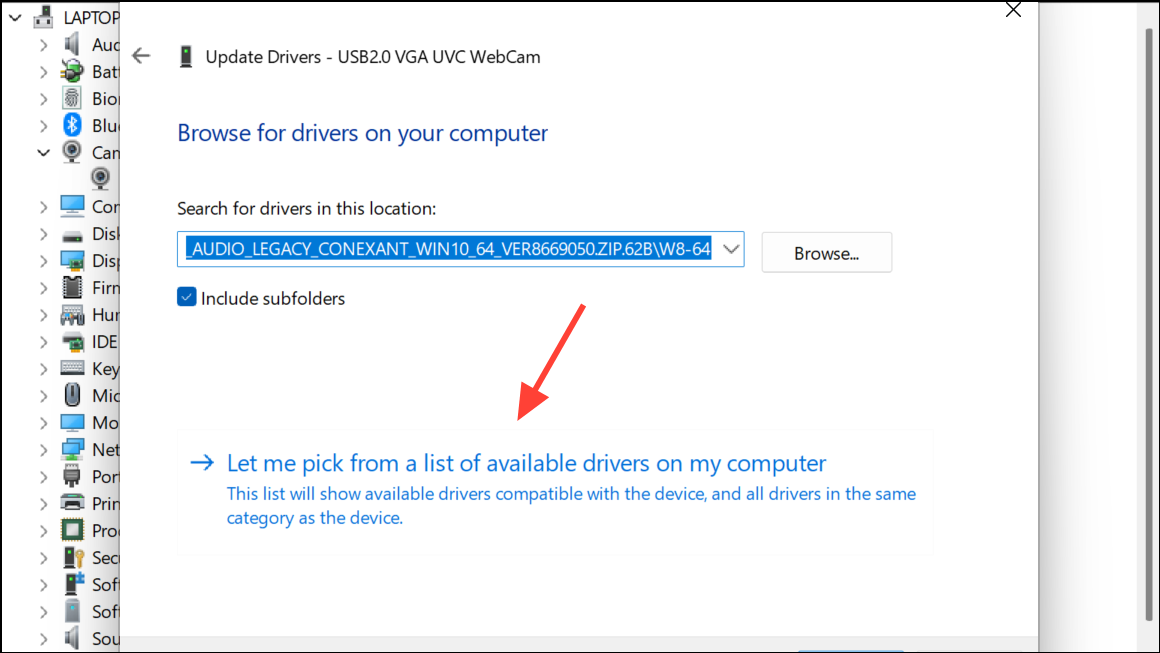
Step 5: If the problem continues, repeat the process, but this time select Update driver > Browse my computer for drivers > Let me pick from a list of available drivers on my computer.
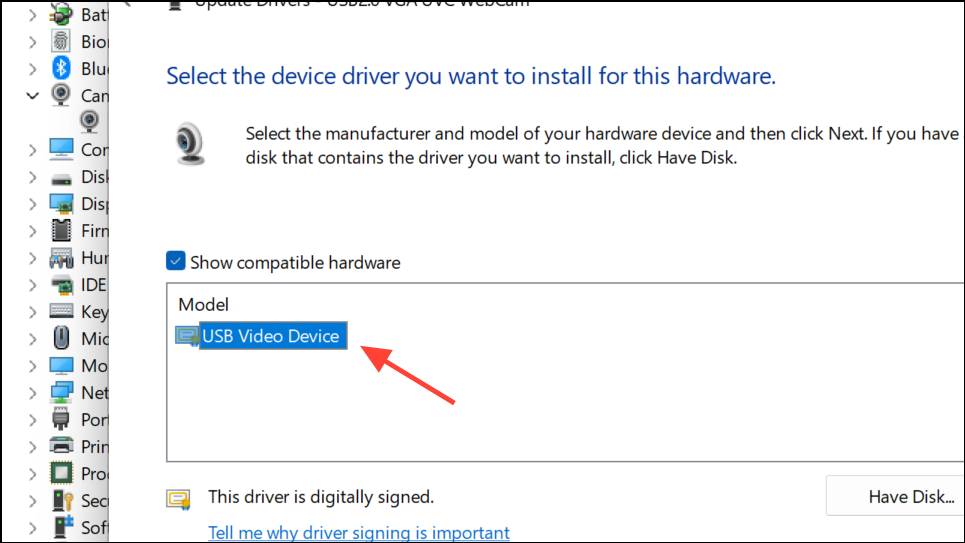
Step 6: Choose USB Video Device and complete the update. This step forces Windows to use its generic camera driver, which can resolve compatibility problems.
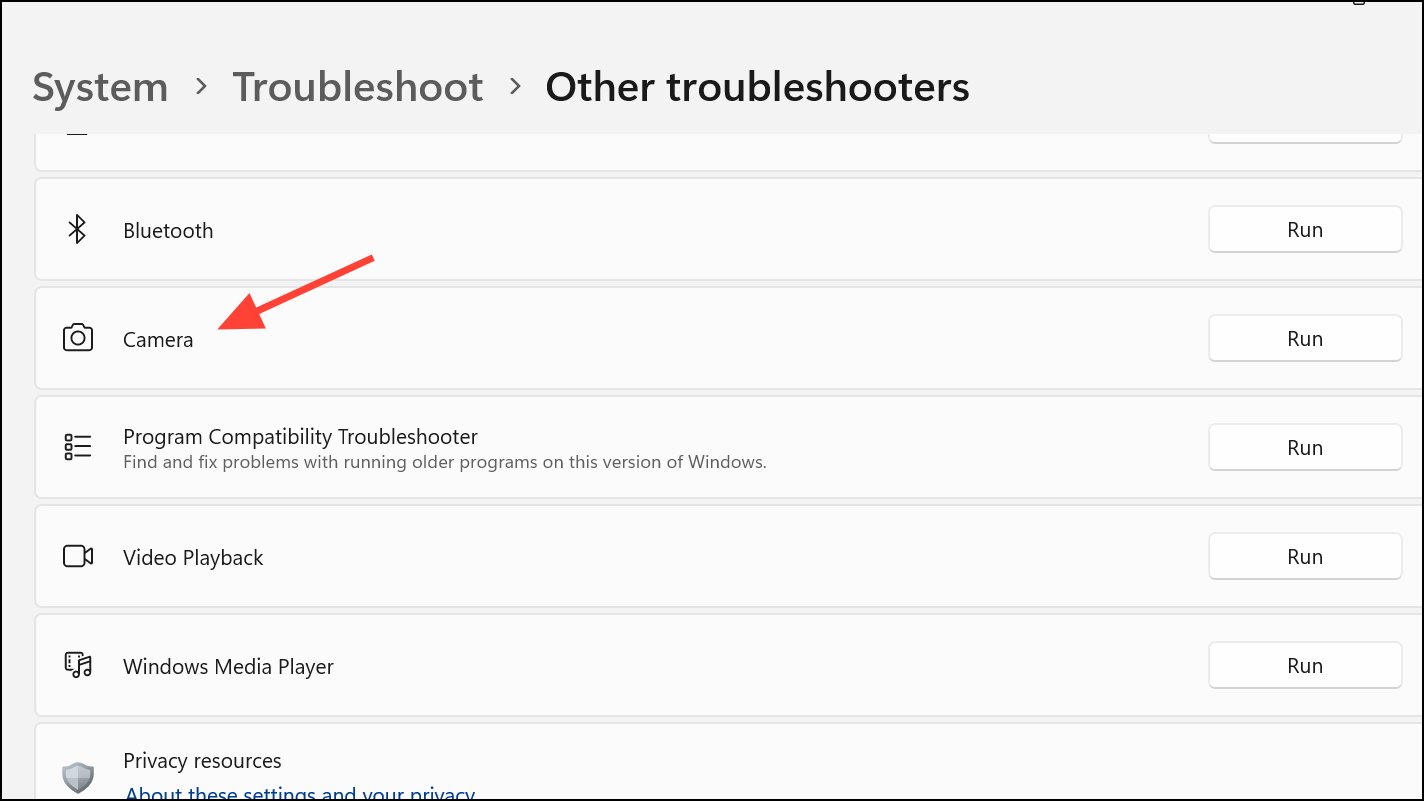
Run the Windows Camera Troubleshooter
Step 1: Open Settings with Windows + I and go to System > Troubleshoot > Other troubleshooters.
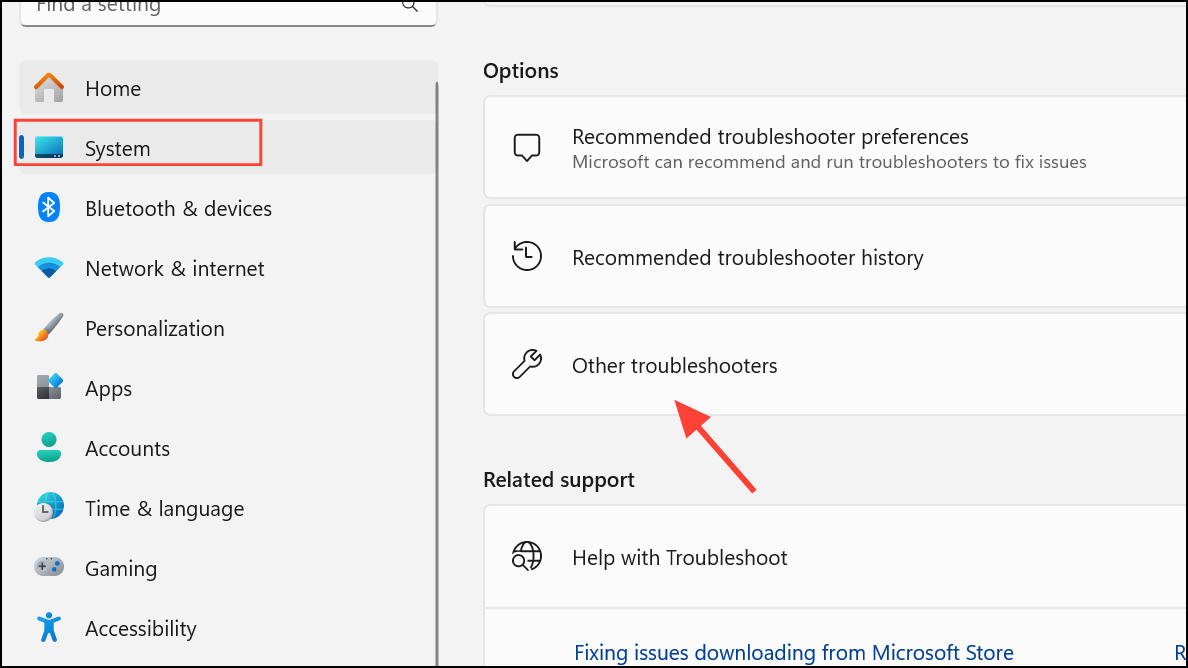
Step 2: Scroll down to the Camera section and click Run. The troubleshooter will scan for common issues and attempt to fix them automatically, including permission errors and service conflicts.
Step 3: Follow any on-screen instructions provided by the troubleshooter. After the process completes, test your camera again.
Restart Camera Services and Check Physical Controls
Step 1: Certain laptops have a physical switch, keyboard shortcut, or sliding shutter to disable the camera for privacy. Inspect your device for a dedicated camera button, a function key (often Fn + F8 or similar), or a slider near the webcam lens, and ensure it is set to enable the camera.
Step 2: Open the Services management console by pressing Windows + R, typing services.msc, and pressing Enter.
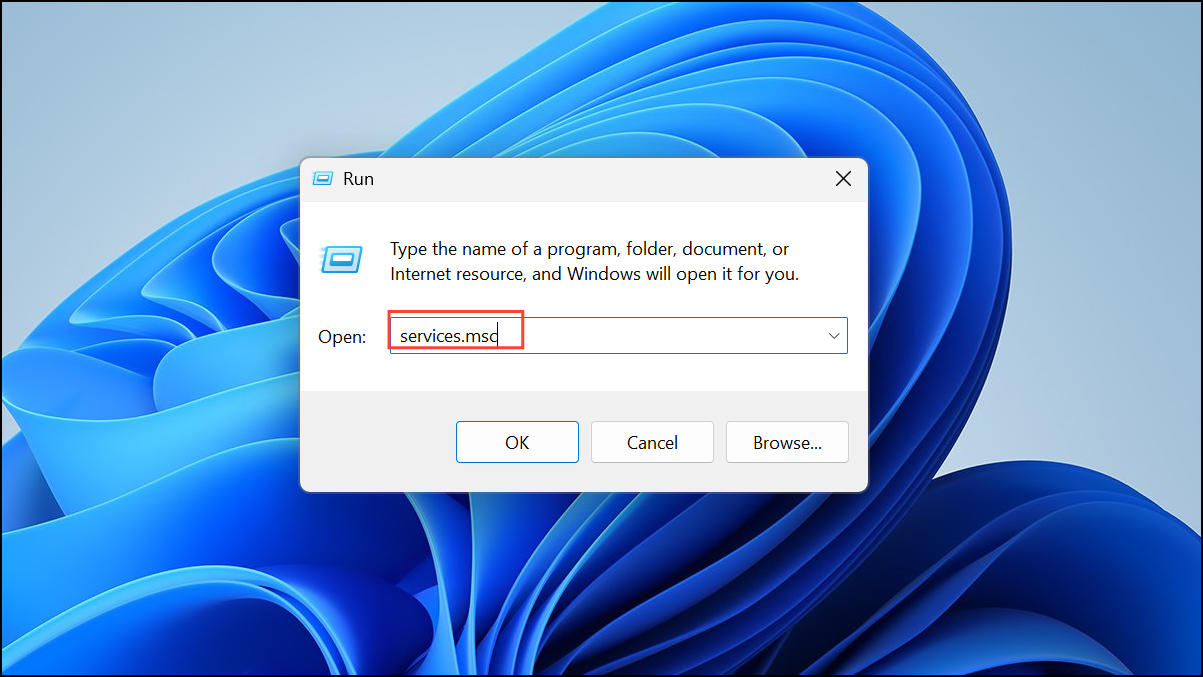
Step 3: In the list, locate services related to your camera hardware (such as Intel RealSense Depth if applicable). Right-click and select Start if the service is not running.
Step 4: Restart your computer to apply changes and test the camera again.
Temporarily Disable Antivirus or Security Software
Step 1: Third-party antivirus or security applications can sometimes block camera access for privacy reasons. Open your antivirus software and look for any settings related to camera privacy or device control.
Step 2: Temporarily disable the antivirus or its camera protection features. Test your camera immediately after disabling the software to determine if it is the source of the conflict.
Step 3: If the camera starts working, add an exception for your camera application within the antivirus settings, or consult the software’s support documentation for a permanent solution. Remember to re-enable your antivirus protection after testing.
Restore System Settings if the Problem Began After a Windows Update
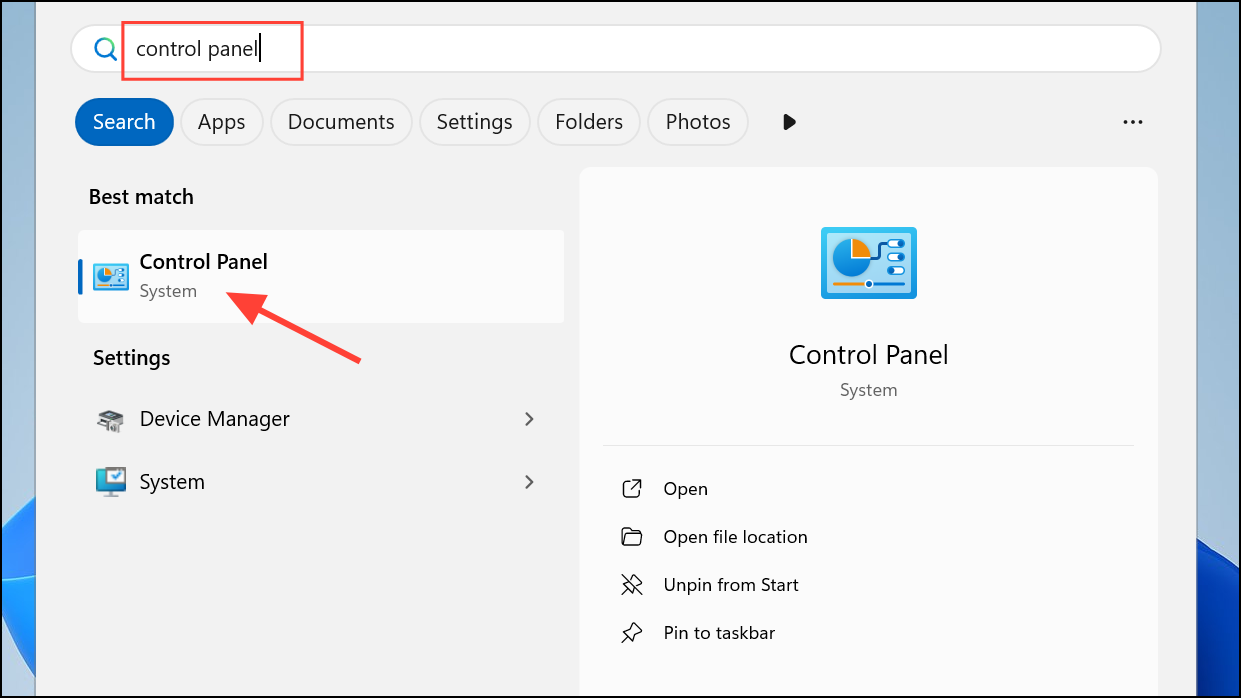
Step 1: If the camera error started following a recent Windows update, use System Restore to revert your system to a previous state. Open the Start menu, type Control Panel, and press Enter.
Step 2: Select Recovery > Open System Restore.
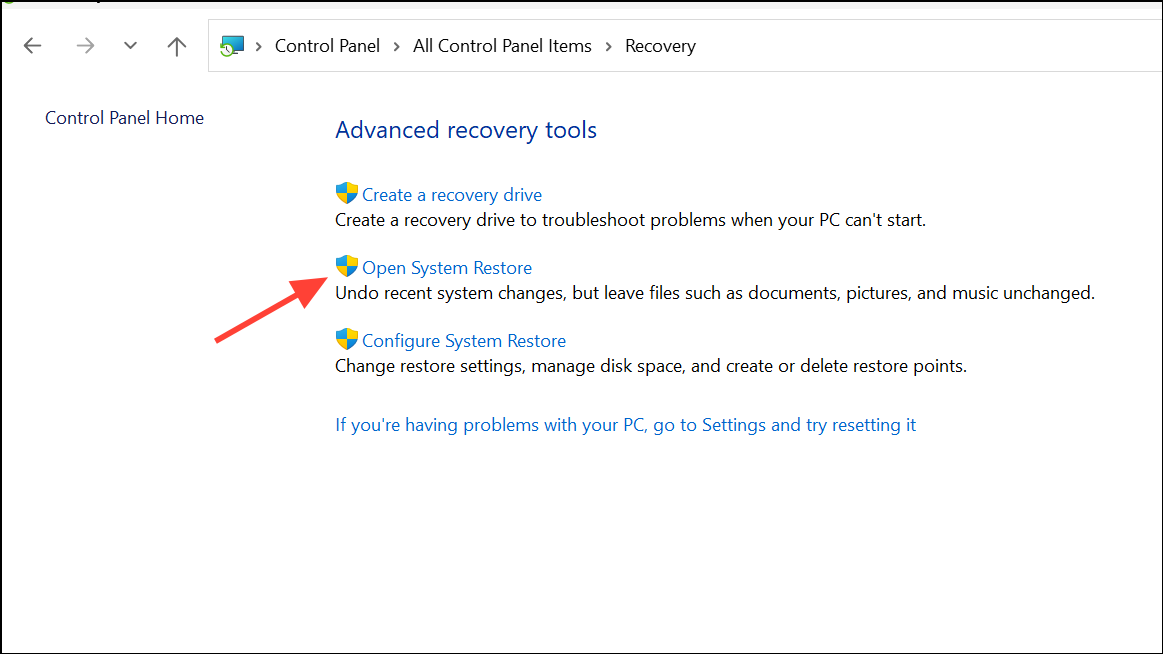
Step 3: Follow the prompts to select a restore point dated before the problematic update. Complete the restoration process and restart your computer.
Step 4: After rebooting, test your camera. This can resolve registry or driver conflicts introduced by recent updates.
Scan for Corrupt System Files
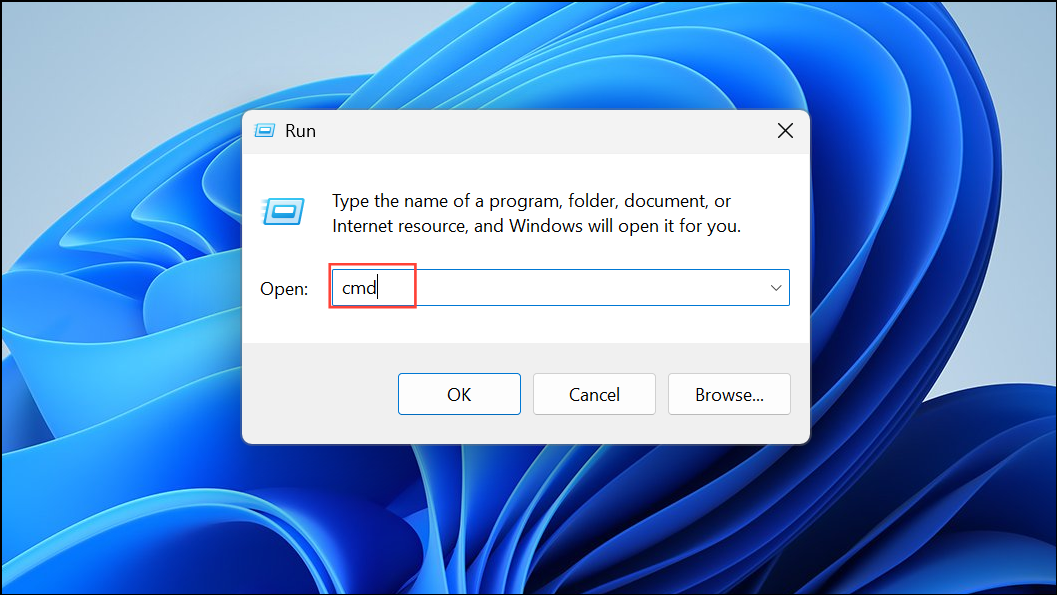
Step 1: Open an elevated Command Prompt by pressing Windows + R, typing cmd, then pressing Ctrl + Shift + Enter to run as administrator.
Step 2: Enter the following command and press Enter:
sfc /scannow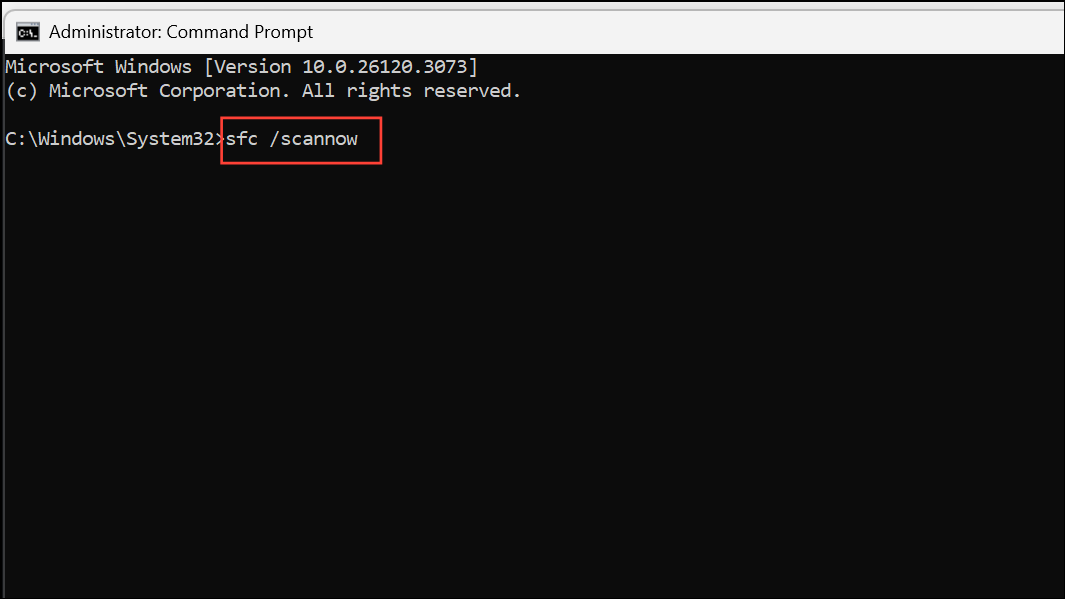
This command scans and repairs corrupt system files that may prevent the camera from functioning correctly. Wait for the scan to complete, then restart your computer and check the camera status.
Applying these steps systematically resolves most instances of camera error 0xA00F4243 in Windows 11, restoring reliable access to your webcam for video calls and other uses.