
Receiving the error message Error 0x800700CE: The filename or extension is too long when creating, renaming, or restoring folders in Windows 11 can block routine file management and disrupt workflow. This issue typically stems from Windows' path length restrictions, software conflicts, or system misconfigurations, and can occur even with short folder names if the underlying path is deeply nested or if certain system settings are misapplied.
Use 7-Zip File Manager to Rename or Move Files with Long Paths
Third-party file managers like 7-Zip are designed to handle files and folders that exceed Windows' default path length restrictions. This approach is especially effective when standard Windows tools fail to rename, move, or restore problematic files or folders.
Step 1: Download and install 7-Zip File Manager from the official website. After installation, right-click the 7-Zip File Manager shortcut and choose Run as administrator to ensure you have the necessary permissions.
Step 2: Navigate within 7-Zip to the folder or file that is generating the error. For example, if you are trying to recover something from the Recycle Bin on your D: drive, go to D:\$Recycle.Bin and locate your user-specific folder (usually ending in four digits).
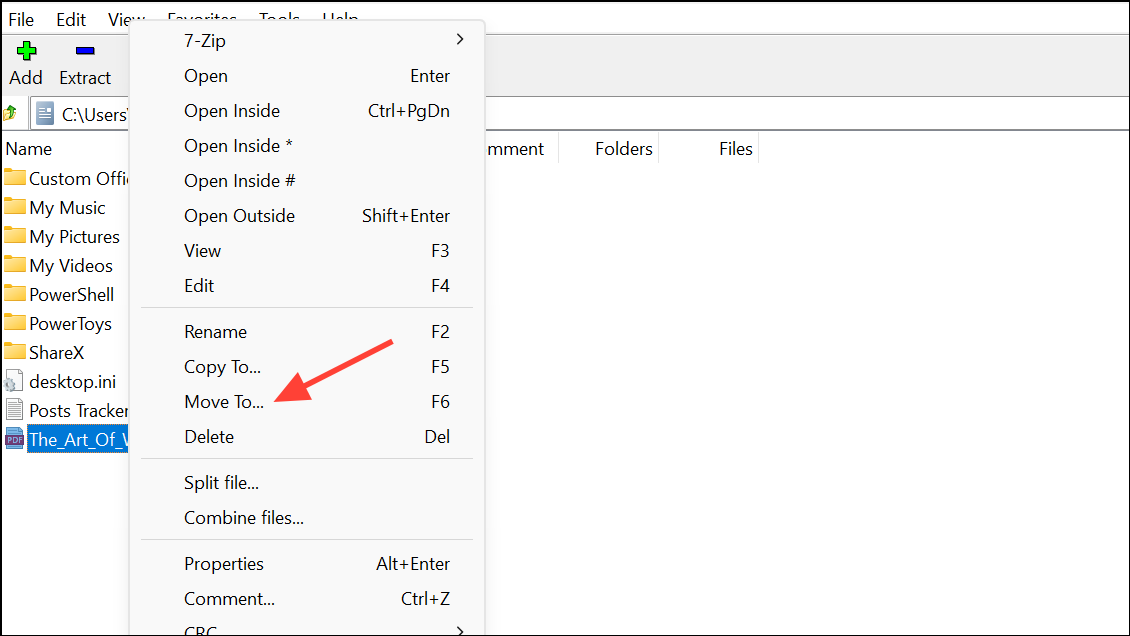
Step 3: Select the problematic files or folders. Right-click and choose Move To..., then select a destination closer to the root of your drive (such as D:\). This reduces the overall path length and bypasses the limitation.
Step 4: Once files are moved, you can rename or organize them as needed using 7-Zip or Windows Explorer.
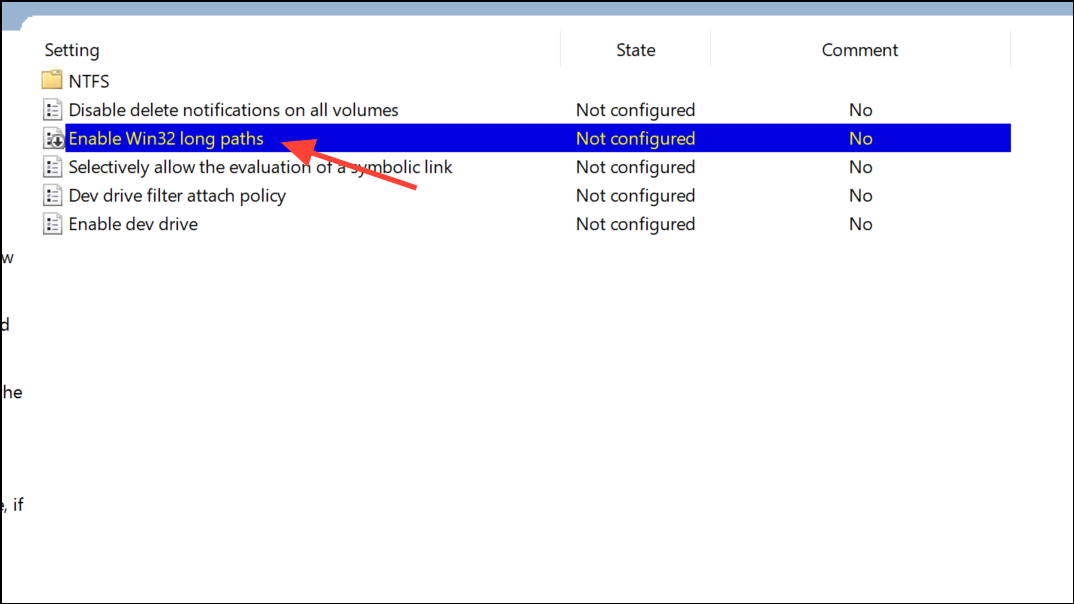
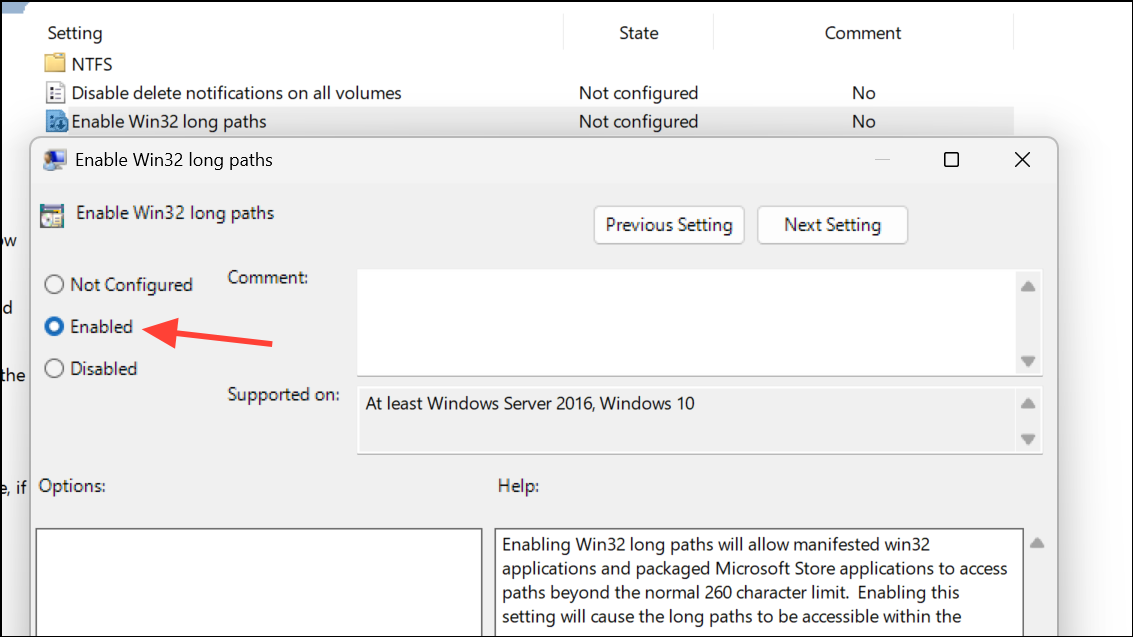
Enable Win32 Long Paths via Group Policy Editor
Windows 11 restricts file and folder paths to 260 characters by default. Enabling long path support allows applications to access files and folders with paths up to 32,767 characters, which resolves many issues related to deep folder structures.
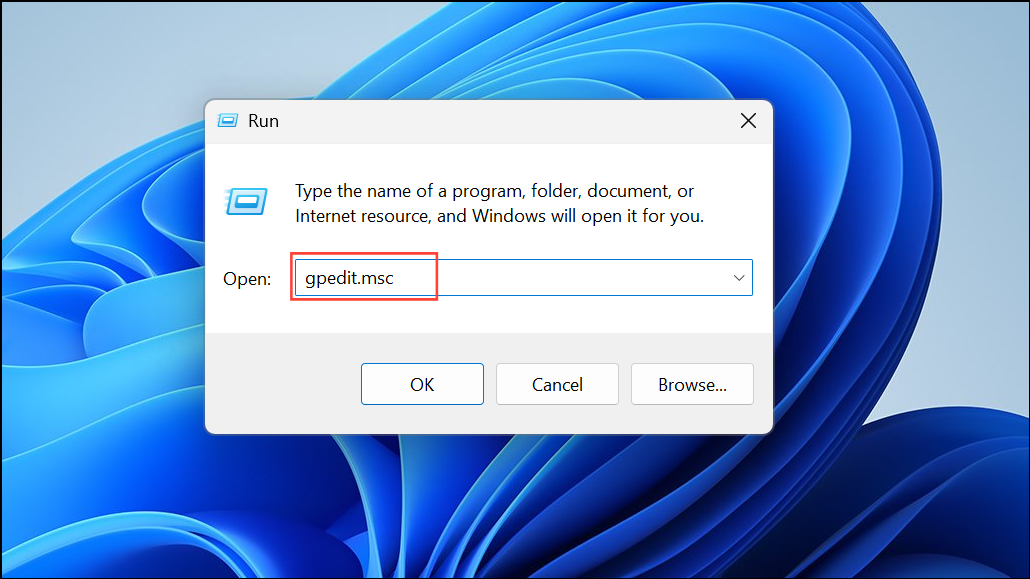
Step 1: Press Windows + R to open the Run dialog, type gpedit.msc, and press Enter to launch the Local Group Policy Editor.
Step 2: Navigate to Local Computer Policy > Computer Configuration > Administrative Templates > System > Filesystem.
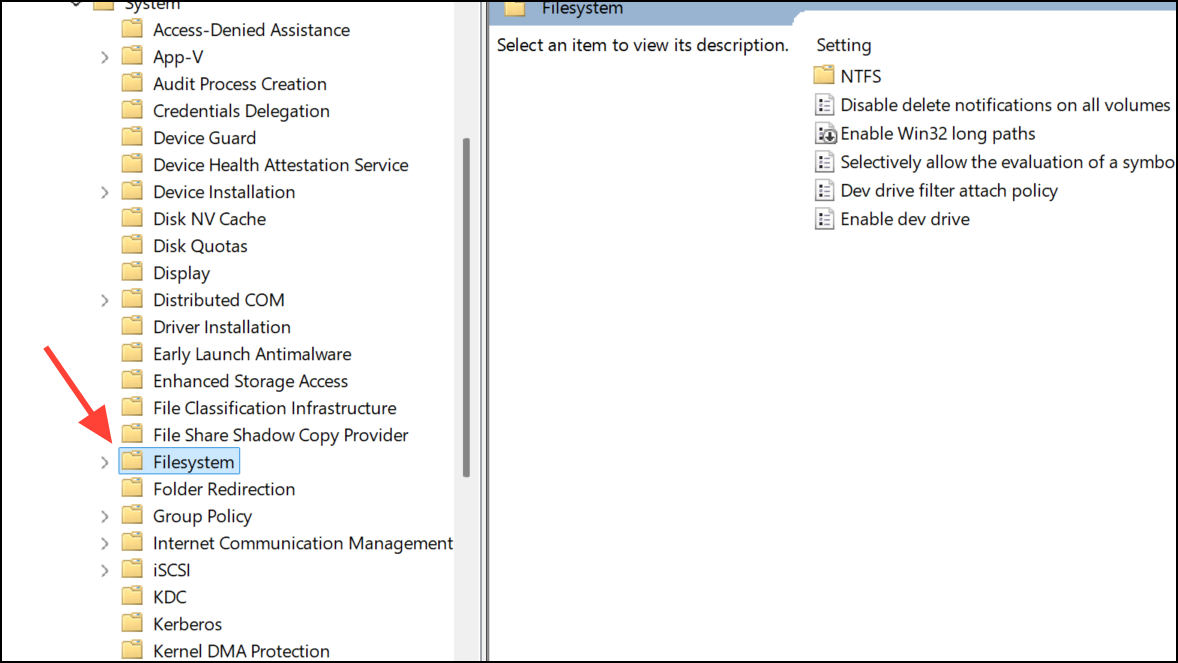
Step 3: Find and double-click Enable Win32 long paths.
Step 4: Select Enabled, then click Apply and OK. Restart your computer for the changes to take effect.
Shorten File or Folder Paths
Excessive folder nesting increases the total path length, which can easily exceed Windows’ limits even if individual folder names are short. Moving files or folders to a higher-level directory can immediately resolve the error.
Step 1: Open File Explorer and locate the file or folder that is causing the error.
Step 2: Drag and drop, or cut and paste, the file/folder directly into a root directory such as C:\ or D:\. This reduces the total path length and can restore normal file operations.
For files that cannot be moved via File Explorer, use 7-Zip File Manager as described above.
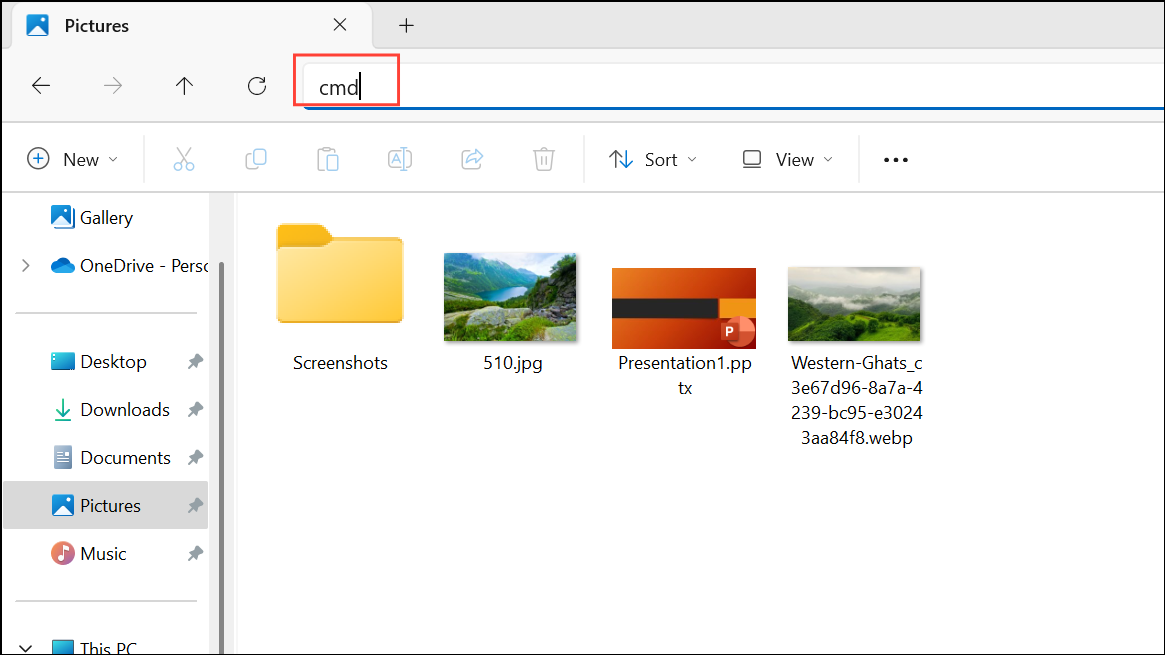
Rename Files and Folders Using Command Prompt
Windows Command Prompt can sometimes bypass Explorer limitations, allowing you to rename files or folders that produce errors in the graphical interface.
Step 1: In File Explorer, navigate to the problematic folder. Click the address bar, type cmd, and press Enter to open Command Prompt in that directory.
Step 2: Use the ren command to change the file or folder name. The syntax is:
ren "old_name" "new_name"For example, to rename New Folder to Archive:
ren "New Folder" "Archive"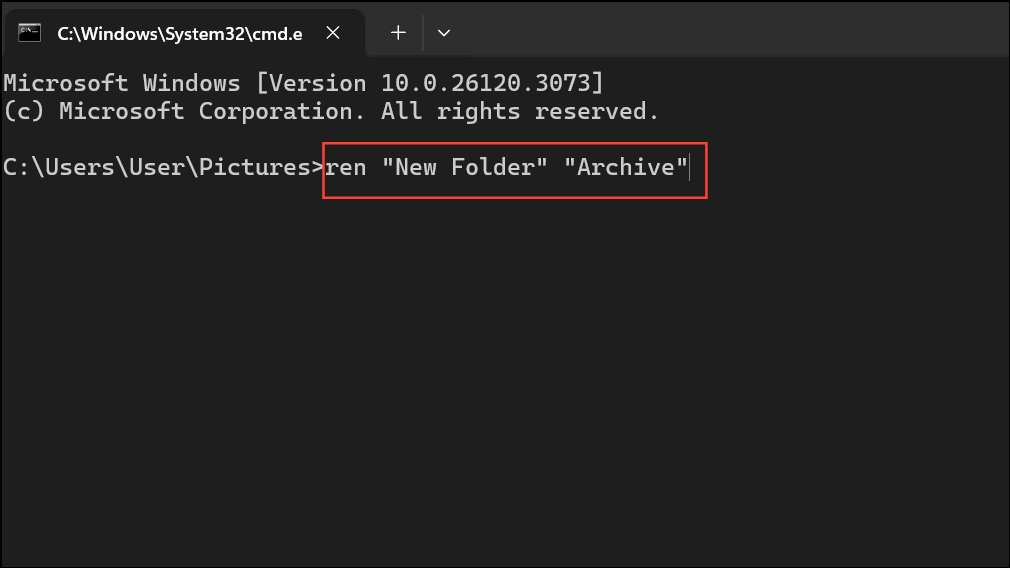
If you encounter errors here as well, the path length may still be too long—try moving the folder higher up in the directory tree first.
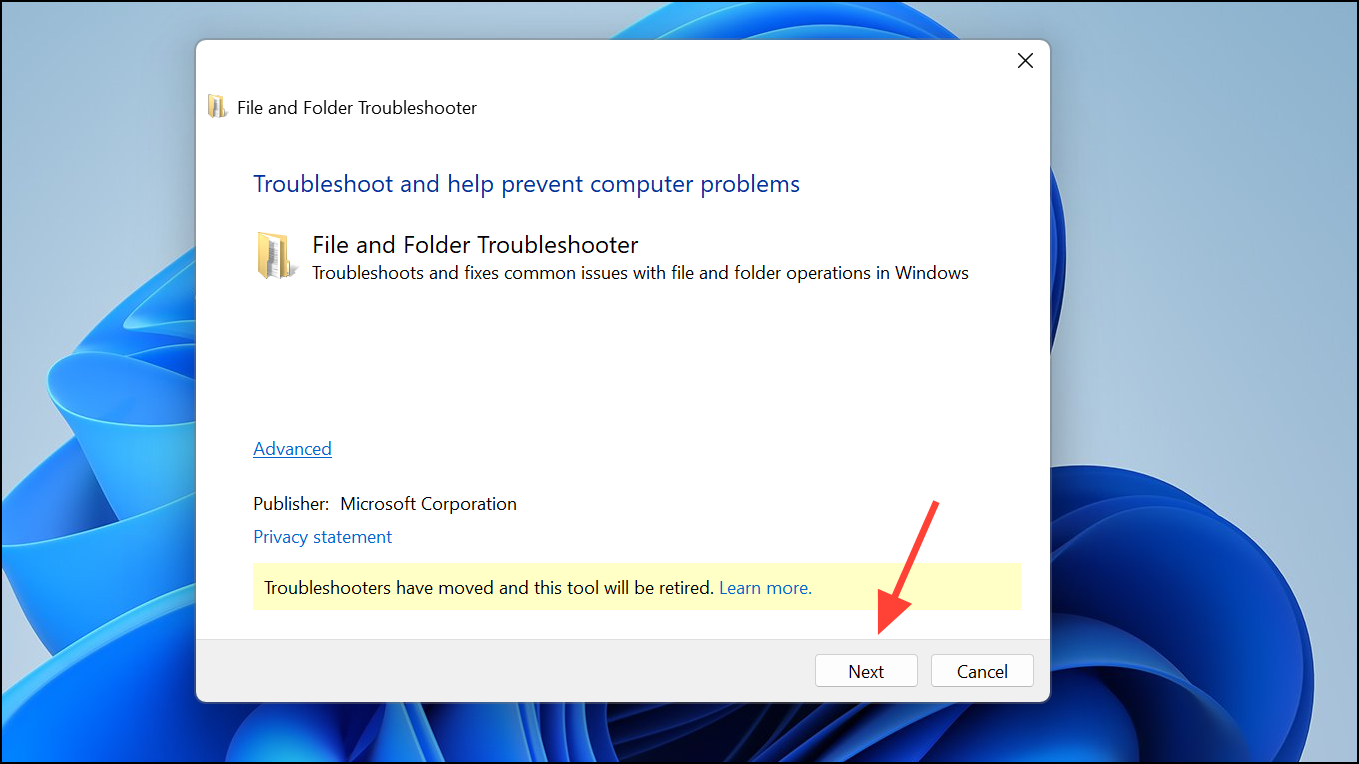
Run the File and Folder Troubleshooter
Windows provides a dedicated troubleshooter to automatically detect and fix issues related to file and folder operations, including problems with renaming, deleting, or moving items.
Step 1: Download the File and Folder Troubleshooter from Microsoft’s official site.
Step 2: Open the downloaded tool and select Next.
Step 3: Check the boxes for Problems with deleting files or folders and Renaming or moving files and folders, then continue.
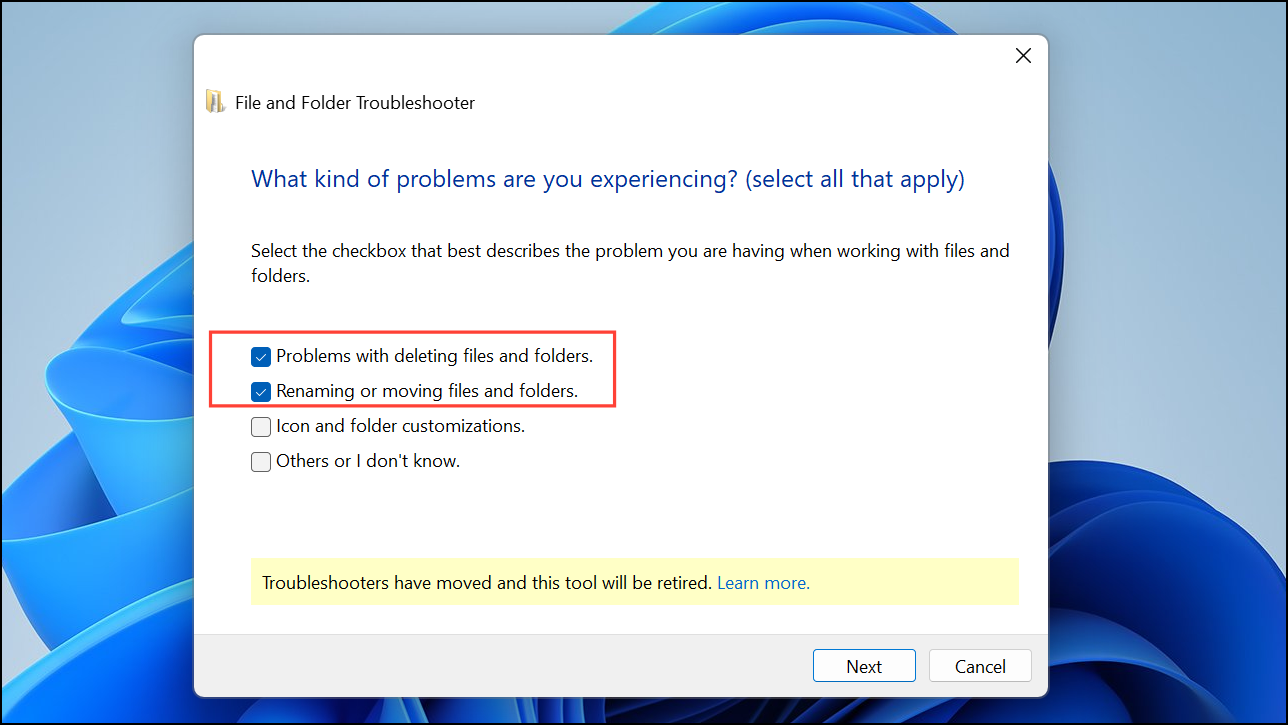
Step 4: Allow the troubleshooter to scan and apply any recommended fixes. Restart your system and check if the issue is resolved.
Check for Third-Party Software Conflicts
Security software or third-party drivers may interfere with file operations, causing the 0x800700CE error system-wide. Even after disabling such software, their drivers may still load at startup.
Step 1: Uninstall any recently added antivirus or security software completely, rather than just disabling it. Reboot your system to ensure all drivers are removed.
Step 2: If the issue began recently, use System Restore to revert your system to a previous state before the problem started. This can reverse any system changes or driver installations that triggered the error.
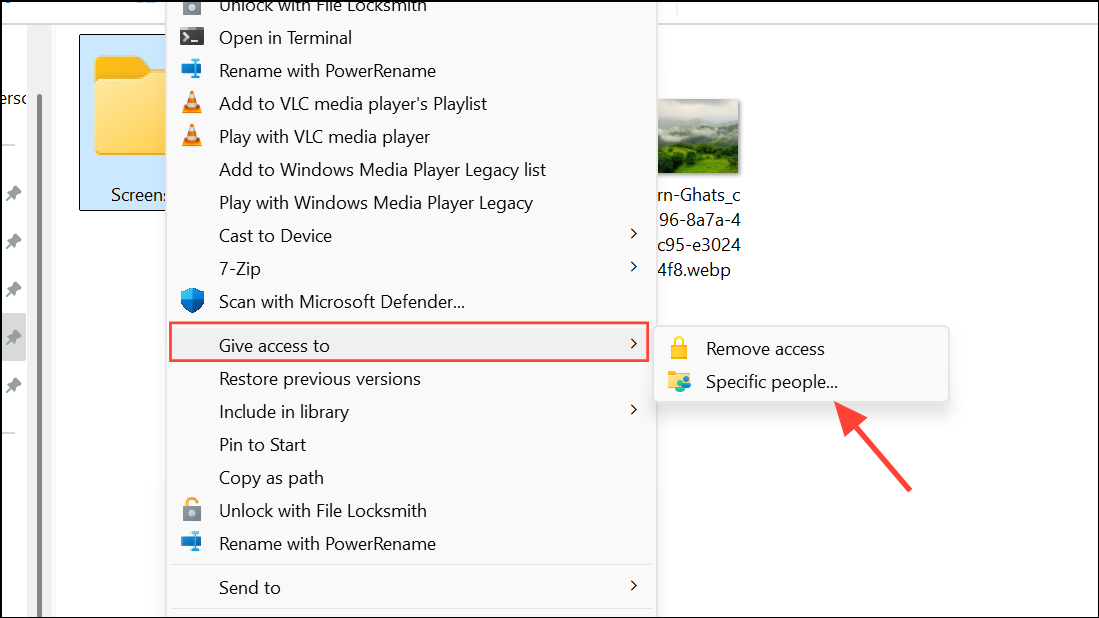
Create a Network Drive to Access Long Paths
Mapping a network drive to a deep folder path can provide a virtual shortcut, effectively reducing the path length Windows sees and allowing file operations that would otherwise fail.
Step 1: Right-click the problematic folder, select Give access to, then choose Specific people and follow prompts to share with your user account.
Step 2: Open This PC, click the three-dot menu, and select Map network drive.
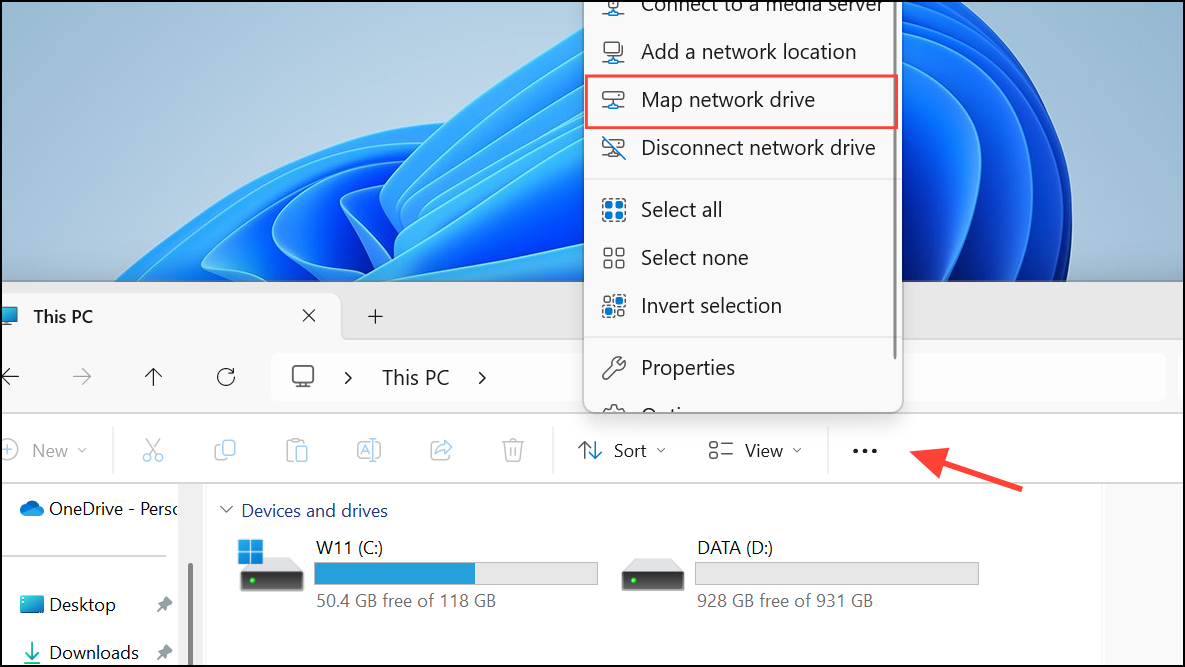
Step 3: Choose a drive letter and browse to the shared folder. Uncheck Reconnect at sign-in if you only need temporary access, then click Finish.

This mapped drive will present a shorter path to Windows, making it possible to rename, move, or delete files as needed.
Resolving error 0x800700CE in Windows 11 usually comes down to managing path lengths, using specialized tools, and addressing software conflicts. Applying these methods restores normal file management and helps prevent future interruptions.