
Windows Update error 0x800f0993 occurs when Windows 11 encounters issues downloading or installing updates, commonly due to corrupted system files, problematic update components, or service misconfigurations. This error can halt critical system updates, leaving your PC vulnerable and potentially unstable. Follow these detailed steps to resolve error 0x800f0993 and successfully update Windows 11.
Method 1: Reset Windows Update Components
The most effective way to fix error 0x800f0993 is to reset the Windows Update components. Corrupted or misconfigured update files can cause this error, and resetting these components can resolve the issue.
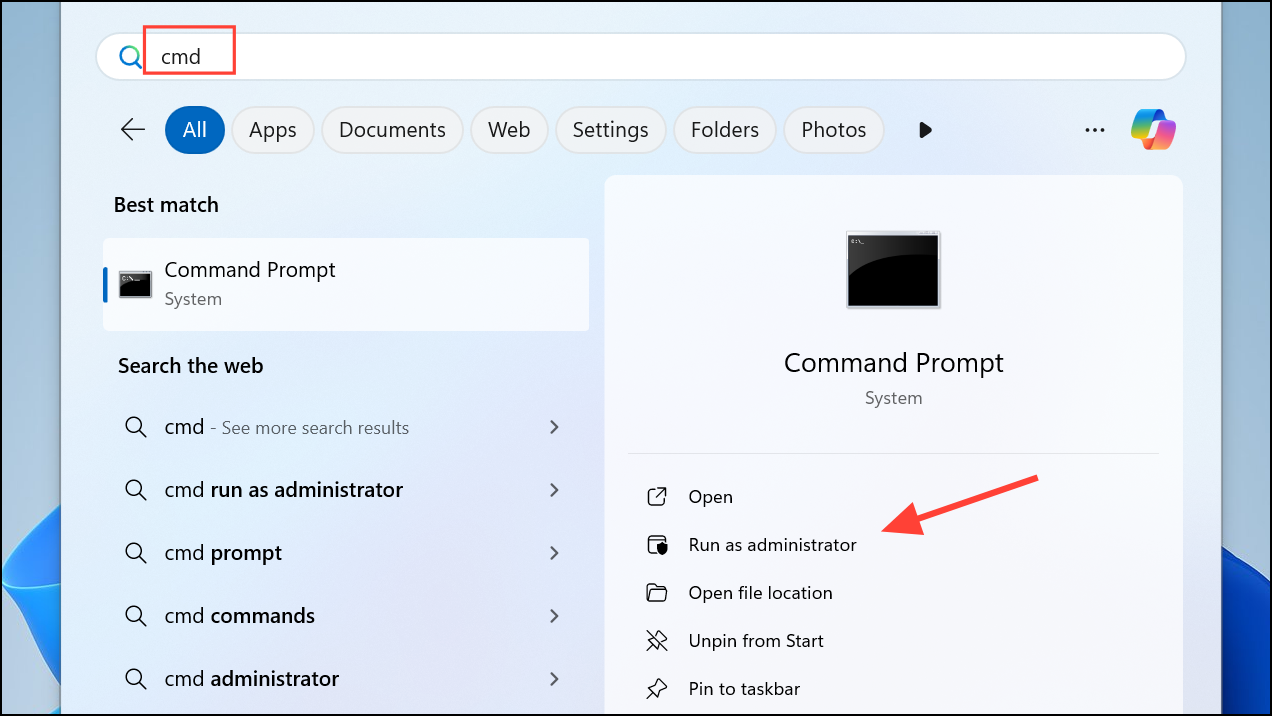
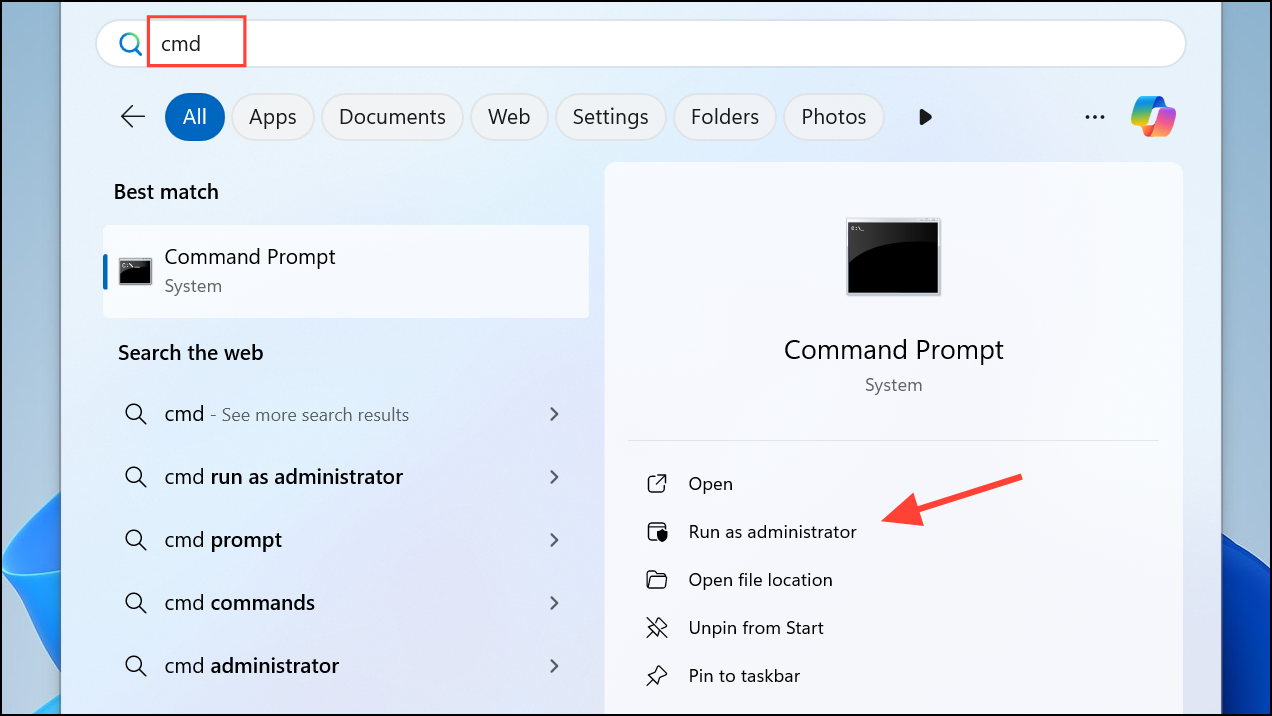
Step 1: Click on the Start menu, type cmd, right-click on "Command Prompt," and select "Run as administrator."
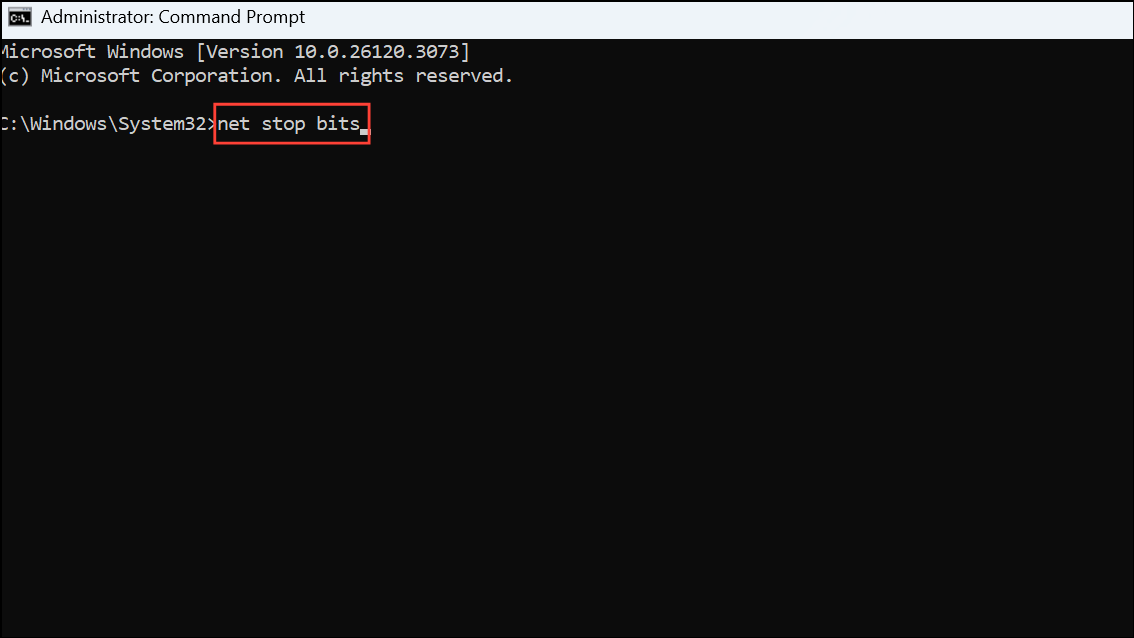
Step 2: In the Command Prompt window, enter the following commands one by one, pressing Enter after each:
net stop bits
net stop wuauserv
net stop cryptSvc
net stop msiserver
ren %systemroot%\SoftwareDistribution SoftwareDistribution.old
ren %systemroot%\System32\catroot2 catroot2.old
net start bits
net start wuauserv
net start cryptSvc
net start msiserver
After executing these commands, restart your computer and try updating Windows again.
Method 2: Run the Windows Update Troubleshooter
Windows has a built-in troubleshooter designed to diagnose and fix common update issues, including error 0x800f0993.
Step 1: Open the Settings app by pressing Win + I, then select "System."

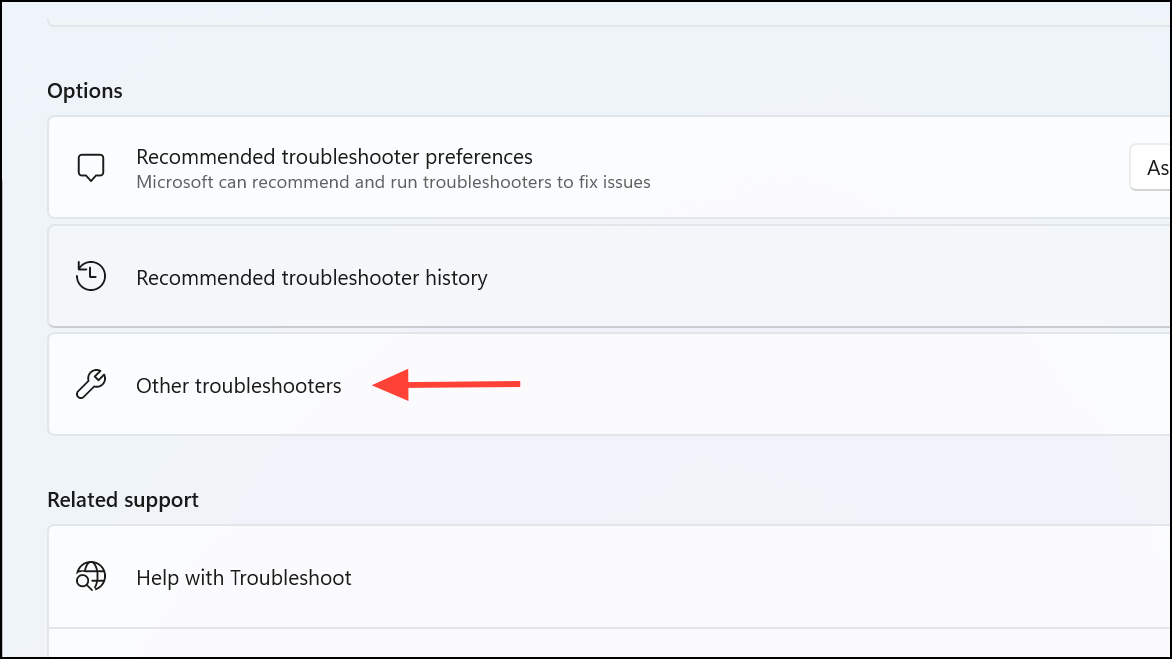
Step 2: Navigate to "Troubleshoot" and click "Other troubleshooters."
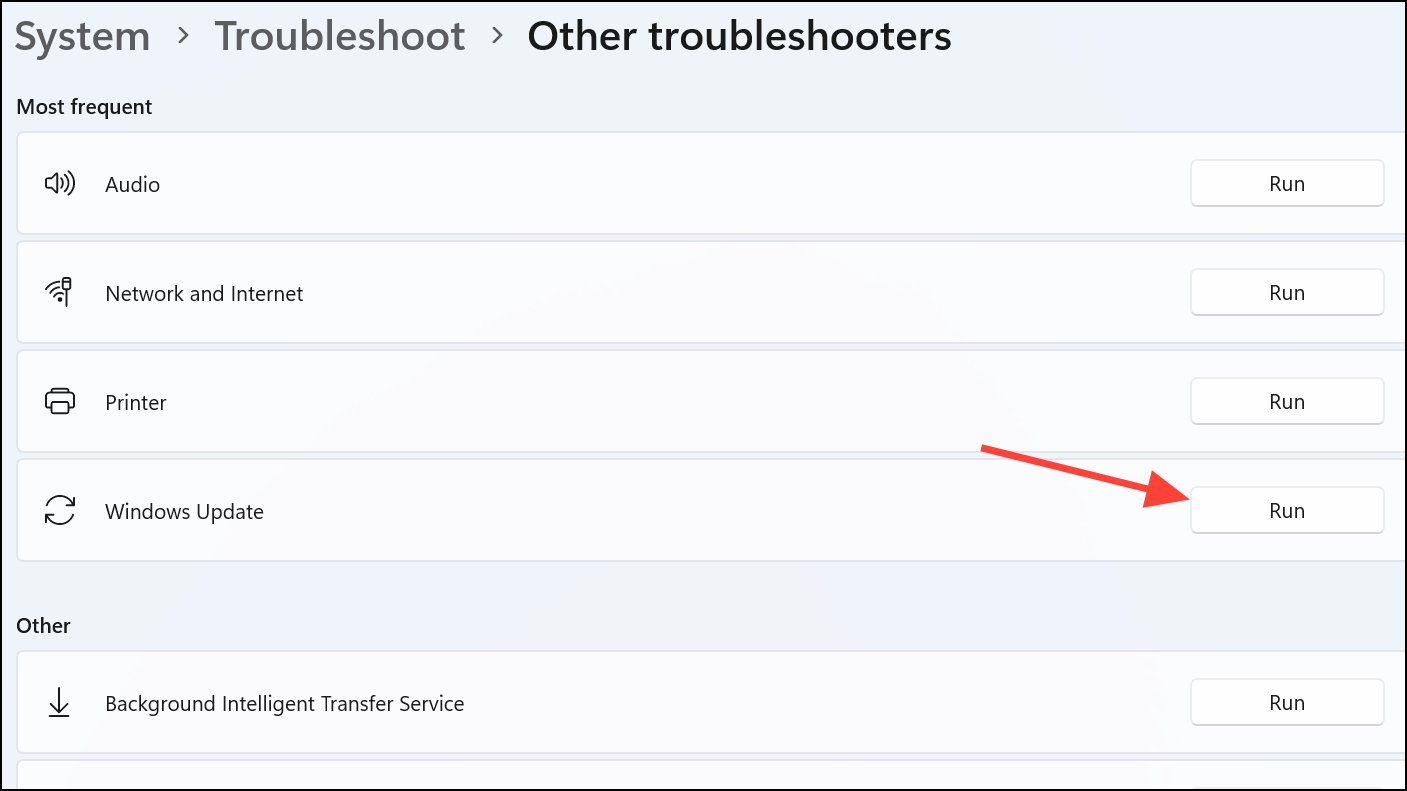
Step 3: Locate "Windows Update" and click "Run." Follow the on-screen instructions and apply any suggested fixes.
After completion, restart your PC and attempt the update again.
Method 3: Repair Corrupted System Files Using SFC and DISM
Corrupted system files often lead to update errors. The System File Checker (SFC) and Deployment Image Servicing and Management (DISM) tools can identify and repair these corrupted files.
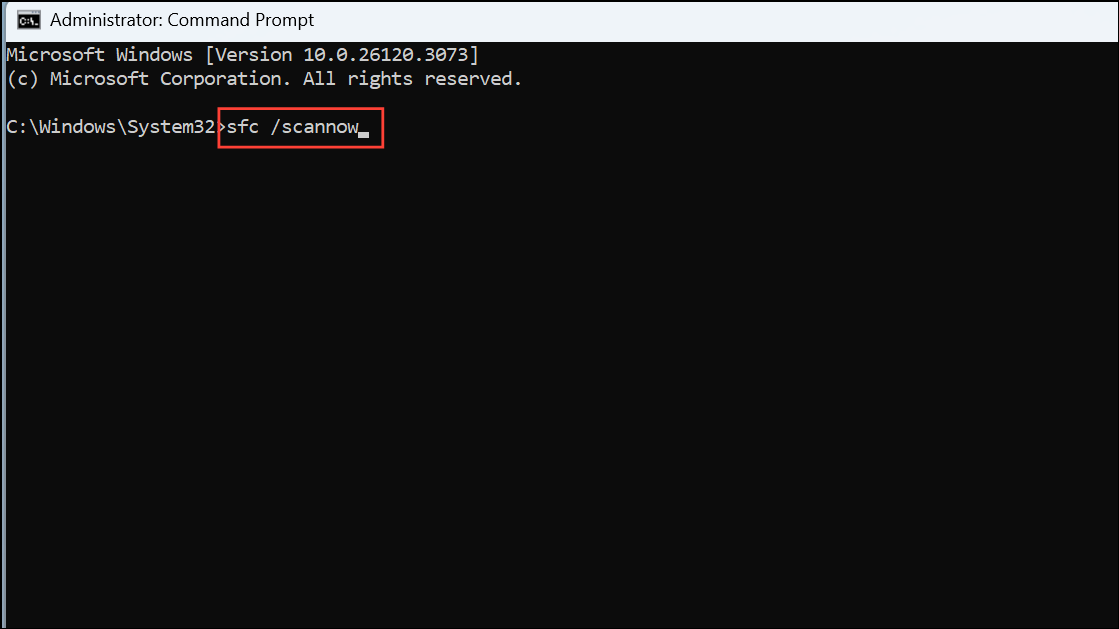
Step 1: Open Command Prompt as administrator (type cmd in the Start menu, right-click, select "Run as administrator").
Step 2: Type sfc /scannow and press Enter. Wait for the scan to complete.
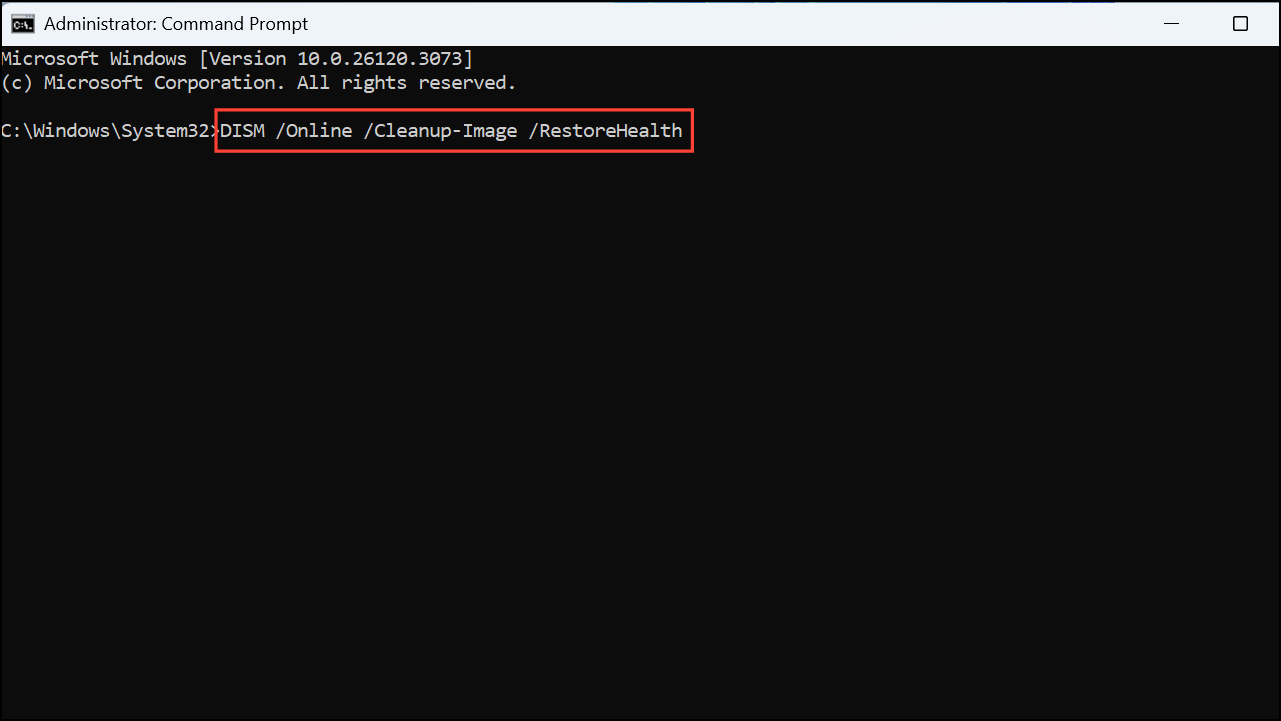
Step 3: Once the SFC scan is finished, enter the following command and press Enter:
DISM /Online /Cleanup-Image /RestoreHealth
After DISM completes its repair, restart your system and retry the Windows update.
Method 4: Manually Install the Problematic Update
If automatic updates repeatedly fail, manually installing the update from Microsoft Update Catalog can resolve the issue.
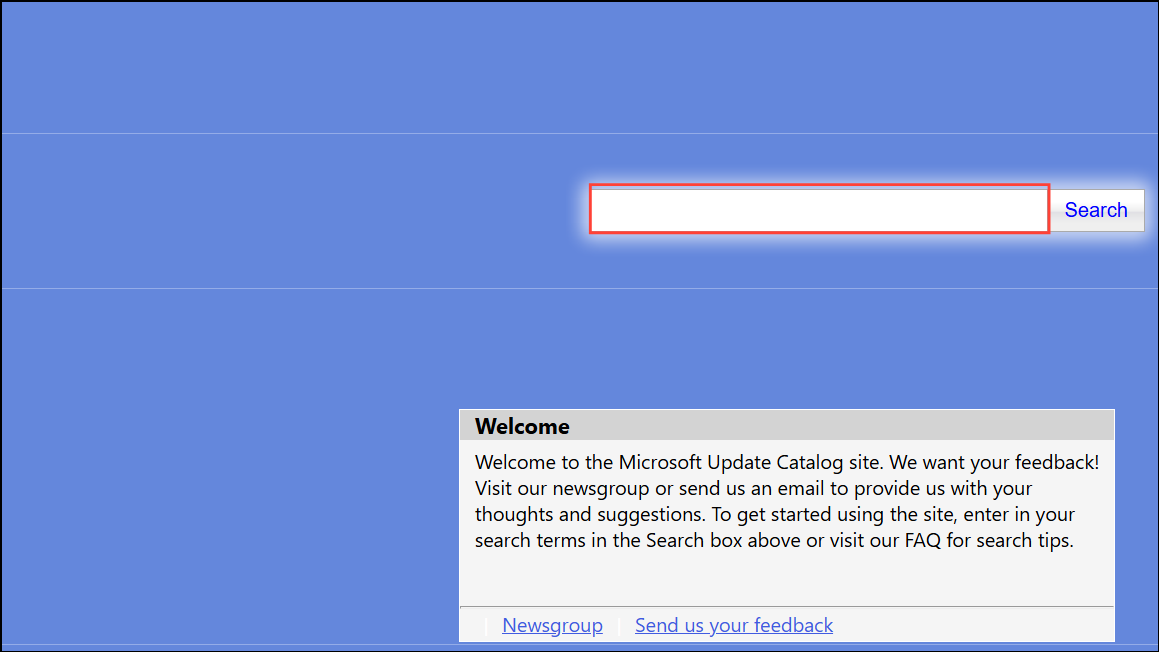
Step 1: Visit the Microsoft Update Catalog website.
Step 2: Search for the specific update causing error 0x800f0993 (e.g., KB5046740).
Step 3: Select the correct update matching your system architecture (x64 or ARM64) and Windows version (24H2, 23H2, etc.).
Step 4: Download and run the update file. Follow the installer prompts to complete the installation, then reboot your PC.
Method 5: Perform an In-place Upgrade Using Windows 11 ISO
If all previous methods fail, performing an in-place upgrade using the Windows 11 ISO file can repair system issues without deleting personal data or installed applications.
Step 1: Download the Windows 11 ISO file via the official Windows 11 download page.
Step 2: Right-click the downloaded ISO file and select "Mount."
Step 3: In the mounted drive, double-click the setup.exe file to start the installation.
Step 4: Follow the on-screen instructions. Choose "Keep personal files and apps" when prompted. Allow the process to complete and restart your PC as required.
This method provides a comprehensive repair of Windows system files and usually resolves persistent update issues.
After following these methods, error 0x800f0993 should be resolved, allowing Windows 11 to update smoothly. If the issue persists after these steps, consider contacting Microsoft Support for more specialized assistance.