
Windows 11 update error 0x8024001f can interrupt critical security and feature updates, leaving devices exposed to vulnerabilities or missing out on new capabilities. This error typically appears when Windows Update fails to connect to Microsoft’s servers, or when system files and update components are misconfigured or corrupted. Addressing the root causes and applying targeted solutions restores reliable update functionality and prevents recurring failures.
Repair Windows 11 Update Error 0x8024001f Using the Windows Update Troubleshooter
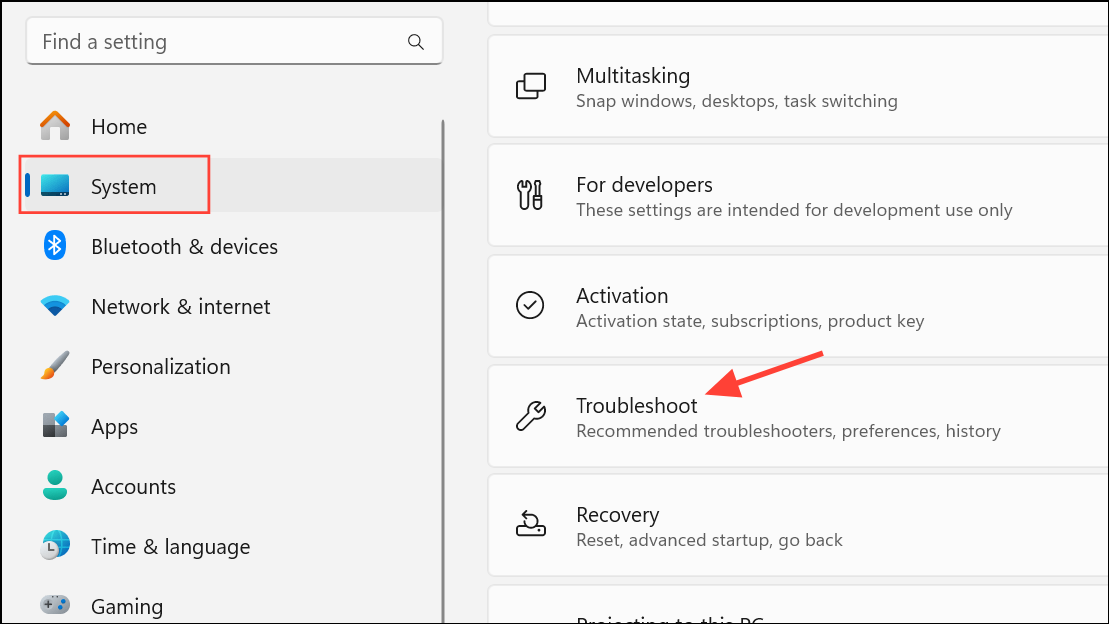
Step 1: Open the Windows Settings app by pressing Windows + I on your keyboard. In the Settings window, select System from the sidebar, then choose Troubleshoot.
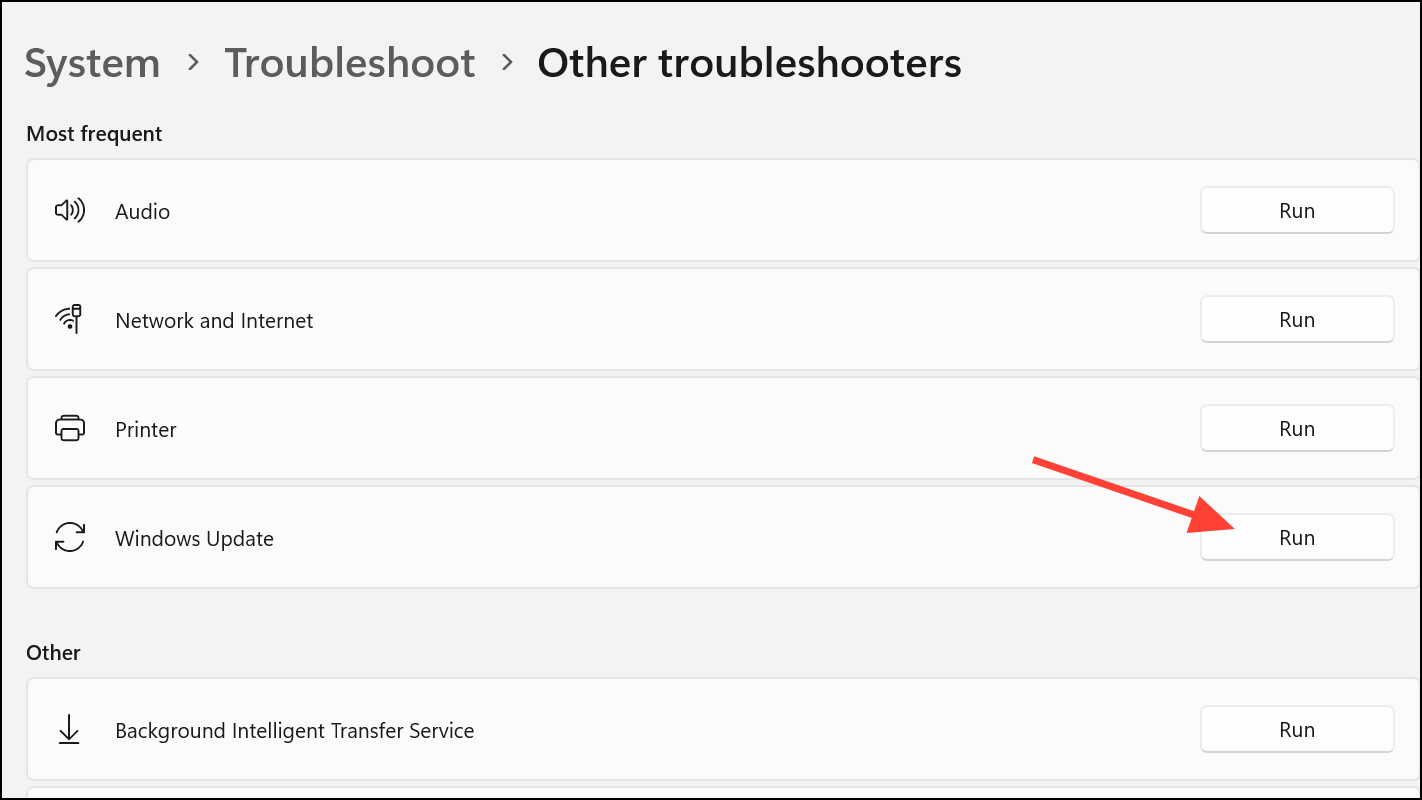
Step 2: Click on Other troubleshooters. Locate Windows Update in the list and click Run next to it. The troubleshooter will automatically check for common problems, such as missing or corrupt files, and attempt to resolve them.
Step 3: Carefully follow any prompts or on-screen instructions provided by the troubleshooter. If it suggests actions or applies fixes, allow the process to complete.
Step 4: After the troubleshooter finishes, restart your computer. Then, open Settings and navigate to Windows Update to check for updates again. If the error persists, proceed to the next method.
Reset Windows Update Components Manually
Corrupted or misconfigured update components frequently trigger error 0x8024001f. Manually resetting these components can restore normal update behavior.
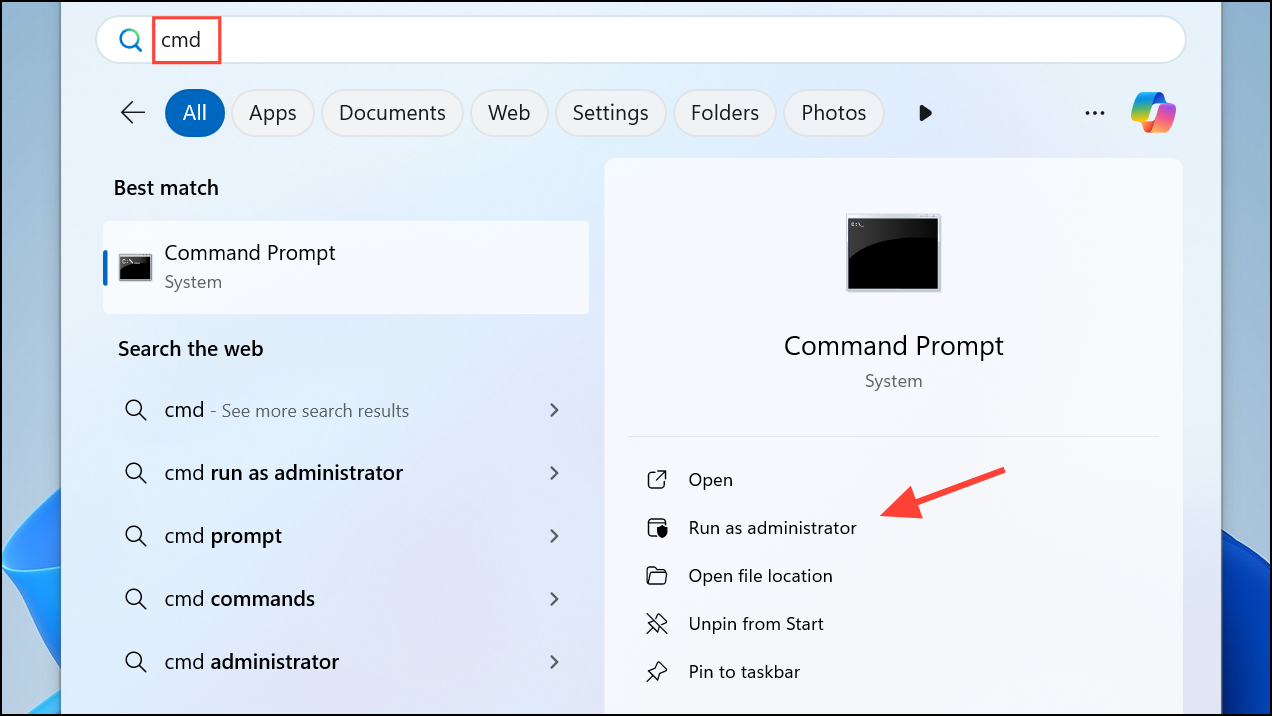
Step 1: Open the Start menu, type cmd, right-click Command Prompt, and select Run as administrator.
Step 2: In the Command Prompt window, stop the Windows Update services by entering the following commands one at a time, pressing Enter after each:
net stop wuauserv
net stop cryptSvc
net stop bits
net stop msiserver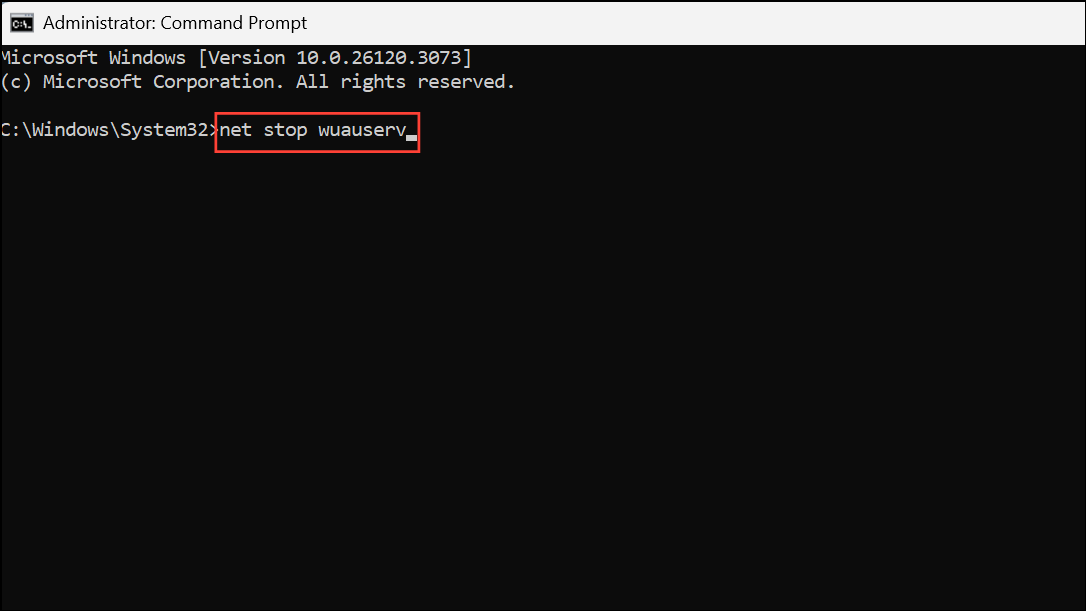
Step 3: Rename the update cache folders to force Windows to create new ones. Enter these commands:
ren C:\Windows\SoftwareDistribution SoftwareDistribution.old
ren C:\Windows\System32\catroot2 catroot2.old
Step 4: Restart the services by entering:
net start wuauserv
net start cryptSvc
net start bits
net start msiserver
Step 5: Close Command Prompt and restart your PC. Try running Windows Update again to verify if the error is resolved.
Temporarily Disable Third-Party Antivirus or Firewall Software
Security software can sometimes block Windows Update processes, resulting in error 0x8024001f. Disabling these programs temporarily helps determine if they’re the source of the problem.
Step 1: Locate your antivirus or firewall icon in the system tray (bottom-right corner of the screen). Right-click the icon and select the option to disable or pause protection. If you use multiple security programs, repeat this for each.
Step 2: With the security software disabled, open Settings and attempt to run Windows Update again.
Step 3: If updates install successfully, re-enable your antivirus and firewall immediately to maintain system protection. If the update still fails, continue with additional troubleshooting steps.
Check and Reset Network Settings
Network connectivity issues, such as DNS misconfigurations or stale network caches, can block communication with update servers. Resetting network settings can restore proper connectivity.
Step 1: Open Command Prompt as administrator as described previously.
Step 2: Enter the following commands one by one, pressing Enter after each to flush and renew network settings:
ipconfig /flushdns
ipconfig /release
ipconfig /renew
netsh winsock reset
netsh int ip reset
Step 3: Restart your computer to apply the network changes. Once restarted, check for updates in Settings.
Advanced Repair: In-Place Upgrade or Windows Repair Install
When standard troubleshooting fails, performing an in-place upgrade or repair install using the latest Windows 11 ISO image can resolve persistent update errors without deleting your files or applications.
Step 1: Download the official Windows 11 ISO from the Microsoft website. Save the ISO file to your computer.
Step 2: Right-click the ISO file and select Mount. Open the mounted drive in File Explorer and double-click Setup.exe to begin the repair installation process.
Step 3: Follow the on-screen instructions. When prompted, choose to keep your personal files and apps. The setup will reinstall Windows 11, repair system files, and update core components.
Step 4: After the installation completes and your system restarts, check Windows Update to confirm that error 0x8024001f no longer appears.
Additional Tips and Preventive Measures
- Ensure your device has a stable internet connection and is plugged into a reliable power source.
- Disconnect unnecessary external hardware, such as USB drives or docks, before running updates.
- Verify that your system date and time are set correctly. Incorrect settings can interfere with update authentication.
- Free up disk space if your drive is nearly full, as insufficient space can block updates.
- Keep device drivers up to date, especially for network and storage controllers.
Addressing error 0x8024001f restores normal update operations in Windows 11, strengthens system reliability, and ensures your device stays protected with the latest security patches and features.