
Experiencing internet or Wi-Fi connectivity problems after updating to Windows 11 24H2? You're not alone. Many users have reported issues with their network connections failing to work properly after installing the latest update. Fortunately, there are several solutions you can try to restore your internet access.
Why Windows 11 24H2 Causes Internet/Wi-Fi Issues
After upgrading to Windows 11 24H2, some devices are unable to connect to the internet via Ethernet or Wi-Fi. Instead of obtaining a valid IP address from the router or DHCP server, these devices are assigned an IP address starting with 169.xxx.xxx.xxx, indicating that Windows cannot reach the network's DHCP service. As a result, the affected PCs have no internet or network connectivity. Common symptoms include:
- Network adapters appearing disabled in the Control Panel's network settings.
- Wi-Fi options missing from the system tray and network settings.
- Unable to enable network adapters; they disable again immediately.
- PCs not visible on the network, affecting file and printer sharing.
How to Fix Internet/Wi-Fi Issues in Windows 11 24H2 Update
Below are several methods that have helped users resolve these connectivity problems. It's recommended to try them in order until your issue is resolved.
Method 1: Remove WinHTTPAutoProxySvc Dependency in Registry
Modifying the Windows registry can help resolve conflicts causing network services to malfunction. Follow these steps carefully:
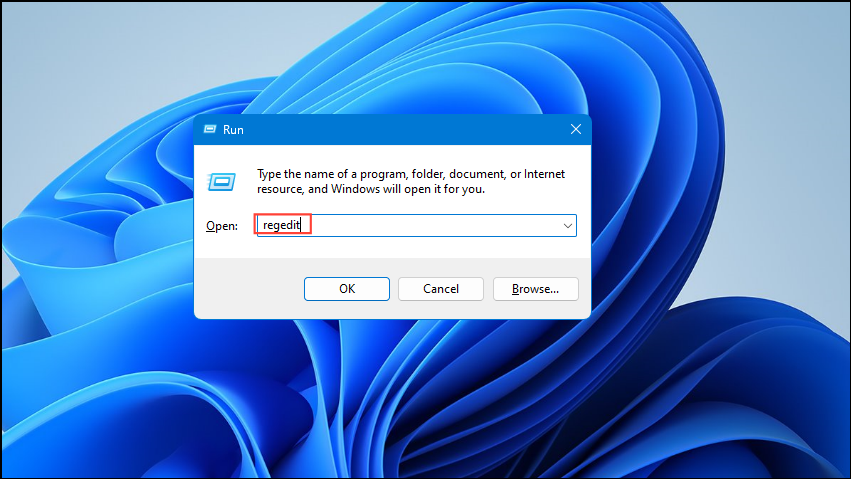
- Press
Win + Rto open the Run dialog. - Type
regeditand pressEnterto open the Registry Editor. Grant administrator permission if prompted.
- Navigate to the following key:
HKEY_LOCAL_MACHINE\SYSTEM\CurrentControlSet\Services\WcmSvc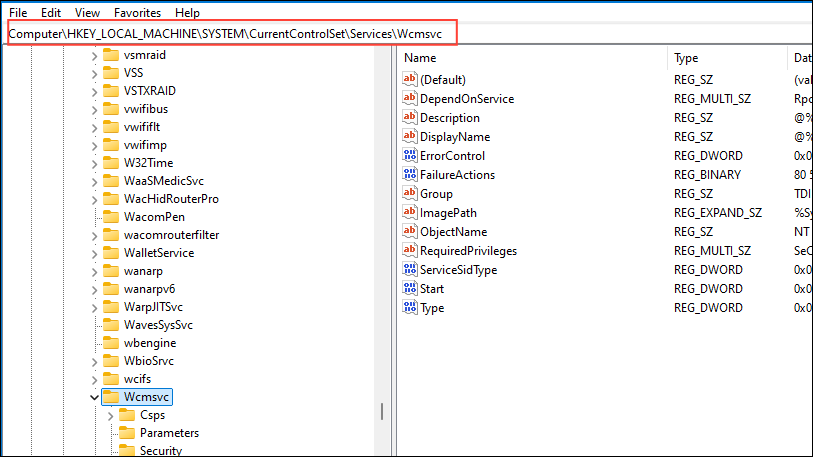
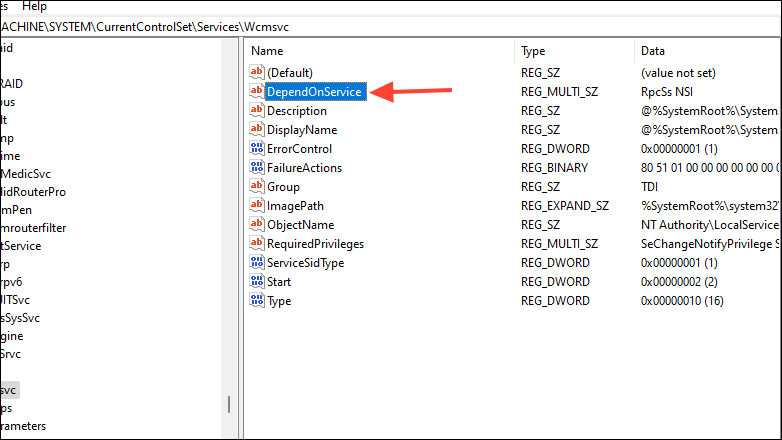
- In the right pane, find the
DependOnServiceentry and double-click it.
- Remove
WinHTTPAutoProxySvcfrom the list, leaving onlyRpcSsandNSIand clickOKto save the changes.
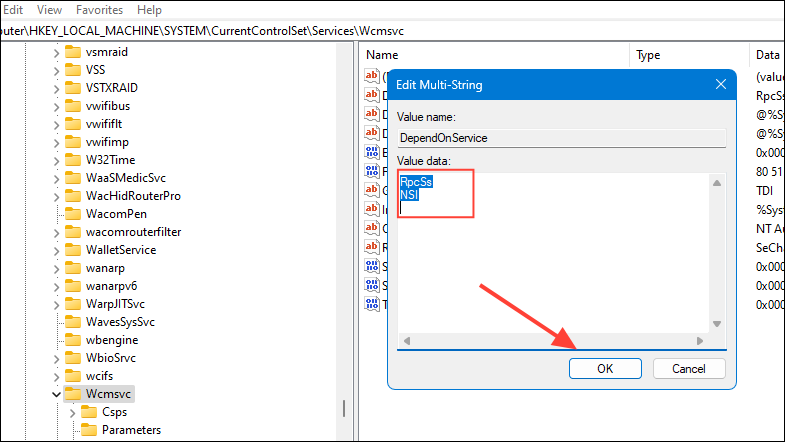
- Restart your computer to apply the changes.
Method 2: Enable the WinHTTP AutoProxy Service
If the WinHTTP Web Proxy Auto-Discovery Service is disabled, it can cause network connectivity issues. Enabling it might resolve the problem:
- Press
Win + Rto open the Run dialog. - Type
regeditand pressEnterto open the Registry Editor.
- Navigate to the following key:
HKEY_LOCAL_MACHINE\SYSTEM\CurrentControlSet\Services\WinHttpAutoProxySvc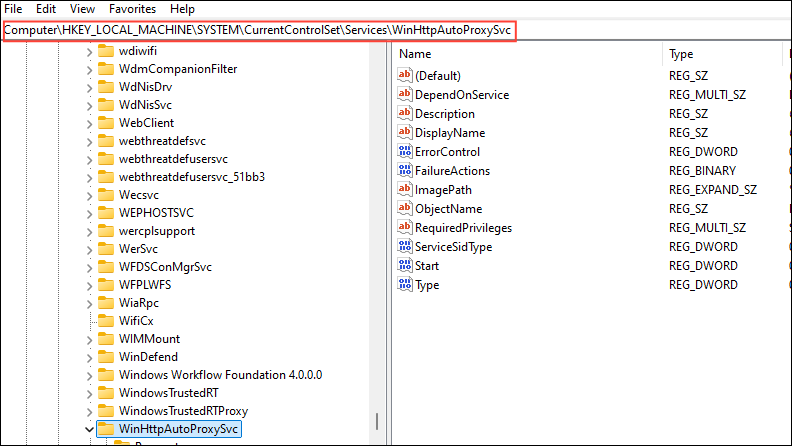
- In the right pane, find the
Startentry and double-click it.
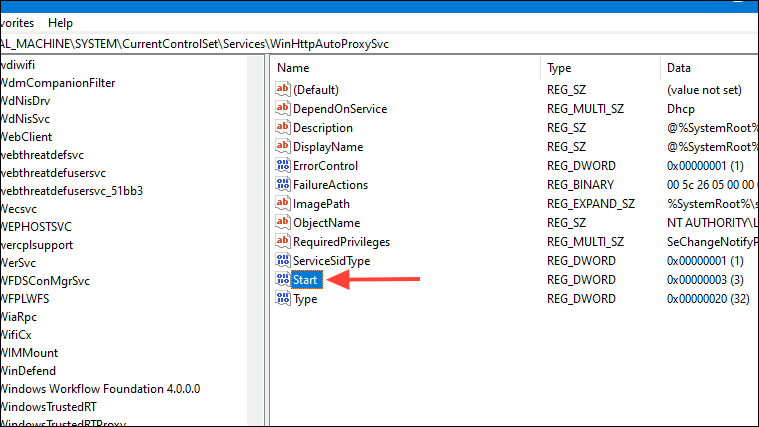
- Change the value from
4(disabled) to3(manual) and clickOKto save changes.
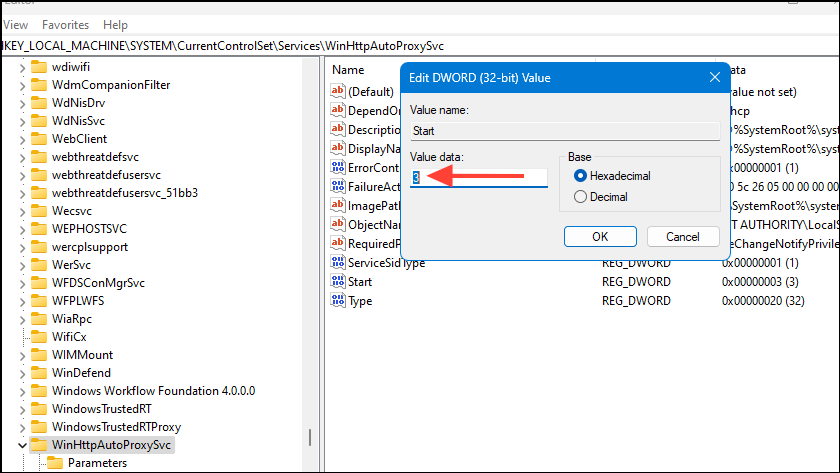
- Restart your computer to apply the changes.
Method 3: Modify the Windows Connection Manager Service
Adjusting the dependencies of the Windows Connection Manager service can help start the necessary network services:
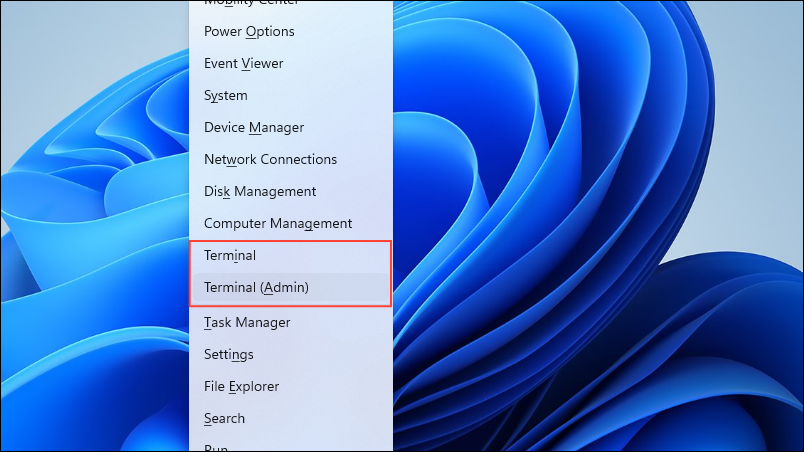
- Press
Win + Xand selectCommand Prompt (Admin)orWindows Terminal (Admin).
- If prompted by User Account Control, click
Yes. - In the command prompt window, type the following command and press
Enter:
sc config WcmSvc depend= RpcSs/NSI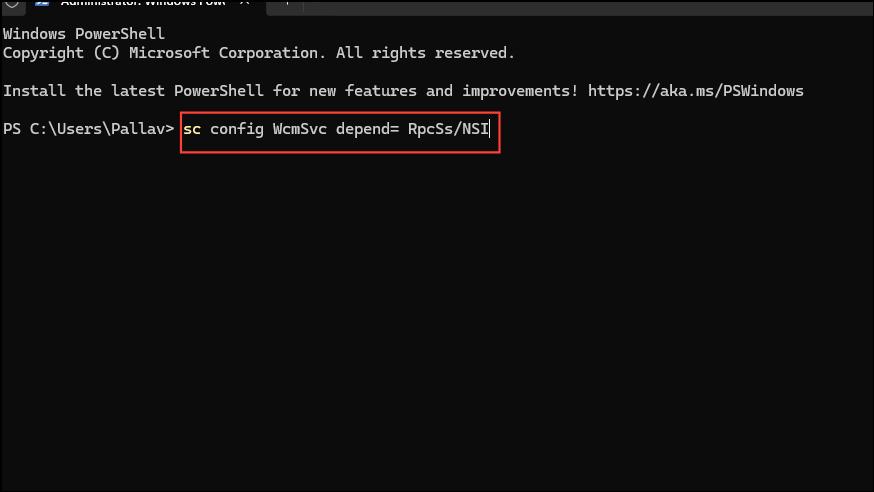
- Wait for the command to execute successfully.
- Restart your computer to apply the changes.
Method 4: Set a Static IP Address Manually
Assigning a static IP address can bypass DHCP issues and restore network connectivity:
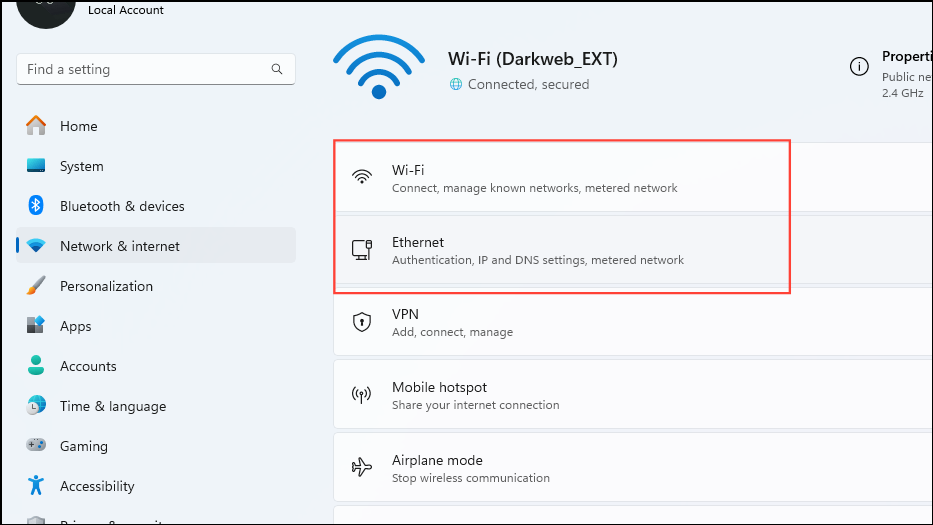
- Press
Win + Ito open Settings. - Go to
Network & Internet, then selectEthernetorWi-Fibased on your connection type.
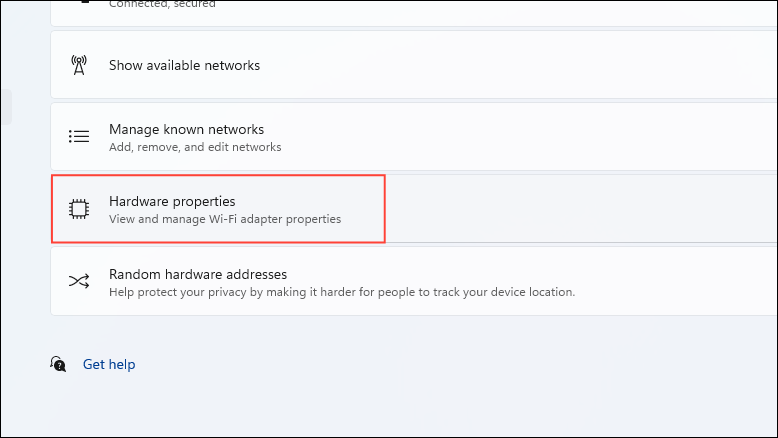
- Click on
Hardware properties.
- Under
IP assignment, clickEdit.
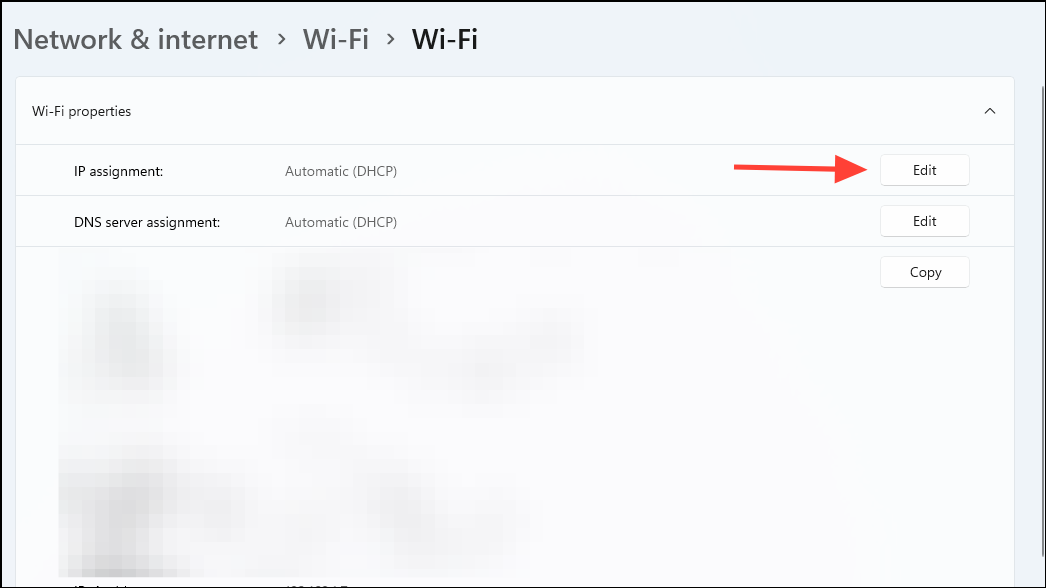
- Select
Manual, then toggle onIPv4.
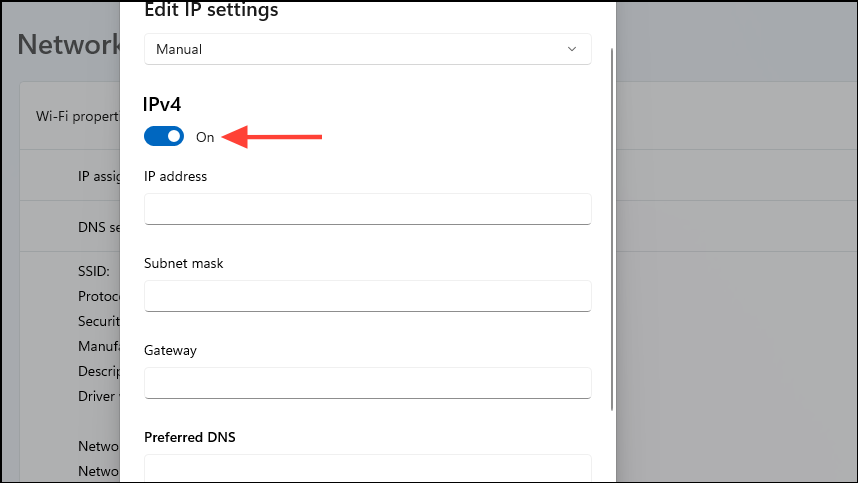
- Enter the IP address, subnet mask, gateway, and DNS server information provided by your network administrator or ISP.
- Click
Saveto apply the settings. - Restart your computer if necessary.
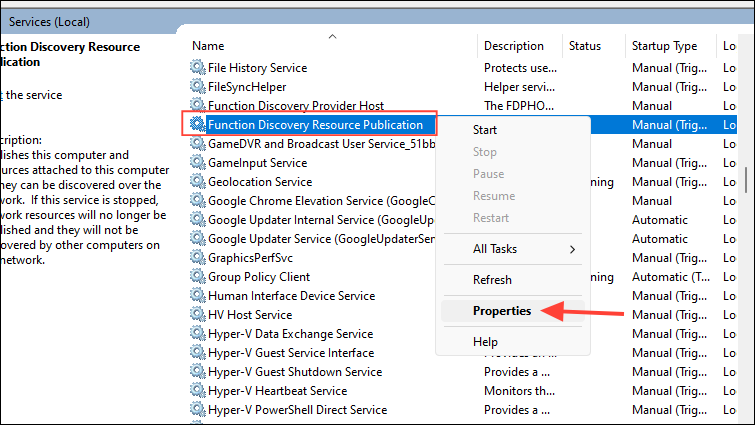
Method 5: Ensure Function Discovery Resource Publication Service is running
This service allows your computer to be discoverable on the network:
- Press
Win + Rto open the Run dialog. - Type
services.mscand pressEnterto open the Services Manager.

- Scroll down and locate
Function Discovery Resource Publication. - Right-click it and select
Properties.
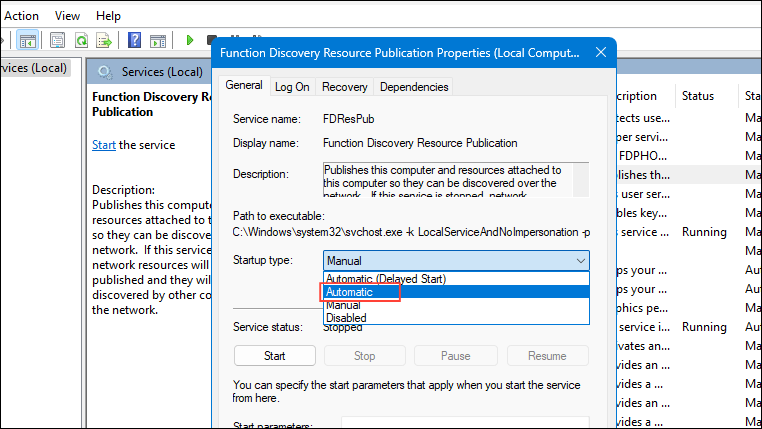
- Set the
Startup typetoAutomatic.
- Click
Startif the service is not running, and clickOKto save the changes.
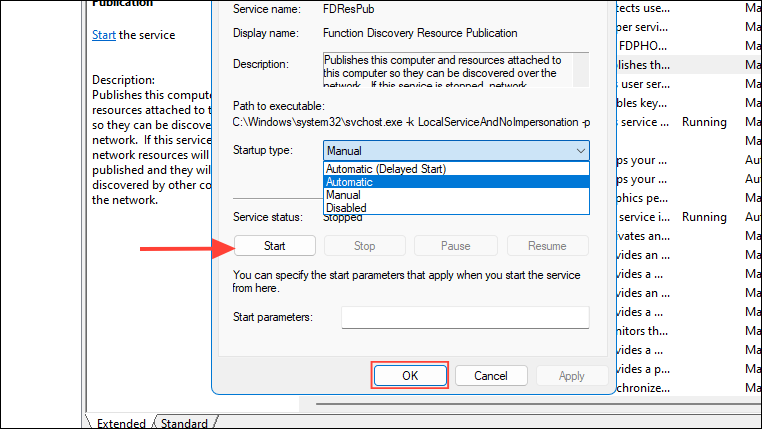
- Restart your computer if prompted.
Additional Tips
- Ensure that your network drivers are up to date. Visit your network adapter manufacturer's website to download the latest drivers.
- Run the Windows Network Troubleshooter by going to
Settings>System>Troubleshoot>Other troubleshootersand selectingNetwork Adapter. - If you are using any VPN or proxy services, try disabling them temporarily to see if they are causing conflicts.
- Consider rolling back the Windows 11 24H2 update if none of the methods work. Go to
Settings>Windows Update>Update history>Uninstall updates.
Regaining internet connectivity after the Windows 11 24H2 update can be challenging, but hopefully, one of these methods has helped you resolve the issue. Stay connected and keep your system updated for the best performance.