
These steps are specifically for the Logitech MX Master mouse series and Windows 11. The process may vary for other mouse models or Windows versions.
Step 1: Unpair your mouse from Bluetooth settings
Remove the existing Bluetooth connection between your mouse and PC to clear potential communication errors.
- Open the Windows Settings app by pressing the
Windows key+I. - Navigate to the 'Bluetooth & devices' section.
- Find your Logitech MX Master mouse in the list of paired devices.
- Click on the three dots next to the mouse name.
- Select 'Remove device'.
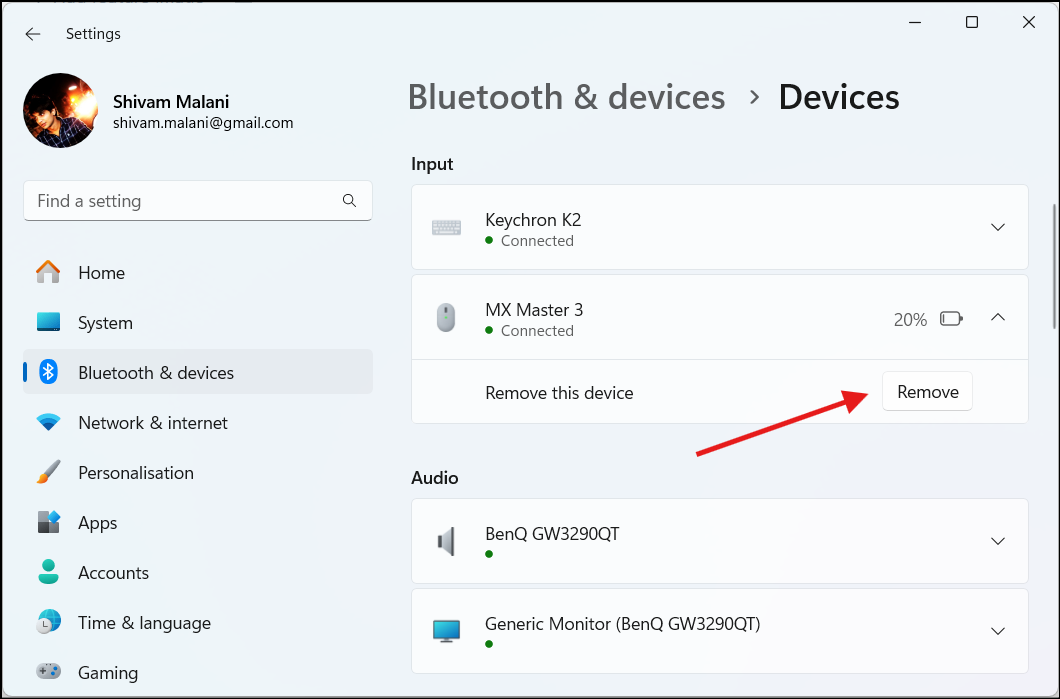
- Confirm the action when prompted.
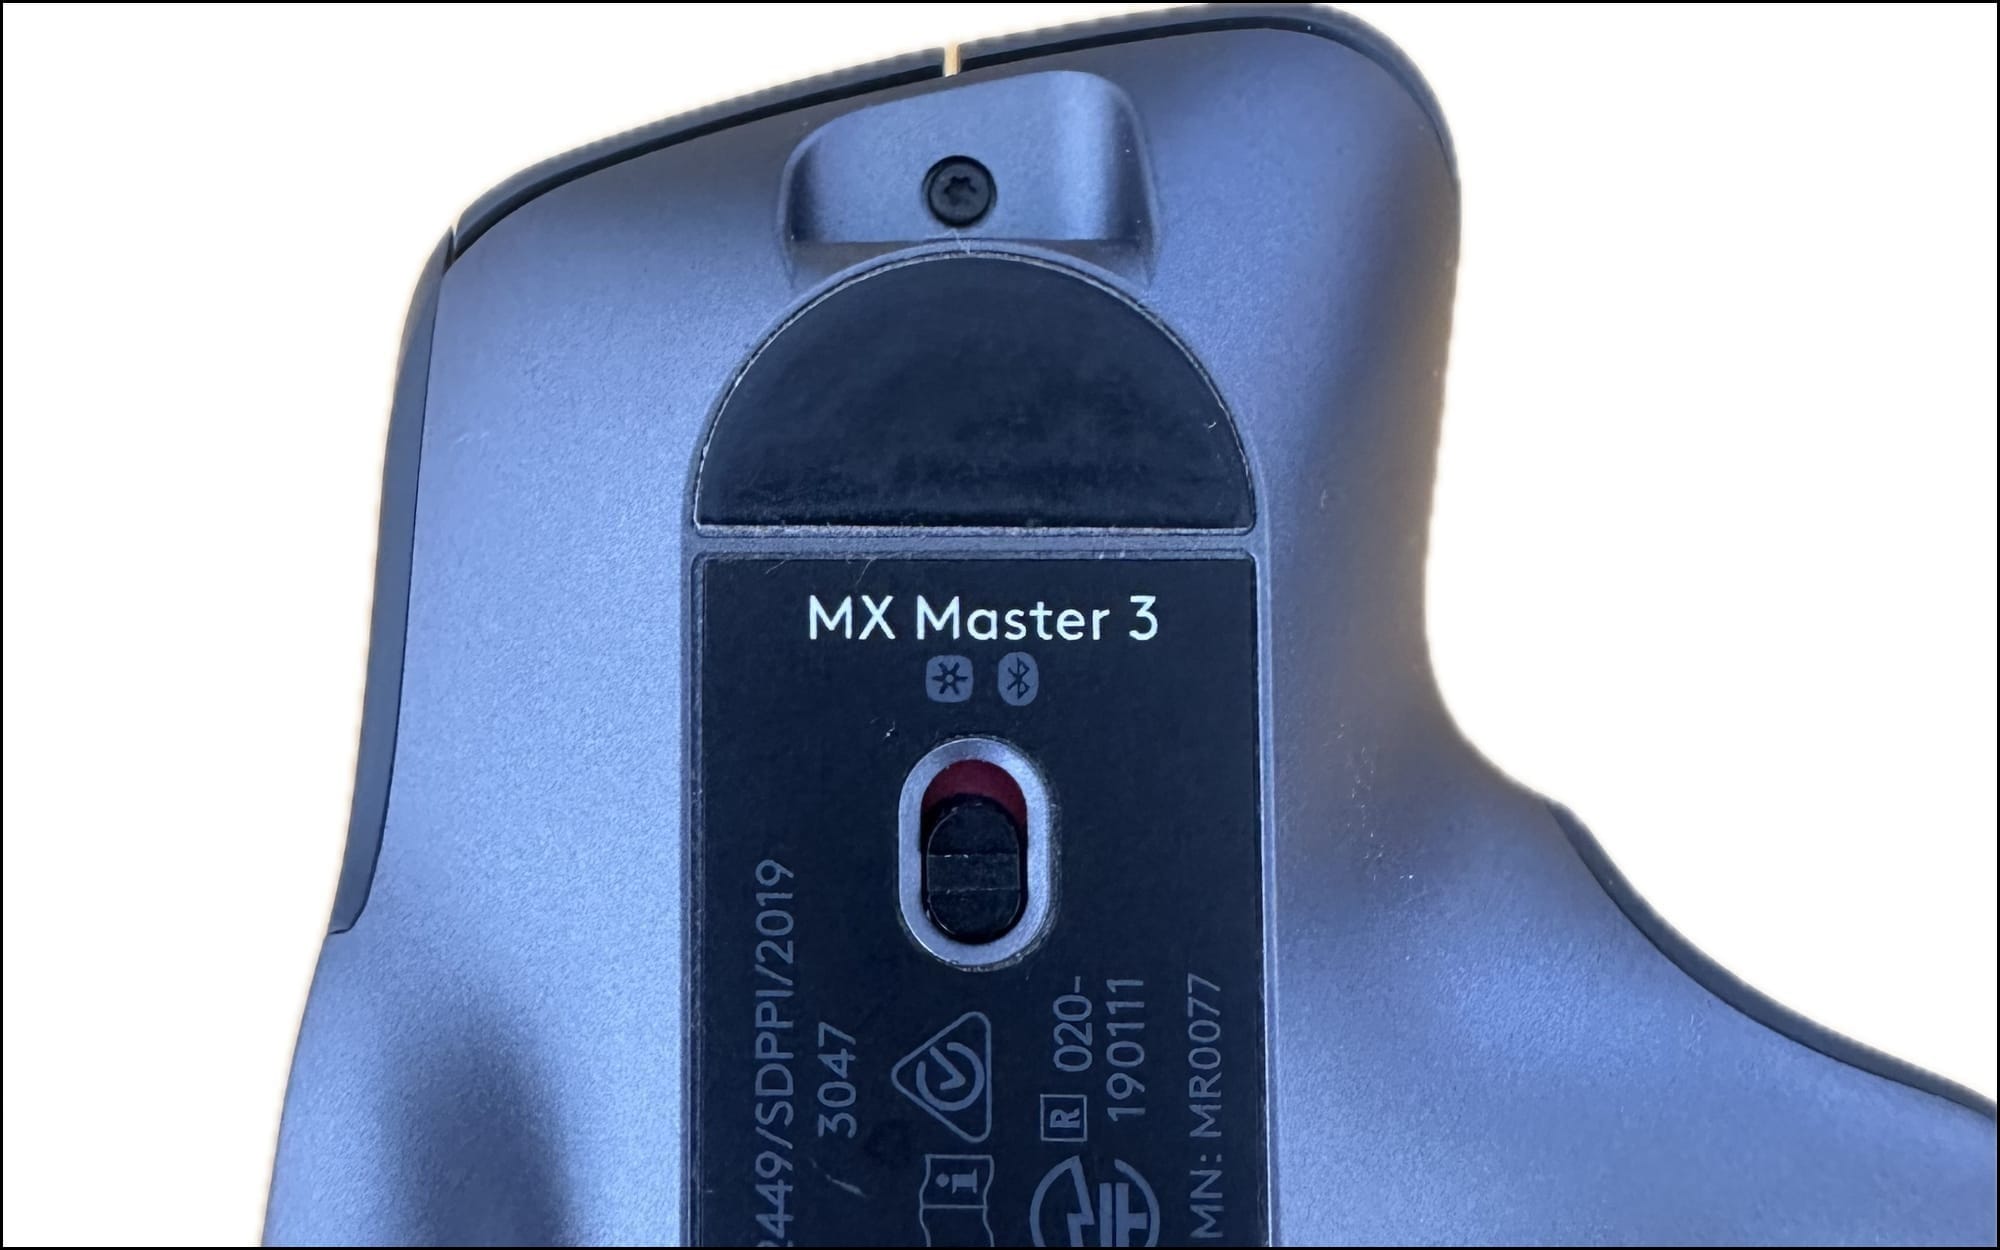
Step 2: Turn off your mouse
- Locate the power switch on the bottom of your Logitech MX Master mouse.
- Slide the switch to the 'Off' position.
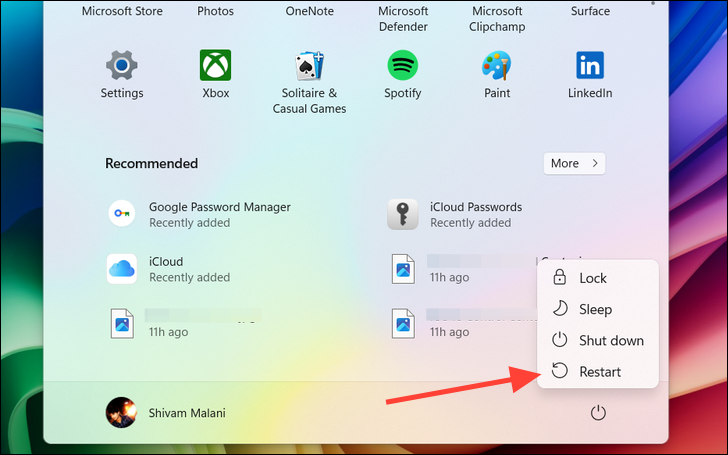
Step 3: Restart your PC
A system restart can often resolve various connectivity issues by clearing temporary files and refreshing system processes.
- Click on the Start menu.
- Select the Power icon.
- Choose 'Restart'.
- Wait for your PC to fully reboot before proceeding to the next step.
Step 4: Initiate pairing mode on your mouse
After your PC has restarted, it's time to set up your mouse for a fresh connection. You'll need to put your mouse into pairing mode to make it discoverable to your PC.
- Turn on your Logitech MX Master mouse using the power switch on its bottom.
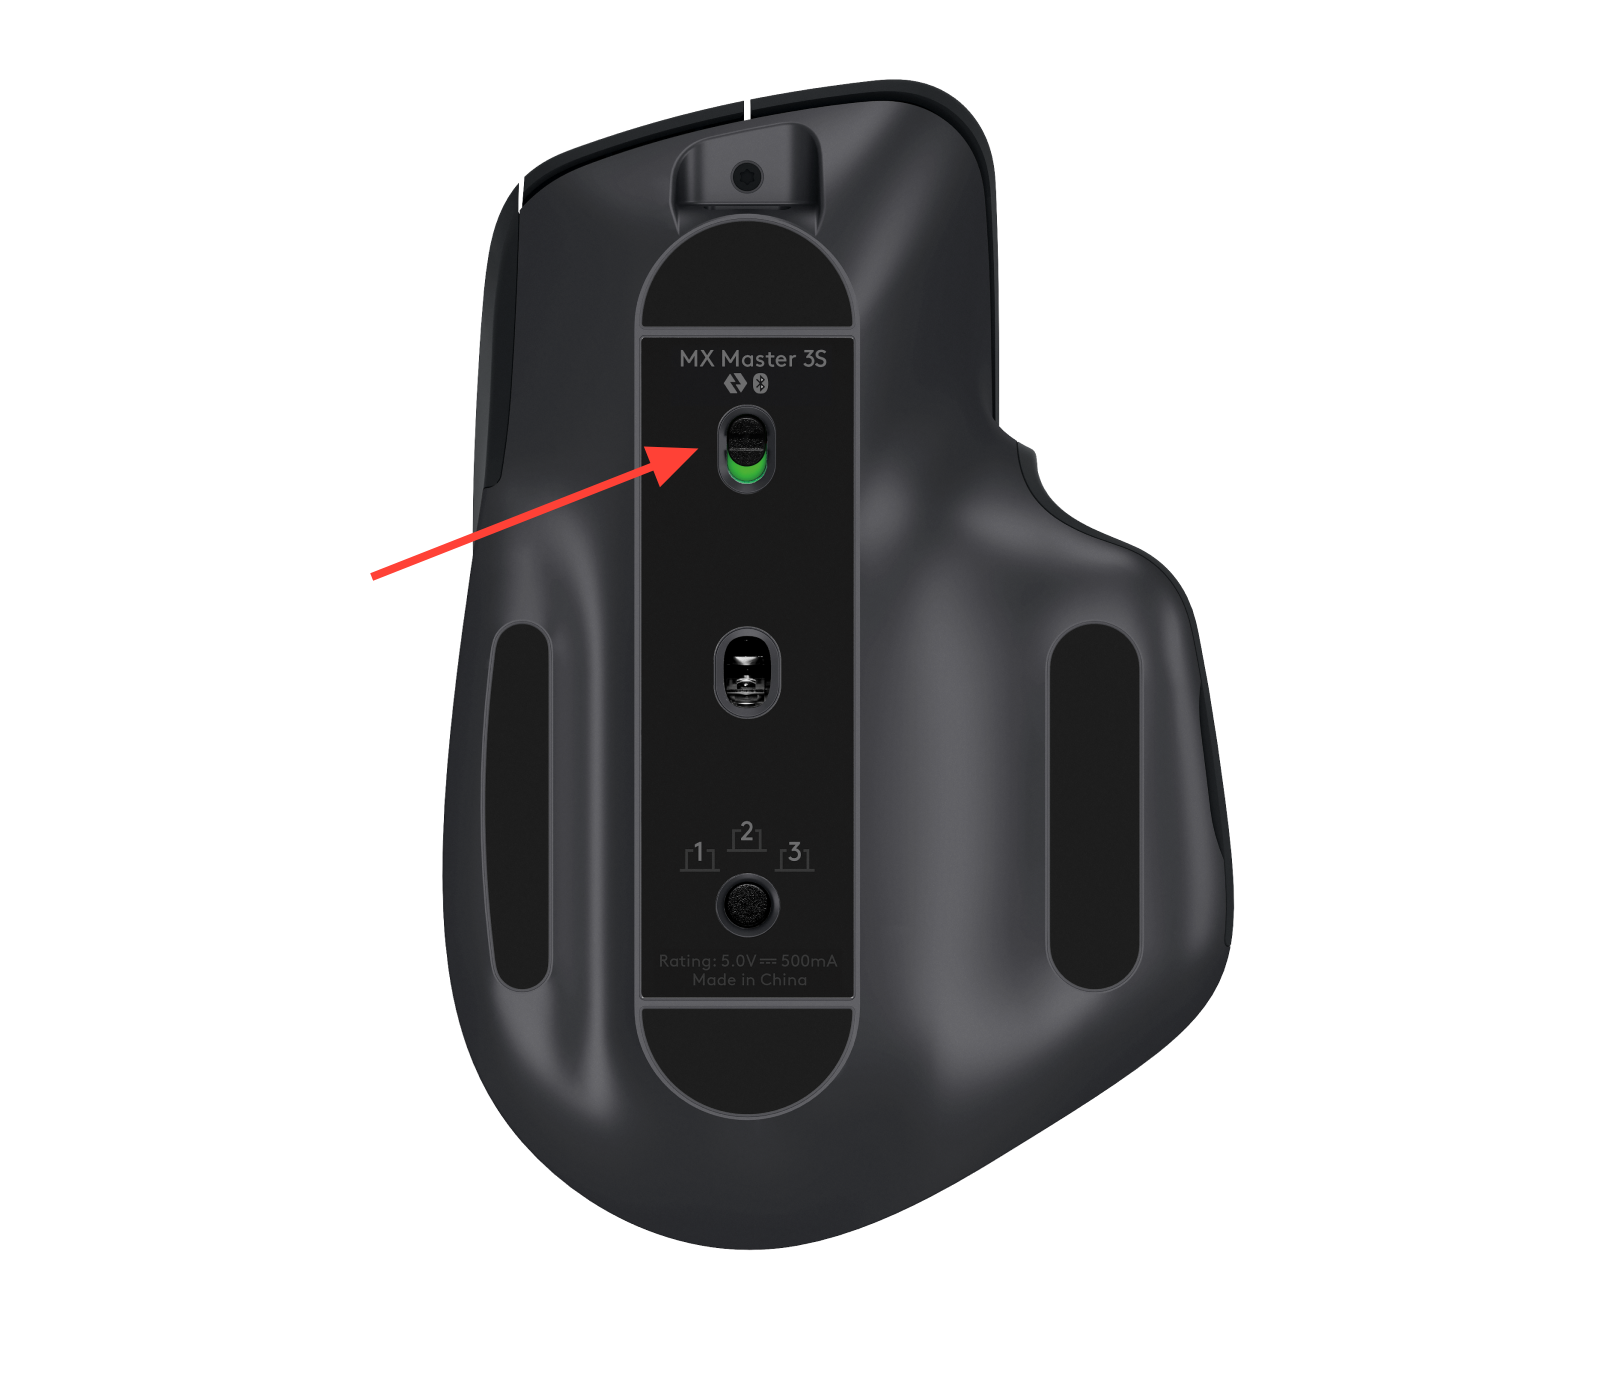
- Locate and press the 'Easy-Switch' button to cycle through the available connection slots until you reach the number you want to use for your Windows 11 PC.
- Press and hold the 'Easy-Switch' button for 3 seconds or until the LED light for the selected number starts blinking rapidly.
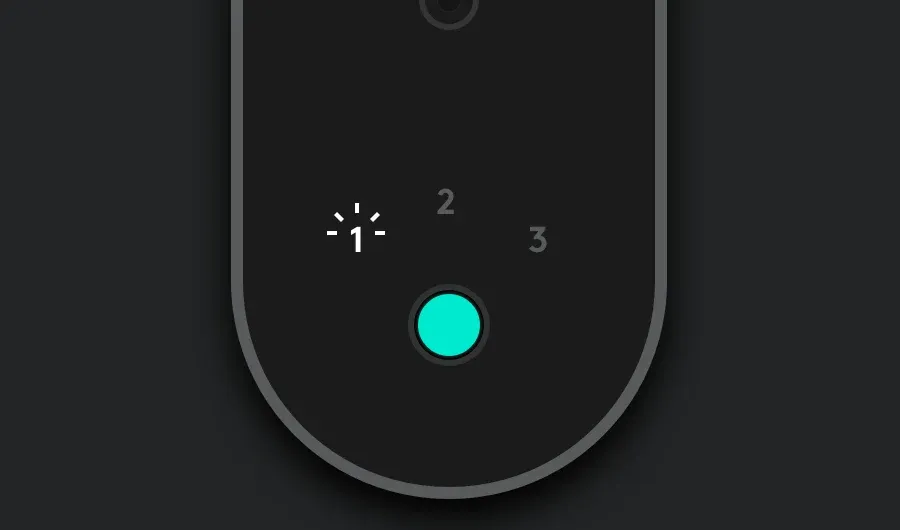
- This rapid blinking indicates that the mouse is now in pairing mode and ready to connect.
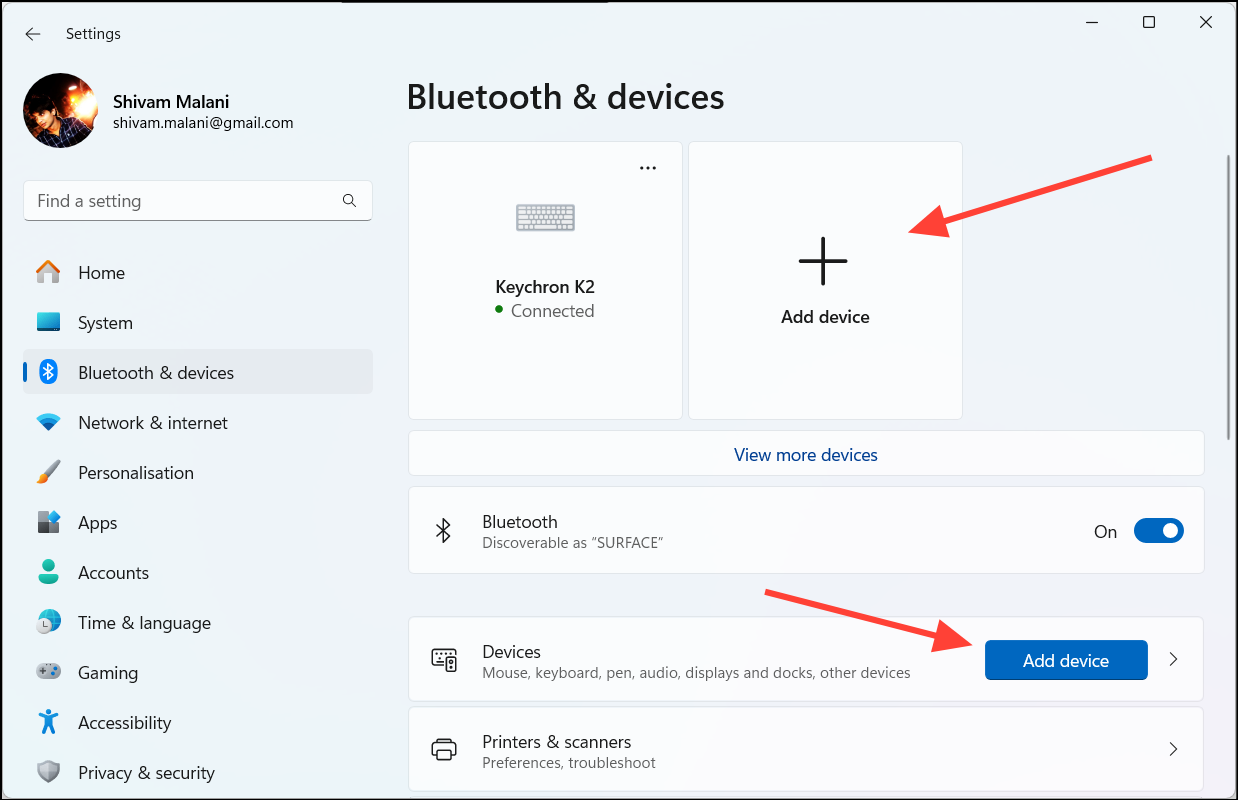
Step 5: Pair your mouse through Windows 11 Bluetooth settings
With your mouse in pairing mode, it's time to establish a new connection through your PC's Bluetooth settings.
- Open Windows Settings again (
Windows key+I) - Go to 'Bluetooth & devices'.
- Click on 'Add device'.
- Select 'Bluetooth' from the options presented.
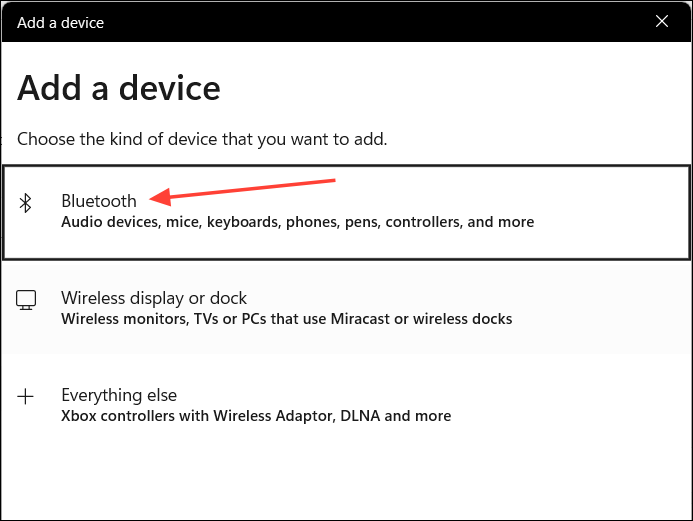
- Wait for your PC to scan for available devices.
- When your Logitech MX Master mouse appears in the list, click on it to initiate pairing.
- Follow any on-screen prompts to complete the pairing process.
After following these steps, your Logitech MX Master mouse should now be successfully paired and functioning with your Windows 11 PC.