Encountering the 0x8004010F error in Microsoft Outlook can be frustrating, especially when it disrupts your email communication. This error typically appears with the message "Outlook data file cannot be accessed" or "The operation failed. An object could not be found." Fortunately, there are effective methods to resolve this issue and get your Outlook back to normal. In this guide, we'll walk you through the steps to fix the error.
Before diving into the solutions, it's helpful to understand why this error occurs:
- Corrupted Outlook Profile
- Damaged Outlook Data File (
.pstor.ost) - Incorrect Send/Receive Settings
- Security Software Interference
- Issues with the Offline Address Book
Method 1: Create a New Outlook Profile
A corrupted Outlook profile is a common cause of the 0x8004010F error. Creating a new profile can often resolve the issue.
Step 1: Close Outlook completely.
Step 2: Open the Control Panel on your computer.
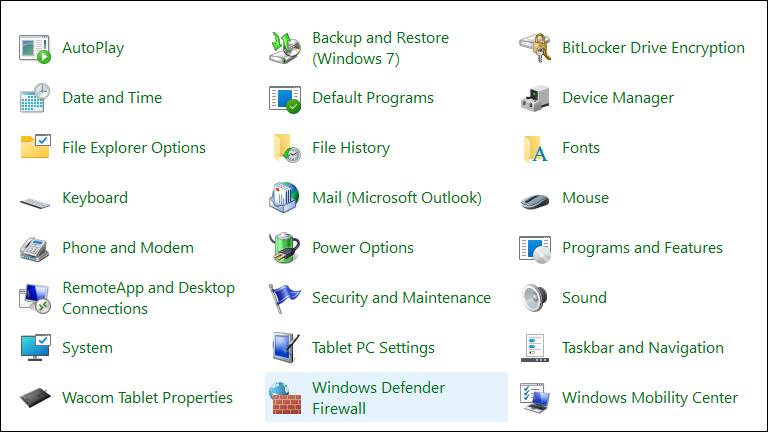
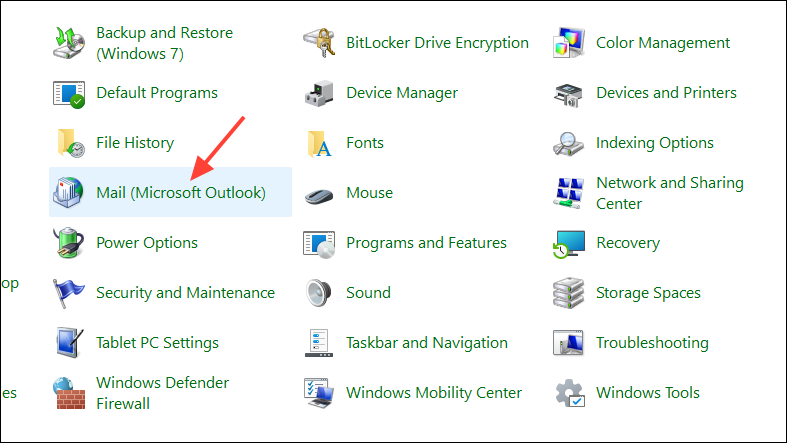
Step 3: In the Control Panel, select Mail or search for Mail using the search bar.
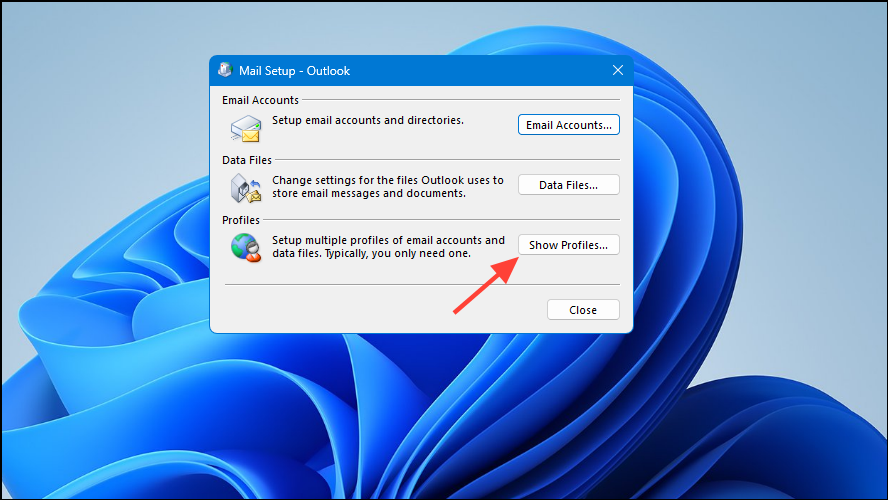
Step 4: In the Mail Setup window, click on Show Profiles.
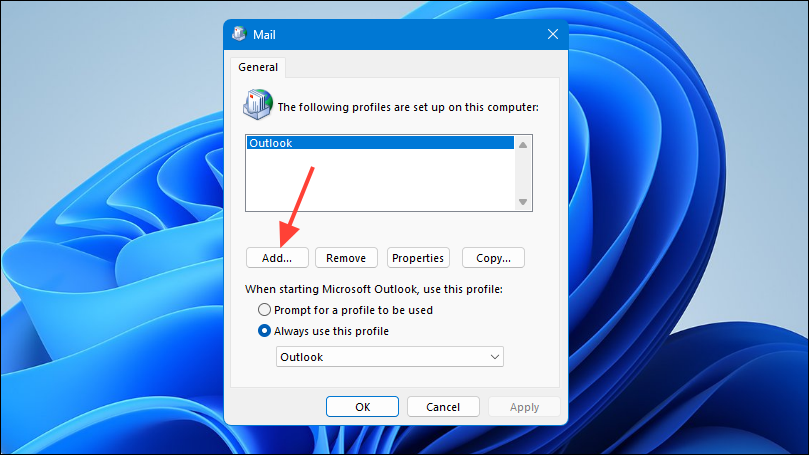
Step 5: Click on the Add button to create a new profile.
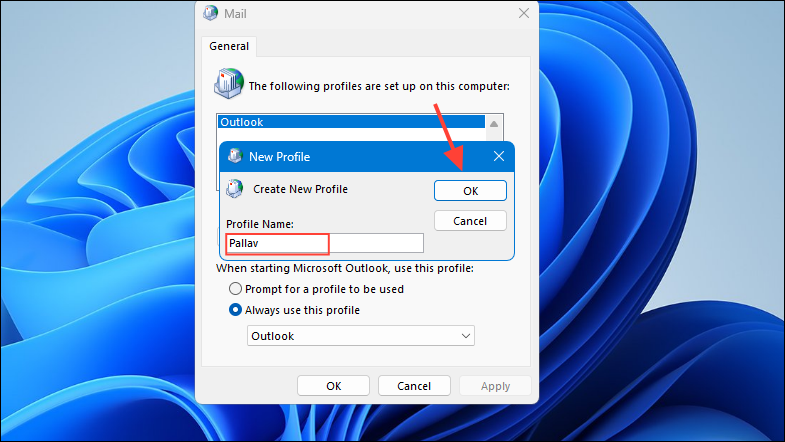
Step 6: Enter a name for your new profile and click OK.
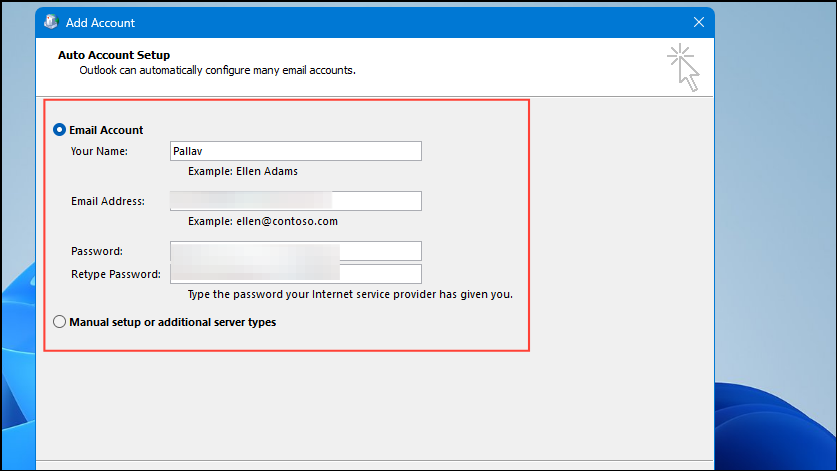
Step 7: Follow the prompts to add your email account to the new profile. Enter your name, email address, and password when requested.
Step 8: After adding your account, return to the Mail window. Under When starting Microsoft Outlook, use this profile, select your new profile from the dropdown menu.
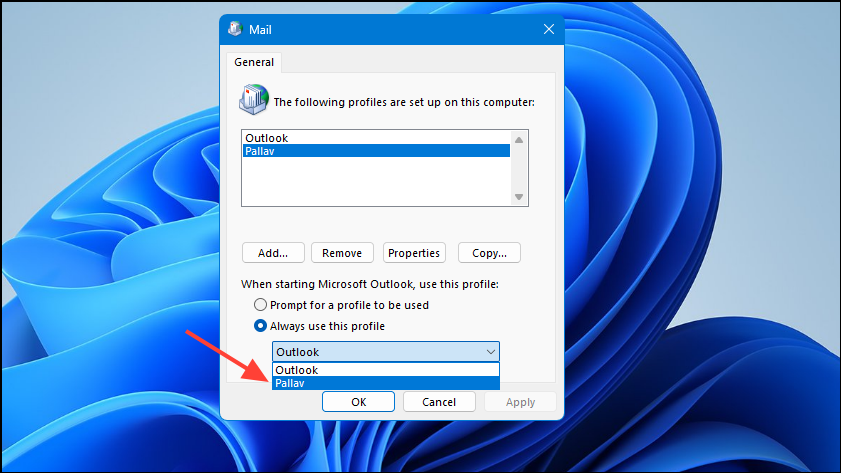
Step 9: Click OK to save the changes.
Restart Outlook and check if the error persists. If you can now send and receive emails, the issue was likely due to a corrupted profile.
Method 2: Repair the Outlook Data File
Damage to the Outlook data file can cause the 0x8004010F error. Repairing the data file may resolve the problem.
Step 1: Close Outlook.
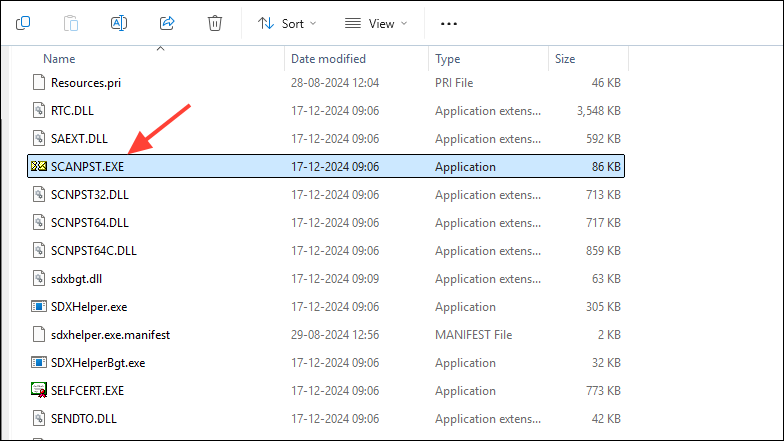
Step 2: Locate the Inbox Repair Tool (SCANPST.exe) on your computer. The default location is:
- For 64-bit Windows and 32-bit Office:
C:\Program Files (x86)\Microsoft Office\Office16 - For 64-bit Windows and 64-bit Office:
C:\Program Files\Microsoft Office\Office16
Office16 may vary based on your Office version (e.g., Office15 for Office 2013).Step 3: Double-click SCANPST.exe to open the tool.
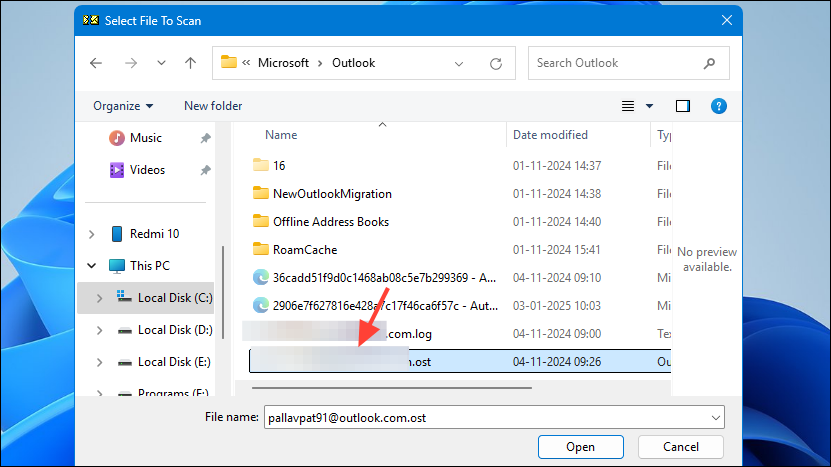
Step 4: Click Browse and navigate to your Outlook data file location. The default path is:
C:\Users\YourUsername\AppData\Local\Microsoft\Outlook
Step 5: Select your Outlook data file (.pst or .ost) and click Open.
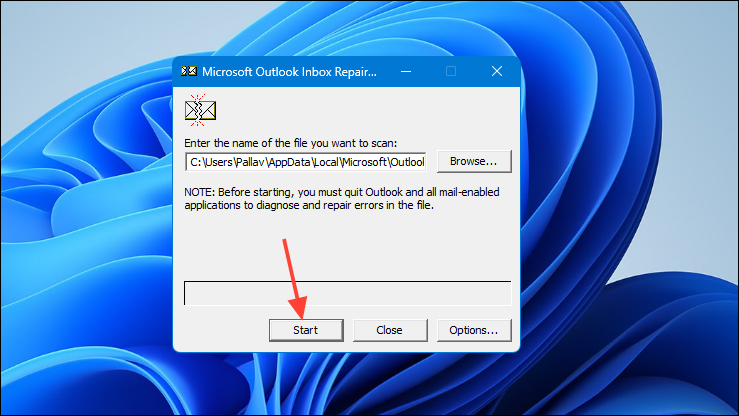
Step 6: Click Start to begin scanning the file for errors.
Step 7: If errors are found after the scan, ensure the option Make a backup of scanned file before repairing is checked, then click Repair.
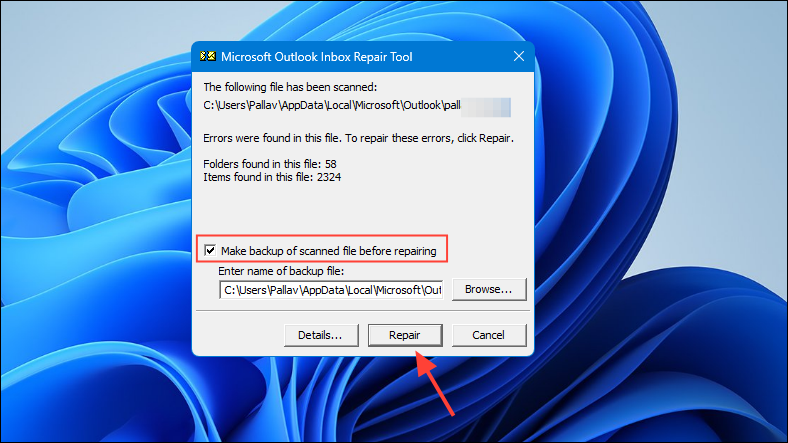
Step 8: Once the repair is complete, open Outlook and see if the error has been resolved.
Method 3: Reconfigure Send/Receive Settings
Incorrect send/receive settings can lead to synchronization issues. Resetting these settings might fix the error.
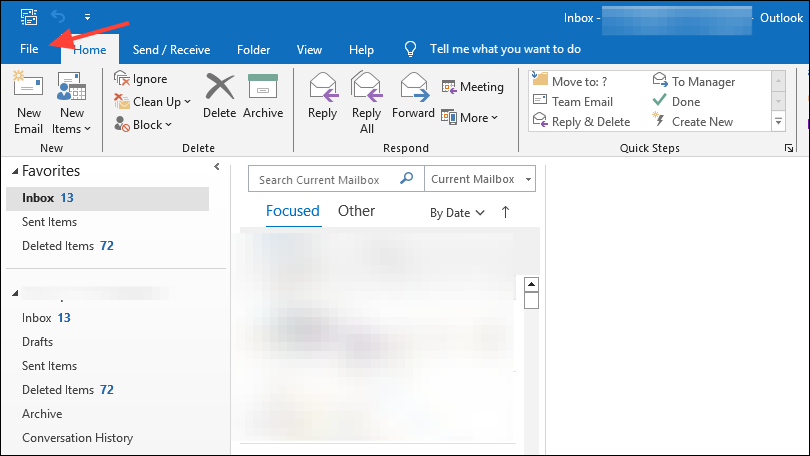
Step 1: In Outlook, click on the File tab.
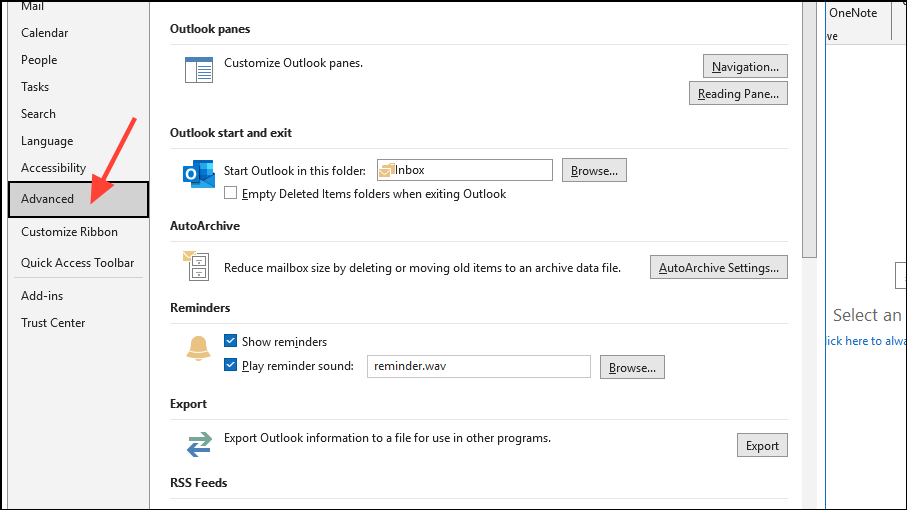
Step 2: Select Options, then choose Advanced from the left pane.
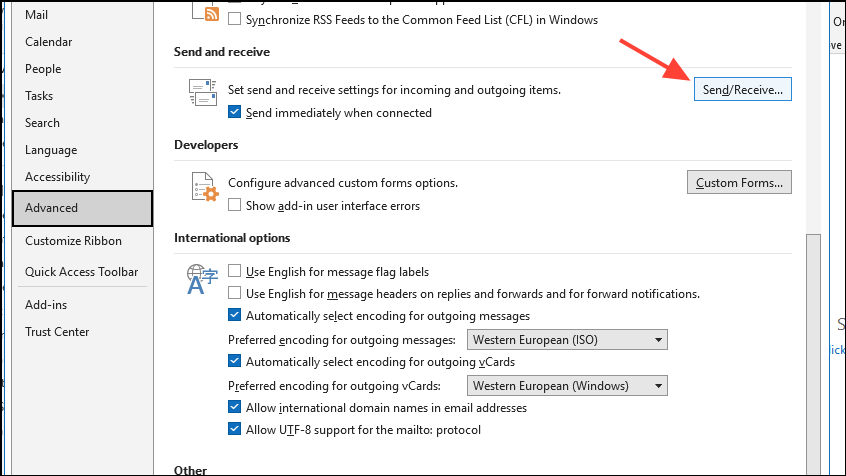
Step 3: Under the Send and Receive section, click on the Send/Receive... button.
Step 4: In the Send/Receive Groups dialog, select All Accounts and click on Edit.
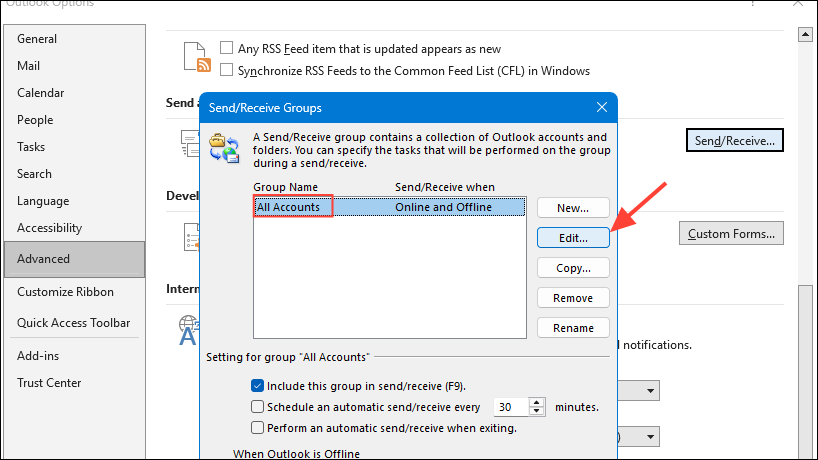
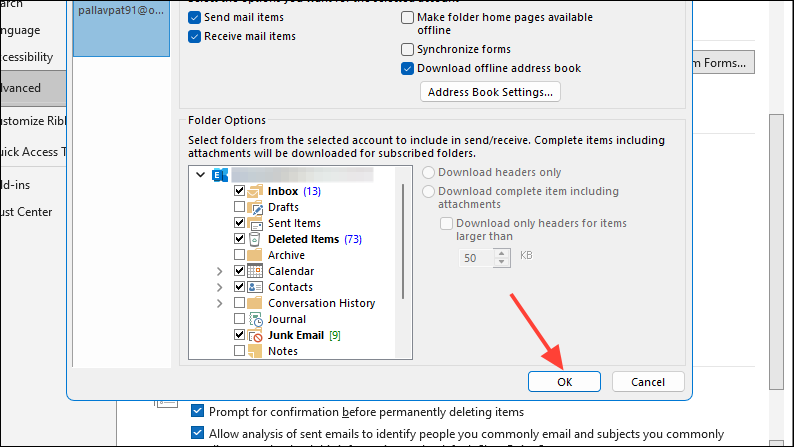
Step 5: Ensure that your account is checked under both Account Options and Folder Options.
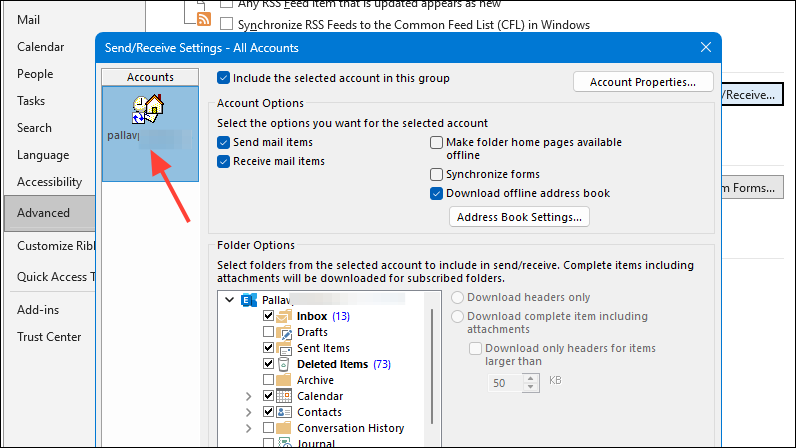
Step 6: Click OK, then Close the dialog boxes.
Try sending and receiving emails to check if the error is resolved.
Method 4: Disable Antivirus and Firewall Temporarily
Sometimes, security software can interfere with Outlook's ability to access data files. Disabling them temporarily can help identify if they're causing the issue.
Step 1: Locate your antivirus software icon in the system tray (bottom-right corner of the screen).
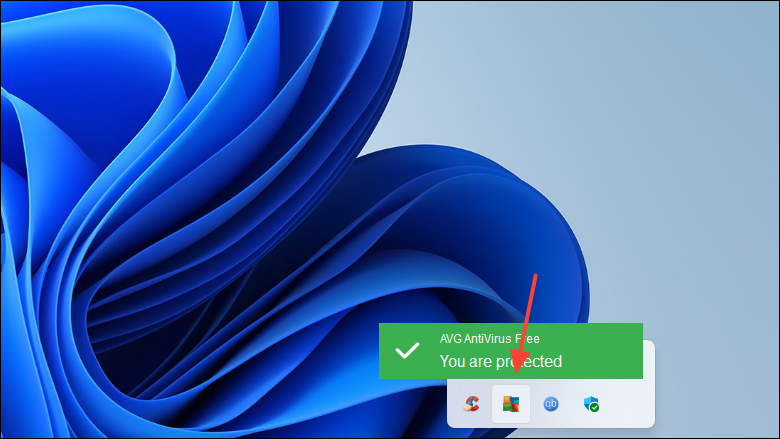
Step 2: Right-click the icon and choose the option to disable or pause protection. The exact steps vary depending on your software.

Step 3: Repeat the process for your firewall software if it's separate from your antivirus.
Step 4: Open Outlook and attempt to send or receive emails.
Step 5: If the error no longer occurs, your security software may be blocking Outlook. You'll need to configure the software to allow Outlook's processes.
Method 5: Update or Recreate the Offline Address Book (For Exchange Accounts)
Issues with the Offline Address Book (OAB) can cause the 0x8004010F error for Exchange accounts.
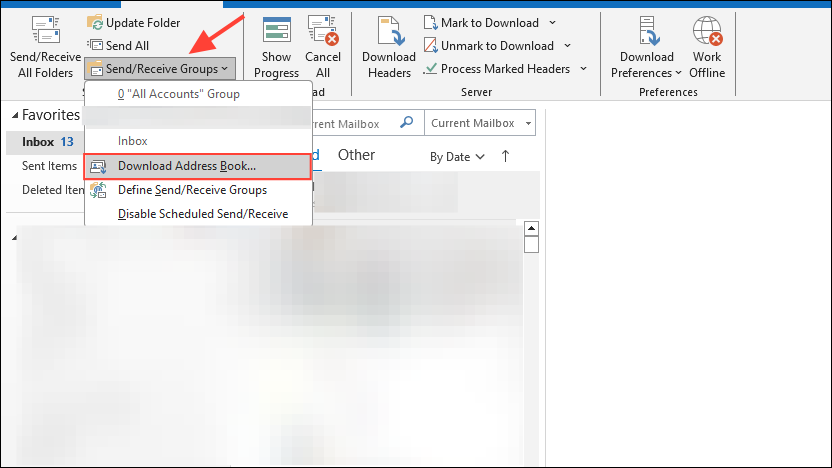
Step 1: In Outlook, click on the Send/Receive tab.
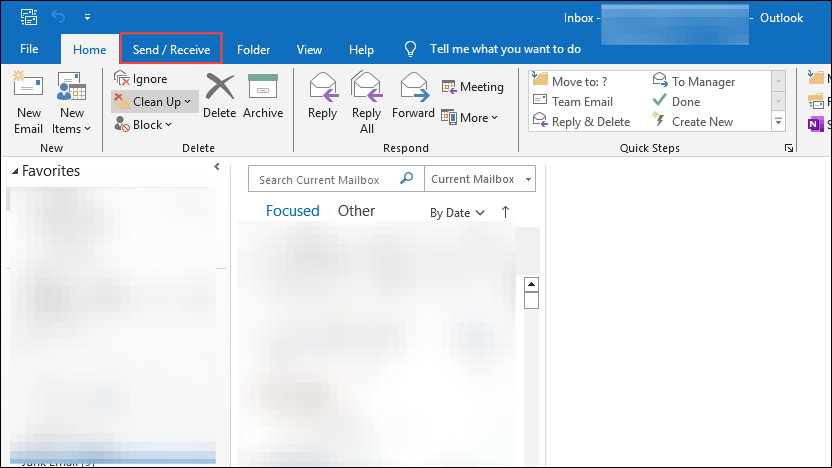
Step 2: Click on Send/Receive Groups, then select Download Address Book...
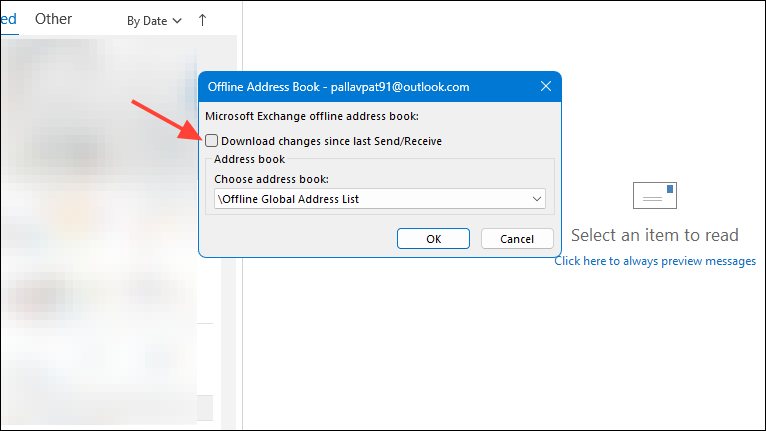
Step 3: In the dialog box, uncheck Download changes since last Send/Receive and click OK.
Step 4: Allow the OAB to download completely.
Once completed, try sending an email to see if the error is resolved.
Method 6: Reinstall Microsoft Outlook
If none of the above methods work, reinstalling Outlook may fix the error by repairing any corrupted application files.
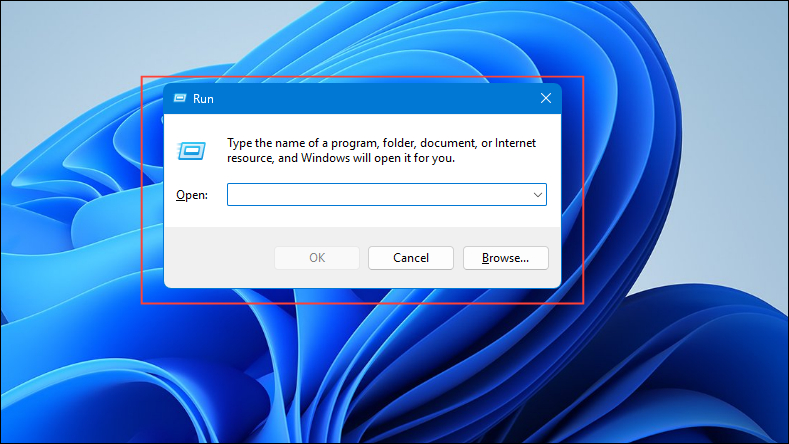
Step 1: Press Windows Key + R to open the Run dialog box.
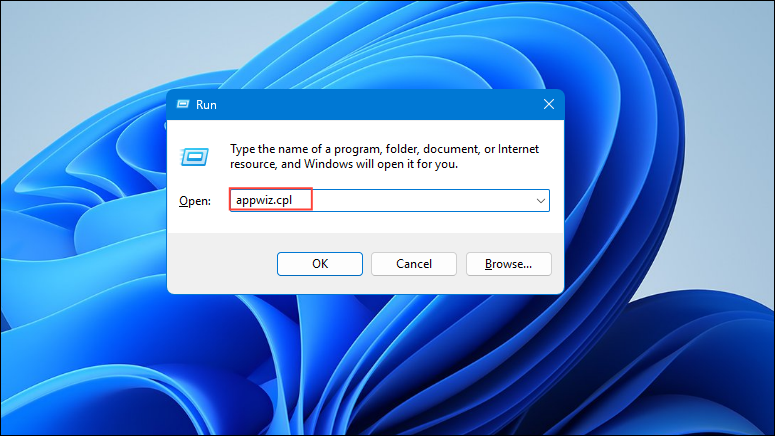
Step 2: Type appwiz.cpl and press Enter to open the Programs and Features window.
Step 3: Find Microsoft Office in the list, select it, and click on Uninstall.
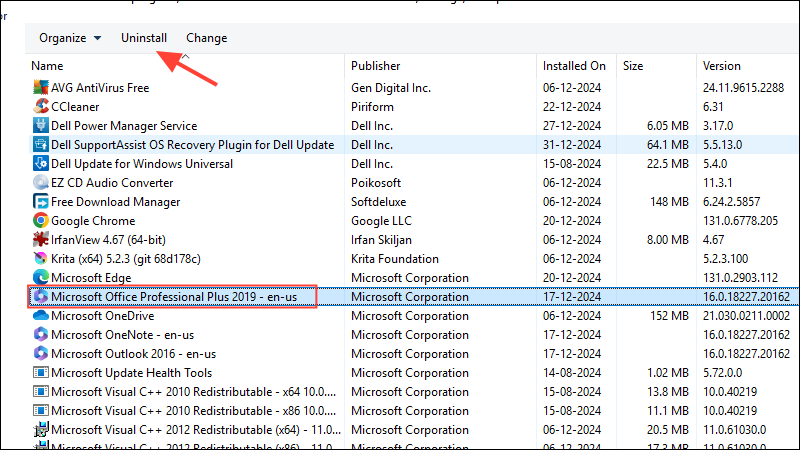
Step 4: Follow the prompts to uninstall Office completely.
Step 5: Restart your computer.
Step 6: Reinstall Microsoft Office using your installation media or by downloading it from the official Microsoft website.
Step 7: Open Outlook, set up your email account, and check if the issue persists.
By following these methods, you should be able to resolve the 0x8004010F error in Outlook and restore your email functionality. If the problem continues, consider reaching out to Microsoft Support for further assistance.

