
Exporting PowerPoint slides as Word handouts can fail with the error message "PowerPoint couldn't write to Microsoft Word," especially when working with large presentations or files containing many images. This error disrupts workflows that depend on creating editable Word documents from PowerPoint, such as preparing meeting handouts or lecture notes. Several methods can address this issue, ranging from optimizing image settings to troubleshooting Office installations.
Compress Images to Reduce File Size
Large PowerPoint files—especially those with many high-resolution images—can overwhelm the export process, causing the error. Adjusting image settings to compress pictures and discard unnecessary editing data often resolves the problem and allows the export to finish.
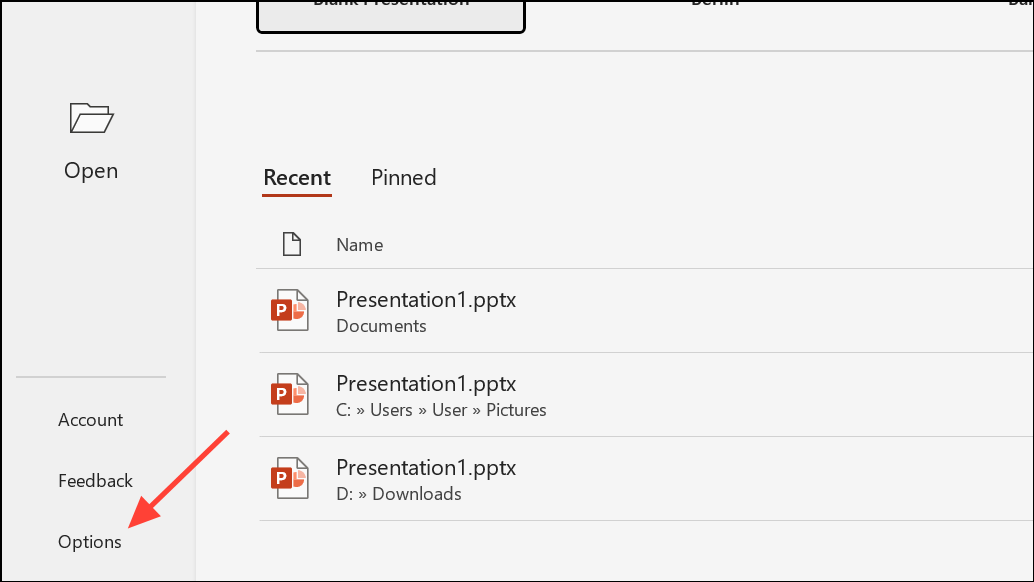
Step 1: Open your PowerPoint presentation that you want to export to Word.
Step 2: Click File in the top menu, then select Options at the bottom of the sidebar.
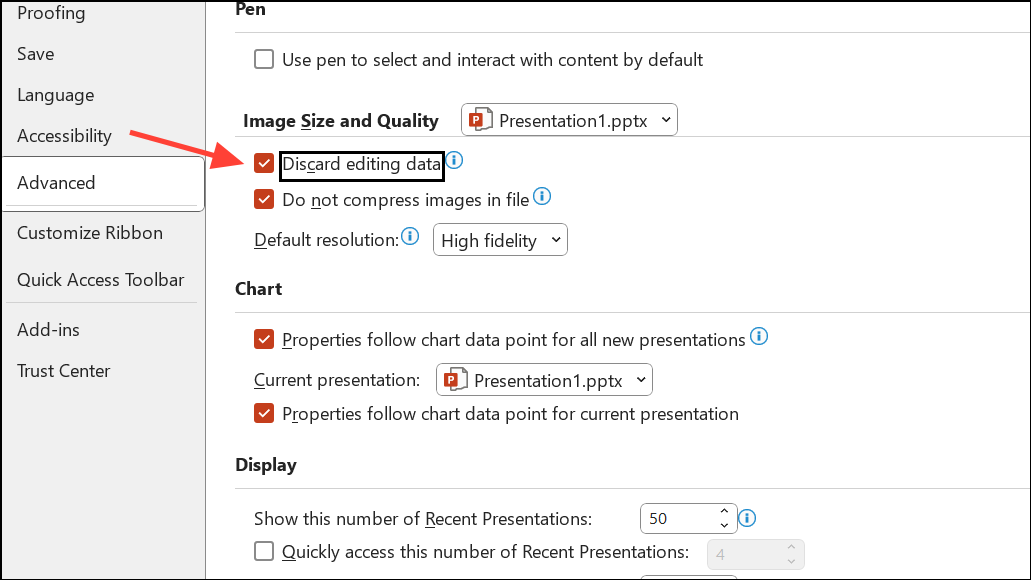
Step 3: In the Options dialog, select Advanced from the left sidebar. Scroll down to the "Image Size and Quality" section.

Step 4: Check the box for Discard Editing Data to remove excess information from images.
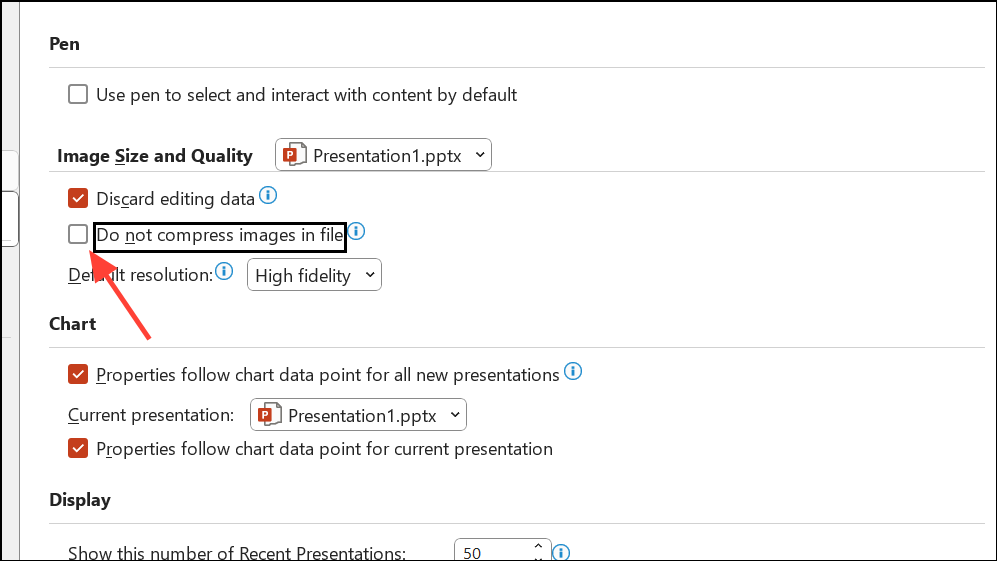
Step 5: Ensure Do not compress images in file is not checked. This setting allows PowerPoint to compress images and reduce file size.
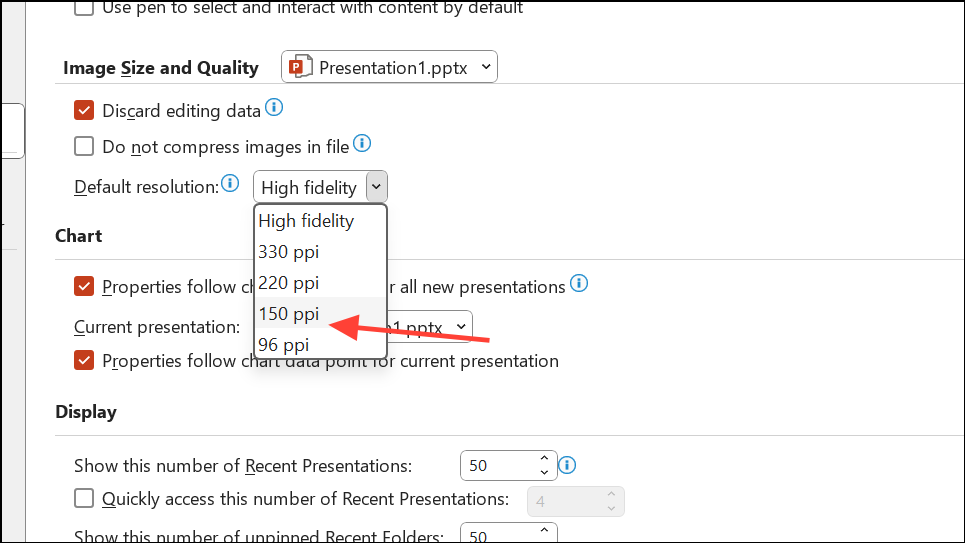
Step 6: Set Default Resolution to 150 ppi for a good balance between quality and performance.
Step 7: Click OK to apply the changes.
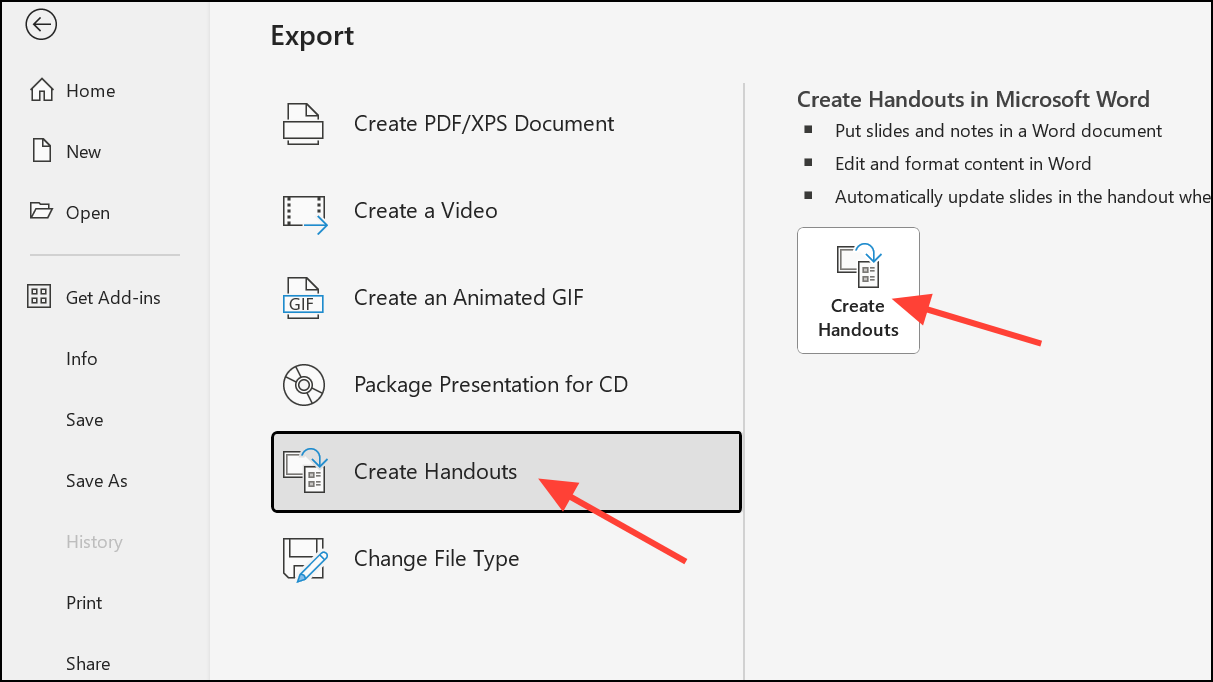
Step 8: Try exporting the presentation again by clicking File > Export > Create Handouts > Create Handouts in Microsoft Word. Select your preferred layout and click OK.
This approach reduces the file size and streamlines the export process, which often eliminates the error and allows large presentations to be successfully written to Word.
Split Large Presentations into Smaller Segments
If compressing images does not allow the entire file to export, breaking up the presentation into smaller sections can help. PowerPoint and Word require significant memory to process large files, and dividing the export into batches can prevent the process from failing partway through.
Step 1: Save a copy of your PowerPoint file to your local drive using the latest .pptx format. Avoid saving directly to OneDrive or network drives for this process.
Step 2: Open the copy and remove slides that have already been successfully exported to Word, leaving only the remaining slides.
Step 3: Export this smaller presentation to Word using the same steps as above.
Step 4: Repeat as needed until all slides have been exported. Combine the resulting Word documents into a single file if necessary.
This method improves reliability for exporting very large or complex presentations.
Restart and Minimize Background Processes
Exporting to Word consumes a significant amount of memory. Running many applications at once can cause PowerPoint to fail during export. Restarting your computer and running only PowerPoint can free up resources for the export process.
Step 1: Save your work and restart your computer to clear memory.
Step 2: After rebooting, open only PowerPoint and Word. Close any other programs or browser tabs that may use system resources.
Step 3: Attempt the export process again from PowerPoint to Word.
This approach can improve the chances of a successful export, especially on systems with limited RAM or when handling large files.
Update and Repair Office Installation
Outdated or corrupted Office installations can cause export errors. Ensuring your Office suite is up to date and running a repair can resolve underlying software issues.
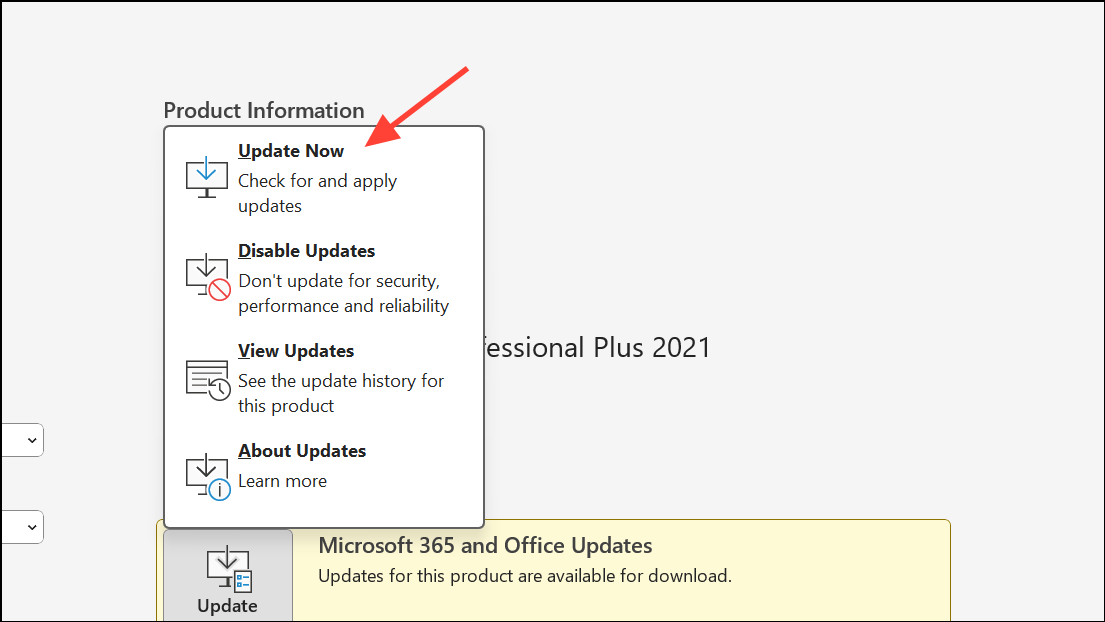
Step 1: Open any Office application and go to File > Account > Update Options, then select Update Now to check for and install updates.
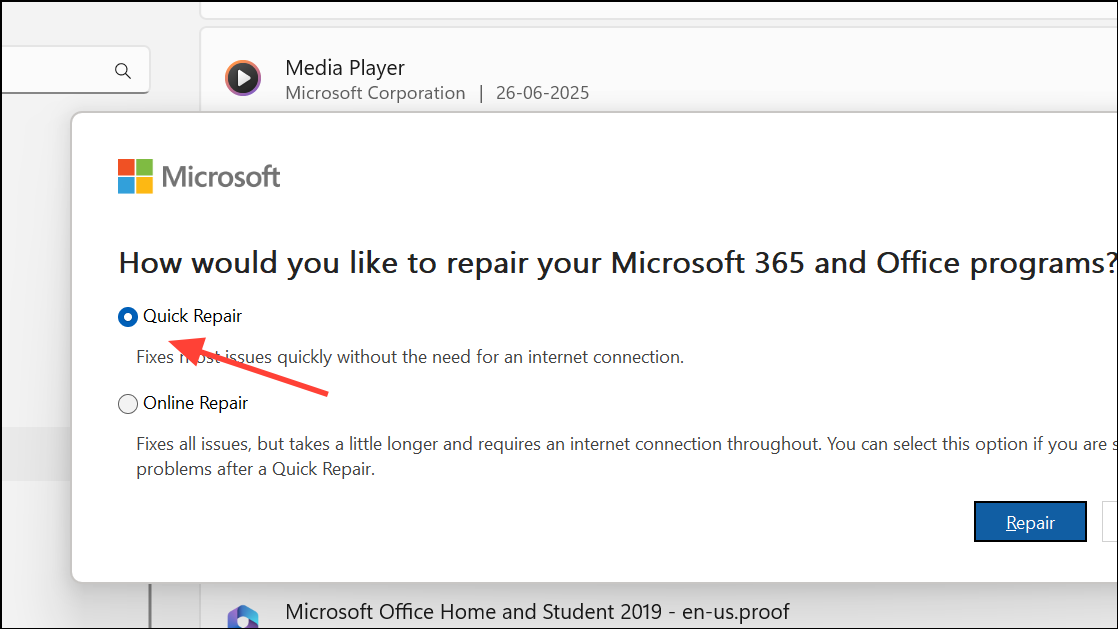
Step 2: If updating does not resolve the issue, run an Office repair. Open Control Panel > Programs and Features, select Microsoft Office, and click Change. Choose Quick Repair or Online Repair for a deeper fix.
Step 3: After repairs are complete, restart your computer and try exporting again.
Keeping Office updated and repaired can prevent and resolve export errors caused by software issues.
Use Safe Mode and Disable Add-ins
Conflicts with PowerPoint or Word add-ins can sometimes cause export failures. Running PowerPoint in Safe Mode disables add-ins and customizations, allowing you to test whether these are the source of the problem.
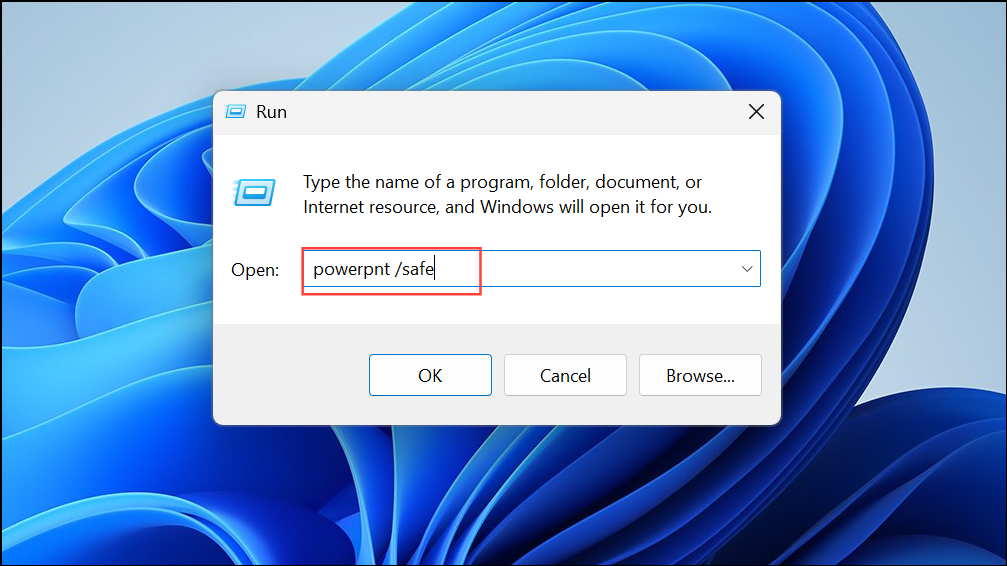
Step 1: Start PowerPoint in Safe Mode by holding Ctrl while launching the application, or by running powerpnt /safe from the Run dialog.
Step 2: Open your presentation and attempt the export process.
Step 3: If the export works in Safe Mode, disable add-ins one by one from File > Options > Add-ins to identify the culprit.

This troubleshooting step targets issues caused by third-party plugins or customizations.
Upload and Open in Microsoft 365 Online
Some users report that uploading the presentation to Microsoft 365 Online (using a web browser like Edge) and opening it there can clean up file compatibility issues, making the export process more reliable.
Step 1: Save your PowerPoint file locally in .pptx format.
Step 2: Log in to Microsoft 365 Online and upload the file from your computer.

Step 3: Once uploaded, open the file in PowerPoint for the web and close it after it loads.
Step 4: Open the synchronized file from your local OneDrive folder using your desktop PowerPoint.
Step 5: Try the export to Word process again.
This method can resolve file corruption or compatibility issues that block the export process.
Addressing the "PowerPoint couldn't write to Microsoft Word" error typically involves compressing images, managing file size, updating Office, or troubleshooting add-ins and compatibility. These steps can help you reliably export your slides as Word handouts and avoid workflow interruptions.