
Audio problems with Realtek drivers on Windows 11 can be quite troublesome, impacting everything from streaming videos to system sounds. These issues can arise due to outdated drivers, incorrect settings, or other system glitches. This article offers several solutions to help you fix Realtek audio issues on your Windows 11 computer.
1. Update the Realtek Audio Driver
An outdated or corrupt audio driver is a common cause of sound problems. Updating the Realtek audio driver can often resolve these issues.
To update the Realtek audio driver:
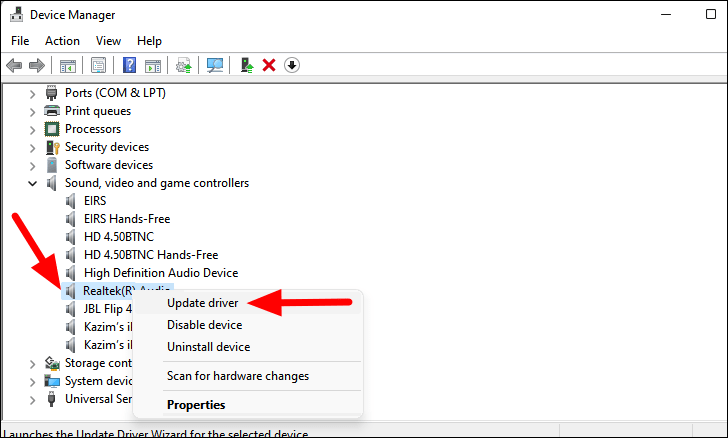
- Right-click the Start button on the taskbar or press WINDOWS + X and select Device Manager from the menu.
- In Device Manager, expand the Sound, video and game controllers category.
- Right-click on Realtek Audio and choose Update driver.
- Select Search automatically for drivers to allow Windows to find and install the latest driver.
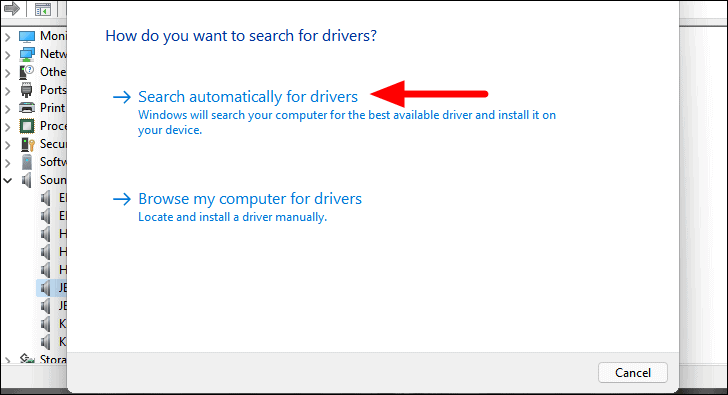
If Windows reports that the best drivers are already installed, you can check the manufacturer’s website for the latest drivers. Once downloaded, double-click the installer and follow the prompts to update the driver. After updating, restart your computer and see if the audio issue is resolved.
2. Reinstall the Realtek Audio Device
If updating the driver doesn’t work, reinstalling the audio device might help fix any corruption or glitches.
To reinstall the Realtek audio device:
- Open Device Manager as described earlier.
- Expand the Sound, video and game controllers section.
- Right-click on Realtek Audio and select Uninstall device.
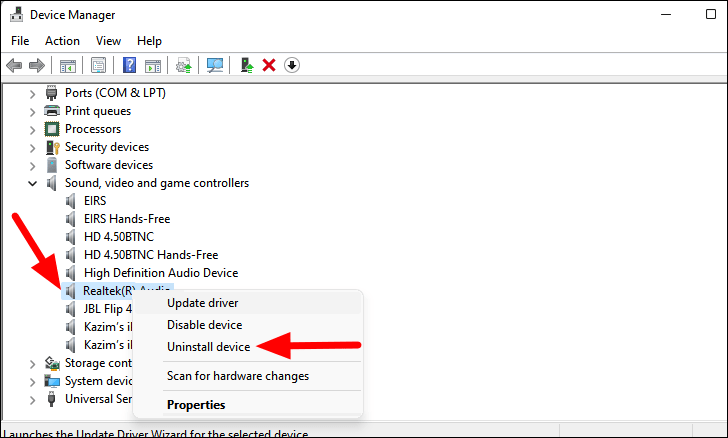
- In the confirmation dialog, click Uninstall.
- Restart your computer. Windows will automatically reinstall the Realtek audio driver upon startup.
After the system restarts, check if your audio is functioning properly.
3. Restart Windows Audio Services
Windows audio services manage sound on your system; if they’re not running correctly, you may experience issues. Restarting these services can help.
To restart the audio services:
- Press WINDOWS + R to open the Run dialog, type
services.msc, and press Enter. - In the Services window, locate Windows Audio and verify if it’s running.

- If the service is not running, right-click on it and select Start.
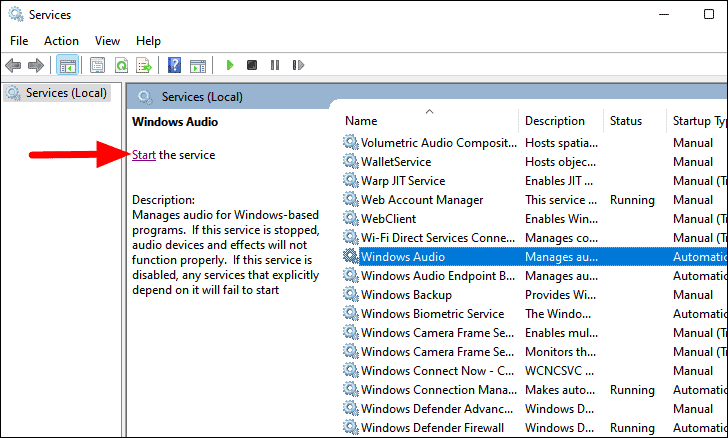
- If the service is running, right-click on it and choose Restart.
- Repeat the same steps for Windows Audio Endpoint Builder and Remote Procedure Call (RPC) services.
After restarting these services, test your audio to see if the issue persists.
4. Run the Audio Troubleshooter
Windows 11 includes a built-in troubleshooter that can detect and fix common audio problems.
To run the audio troubleshooter:
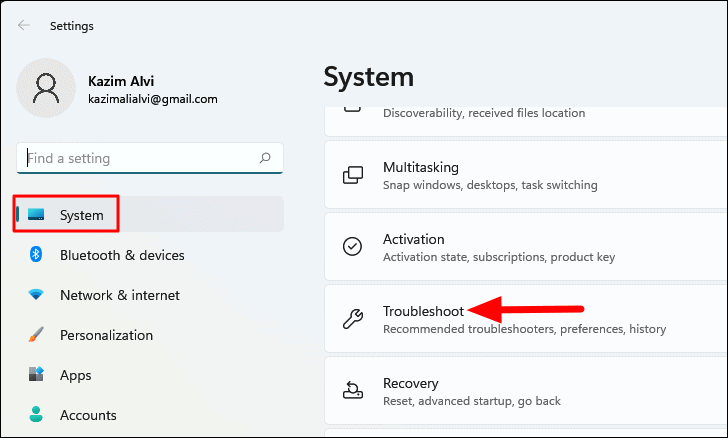
- Open Settings by pressing WINDOWS + I.
- In the System section, scroll down and select Troubleshoot.
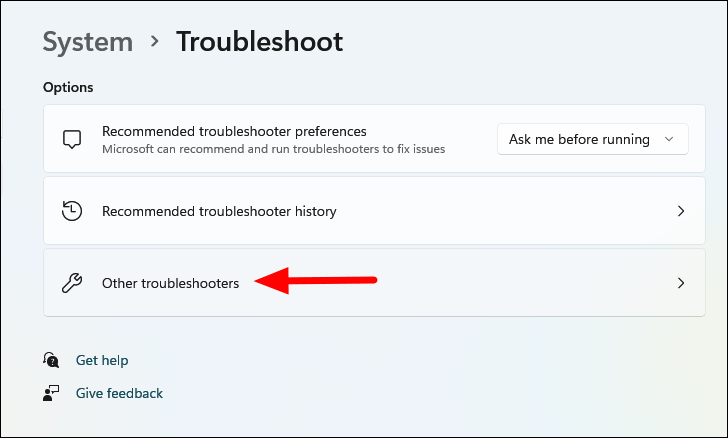
- Click on Other troubleshooters.
- Find Playing Audio and click Run.
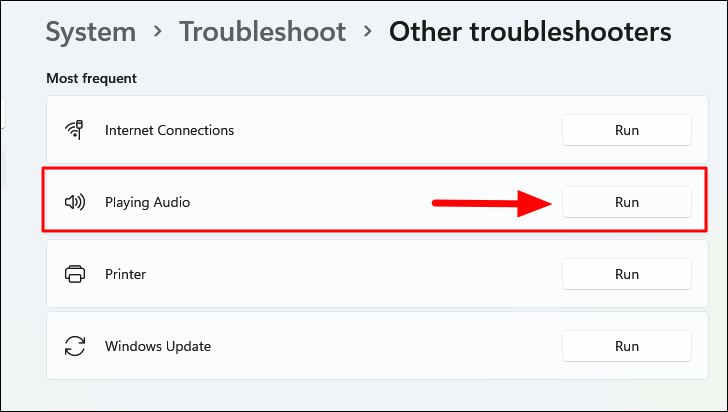
- Follow the on-screen instructions to complete the troubleshooting process.
The troubleshooter will attempt to detect and fix any audio issues automatically.
5. Disable Audio Enhancements
Sometimes, audio enhancements can interfere with sound playback. Disabling them might resolve the issue.
To disable audio enhancements:
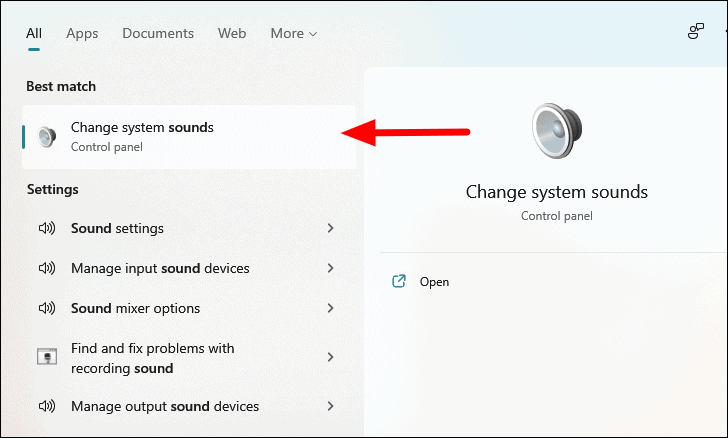
- Right-click the speaker icon in the taskbar and select Sounds, or search for Change system sounds in the Start Menu.

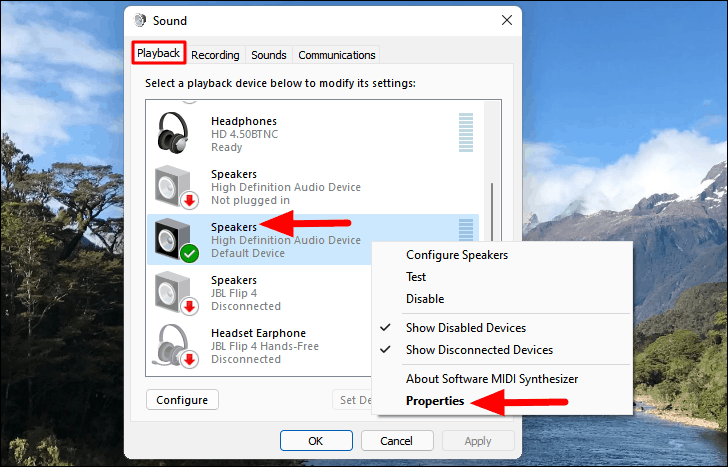
- In the Sound window, go to the Playback tab.
- Select your audio device and click Properties.
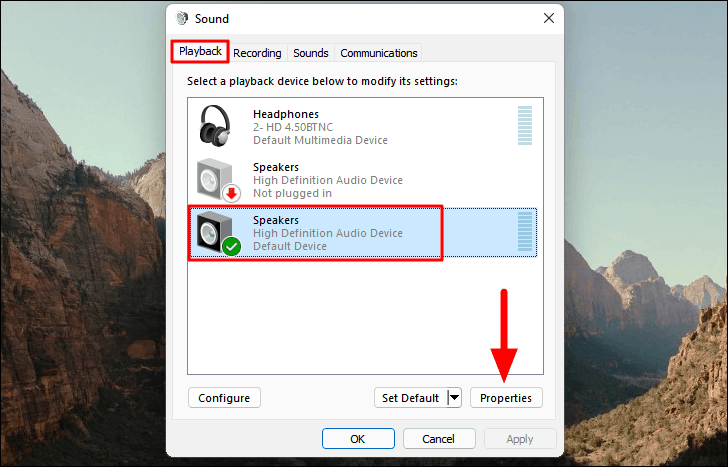
- Navigate to the Enhancements tab.
- Check the box for Disable all enhancements.
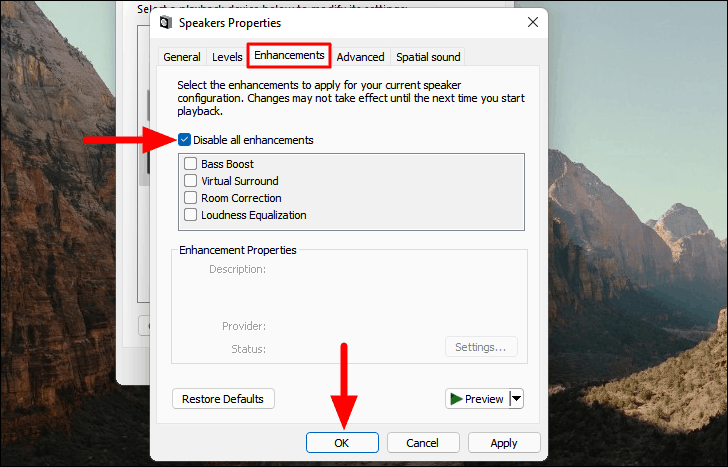
- Click OK to apply the changes.
Now, test your audio to see if disabling enhancements resolved the problem.
6. Verify Audio Output Device
Incorrect selection of the audio output device can lead to sound issues, especially if multiple devices are connected.
To check the selected audio output device:
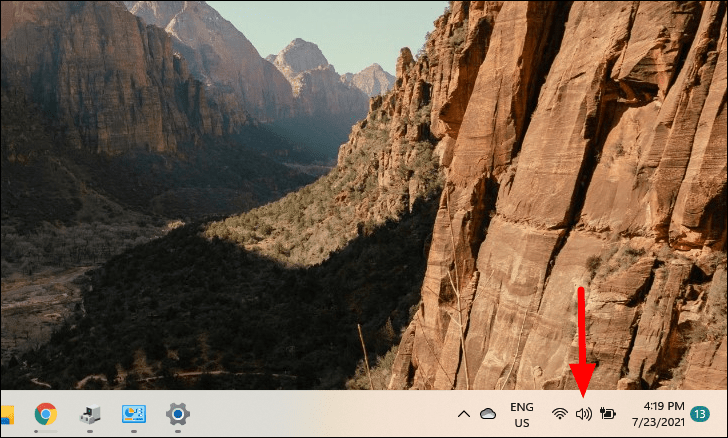
- Click on the Action Center in the taskbar or press WINDOWS + A.
- Click the arrow next to the volume slider.
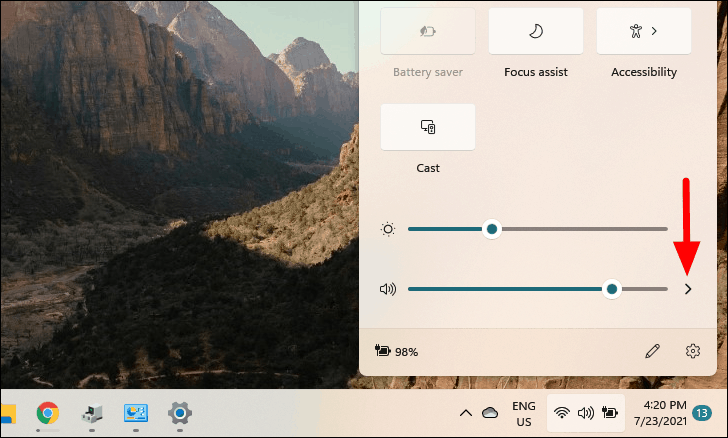
- Select the desired audio output device from the list.
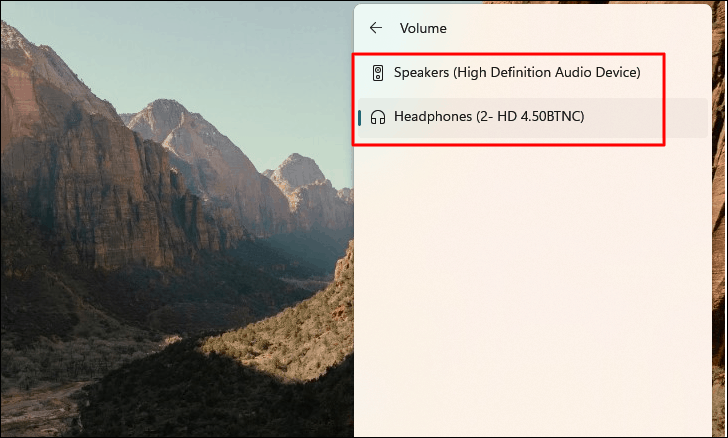
If this fixes the issue, you can set this device as the default to prevent future problems.
To set the device as default:
- Search for Change system sounds in the Start Menu and open it.
- In the Playback tab, select your preferred device and click Set Default.
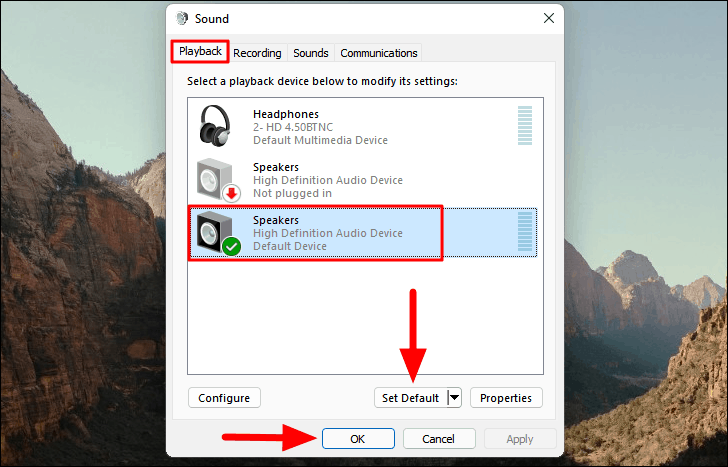
Click OK to save the changes.
7. Choose a Different Audio Format
Incompatible audio formats can sometimes cause sound issues. You can try selecting a different format to fix this.
To change the audio format:
- Open Change system sounds from the Start Menu.
- Go to the Playback tab, right-click your audio device, and select Properties.
- In the Advanced tab, use the dropdown menu under Default Format to select a different format.
- Click Test to see if the new format works.
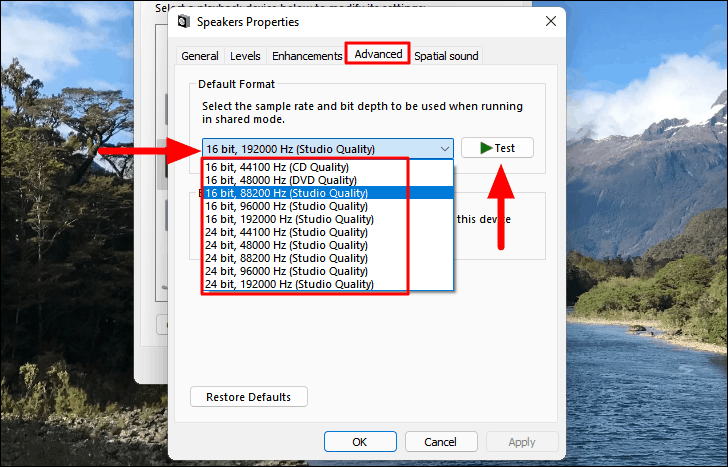
- Once you find a working format, click OK to apply the changes.
Check if changing the audio format has resolved the issue.
8. Inspect Connections and Hardware
Sometimes the issue might be with the physical connections or the audio device itself.
Ensure that:
- The audio device is properly connected and powered on.
- Cables are securely plugged in without any damage.
- The device’s volume is turned up and not muted.
If possible, try connecting the audio device to another computer to rule out hardware faults.
9. Perform a System Restore
If none of the above solutions work, you can restore your system to a point where the audio was functioning correctly.
To perform a system restore:
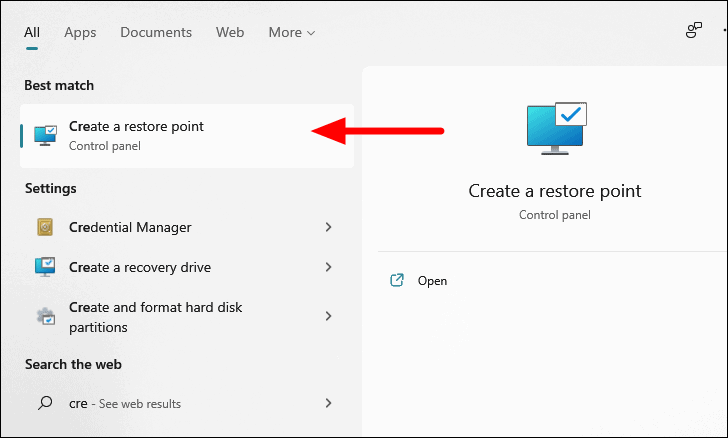
- Search for Create a restore point in the Start Menu and open it.
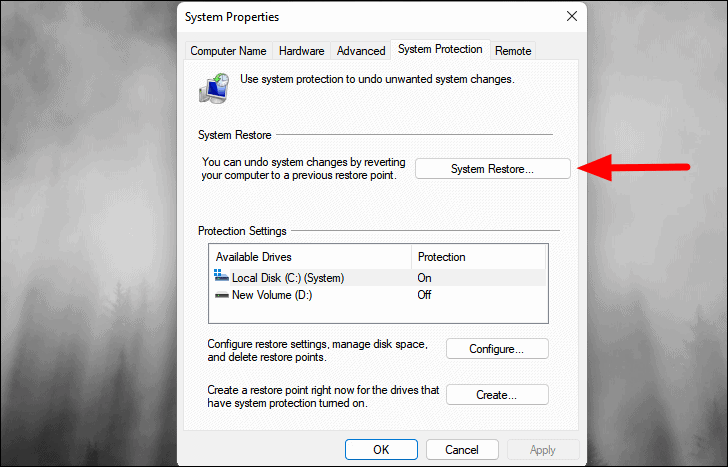
- In the System Protection tab, click on System Restore.
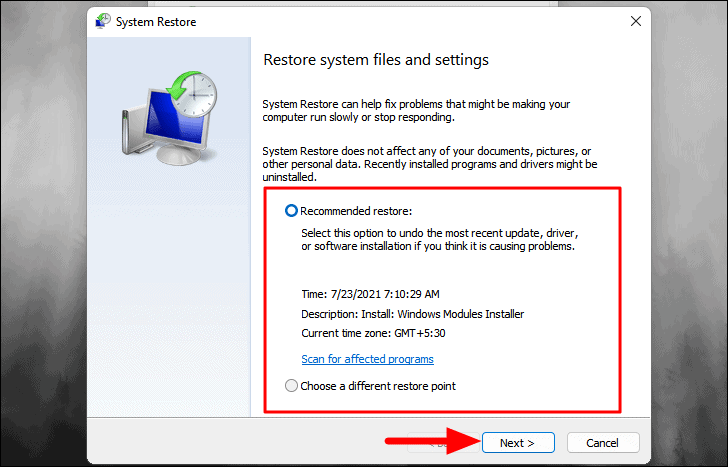
- Choose a restore point from before the audio issues began and click Next.
- Review the details and click Finish to start the restoration process.
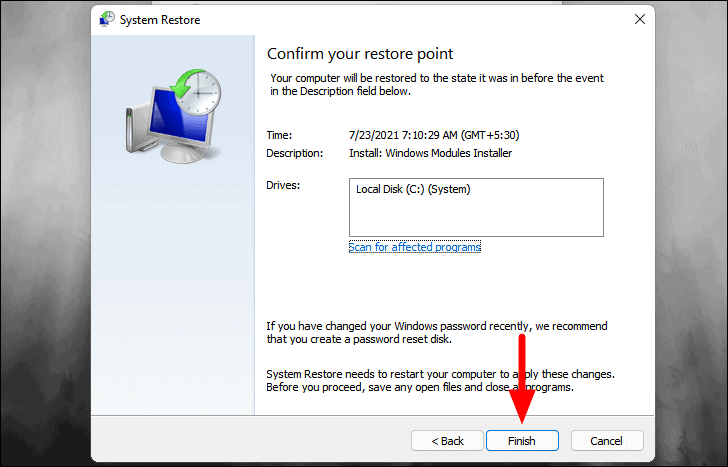
Your computer will restart, and the system will be restored to the selected point. After the process completes, check if the audio issue is resolved.
By following these methods, you should be able to fix Realtek audio issues on your Windows 11 PC. Identify the solution that works best for your situation to restore clear and functional audio on your system.


