
System image backups in Windows 11 can fail for a variety of reasons, including storage issues, disk errors, system file corruption, or conflicts with security software. These failures can prevent you from restoring your system after a crash or major update. Addressing these problems not only restores backup functionality but also improves overall system reliability and data safety.
Use a Reliable Third-Party Backup Tool
Switching to a dedicated backup application often resolves persistent backup failures caused by Windows’ legacy tools. Macrium Reflect Free and AOMEI Cyber Backup are two widely recommended options. These programs offer robust imaging and restore features, and they tend to be more dependable than the built-in Backup and Restore (Windows 7) tool, which Microsoft has deprecated and no longer actively maintains.
Step 1: Download and install your preferred backup software, such as Macrium Reflect Free or AOMEI Cyber Backup, from the official website.
Step 2: Launch the application and select the system or partitions you want to back up. Choose your external drive or network location as the destination.
Step 3: Configure backup options such as compression, scheduling, and retention policies as needed. Start the backup process and wait for it to complete.
Step 4: To restore, use the software’s recovery media creation tool to make a bootable USB or CD/DVD. Boot from this media if your system won’t start, then follow prompts to restore your image from the backup location.
These tools also support incremental and differential backups, which speed up subsequent backups and reduce storage requirements.
Check Storage Space on Backup Destination
For those who prefer using Windows’ built-in tools, several targeted troubleshooting steps can address common causes of backup failures. Error codes like 0x80070015 (file in use or locked), 0x80780166 (VSS service failures), and 0x807800A1 (insufficient storage) each point to specific problems that can be resolved with the right approach.
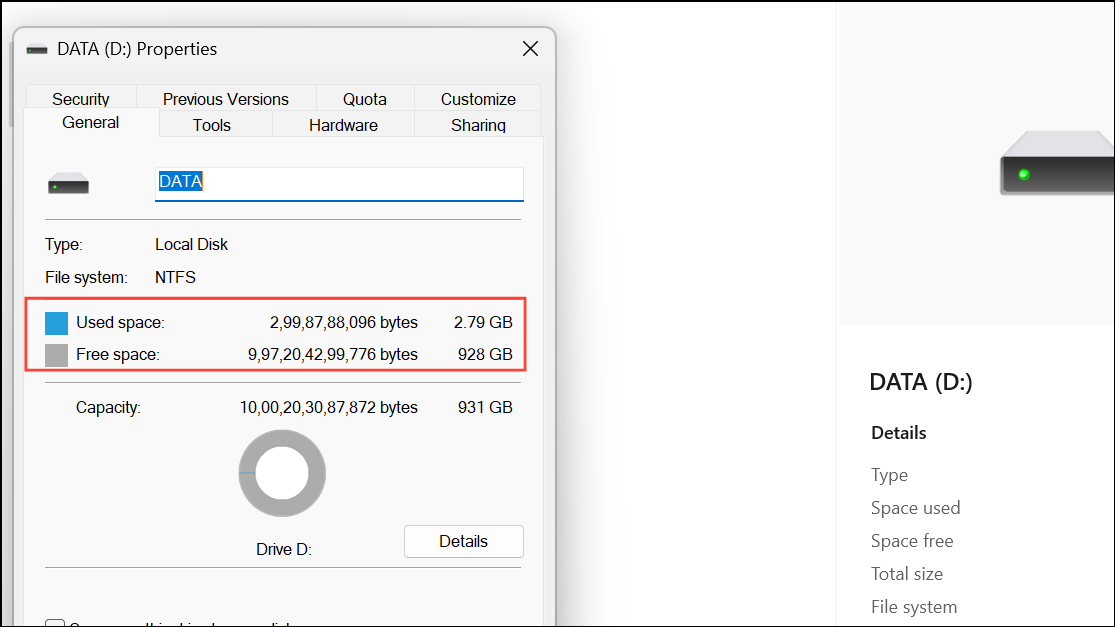
Step 1: Open File Explorer and navigate to your backup destination drive. Right-click and select Properties to view available free space. Make sure you have more free space than the total size of the system image you want to create. If storage is low, delete old backups or move non-essential files elsewhere.
Scan for Disk Errors and Repair System Files
Step 1: Open Command Prompt as administrator. Run a disk check by typing:
chkdsk /f /r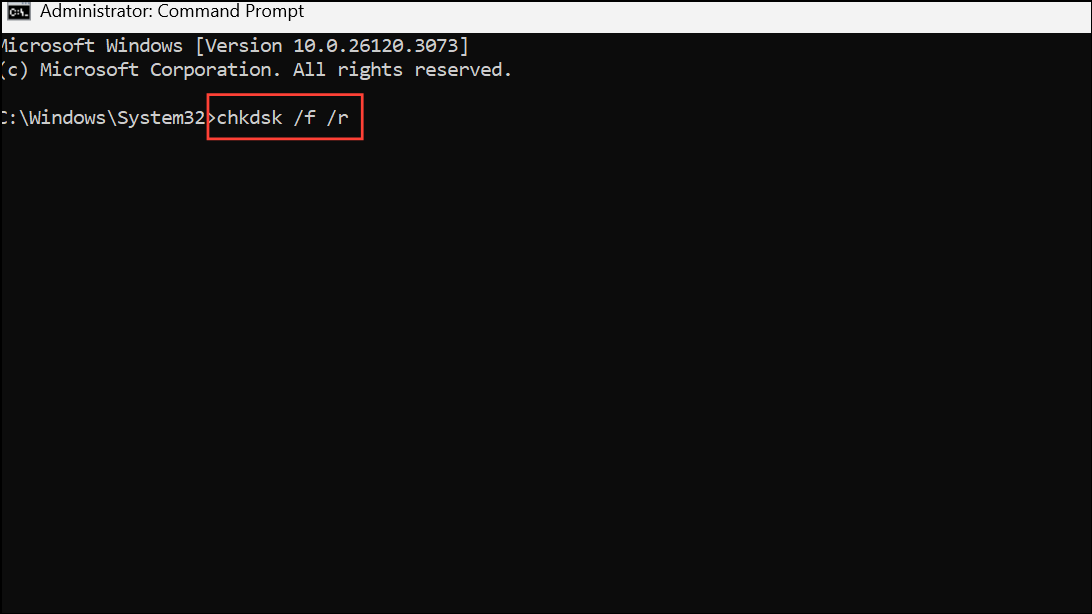
Step 2: Follow prompts to schedule a scan and restart your PC. After the scan, run the System File Checker:
sfc /scannow
Step 3: If SFC reports unrepairable corruption, use DISM to restore health:
dism /online /cleanup-image /restorehealth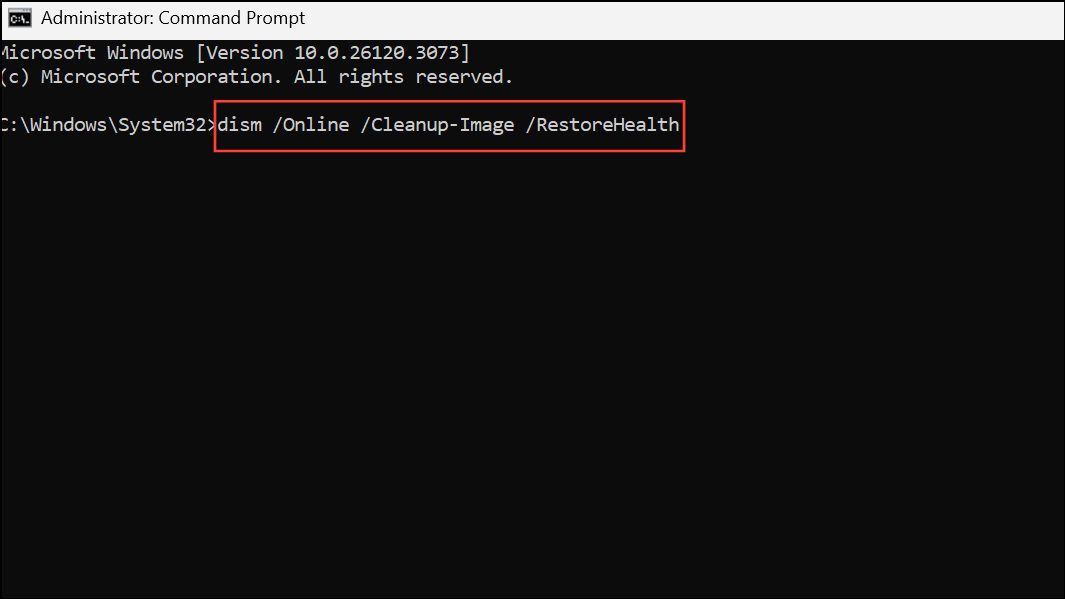
These steps address both physical disk issues and corrupted Windows system files that can block backups.
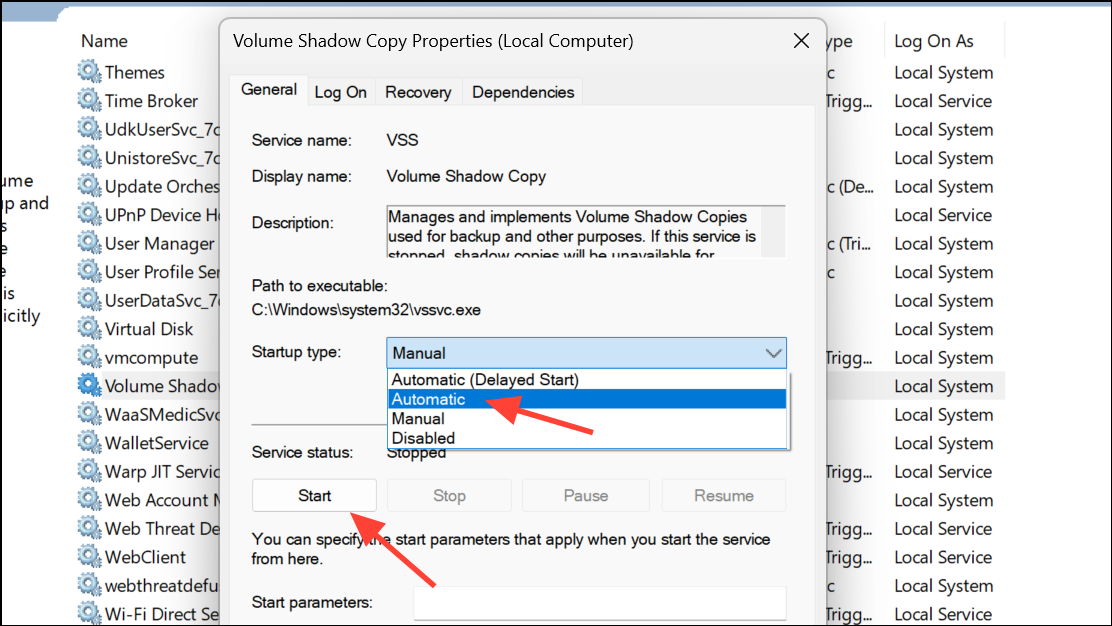
Check and Restart Backup-Related Services
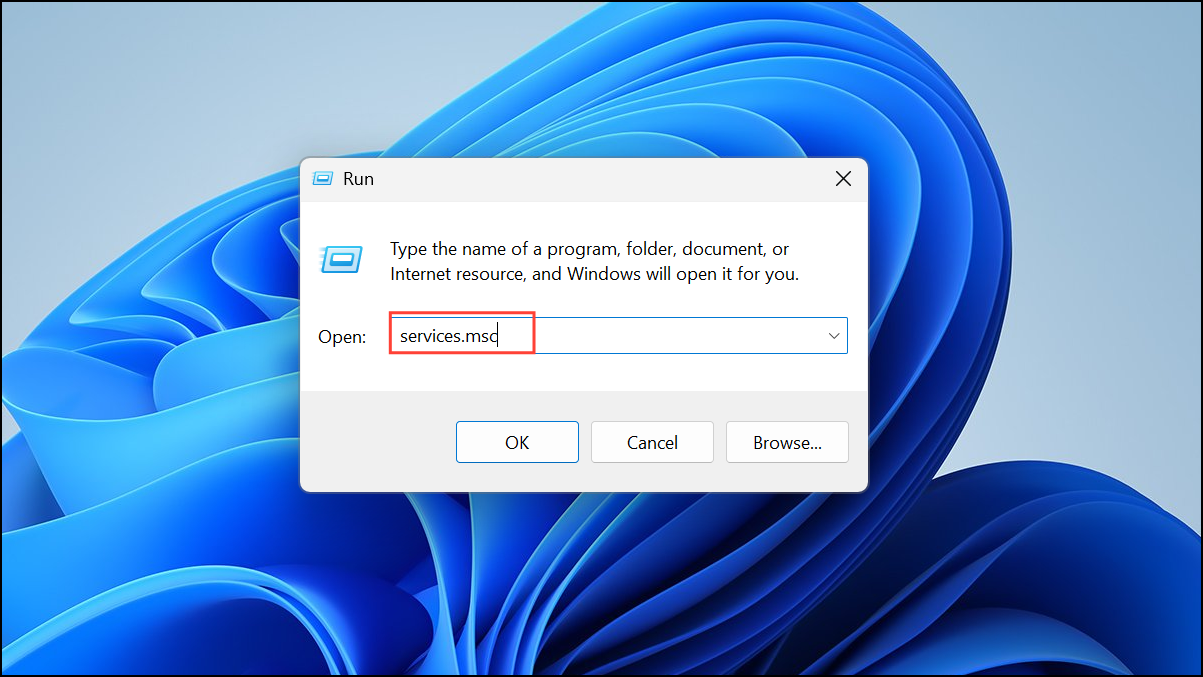
Step 1: Press Win + R, type services.msc, and press Enter.
Step 2: Locate these services:
- Volume Shadow Copy (VSS)
- Microsoft Software Shadow Copy Provider
- Block Level Backup Engine Service
- Windows Backup
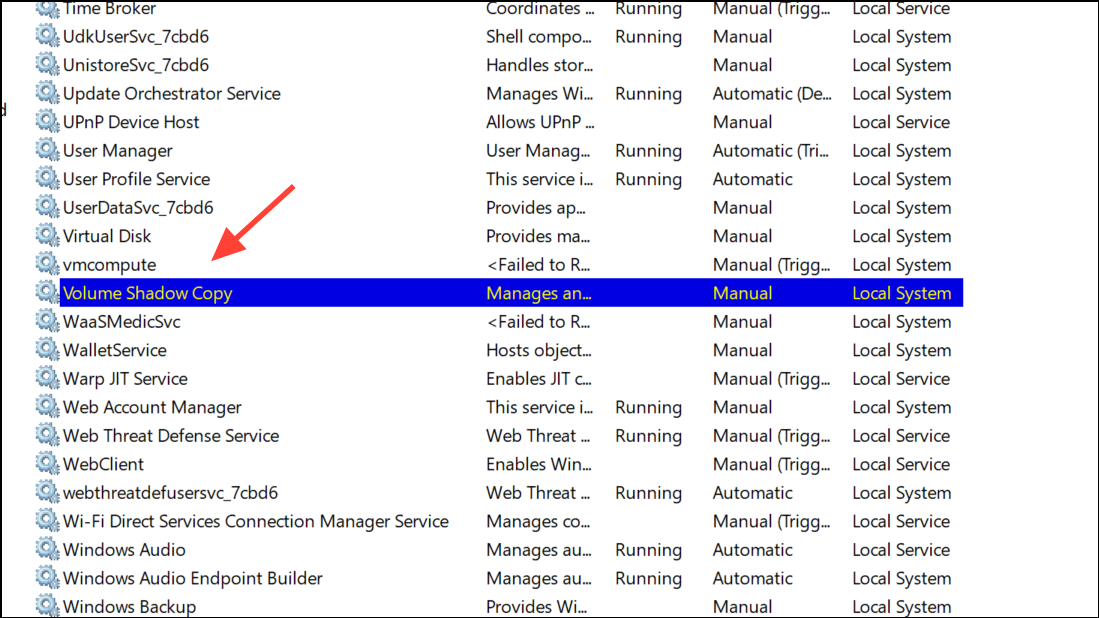
Step 3: Ensure each is set to Automatic and running. Right-click any stopped service and select Start.
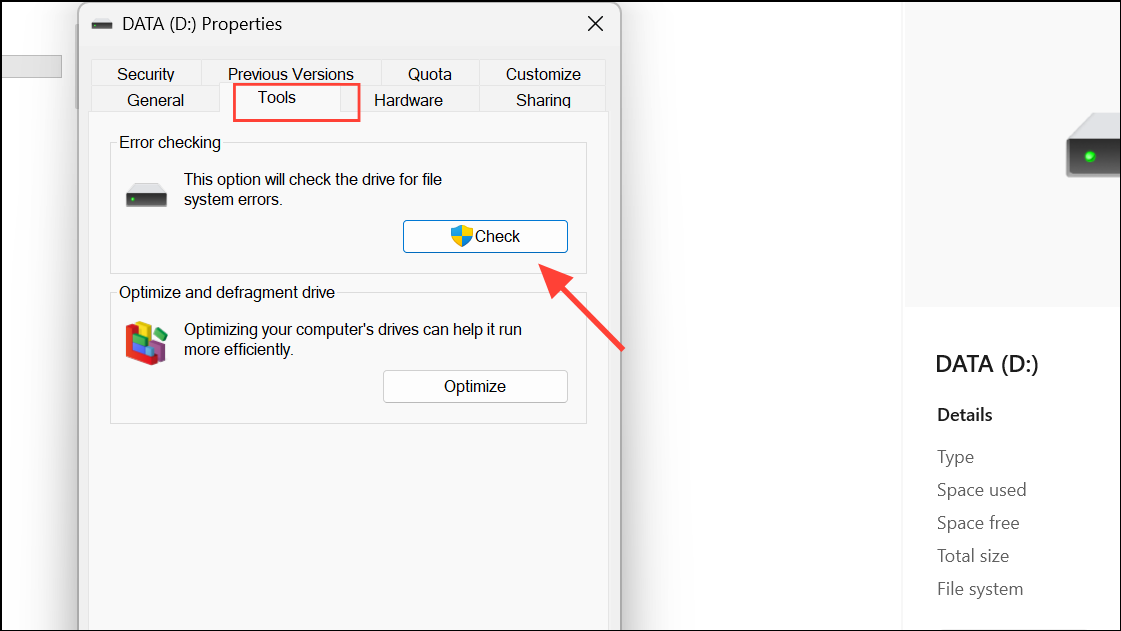
Reconnect or Reformat the Backup Drive
Step 1: If your external drive is not recognized or gives errors, safely remove and reconnect it.
Step 2: In File Explorer, right-click the drive, choose Properties > Tools > Error Checking, and scan for problems. If issues persist, back up any data, then reformat the drive as NTFS to resolve potential corruption or permission problems.
Temporarily Disable Security Software
Third-party antivirus programs can block backup operations. Temporarily disable your antivirus and firewall, then retry the backup. If the process works, add exceptions for backup services or consider using Windows Defender instead.
Review and Reset Backup Configuration
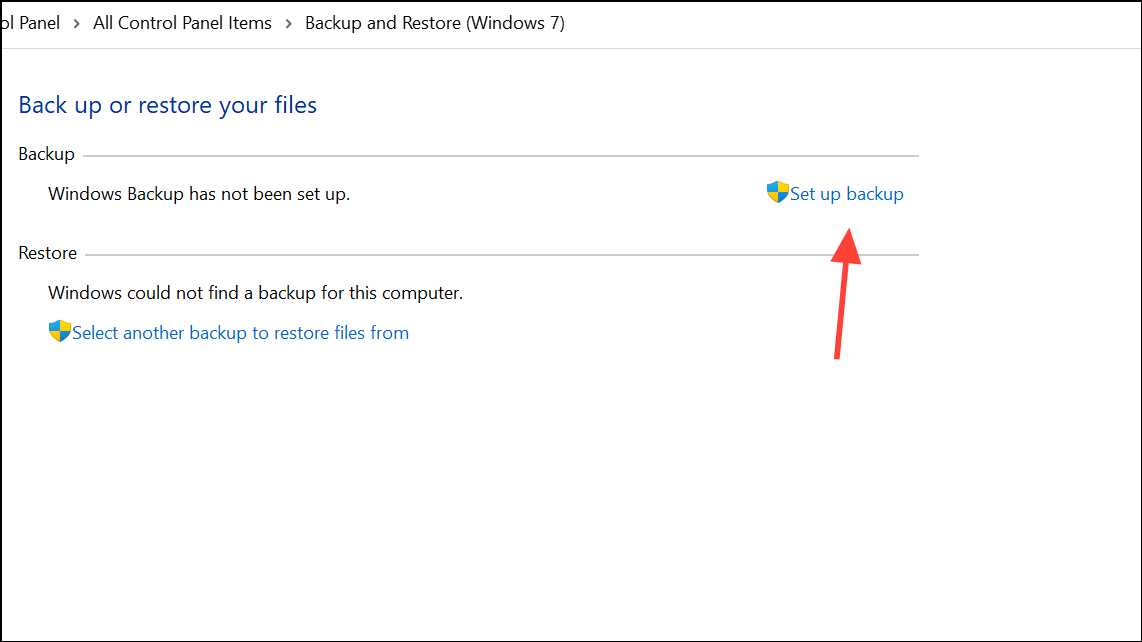
Step 1: Open Control Panel > Backup and Restore (Windows 7).
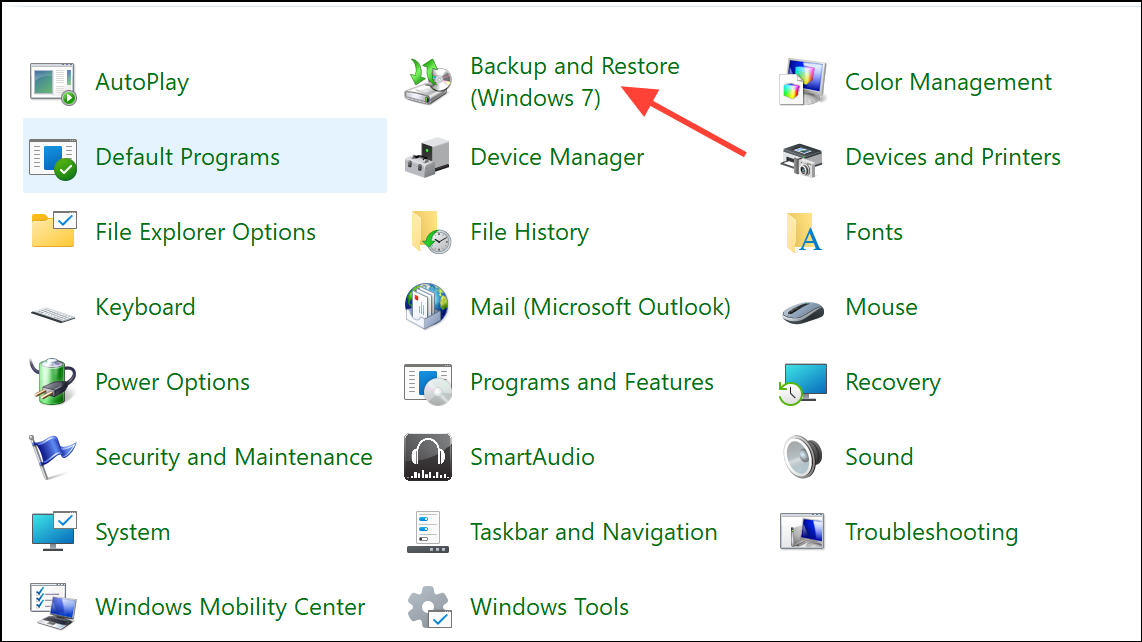
Step 2: Click Manage space to delete old backup images. If backups continue to fail, select Set up backup to create a new backup plan from scratch, rather than using an old schedule that may be corrupted.
Check for Locked or Missing Files
Backup errors can occur if files are missing or in use. Review the error details for skipped files. If the backup tool reports missing folders (such as a Pictures directory), create the required folder or exclude it from the backup selection. Close any open files or applications before starting the backup.
Repair Windows with In-Place Upgrade
If system corruption persists, perform a non-destructive repair install. Download the latest Windows 11 ISO from Microsoft’s website. Right-click the ISO, select Mount, and run setup.exe. Choose the option to keep personal files and apps. This process reinstalls Windows system files without affecting your data or programs.
Restore System Image When Recovery Fails
Restoring a system image sometimes fails if you attempt it from the standard Windows Recovery Environment (WinRE) and the necessary drivers or partitions are missing. If you see prompts to insert a CD or cannot select your backup location, use these steps:
Step 1: Create a USB recovery drive or Windows 11 installation media using Microsoft’s Media Creation Tool. Boot your PC from this USB drive and access the advanced recovery options.
Step 2: Select System Image Recovery and point to the backup image stored on an external drive. Ensure the WindowsImageBackup folder is in the root directory of the drive, not inside a subfolder.
Step 3: If you encounter errors about partitions, check that the external drive is formatted with the correct partition style (MBR or GPT) and that it is accessible in the recovery environment. You may need to adjust boot order in UEFI/BIOS to prioritize the USB device.
Use File Synchronization for Personal Data
For users mainly concerned with backing up personal files (Documents, Pictures, Videos), synchronization tools like FreeFileSync provide a simple way to mirror folders to an external drive. This approach is ideal if you want to avoid full system images and only need to protect specific data.
Step 1: Download and install FreeFileSync from the official website. Create destination folders on your backup drive (e.g., D:\Documents, D:\Pictures).
Step 2: In FreeFileSync, set the left pane to your source folder (e.g., C:\Users\YourName\Documents) and the right pane to the destination folder on your external drive.
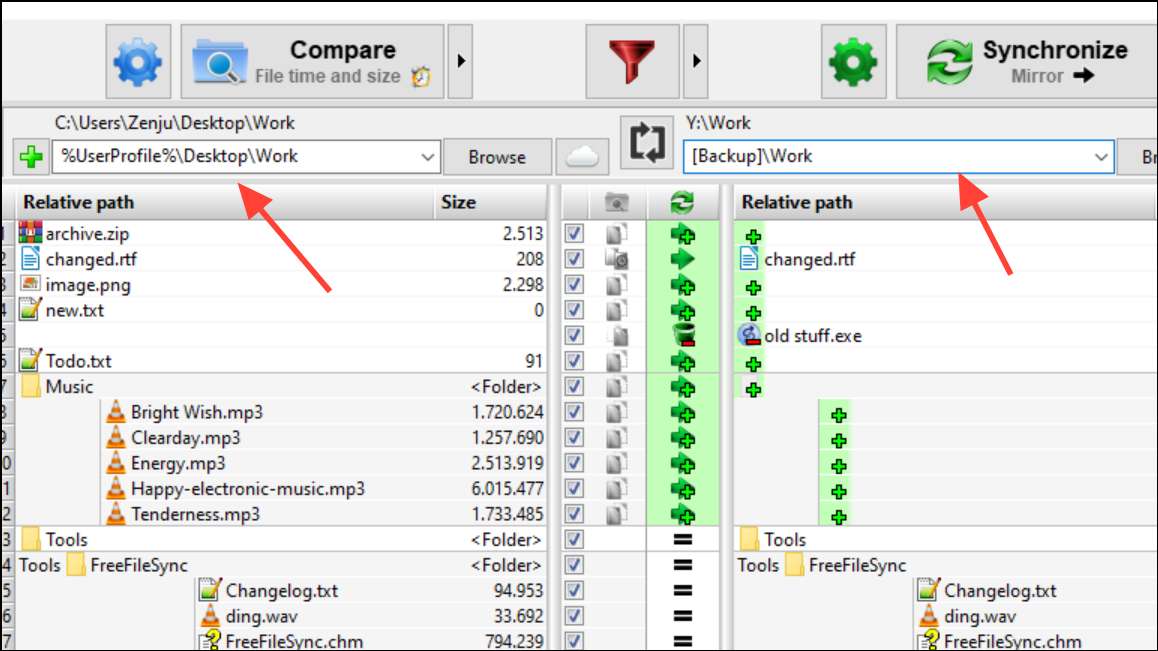
Step 3: Choose the Mirror option to ensure the backup drive matches your source folder. Only new, updated, or deleted files are synchronized each time you run the job.
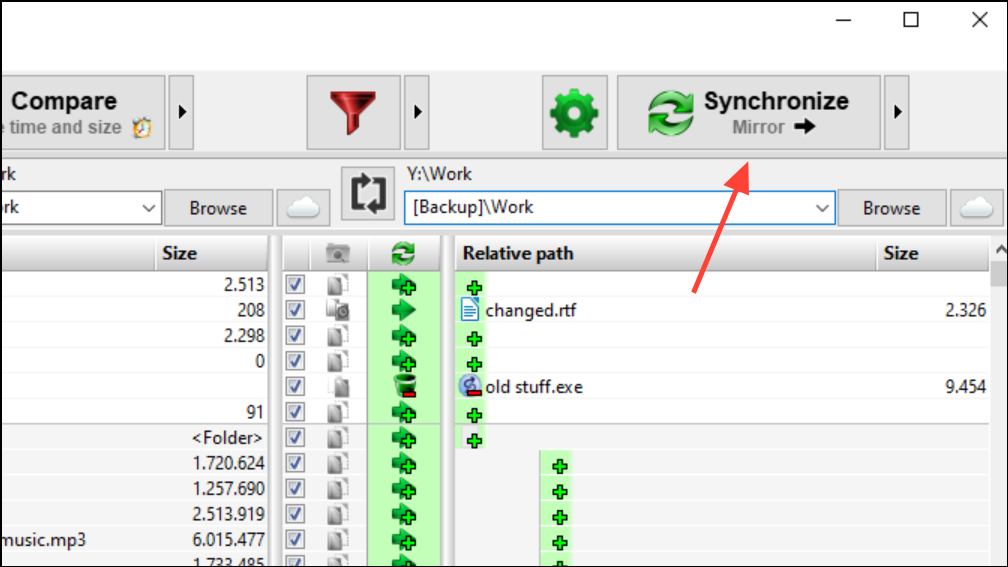
Step 4: For real-time sync, use FreeFileSync’s RealTimeSync tool to monitor changes and automatically update the backup drive as files are added or modified.
This method streamlines the process of keeping personal files safe without relying on system image tools.
Regularly verifying your backup destination, keeping system files healthy, and considering reliable alternatives to Windows’ built-in tools will minimize backup failures and ensure your data is always recoverable.