
The error message Windows could not update the computer's boot configuration. Installation cannot proceed. frequently appears during Windows 11 installations, especially when disk partition layouts or BIOS settings do not match the system requirements. This issue can prevent Windows from setting up the necessary boot files, leaving the system unbootable until the underlying configuration problem is resolved.
Rebuild Boot Configuration Using Command Prompt
Step 1: Boot the computer from a Windows 11 installation USB drive. When the Windows Setup screen appears, select your language and region, then choose Repair your computer instead of installing.
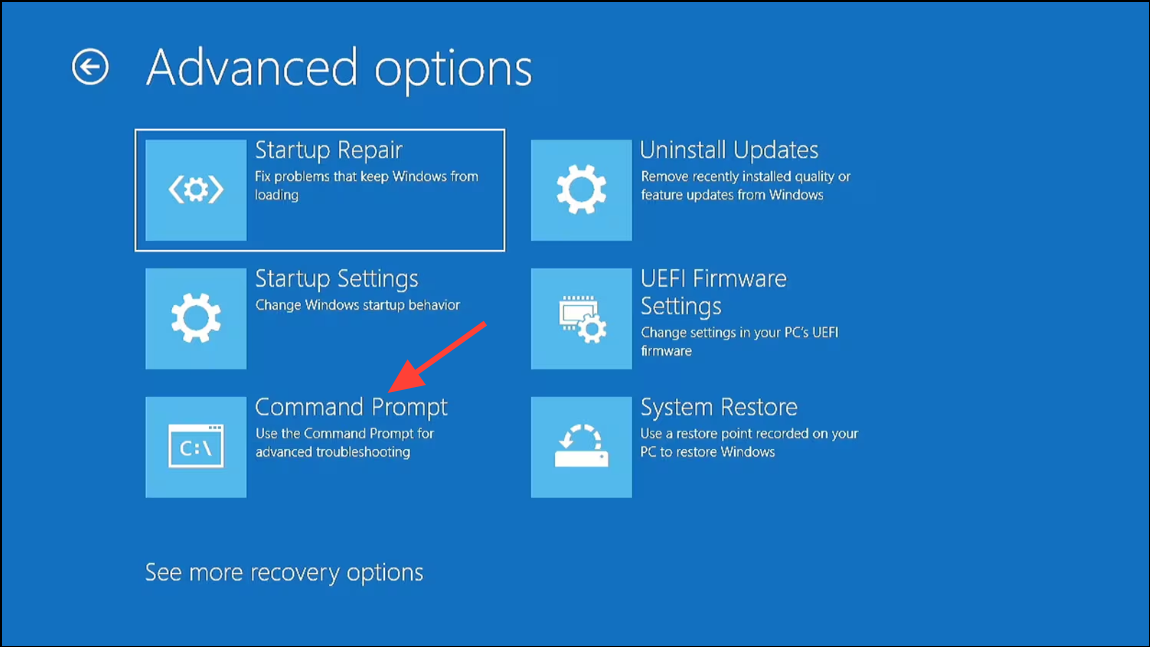
Step 2: Navigate to Troubleshoot > Advanced options > Command Prompt. This will open a command prompt window in the Windows Preinstallation Environment (WinPE).
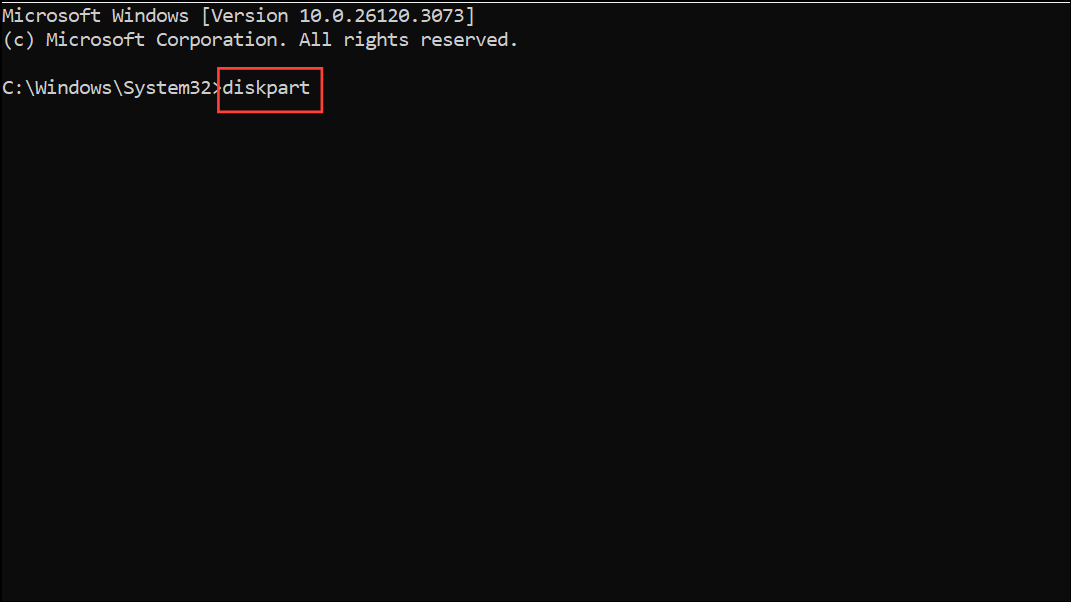
Step 3: Identify the system disk and the EFI partition. Enter the following commands one by one, pressing Enter after each:
diskpart
list disk
select disk 0   (Replace 0 with your system disk number if different)
list partition
select partition 2   (Replace 2 with your EFI partition number, usually ~100MB, FAT32)
assign letter=w
exit
Step 4: Format the EFI partition to FAT32 if necessary.
format /FS:FAT32 w:
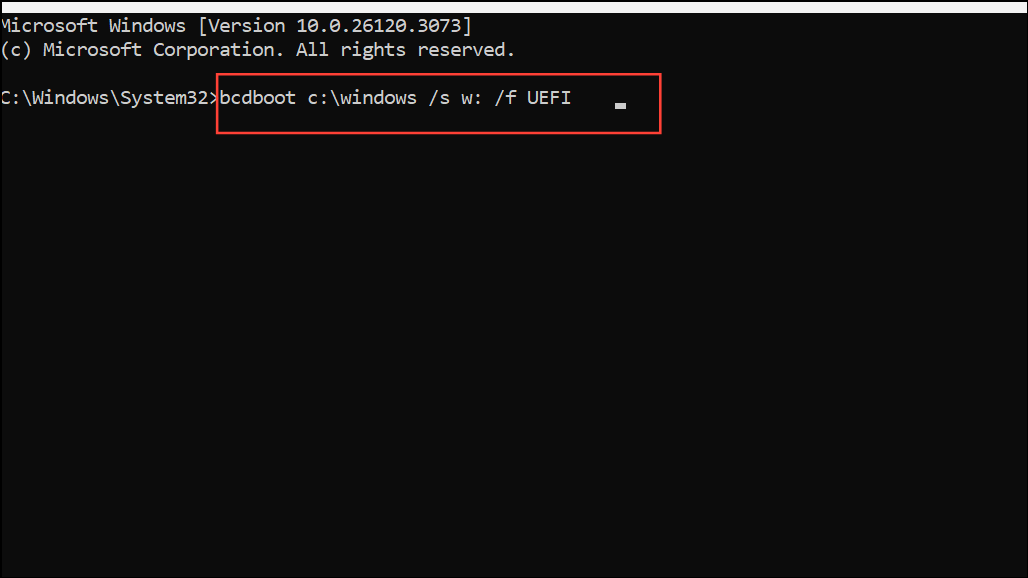
Step 5: Recreate the boot files using the bcdboot tool. This command copies boot files from the Windows directory to the EFI partition and configures the boot environment:
bcdboot c:\windows /s w: /f UEFI
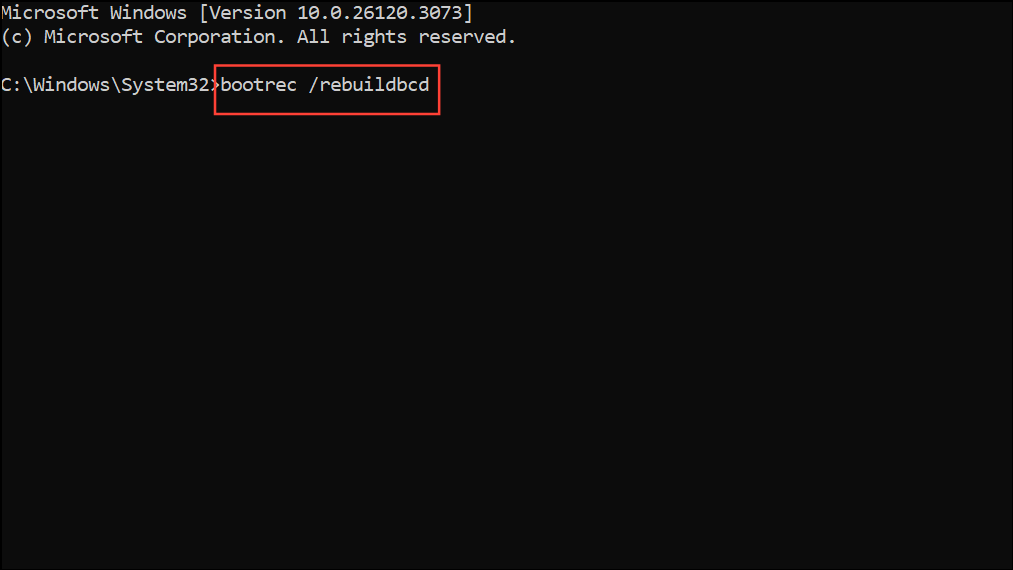
Step 6: Rebuild the Boot Configuration Data (BCD) store:
bootrec /rebuildbcd
Step 7: Close the command prompt and restart the computer. The boot configuration should now be functional, allowing Windows 11 setup to continue or complete successfully.
Correct Disk Partition Style and BIOS Settings
Conflicts between disk partition style (MBR vs. GPT) and BIOS firmware mode (Legacy vs. UEFI) often cause boot configuration errors. Windows 11 requires a GPT disk and UEFI firmware mode for installation on most modern systems.
Step 1: Enter the BIOS/UEFI firmware settings. This is usually done by pressing F2, F10, Del, or Esc immediately after powering on the computer. Refer to your motherboard or laptop manual for the exact key.
Step 2: Locate boot options and set the firmware to UEFI Only (not Legacy or CSM). Disable Secure Boot temporarily if installation fails, as some systems may block changes to the boot configuration with Secure Boot enabled.
Step 3: Set the SATA controller mode to AHCI instead of RAID or IDE for optimal compatibility with Windows 11.
Step 4: Save changes and reboot from the Windows 11 installation USB. When you reach the Windows Setup screen, press Shift+F10 to open Command Prompt.
Step 5: Clean and convert the system disk to GPT using Diskpart.
diskpart
list disk
select disk 0   (Replace 0 with your system disk number)
clean
convert gpt
exit
Step 6: Close the command prompt and proceed with Windows 11 installation. When prompted for the installation location, select the unallocated space on your disk and allow Windows Setup to create the necessary partitions automatically.
Check and Recreate Installation Media
Corrupted or improperly created installation media can also trigger boot configuration errors.
Step 1: Recreate your Windows 11 installation USB using the official Media Creation Tool from Microsoft. Ensure the USB drive is at least 8GB and formatted properly.
Step 2: If possible, use a different USB drive, as faulty drives can cause read/write errors during installation.
Step 3: When using third-party tools like Rufus, select the correct partition scheme (GPT for UEFI) and file system (FAT32 for UEFI boot).
Step 4: Boot from the newly created USB and attempt the installation again.
Additional Troubleshooting Tips
- Disconnect all non-essential drives and peripherals before installing Windows 11. Only the target system disk should remain connected.
- Update BIOS/UEFI firmware to the latest version from your system or motherboard manufacturer’s website.
- Reset BIOS/UEFI settings to factory defaults if you suspect configuration issues.
- If you are using automated installation tools (such as NTLite), verify that your
autounattend.xmlor preset files do not contain conflicting or incomplete partition instructions. - Manually partitioning drives with
diskpart, followed by runningdismandbcdboot, can bypass some automated setup errors.
Resolving the "Windows could not update the computer's boot configuration" error in Windows 11 requires careful alignment of disk partition style, BIOS settings, and installation media. Following these steps restores the system’s ability to boot and allows Windows 11 to install without further interruption.