When your wireless mouse unexpectedly stops responding on Windows 11, it can disrupt your workflow significantly. Problems such as lagging, freezing, or complete unresponsiveness typically stem from issues like outdated drivers, power management settings, or hardware malfunctions. Fortunately, several straightforward troubleshooting methods can quickly restore your mouse's functionality.
Check Basic Hardware Issues First
Before diving into software-related fixes, confirm these basic hardware checks:
- Ensure the mouse is switched on. Most wireless mice have a physical power button on the underside.
- Replace or recharge the mouse batteries. Weak batteries are a common cause for wireless mice to stop responding.
- Confirm the USB receiver is securely plugged into your computer. Try a different USB port to rule out port-specific issues.
- Examine the mouse and receiver for physical damage. If damaged, replacement might be necessary.
- Test your mouse on another PC to determine if the issue lies with the mouse or your computer.
Method 1: Reconnect the USB Receiver
Sometimes, simply reconnecting your mouse's USB receiver fixes the issue. Disconnect the receiver from your PC, wait about 10 seconds, and then plug it back in. This action forces Windows to reinitialize the connection, resolving minor glitches.
Method 2: Disable USB Power Management
Windows 11 features power-saving settings that may disable USB devices, causing your mouse to stop functioning. To disable this feature:
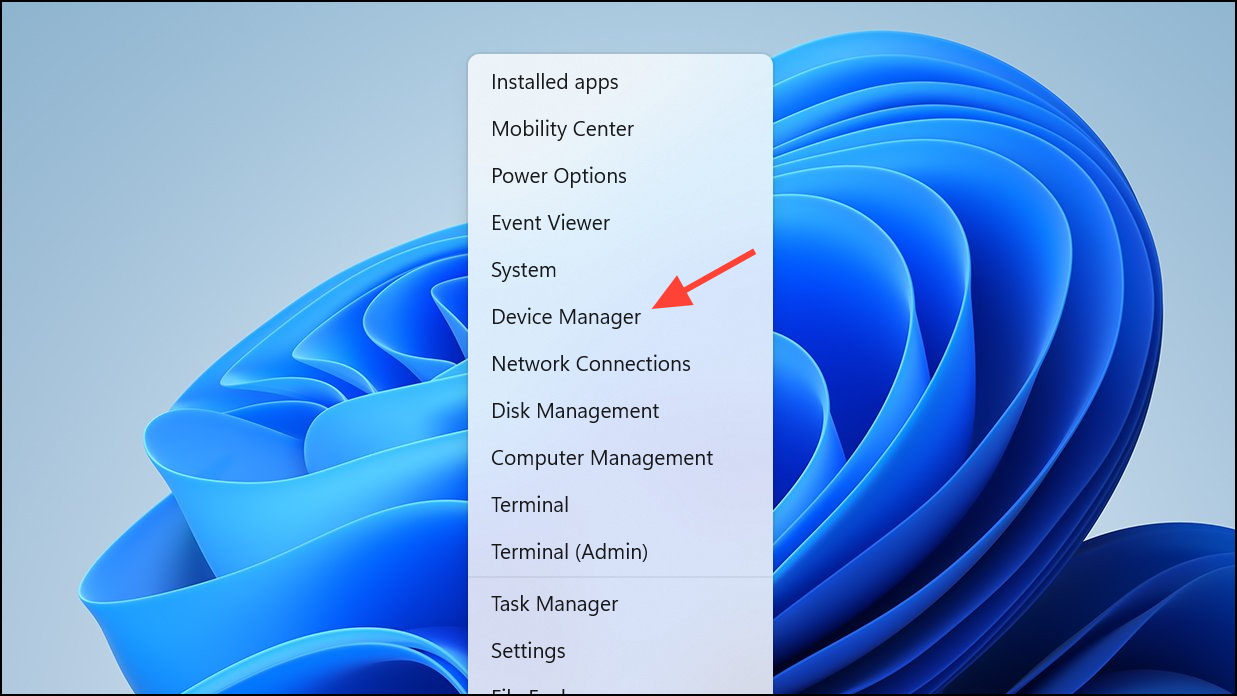
Step 1: Press Windows + X and select Device Manager from the menu.
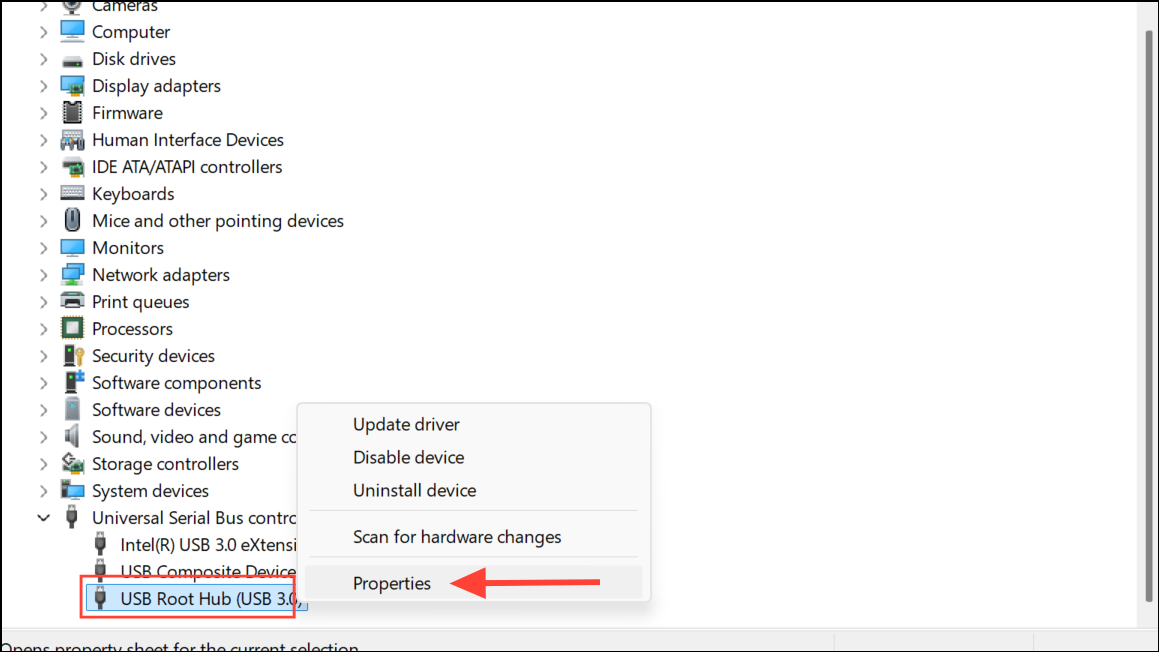
Step 2: Expand Universal Serial Bus Controllers. Right-click USB Root Hub and select Properties.
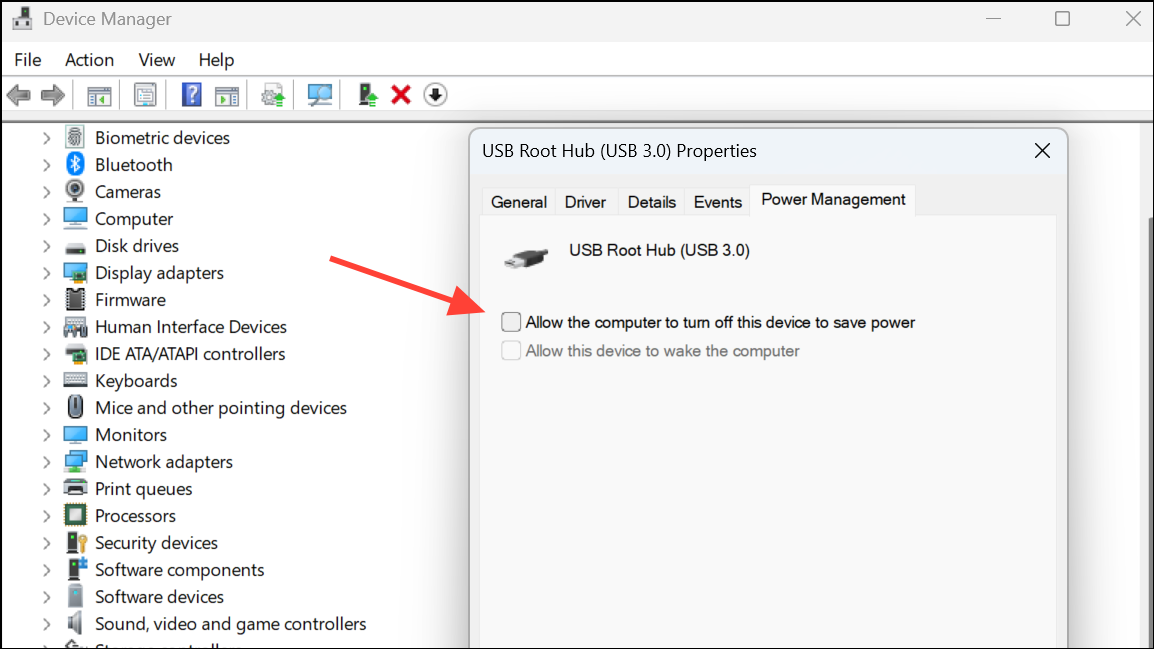
Step 3: Navigate to the Power Management tab and uncheck Allow the computer to turn off this device to save power. Click OK.
Step 4: Repeat this process for each USB Root Hub listed. Afterward, reconnect your wireless mouse receiver.
Method 3: Disable Fast Startup
Windows 11's Fast Startup feature can sometimes interfere with device drivers, including those for wireless mice. To disable Fast Startup:
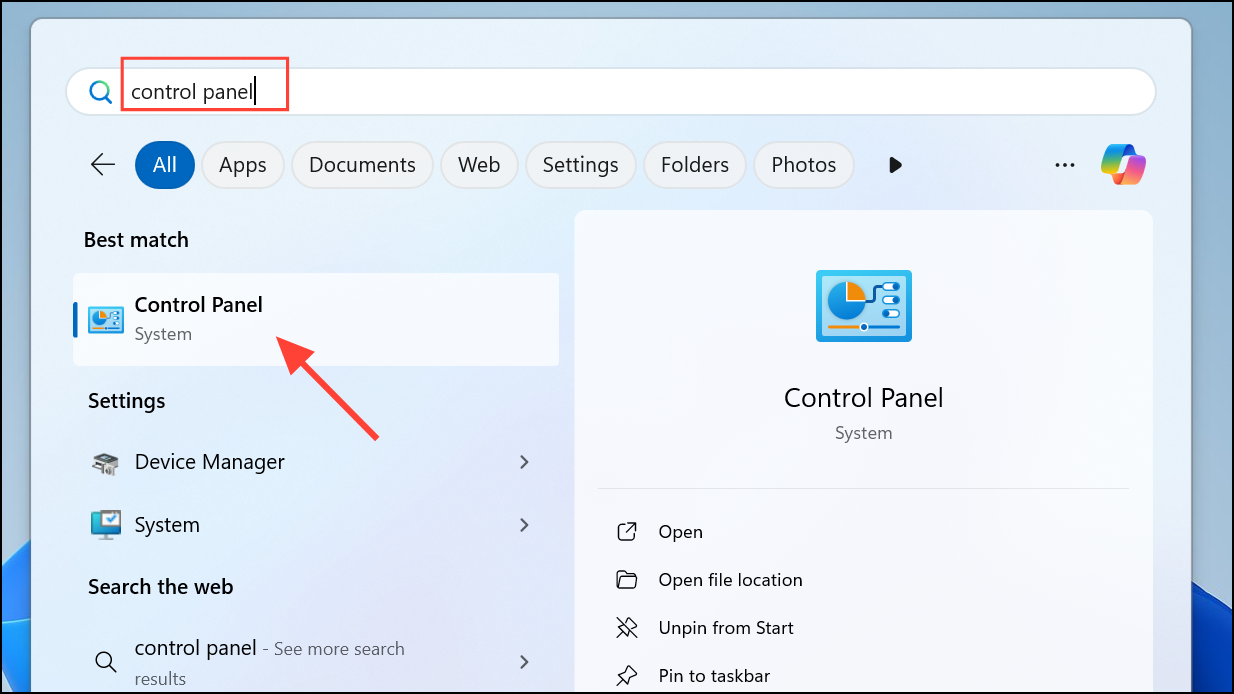
Step 1: Open Control Panel from the Start menu.
Step 2: Navigate to Hardware and Sound > Power Options.
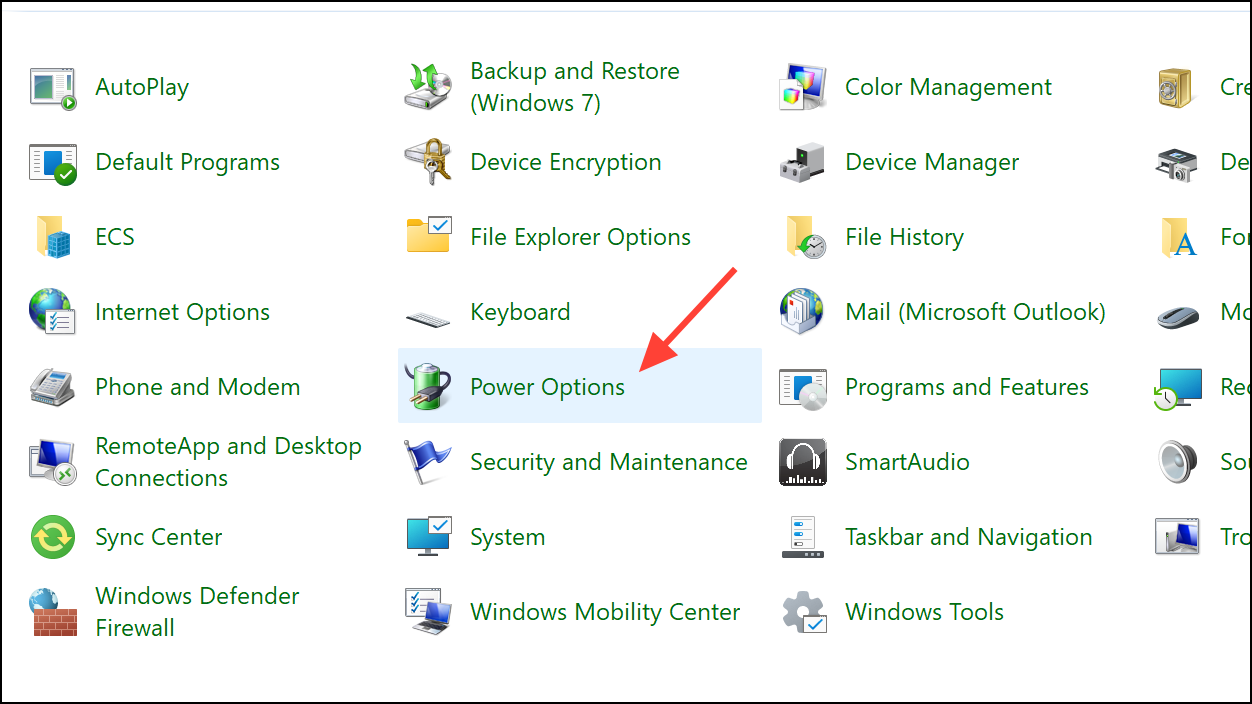
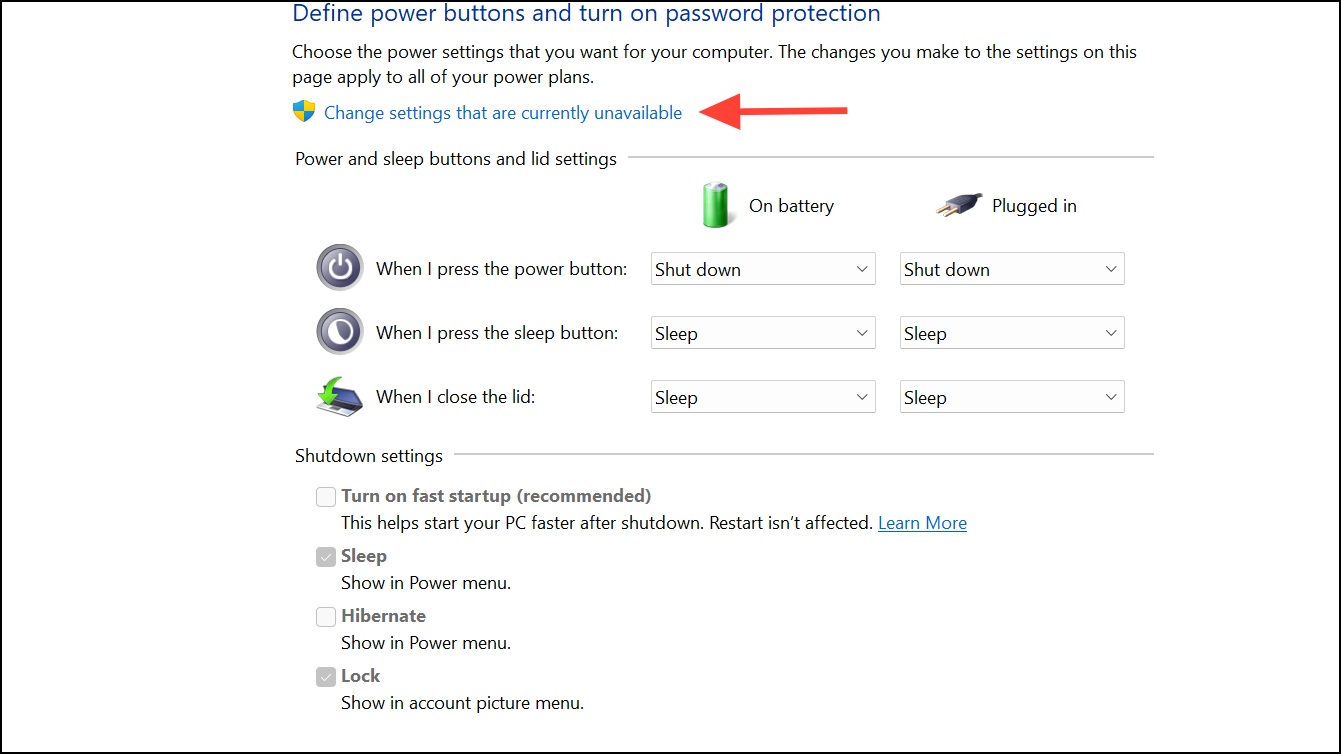
Step 3: Select Choose what the power buttons do, then click on Change settings that are currently unavailable.
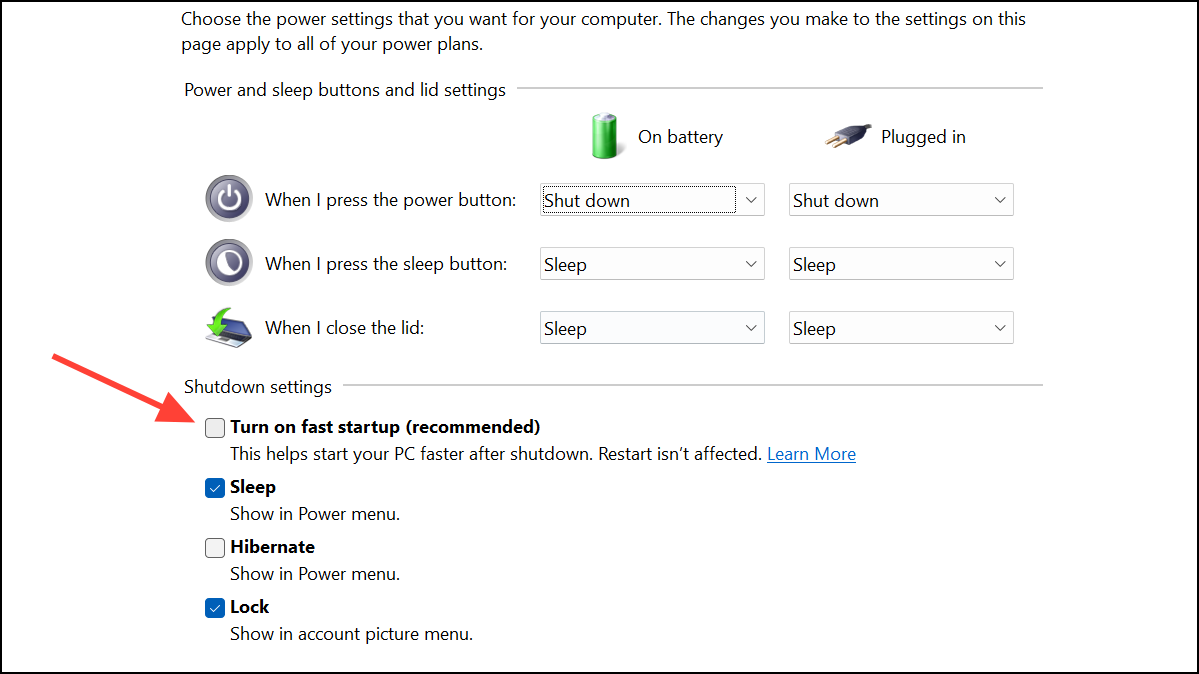
Step 4: Uncheck the box labeled Turn on fast startup (recommended) and click Save changes.
Step 5: Restart your computer to apply these changes.
Method 4: Update or Roll Back Mouse Drivers
Outdated or corrupted drivers often cause hardware issues. You can either update or roll back your mouse drivers depending on your situation.
To update mouse drivers:
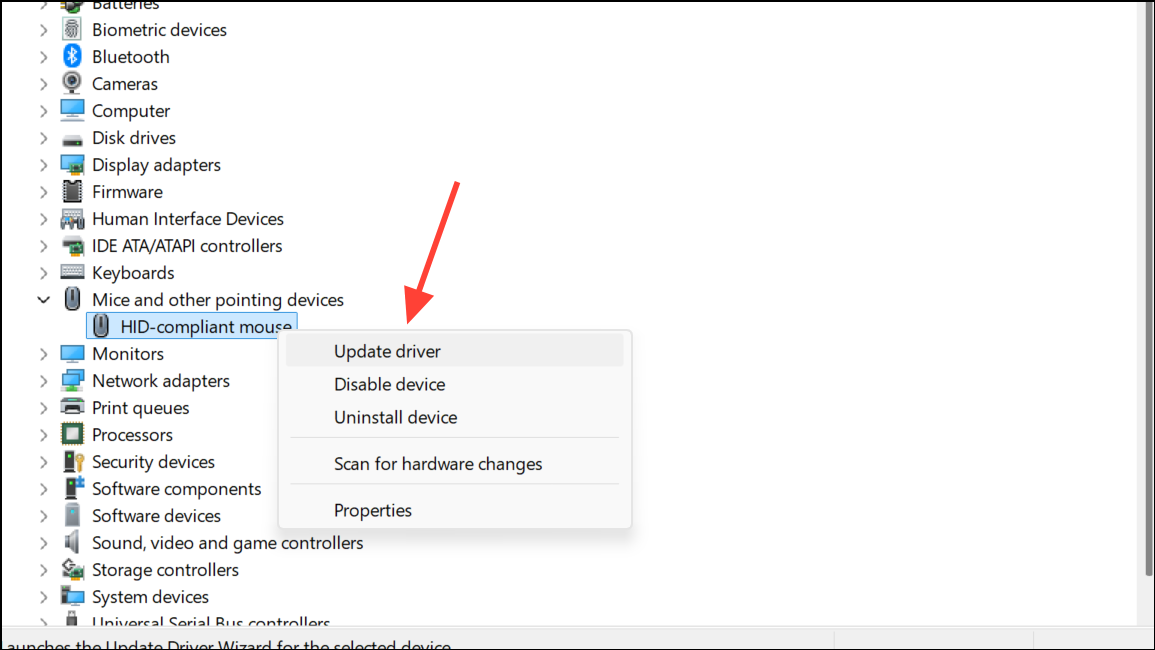
Step 1: Press Windows + X, select Device Manager, and expand Mice and other pointing devices.
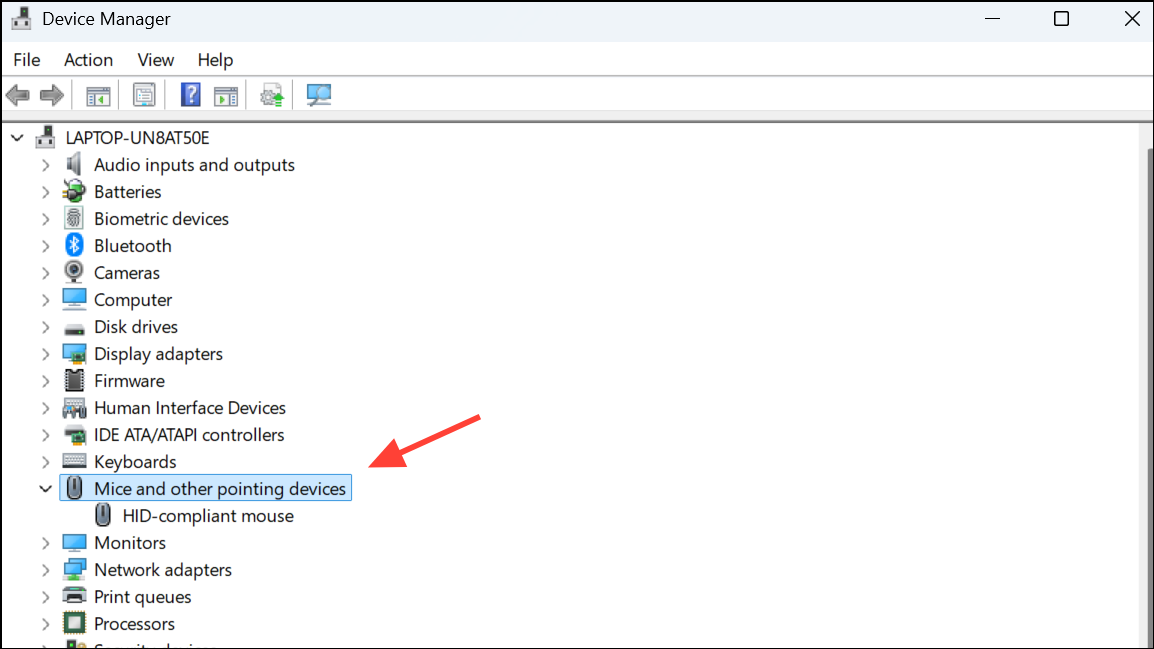
Step 2: Right-click your wireless mouse device and select Update driver. Choose Search automatically for drivers and follow the instructions.
To roll back mouse drivers:
If your mouse stopped working after a recent driver update, roll back to the previous version:
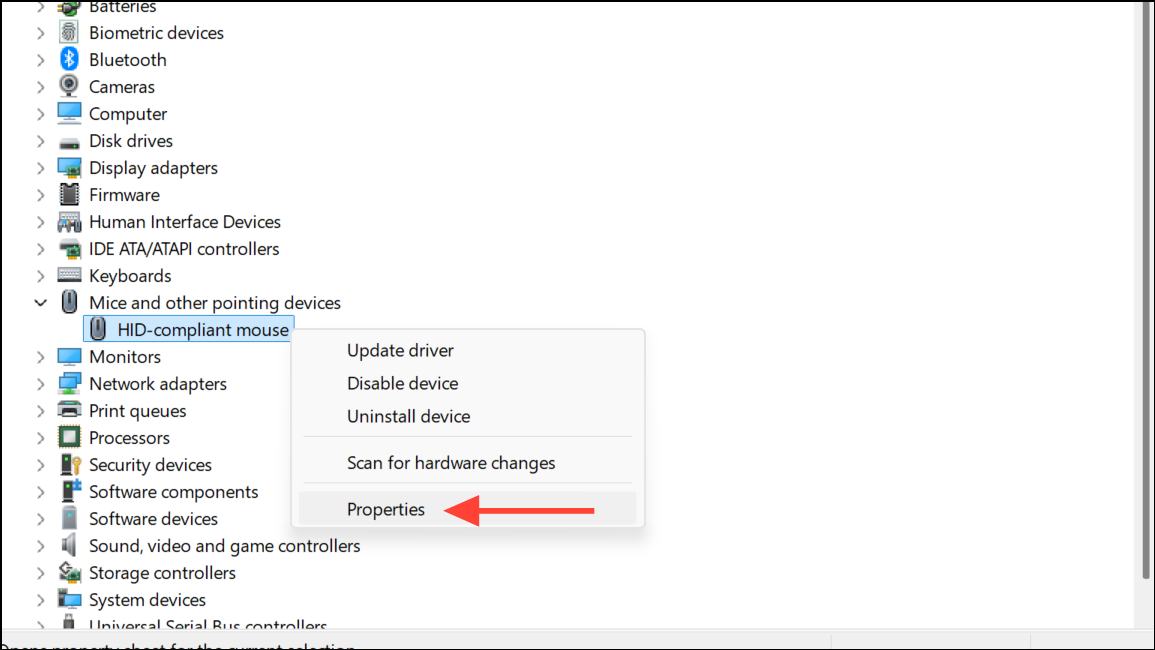
Step 1: In Device Manager, right-click your wireless mouse and select Properties.
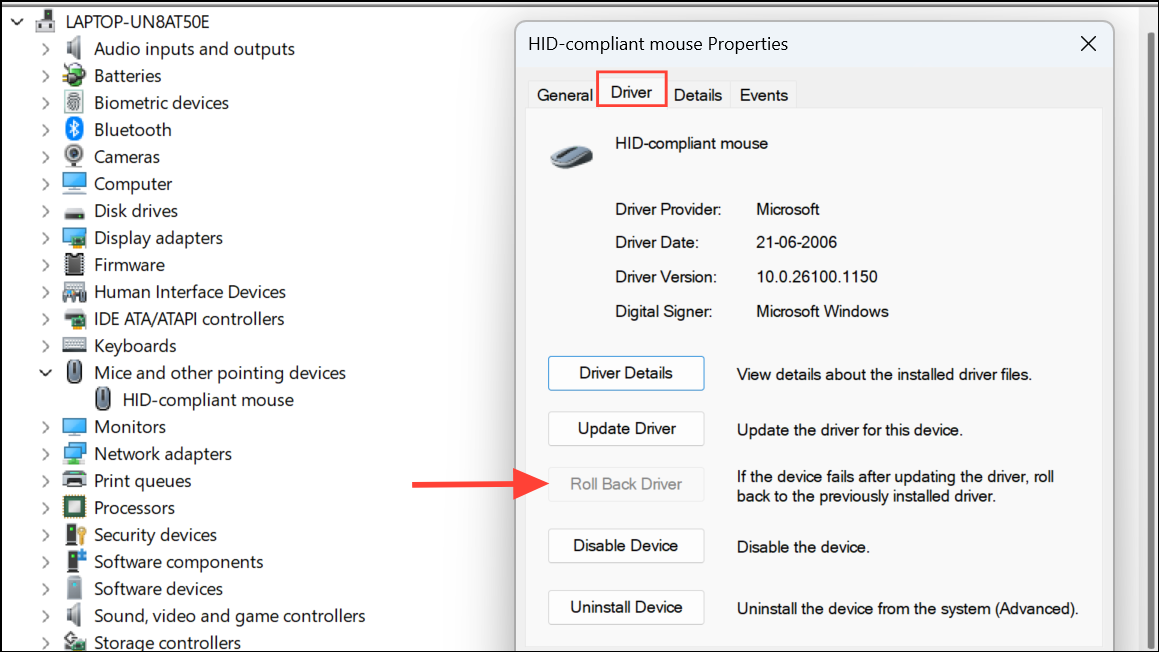
Step 2: Go to the Driver tab and click Roll Back Driver. Follow the prompts to revert the driver.
Step 3: Restart your computer after completing either of these processes.
Method 5: Perform a System Restore
If your wireless mouse issue began after a recent system change or update, performing a system restore can revert your system to a previous working state. You should have set up a restore point earlier to be able to use it.
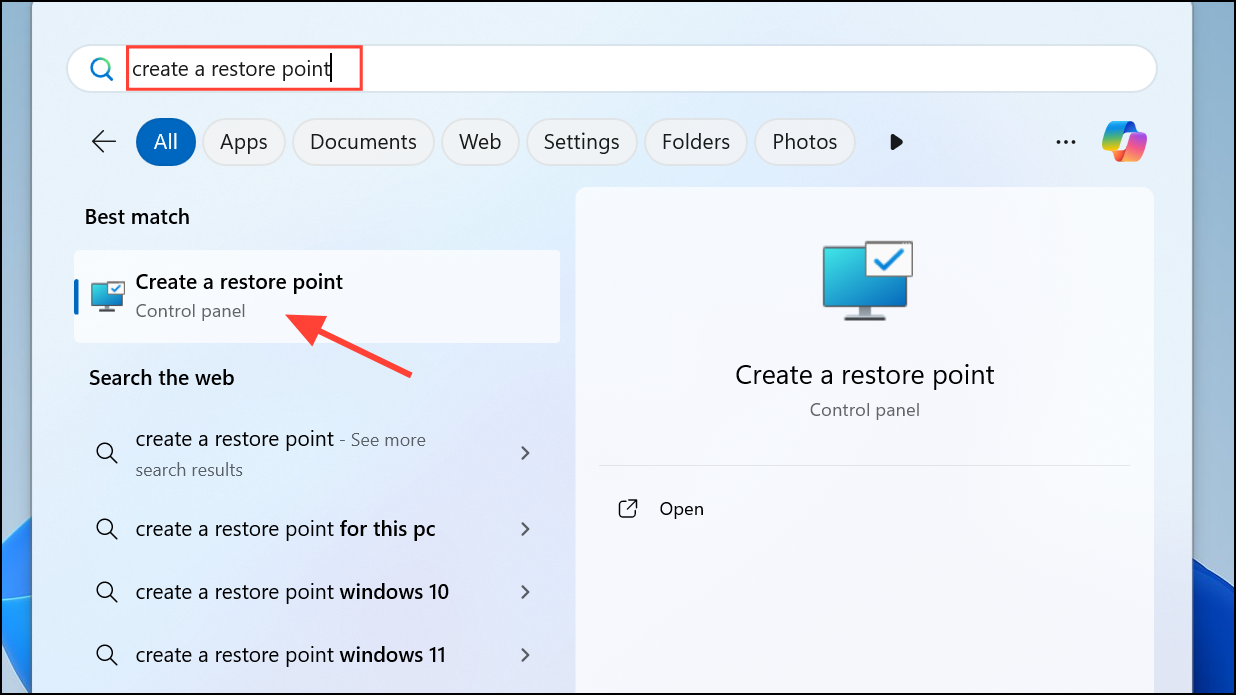
Step 1: Type Create a restore point in the Start menu search bar and open it.
Step 2: On the System Protection tab, lick System Restore, then follow the wizard to select a restore point dated before the issue started.
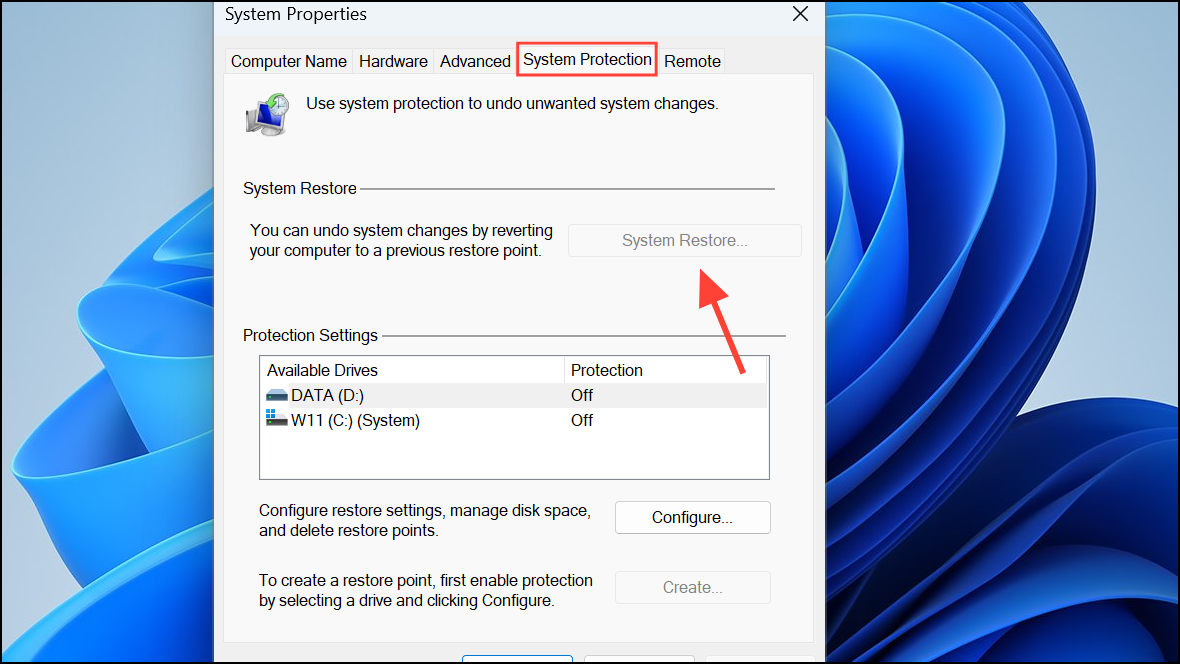
Step 3: Complete the restoration process and reboot your computer to confirm if the mouse works properly again.
Fixing Bluetooth Mouse Connectivity Issues
If you're using a Bluetooth mouse, additional troubleshooting steps can help resolve connectivity problems:
Restart Bluetooth Services:
Step 1: Open Services by typing it into the Start menu search bar.
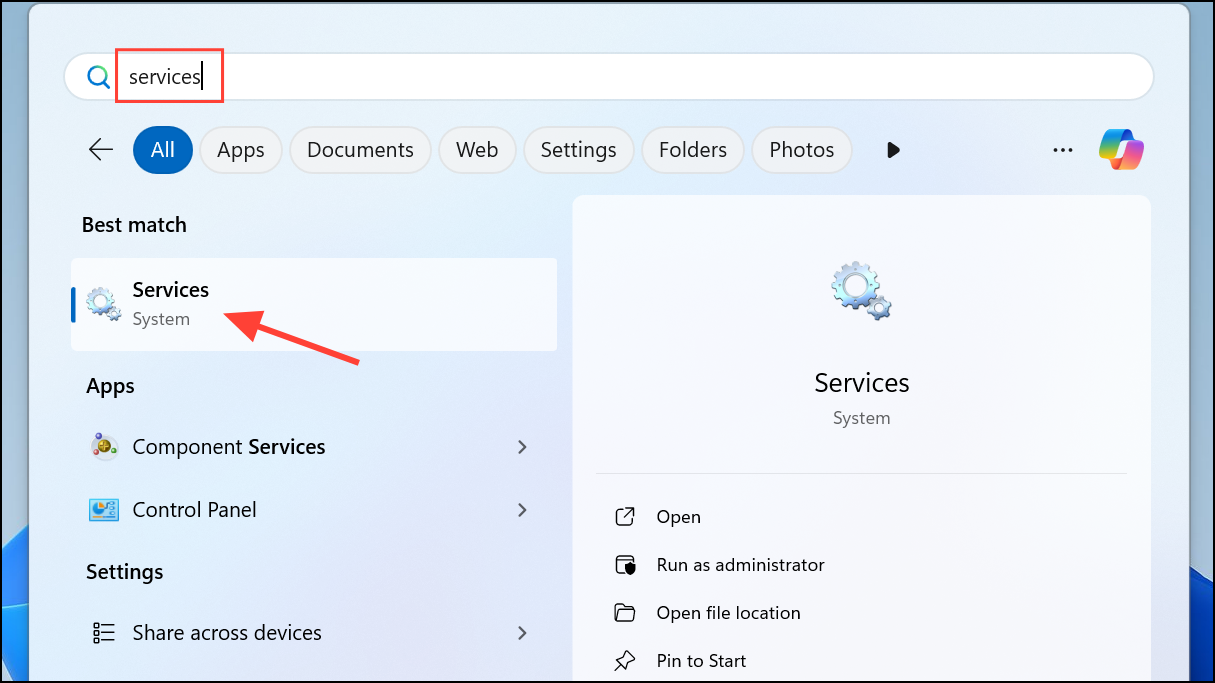
Step 2: Locate Bluetooth Support Service, double-click it, and select Stop, then Start again after a minute. Click OK to apply the changes.
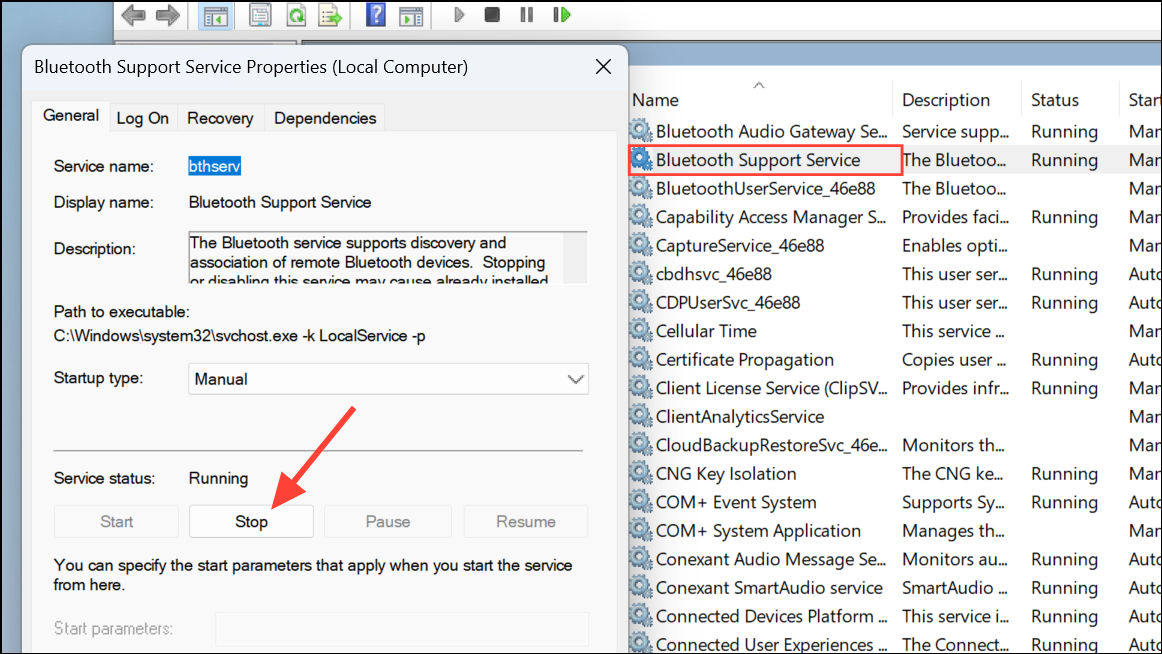
Re-add Your Bluetooth Mouse:
Step 1: Open Settings > Bluetooth & devices. Click View more devices.
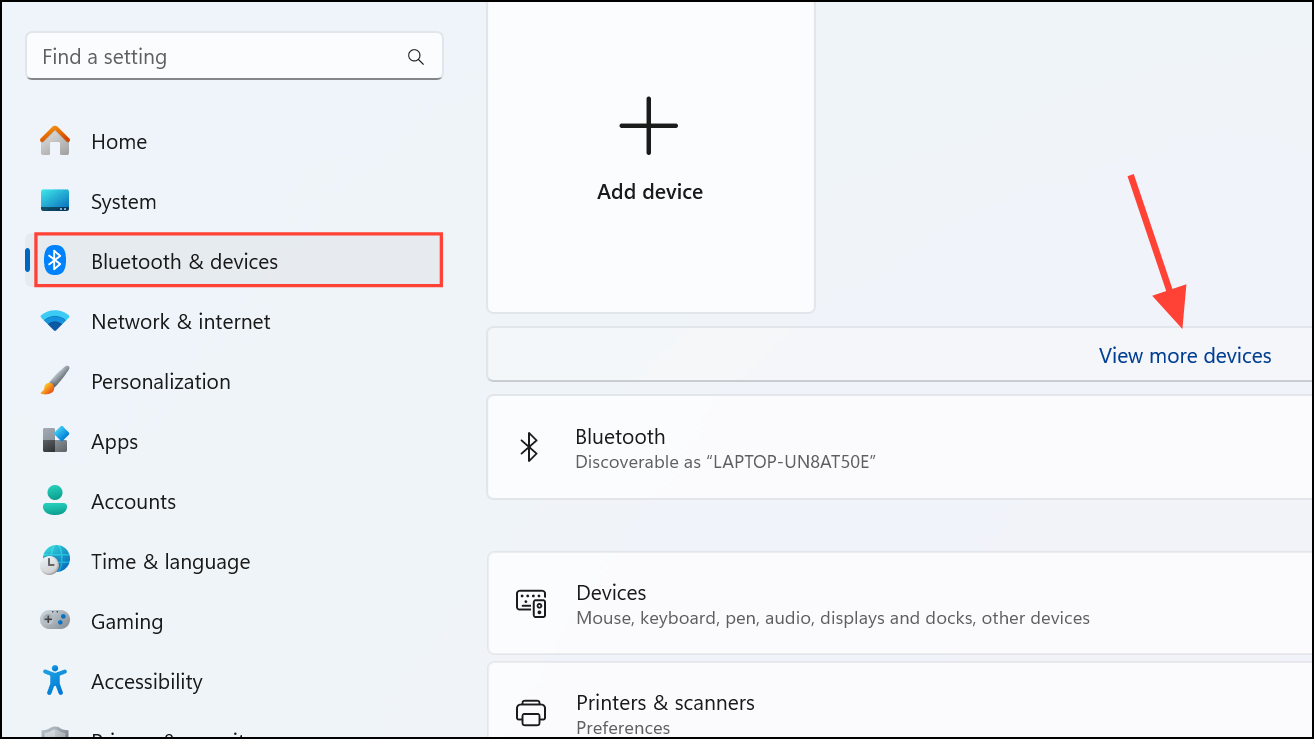
Step 2: Find your mouse, click the three-dot menu, and select Remove device. Then, click Add device to reconnect your mouse.
Run Bluetooth Troubleshooter:
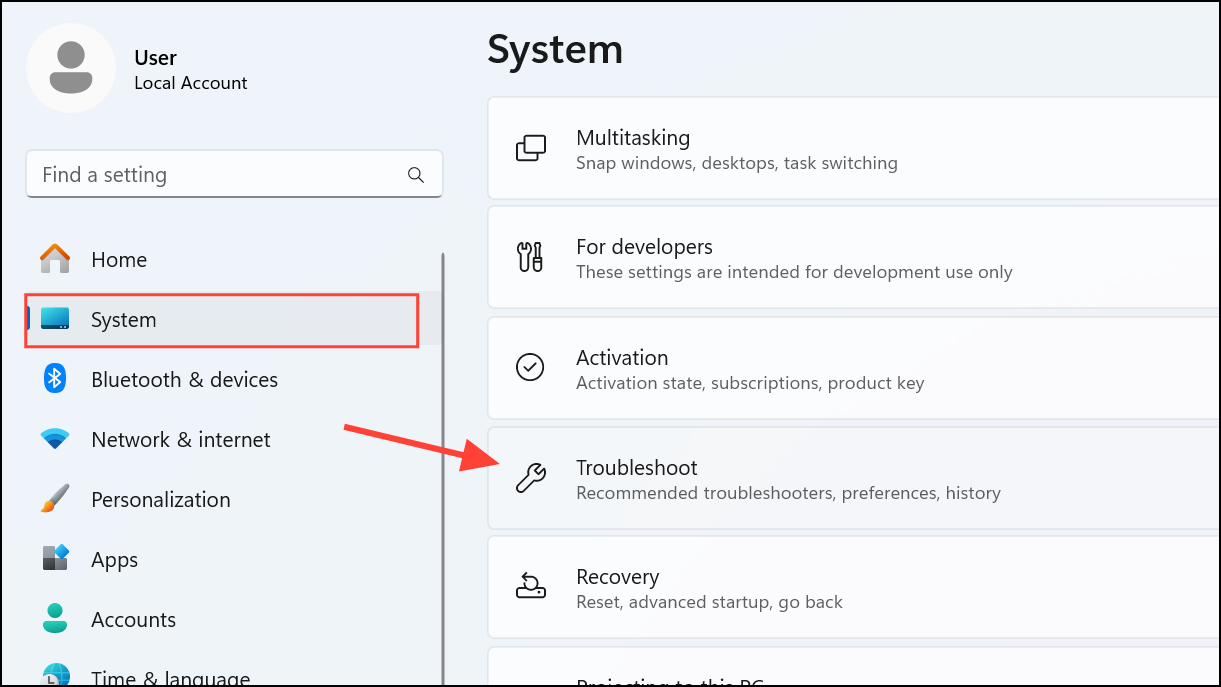
Step 1: Open Settings > System > Troubleshoot.
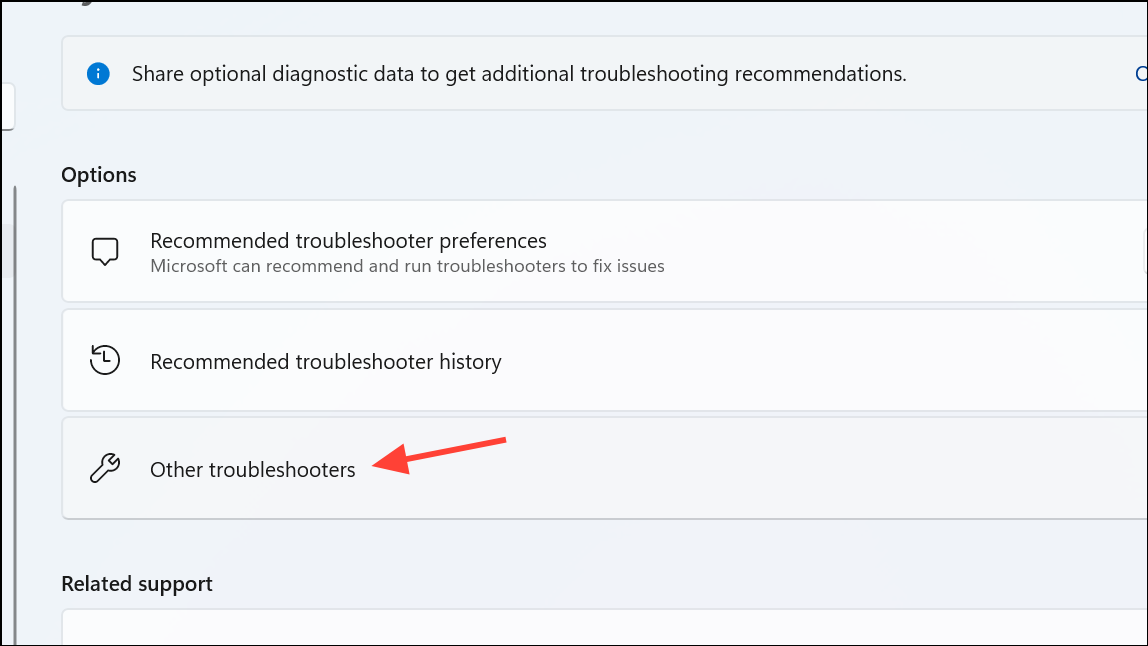
Step 2: Click on Other troubleshooters on the next page.
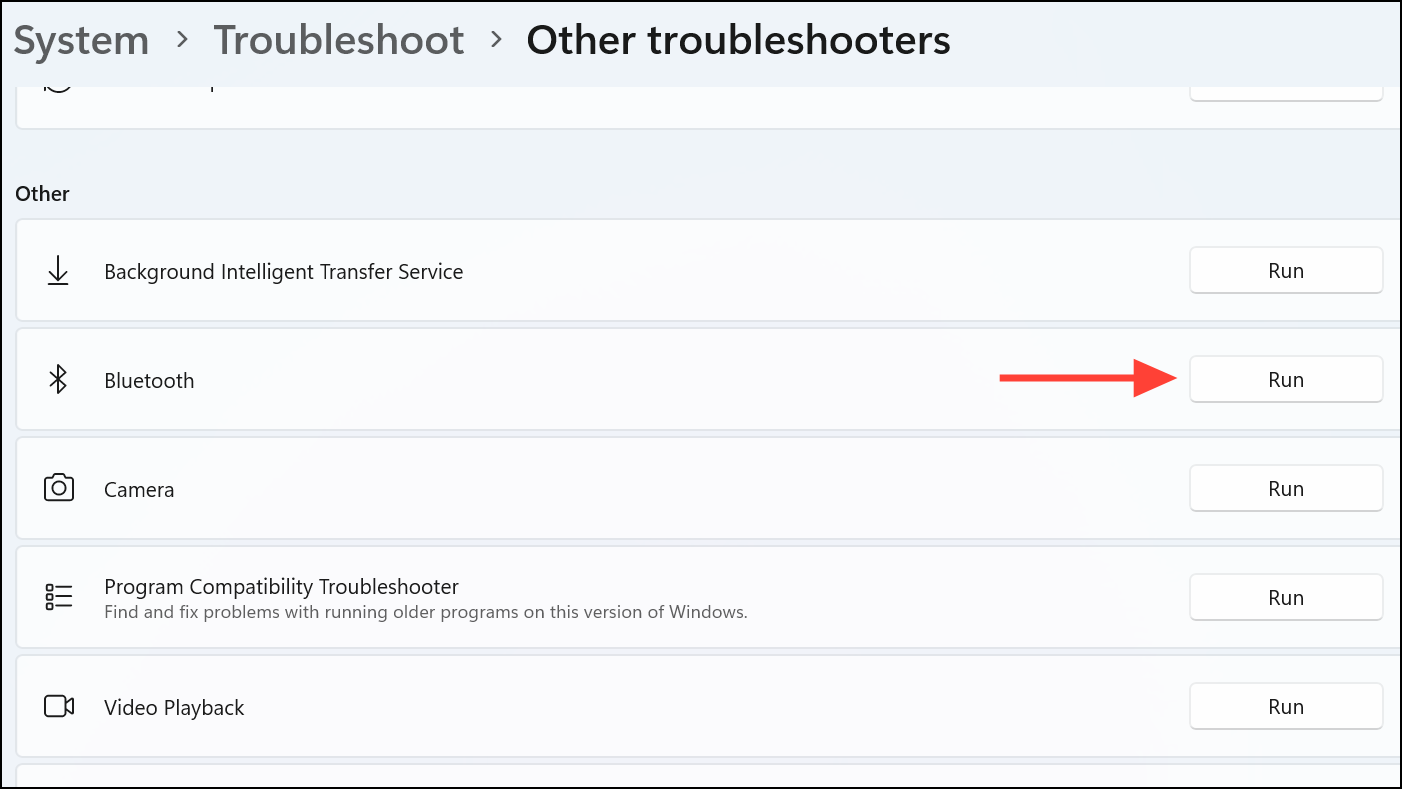
Step 3: Click Run next to Bluetooth and follow the instructions provided by the troubleshooter.
With these solutions, you should be able to quickly restore your wireless mouse's functionality on Windows 11. If the problem persists despite these steps, it may be time to consider replacing the hardware itself.


