
“Your PC Did Not Start Correctly” appears when Windows 11 fails to load its operating system during startup. This error can result from power interruptions, incorrect configuration changes, faulty drivers, or problematic updates, and it prevents access to your desktop and files. Addressing this issue quickly restores your system’s usability and protects your data from loss.
Restart Your Computer
Step 1: From the error screen, select the Restart option. This simple action clears temporary glitches and may restore normal boot functionality. If your PC starts successfully after restarting, continue using Windows as usual.
Step 2: If the error reappears after restarting, proceed to advanced troubleshooting steps below.
Use the Startup Repair Tool
Step 1: On the error screen, select Advanced options, then navigate to Troubleshoot > Advanced options > Startup Repair.
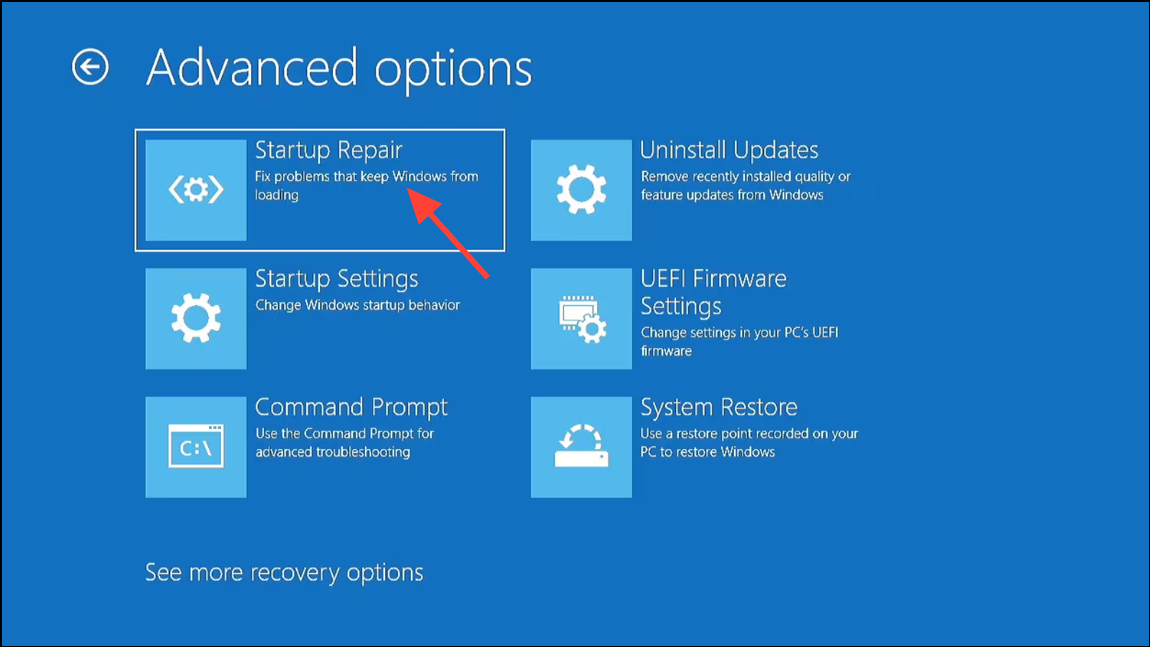
Step 2: Log in with your Windows account if prompted. The Startup Repair tool will scan your system for issues that prevent Windows from loading and attempt automatic repairs. Wait for the process to complete, then restart your PC to check if Windows starts correctly.
Boot Into Safe Mode
Step 1: From the error screen, select Advanced options > Troubleshoot > Advanced options > Startup Settings, then click Restart.
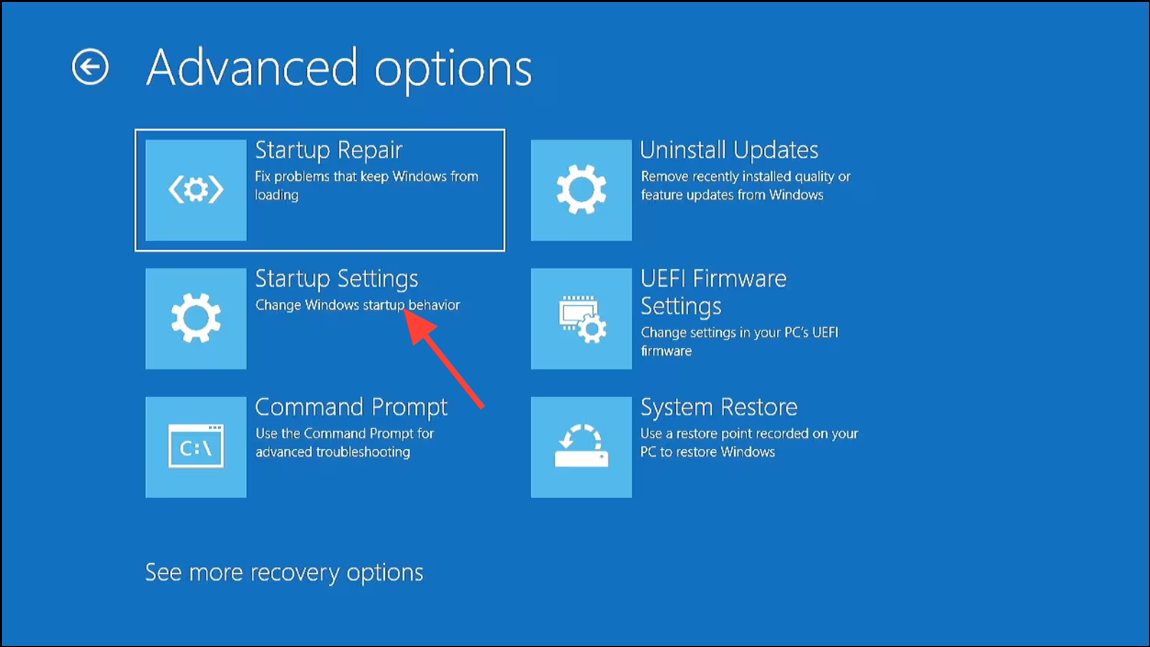
Step 2: After your PC restarts, press the corresponding key (usually 4 or F4) to select Safe Mode, or 5 or F5 for Safe Mode with Networking.
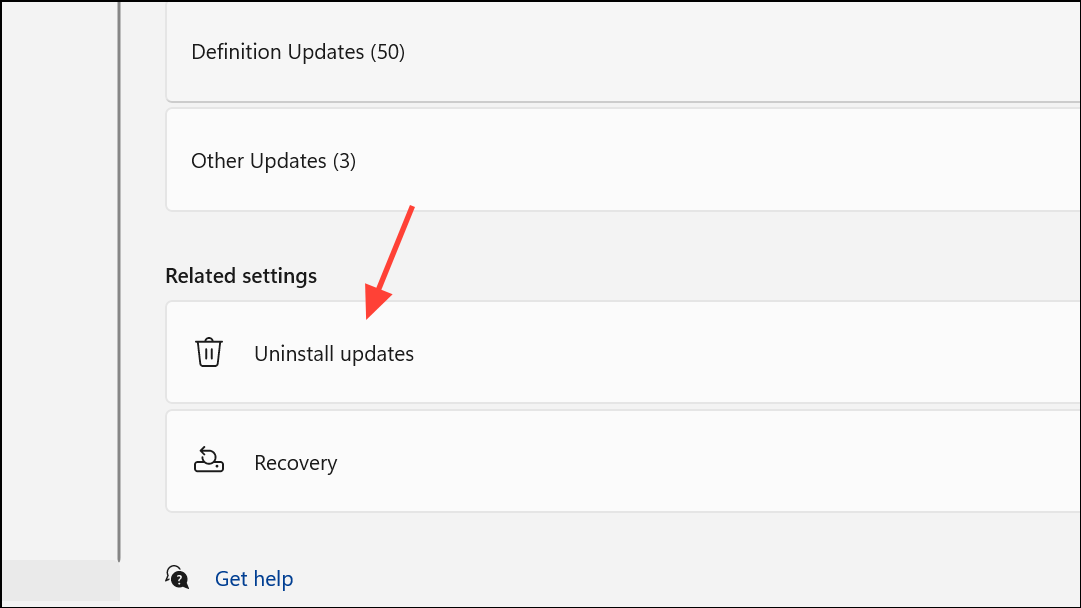
Step 3: Once in Safe Mode, uninstall any recently installed updates or drivers that might have triggered the problem. For Windows 11, go to Settings > Windows Update > Update history > Uninstall updates, then remove the most recent update.
Step 4: For driver issues, open Device Manager, right-click the problematic device, and select Uninstall.

Step 5: Back up important files to an external drive or cloud storage while in Safe Mode to prevent data loss during further troubleshooting.
Uninstall Recent Windows Updates
Step 1: If you suspect a recent Windows update caused the error, access the Uninstall Updates option from the advanced startup menu: Advanced options > Troubleshoot > Advanced options > Uninstall Updates.
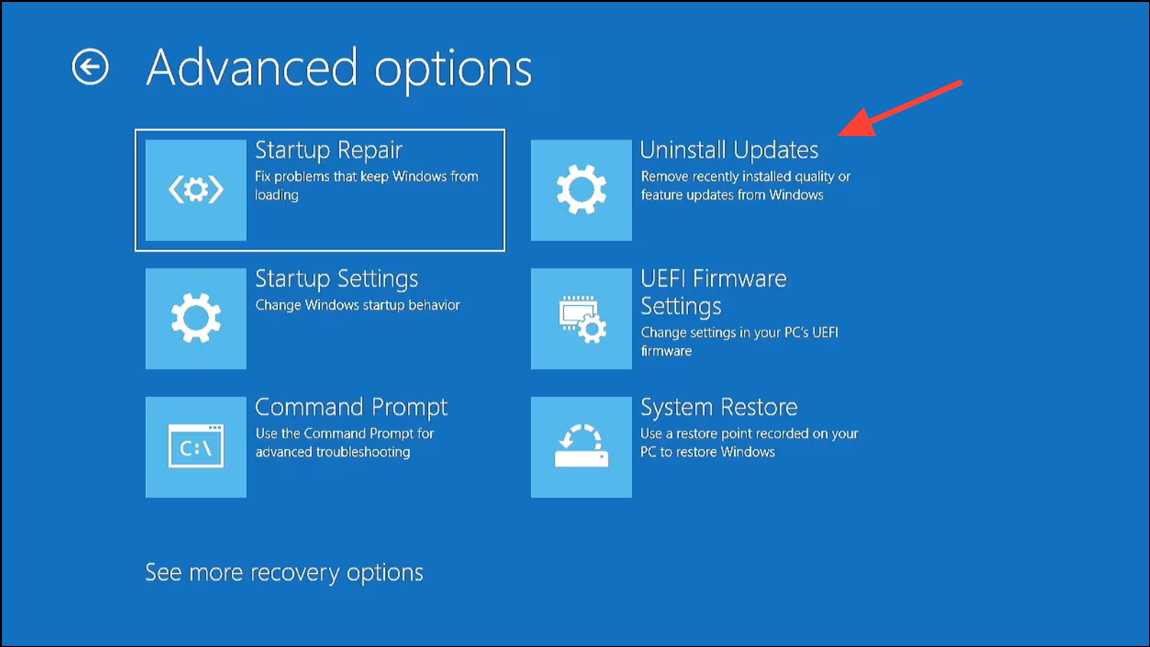
Step 2: Choose to uninstall the latest quality or feature update. Follow the prompts to complete the process, then restart your computer to see if the error is resolved.
Perform a System Restore
Step 1: From the error screen, select Advanced options > System Restore.

Step 2: Choose a restore point from before the issue began. System Restore will revert system settings and files to a previous state, which can resolve issues introduced by recent changes. Complete the restoration process and restart your PC.
Repair Boot Configuration Data (BCD)
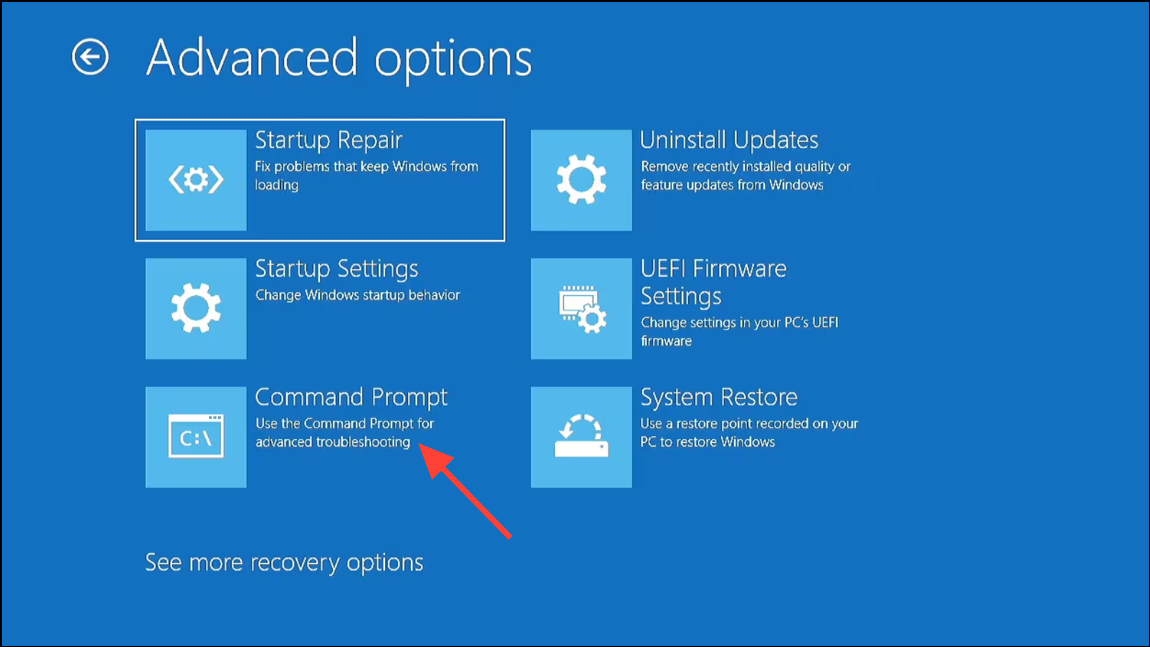
Step 1: On the error screen, go to Advanced options > Command Prompt.
Step 2: In the Command Prompt window, enter the following commands one at a time, pressing Enter after each:
bootrec /fixmbr
bootrec /fixboot
bootrec /rebuildbcd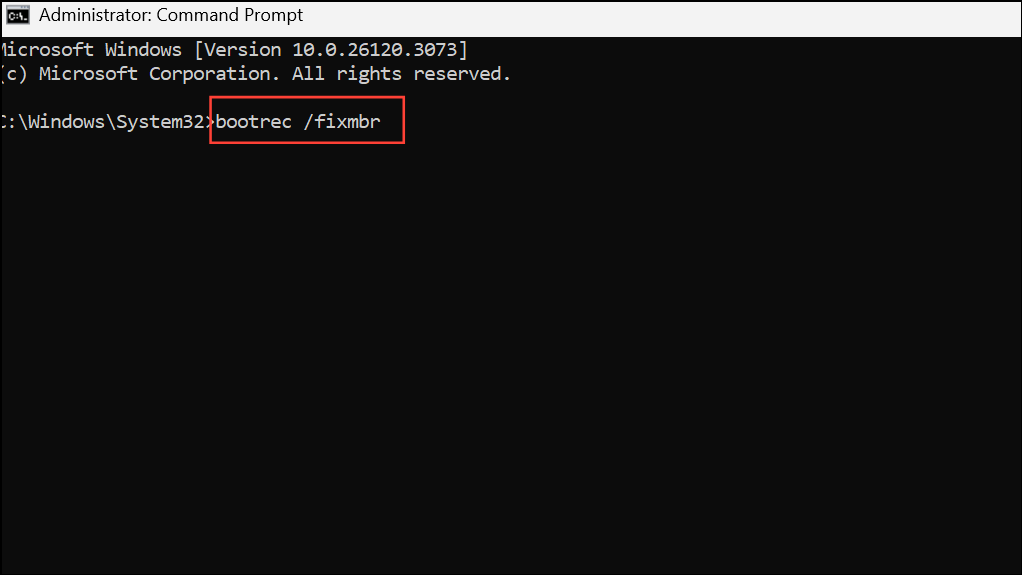
Step 3: After executing these commands, close the Command Prompt and restart the PC. This process repairs corrupted boot data that can prevent Windows from loading.
Reset Your PC
Step 1: If previous methods fail, use the Reset this PC option from the advanced recovery menu.
Step 2: Choose whether to keep your files or remove everything, then follow the prompts to reinstall Windows 11. This process reinstalls the operating system and often resolves persistent boot errors. If you can, back up your data before proceeding, as choosing to remove everything deletes all files and installed programs.
Step 3: If the reset process cannot complete or you encounter errors, create a Windows 11 bootable USB using Microsoft’s Media Creation Tool on another computer. Boot your PC from the USB, select Repair your computer, and repeat the above steps from the recovery environment provided by the USB.
Additional Troubleshooting and When to Seek Help
If you continue to receive the error after attempting all the above methods, hardware issues such as a failing hard drive or memory may be the root cause. Signs of hardware failure include repeated boot errors, slow performance, and disk health warnings from diagnostic tools.
- Check your PC manufacturer’s support page for specific drivers (such as Intel RST drivers) if your bootable USB cannot detect your drive.
- If you are unable to access recovery options or your PC fails to recognize the bootable USB, consult a professional technician or contact your device manufacturer for warranty service.
Resolving the “Your PC Did Not Start Correctly” error in Windows 11 restores access to your system and files. Regular backups and cautious update management help prevent future boot issues.