So, you’ve got a new external drive to use with your Mac. But somehow macOS is not letting you write data on the drive. Fret not, there’s nothing wrong with your drive. It’s happening because it’s been initialized with Windows NT File System (NTFS), which is primarily for Windows PCs. Apple’s Mac devices support a different file system.
In this article, we’ll show you how to format your external drive for a Mac-compatible file system i.e APFS (Apple File System) or Mac OS Extended (Journaled). We will get to each of these file systems later in the post.
Note: If you have important data on your external drive, be sure to transfer them to a different location as this operation will erase all the files on your drive.
Formatting a Drive for Mac
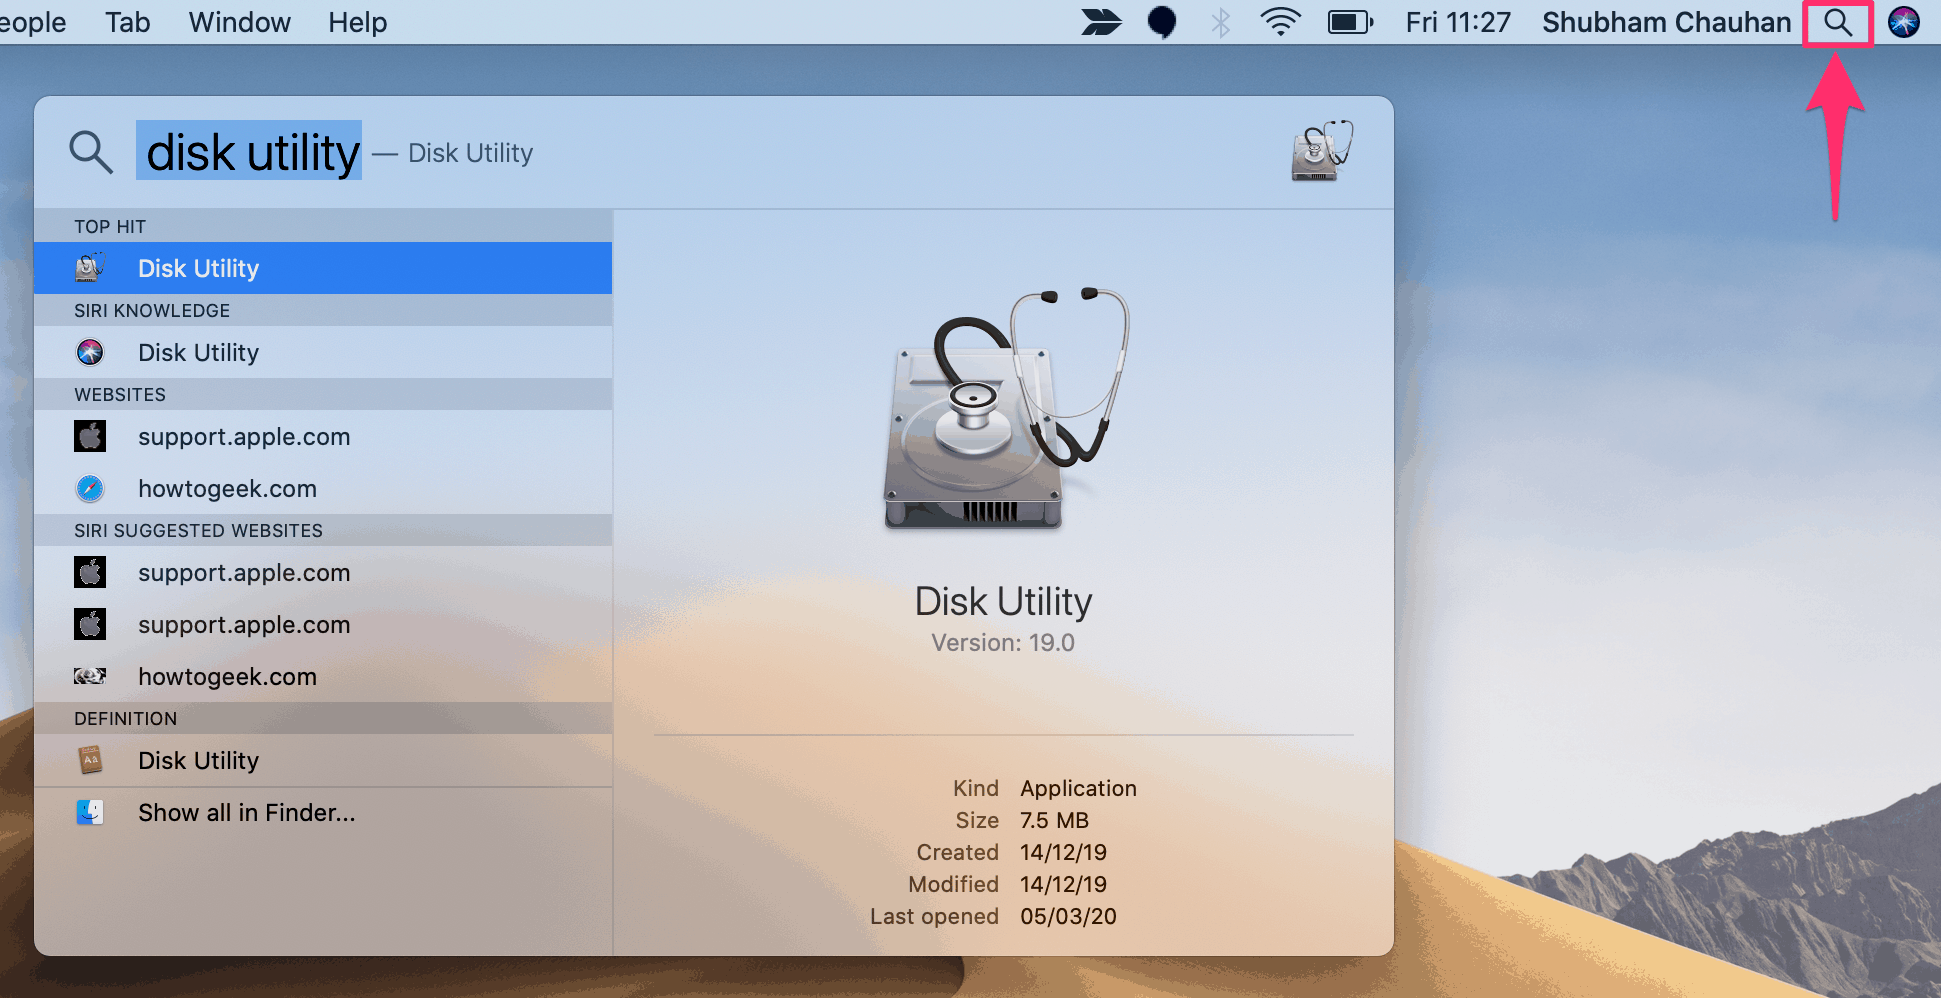
Connect the external drive to the Mac via USB or Thunderbolt port. Next, you need to go to Disk Utility. The quickest way to do this is a Spotlight search. Press Command + Space Bar on your keyboard, type ‘Disk Utility’ and hit the return key. You can also use the search button at the top left corner.
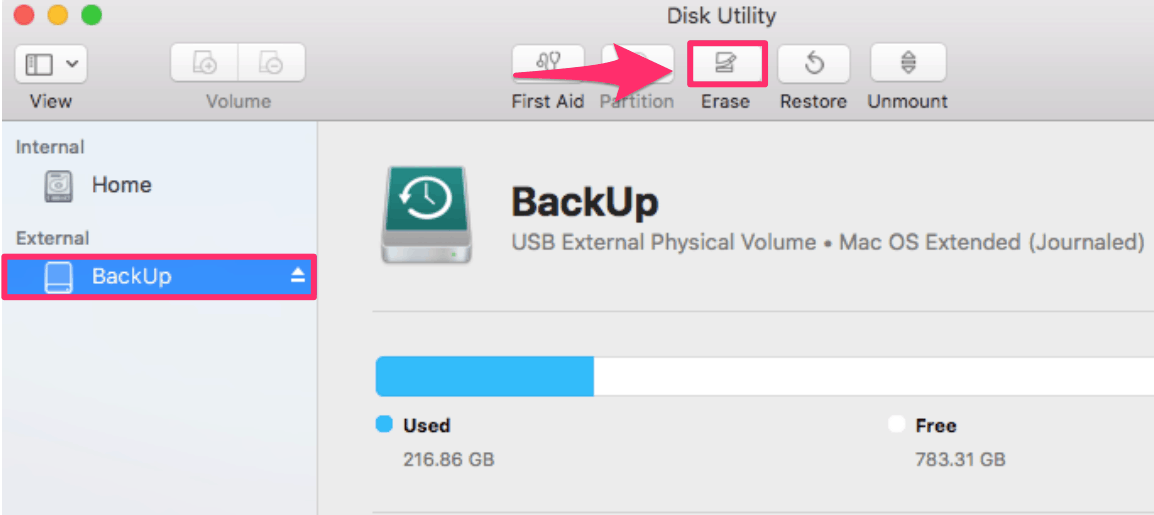
Once it loads up, it’ll show you the list of drives that are connected to your Mac. Your external drive should show up on the left panel under the ‘External’ section, select it and then click on the ‘Erase’ button on the top to format the drive.
A configuration screen will pop-up where you can give a new name to the drive and define its file system structure. By default, the ‘Disk Utility’ program will automatically select a file system format compatible with macOS devices.

You can change and select the ‘Format’ manually from the following formatting options.
- APFS (Apple File System): Latest Mac format for macOS High Sierra or later (10.13+).
- APFS (Encrypted): APFS format that is password-protected and encrypted.
- APFS (Case-Sensitive): APFS format that is case sensitive to folder names. Example: Folders named “Audio” and “AUDIO” are two different folders.
- APFS (Case-Sensitive, Encrypted): APFS format case sensitive to folder names, password-protected and encrypted.
- Mac OS Extended (Journaled or HFS+): Mac format.
- Mac OS Extended (Journaled, Encrypted): Mac format that is password-protected and encrypted.
- Mac OS Extended (Case-sensitive, Journaled): Mac format that is case sensitive to folder names. Example: Folders named “Audio” and “AUDIO” are two different folders.
- Mac OS Extended (Case-sensitive, Journaled, Encrypted): Mac format that is case sensitive to folder names, password-protected and encrypted.
- MS-DOS (FAT): Windows-compatible, general storage which is used for disks which are more than 32 GB or more. This does not work for Time Machine backups.
- ExFAT: Windows-compatible, general storage used for volumes that are 32 GB or less in size. This too will not work for Time Machine Backups.
We suggest that you select APFS if you are using a newer Mac and Mac OS Extended (Journaled) if you have a Mac which is not updated to macOS High Sierra. You can also select MS-DOS (FAT) or ExFAT if you want to use your drive with a Windows-based PC as well. Both FAT and ExFAT are supported by Mac.
You can avoid this hassle by simply proceeding with the format that Disk Utility will have selected automatically.

Once the format is selected, click on the ‘Erase’ button.

Wait until your drive is being erased and formatted to a macOS compatible format. When the process is complete and you see the ‘Operation successful’ message on the screen, click ‘Done’.

Your external drive is ready to be used on your Mac device.