Google Meet is a great place to have meetings. And even though they have come a long way since they first started, there are still a few things that are definitely a snag in the whole experience. Take, for example, the case of the meeting chat. Important information is exchanged often in the meeting chat that you’d like to be able to refer to even after the meeting is over.
But Google Meet does not have a provision for that. Meeting virtually is already challenging enough without having to deal with these snags. Fortunately, Google Meet is a web app. And what does that have to do with anything? A web app means you can have extensions in the browser. It’s literally one of the best perks of using Google Meet.
Enter – Notifs for Google Meet. With Notifs, you can easily fix some of these snags. The extension is easy enough to use without having to worry about learning to navigate it and still elevates the whole meeting session.
What is Notifs for Google Meet?
Notifs for Google Meet is a Chrome extension so you can use it in both Google Chrome and Microsoft Edge. With Notifs, you can easily save the chat from any meeting you attend in Google Meet. But Notifs offers more than just the option to save the chat from meetings.
It also shows notifications for the meeting chats as system notifications. So, when you’re sharing your screen and have a different tab or application open, it makes sure you don’t end up either missing the notifications or switching to your Google Meet tab continuously to keep an eye on these notifications.
You also get the bonus features like saving chats in your Drive, dark mode for Google Meet, and connection detection notifications.
Installing Notifs for Google Meet
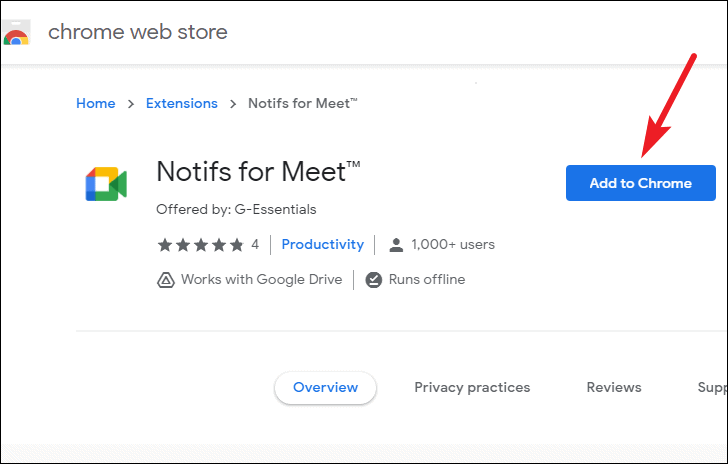
Notifs for Google Meet is available for download from Chrome Web Store. Go to the Chrome Web Store and search for ‘Notifs for Google Meet’ or click this link to go directly to the download page.
From the Chrome web store page, click the ‘Add to Chrome’ button.
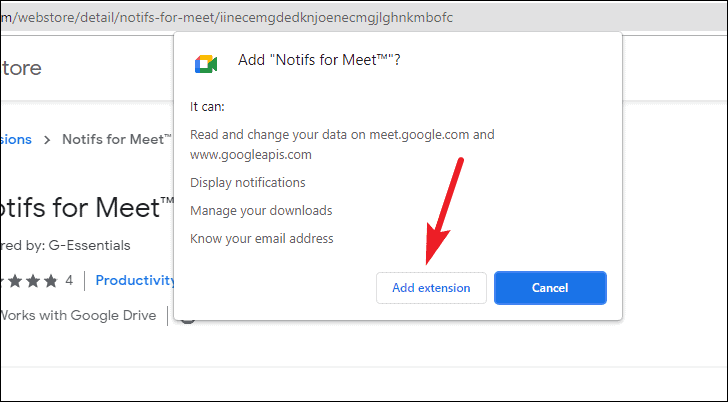
A dialog box will appear on the screen informing that the extension will be able to read and change data on certain sites and other tasks it can perform. Click the ‘Add Extension’ icon to proceed.
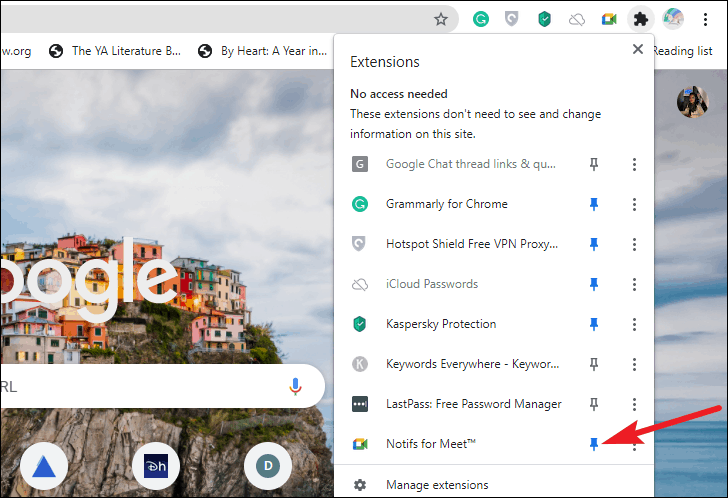
The extension will appear in the Extensions menu of Google Chrome. You can access it from there or pin it to the address bar for quicker access. Click the ‘Extensions’ icon from the address bar.

Then, click the ‘Pin’ icon next to ‘Notifs for Google Meet’ from the menu.
Using Notifs for Google Meet
Using Notifs for Google Meet is incredibly easy. You can configure which features you want to use from the Notifs menu. Click the extension icon from the address bar or the extension menu.
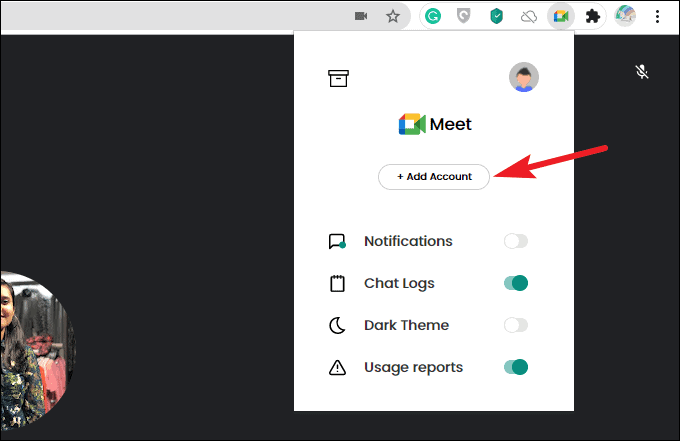
The menu for Notifs will appear. Turn on the toggles for the services you want to use. The toggles for Notifications, Chat, and Usage Reports are on by default.
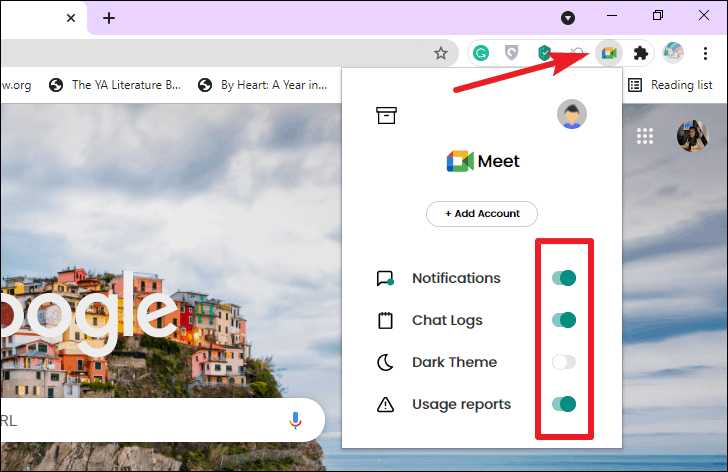
Except for Notifications and Chat, there are two more options: Dark Theme and Usage Reports. Dark Theme, as the name suggests, changes the UI of Google Meet from the Google Meet home screen to all the panels in the meeting screen that aren’t already dark.
Usage Reports is used to send analytical data to the developers. You can turn it off if you don’t want to send analytical reports.
Get Notifications for Meeting Chat
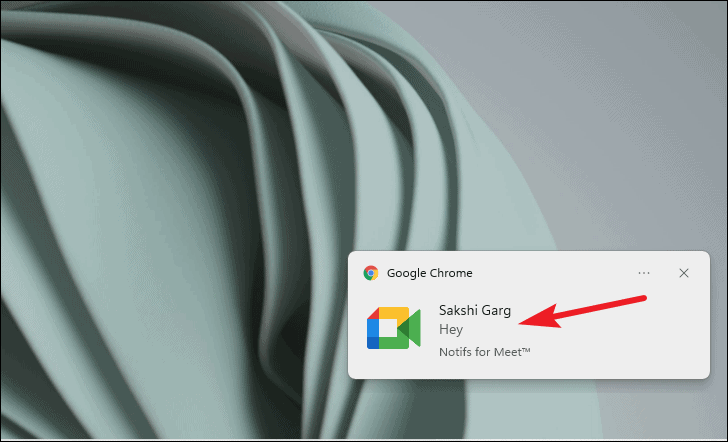
Turning on notifications ensures you’ll get system notifications for new messages in the meeting chat. Without the extension, Meet only delivers chat notifications on the meeting screen even when you’re in another tab or window. With Notifs, you’ll get notifications on the meeting screen normally when you have it open. But when you’re away, you’d get them as system notifications.
It’s especially useful when you’re presenting your screen. The notification will display the name of the sender and the message content.
The system notifications are only to notify you of the new messages. You cannot click them to switch to the Google Meet meeting screen.
If you’re not receiving notifications, there could be a few reasons.
First, if you had the feature off and turned it on in the middle of the meeting, the feature might not implement until you reload Google Meet. If that’s the case, essentially you need to do is reload and rejoin the meeting to implement it in the current meeting itself.
Second, even though the feature is on by default, if you have just installed the extension and never opened the meeting UI, it won’t display notifications until you open the meeting UI at least once. Click the icon for the extension to open the meeting UI.
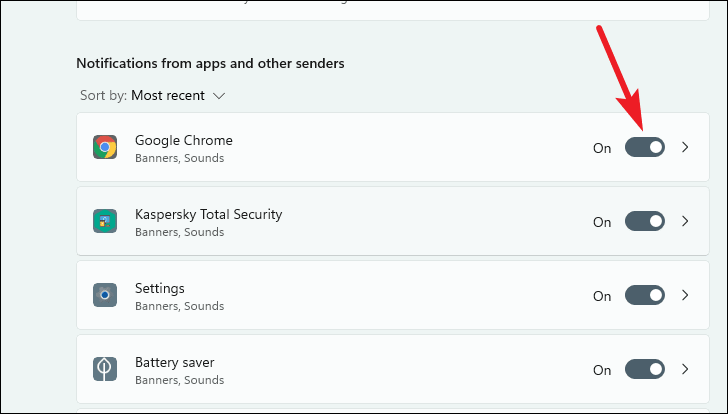
Another reason could be that Google Chrome is not allowed to send notifications to your system. From the settings app, go to ‘Notifications’ in system settings.
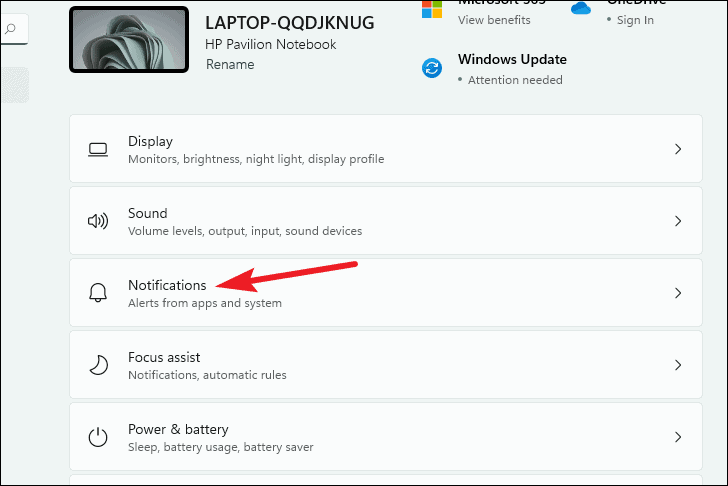
Then, make sure the toggle for ‘Google Chrome’ is on.
Also, you won’t receive notifications if you have Do Not Disturb, Focus Assist, or any other similar feature on that might suppress notifications.
Save the Meeting Chat
When you have the Chat Logs option enabled, you can save the meeting chat for any meeting in Google Meet. But Chat Logs can only log the chats that happen when the feature is enabled. So, if you turn on the feature in the middle of the meeting, it’ll only be able to log the chat after you have enabled it. Also, if you enable it in the middle of the meeting, you first need to reload Google Meet and rejoin the meeting to implement the Chat Logs feature.
You can save the chat during the meeting or after. You can save the meeting chat from a previous meeting even in a new meeting until any messages aren’t sent in the new meeting chat.
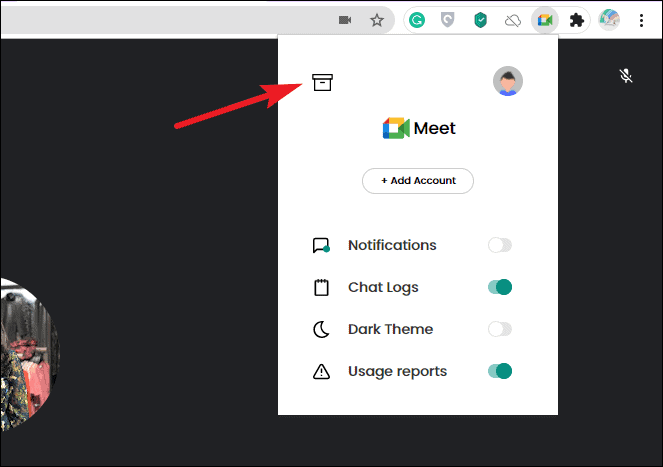
To save a meeting chat, click the extension icon. From the extension UI, click the ‘Archive’ button (looks like a box with a lid) in the top-left corner of the menu.
Then, click the ‘Capture’ icon in the top-right corner of the menu.
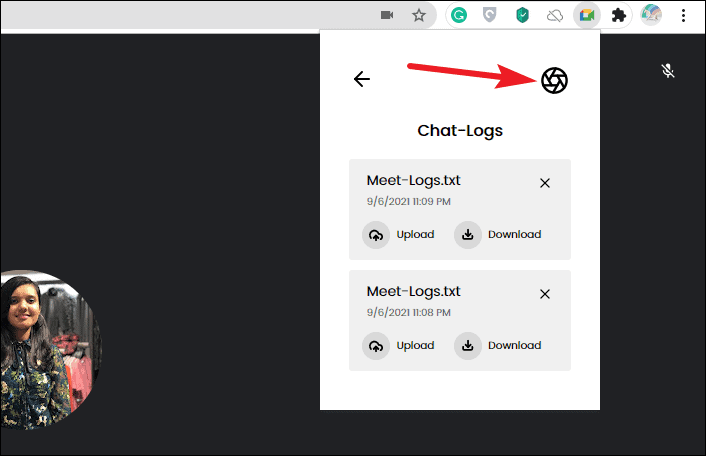
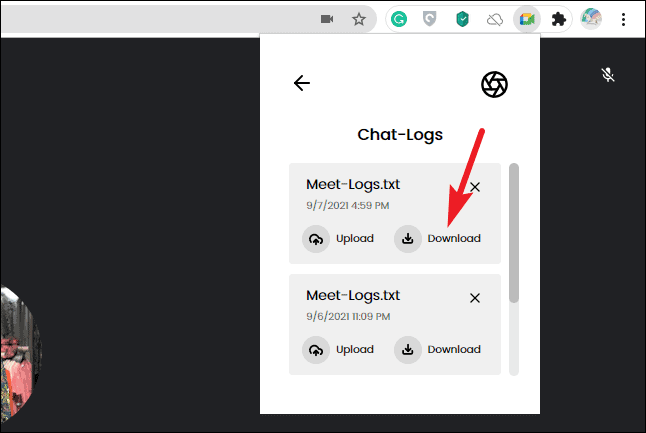
The meeting log will be captured. You can either download it onto your computer or upload it to your Drive. Once you’ve captured the log, it is available in the extension UI until you uninstall the extension or manually delete it. The log will have the date and the time of when you captured it, so you can differentiate between them.
Click the ‘Download’ button to save it to your computer. Until you click the download button, the chat logs will not be saved to the computer.
To save chats to Google Drive, you have to log in to your account. Click the ‘Add Account’ button from the extension UI. The account you use in the extension can be completely different from the one you’re attending meetings from. So, if you’re using your organization or school account to attend meetings but don’t want to save chats there, you can use your personal Google account.
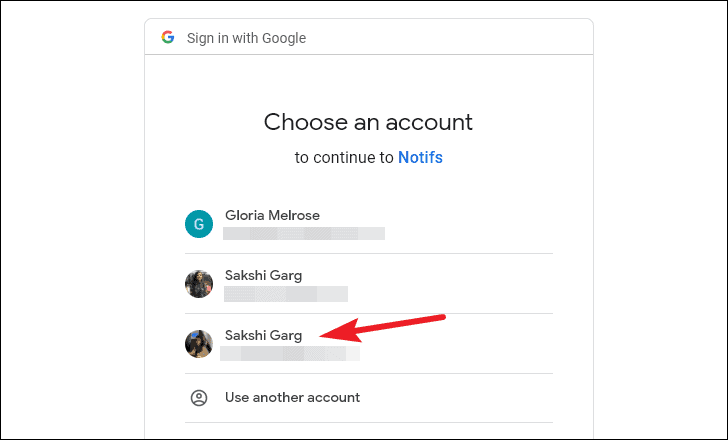
Then, choose a Google account to continue to Notifs. To sign in with a different account not listed there, click ‘Use another account’.
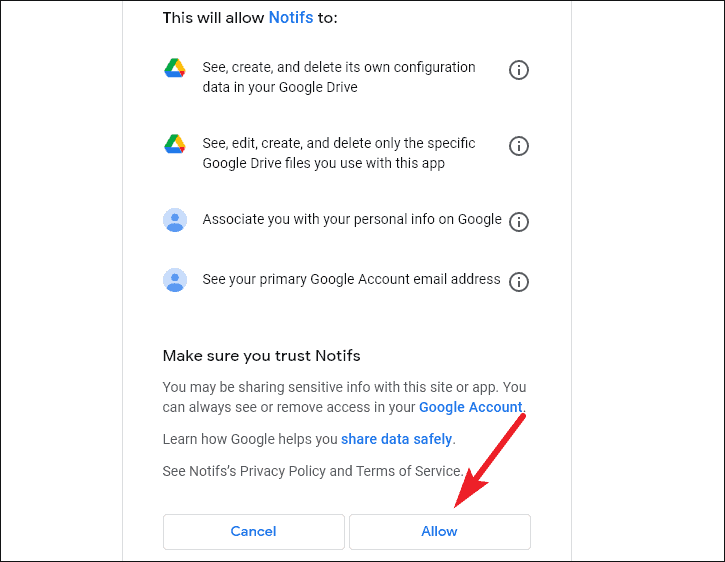
A permissions page will appear. Click ‘Allow’ to provide Notifs with access to your Google account.
Once you log in, you can start saving your chats to Google Drive. Click the ‘Upload’ button to save the chat to Drive. It’ll automatically upload to your Google Drive without any further action. You can then refer to these chats whenever you want.
Notifs for Google Meet is a great way to get chat notifications and save the chat logs. With its no-nonsense UI, you won’t have any difficulties adjusting to the extension.