Google Meet has become an essential tool for virtual meetings and online classes, offering a streamlined platform for communication. Despite its robust features, it lacks a built-in whiteboard, which can be a limitation for educators and presenters needing visual aids. The Google Meet Classroom Extension fills this gap by introducing a whiteboard feature that enhances the collaborative experience.
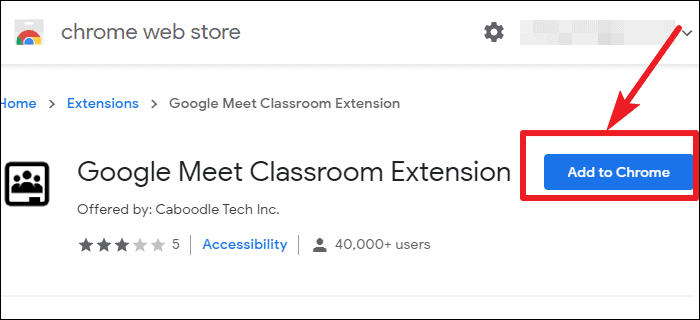
Step 1: Install the Google Meet Classroom Extension. Open the Chrome Web Store and search for the "Google Meet Classroom" extension, or click here to open it directly. Click on the 'Add to Chrome' button to add the extension to your browser.
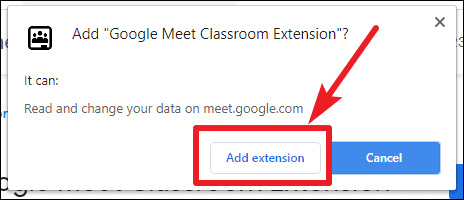
Step 2: Confirm the addition of the extension. A confirmation dialog will appear asking for permission to add the extension. Click on 'Add extension' to proceed. Once installed, the extension's icon will appear next to the address bar in Chrome.
Using the Whiteboard in Google Meet
Step 3: Launch a Google Meet session. Navigate to meet.google.com and create or join a meeting as you normally would. With the extension installed, you'll notice a new 'Whiteboard' option next to the 'Captions' button on the meeting toolbar.
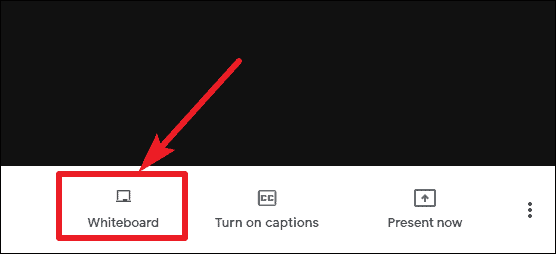
Step 4: Open the whiteboard. Click on the 'Whiteboard' button to access the whiteboard interface. Keep in mind that opening the whiteboard does not automatically make it visible to other participants, nor can they interact with it directly.
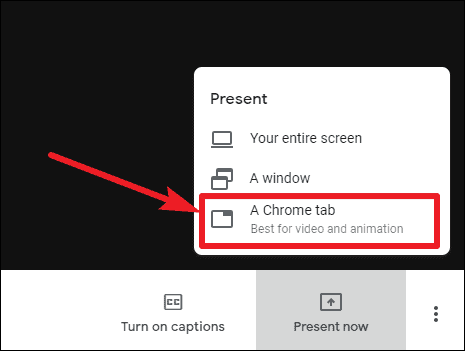
Step 5: Share the whiteboard with participants. To display the whiteboard to everyone in the meeting, you'll need to use the screen sharing feature. Click on the 'Present now' icon located at the bottom of the meeting screen.

Step 6: Select sharing options. From the menu that appears, choose 'A Chrome tab' to ensure you're only sharing the necessary content.
Step 7: Choose the appropriate tab. In the dialog box that lists your open Chrome tabs, select the tab where your Google Meet session is running. Click on the 'Share' button to begin sharing.
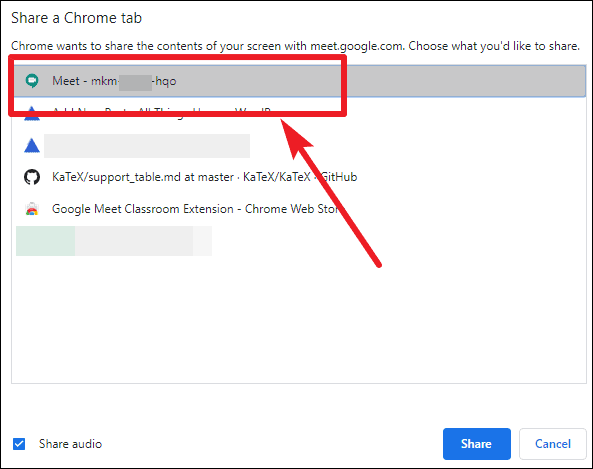
Step 8: Display the whiteboard to attendees. With screen sharing active, click on the 'Whiteboard' icon once more to open it. Now, whatever you write or draw will be visible to all participants in real-time.
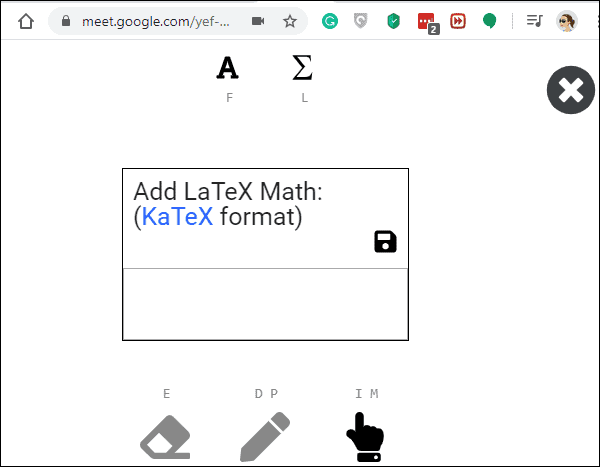
Step 9: Utilize the whiteboard features. You can add text, write mathematical formulas, or draw freehand to illustrate your points more effectively. This is particularly useful for teaching, brainstorming sessions, or any scenario where visual representation enhances understanding.
Step 10: Conclude the whiteboard session. When you're finished, close the whiteboard window. To stop sharing your screen, click on the 'Stop presenting' button in the meeting controls.

The Google Meet Classroom Extension enhances your virtual meetings by providing a whiteboard feature that is particularly beneficial for educators and professionals. This tool makes it easy to present information visually, improving engagement and understanding without complicating the meeting setup.

