The checkbox feature in Microsoft Word enables users to create interactive documents like forms and surveys, allowing recipients to select options with a simple click. Adding checkboxes is straightforward but requires enabling certain tools within Word.
Inserting a checkbox in Microsoft Word
Enable the Developer tab
To insert checkboxes, you first need to access the Developer tab in Word, which is hidden by default.
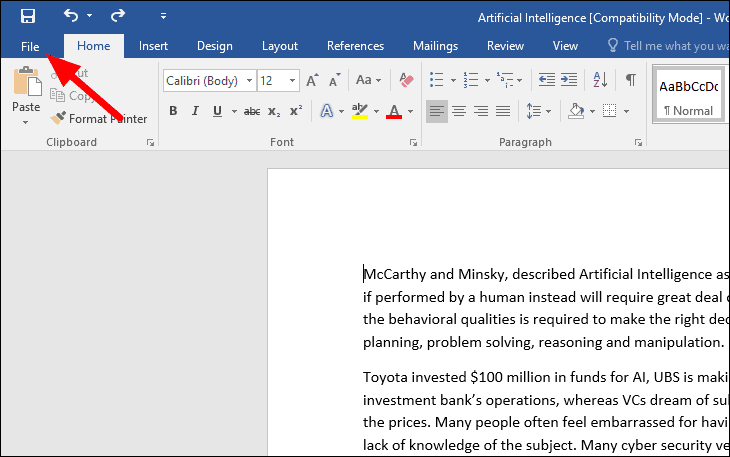
Step 1: Open your Word document where you want to add checkboxes. Click on File located at the top-left corner of the window.
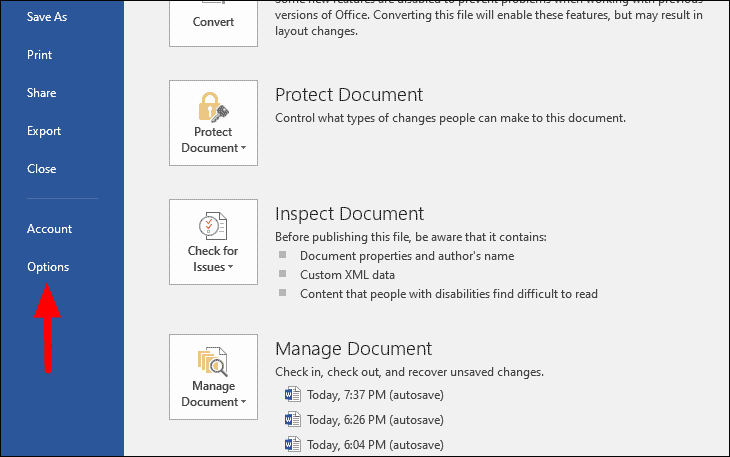
Step 2: In the sidebar that appears, select Options from the menu on the left. This option is typically at the bottom of the list.
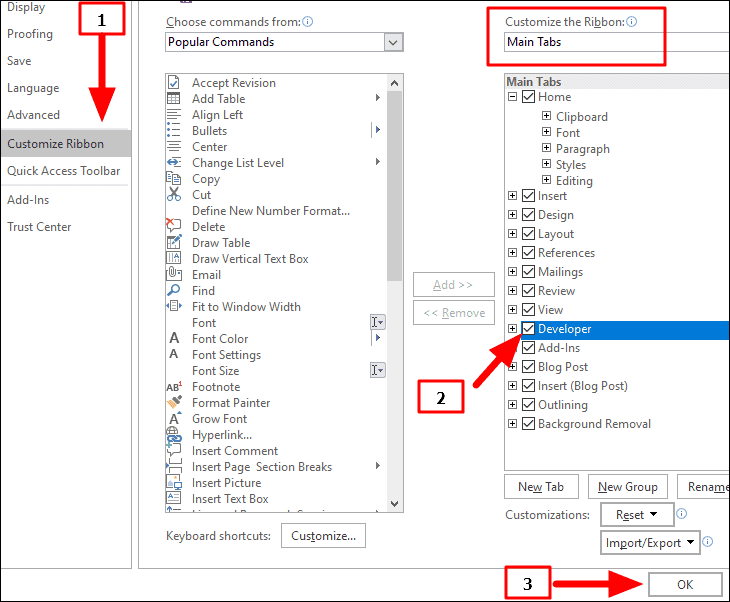
Step 3: In the Word Options dialog box, click on Customize Ribbon on the left side. Under the Customize the Ribbon section on the right, ensure that Main Tabs is selected in the dropdown menu. Scroll through the list of tabs, find Developer, and check the box next to it. Then, click OK at the bottom to save your changes.
The Developer tab should now be visible in the ribbon at the top of the Word window.
Add the checkbox
With the Developer tab enabled, you can now insert checkboxes into your document.
Step 1: Place your cursor where you want to insert a checkbox. This could be before an item in a list or any location within your text.
Step 2: Click on the Developer tab in the ribbon at the top.
Step 3: In the Controls group, click on the Check Box Content Control icon. This icon resembles a checkbox and is usually located near the center of the Developer tab options.
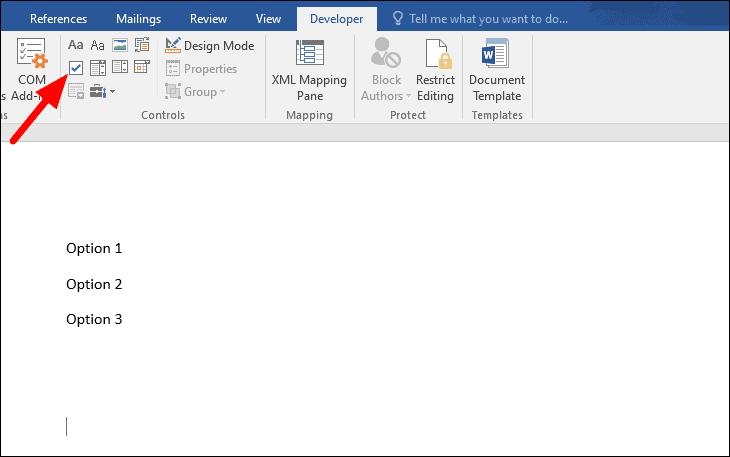
The checkbox will appear at the location of your cursor. You can repeat these steps to add checkboxes wherever needed in your document.
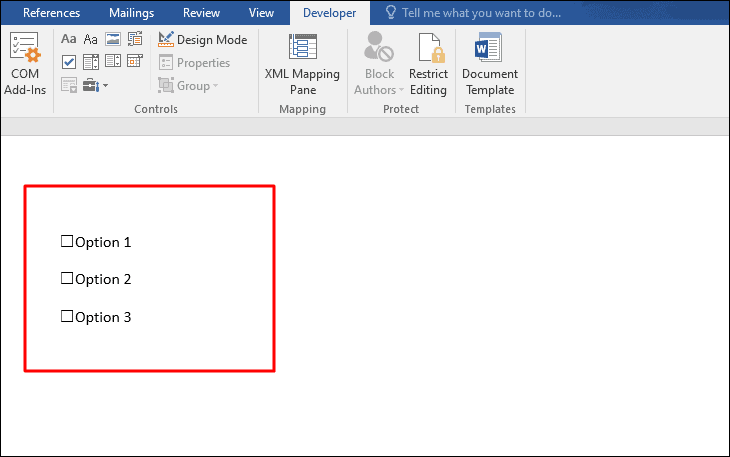
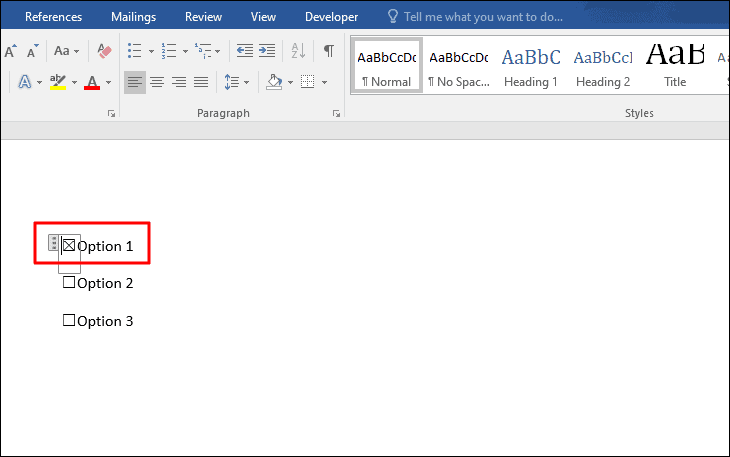
To interact with the checkbox, simply click on it, and it will display a check mark indicating selection.
By following these steps, you can easily incorporate checkboxes into your Word documents, enhancing interactivity and making forms or surveys more user-friendly.

