
Docker is a popular tool used by DevOps teams to create, deploy and run applications as portable containers. The containerization is a process in which applications, its components, configurations and dependencies are packed in a single file known as containers.
Containers are similar to virtual machines, but instead of running complete OS and all its services, they depend on host OS for the most part. As a result, containers are more resource-friendly but also come with the advantage of isolating the container application from the host OS.
There are two different versions of Docker available, the Docker Community Edition (Docker-CE) is the free version of Docker and Docker Enterprise Edition (Docker-EE) is for enterprise and business use.
In this article, we are going look at how to Install Docker-CE on Ubuntu 20.04 LTS using the official Docker and Ubuntu 20.04 repositories.
Install Docker Using Official Docker Repository
The Docker package available on the Ubuntu 20.04 repository might not be the latest one provided by the Docker, also if you face any issues with the installation process or any bugs the Docker community might not be able to help you.
Thus it is recommended to install Docker using its official repository. First, we need to make sure we don’t have any Docker packages installed on our Ubuntu 20.04 system then add the Docker repository and finally install Docker.
Uninstall Old Versions
The old Docker packages were called as docker, docker.io or docker-engine. We need to make sure none of these installed on the system before installing the Docker from the official Docker repository. Open the terminal by pressing Ctrl+Alt+T then running the following command:
sudo apt remove docker docker.io containerd runc docker-engineRun the above command even if you are on a fresh install, it’s okay if apt says none of the packages are installed or if it doesn’t recognise any package.
Add Official Docker Repository
Before we can use apt to install Docker, we need to set up the Docker repository. We will begin the process by updating the package index and installing dependencies needed to add an HTTPS repository.
sudo apt update
sudo apt install apt-transport-https ca-certificates curl gnupg-agent software-properties-common
GPG is a security feature used to ensure the software you are installing is authentic. Import the repository’s GPG key using the shown curl command:
curl -fsSL https://download.docker.com/linux/ubuntu/gpg | sudo apt-key add -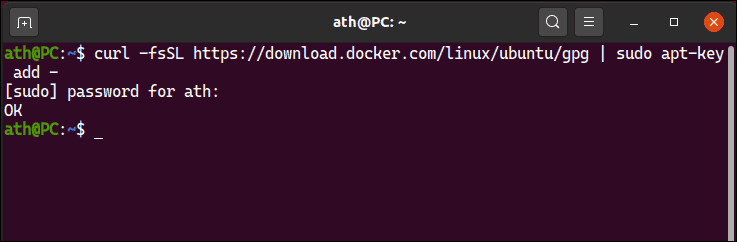
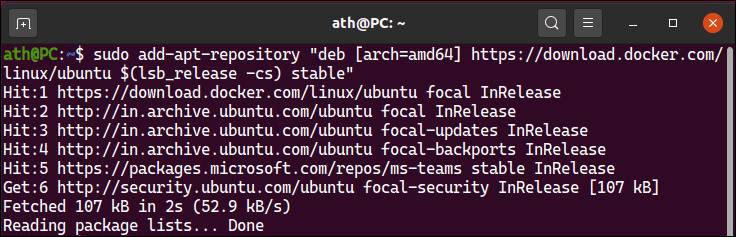
Next add the Docker repository to your Ubuntu 20.04 system:
sudo add-apt-repository "deb [arch=amd64] https://download.docker.com/linux/ubuntu $(lsb_release -cs) stable"The command $(lsb_release –cs) returns the codename of your Ubuntu installation, which is ‘focal’ for Ubuntu 20.04. To add the nightly or test Docker repository you could substitute the word stable with nightly or with test in the above command.
But it is recommended to stick with stable releases because they are tested and less prone to bugs and failures.
Install Docker
The official Docker package is called as docker-ce and it is only available in the Docker repository. Update the repository database and install the latest version of Docker CE and containerd by running:
sudo apt update
sudo apt install docker-ce docker-ce-cli containerd.io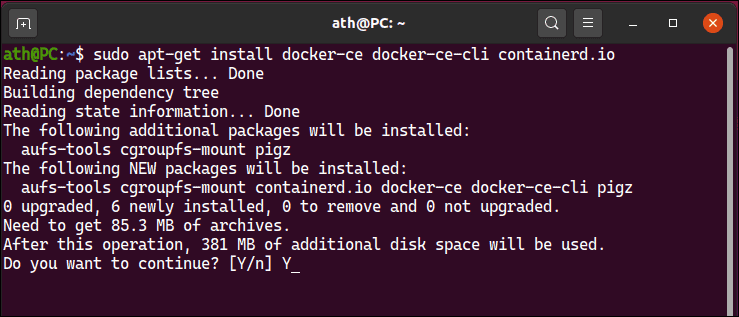
It is possible to install specific version of Docker if you wish to do so. To list all the docker version available run the following command:
apt-cache madison docker-ce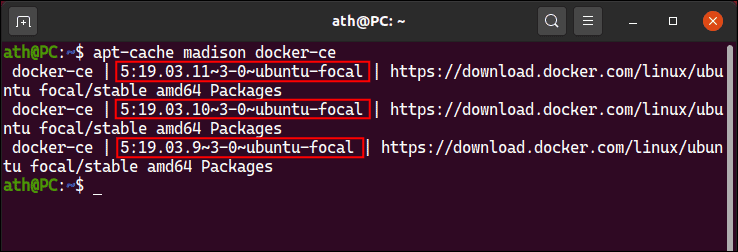
Then install the specific version using the string in the second column (string in red boxes), and running the following command
sudo apt install docker-ce=<VERSION_STRING> docker-ce-cli=<VERSION_STRING> containerd.ioFor example, replace <VERSION_STRING> with 5:19.03.10~3-0~ubuntu-focal in the command and run to install 19.03.10 Docker version.
sudo apt install docker-ce=5:19.03.10~3-0~ubuntu-focal docker-ce-cli=5:19.03.10~3-0~ubuntu-focal containerd.ioInstall Docker using Ubuntu 20.04 Repository
If you don’t want to go through the process of adding a new repository and you are okay with being an update or two behind, you can use the Ubuntu 20.04 repository.
Similar to the previous method we need to make sure that we don’t have older Docker packages. Then we can update the Ubuntu 20.04 repositories and install Docker immediately.
To remove any unnecessary old Docker packages run the following command:
sudo apt remove docker docker.io containerd runc docker-engine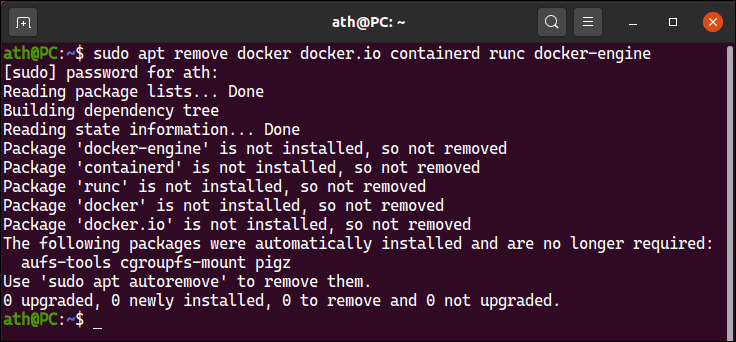
It is fine if apt says none of the packages are installed on the system. We need to run this command to make sure no old package linger around, as it could cause problems when running the latest Docker version.
The Docker package in Ubuntu 20.04 repository is named as docker.io, to install Docker run the following command:
sudo apt install docker.io
The apt package manager will resolve and install any dependencies required by the Docker automatically.
Post-Install Tweaks
Before we go run any containers on Docker, here are some tweaks and changes to make your docker experience smoother.
Run Docker Service with Ubuntu 20.04 Startup
If you want to start the Docker daemon automatically with your Ubuntu 20.04 system, run the following command:
sudo systemctl enable dockerNow every time you boot into your Ubuntu 20.04 machine, Docker will be up and running ready to pull images and start containers.
Run Docker Without The Sudo Command
By default, only root, sudo users and docker group users can execute the docker command.
Thus to execute Docker command without sudo you need to be either root or user in the docker group which was created during Docker installation. To add your user to docker group, run:
sudo usermod -aG docker $USERThe $USER is an environment variable which outputs your username in the above command. Logout and login back so your group membership is refreshed, now you can run the docker command without sudo.
Verify Docker Installation
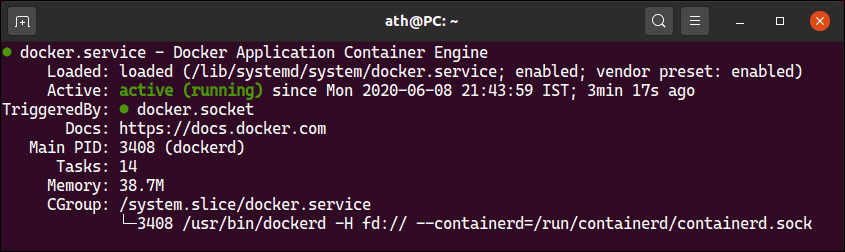
Once the installation is complete, the Docker daemon will start automatically in the background. To verify the status of Docker, run the following Command:
sudo systemctl status dockerThe systemclt status command should display the output as shown below.
Now that we know the Docker Engine is working, we can finally test running some containers. Run the following command to test if Docker is functioning properly.
docker container run hello-worldThe image ‘hello-world’ is used to test Docker installation, it should output the following text:
ath@PC:~$ docker container run hello-world
Unable to find image 'hello-world:latest' locally
latest: Pulling from library/hello-world
0e03bdcc26d7: Pull complete
Digest: sha256:6a65f928fb91fcfbc963f7aa6d57c8eeb426ad9a20c7ee045538ef34847f44f1
Status: Downloaded newer image for hello-world:latest

Hello from Docker!
This message shows that your installation appears to be working correctly.

To generate this message, Docker took the following steps:
 1. The Docker client contacted the Docker daemon.
 2. The Docker daemon pulled the "hello-world" image from the Docker Hub.
    (amd64)
 3. The Docker daemon created a new container from that image which runs the
    executable that produces the output you are currently reading.
 4. The Docker daemon streamed that output to the Docker client, which sent it
    to your terminal.

To try something more ambitious, you can run an Ubuntu container with:
 $ docker run -it ubuntu bash

Share images, automate workflows, and more with a free Docker ID:
 https://hub.docker.com/

For more examples and ideas, visit:
 https://docs.docker.com/get-started/
We have shown you how to install Docker using both Ubuntu & Docker repositories and we have also seen some quality of life tweaks to make Docker usage easier.
To learn more about Docker, check out the official Docker Documentation.