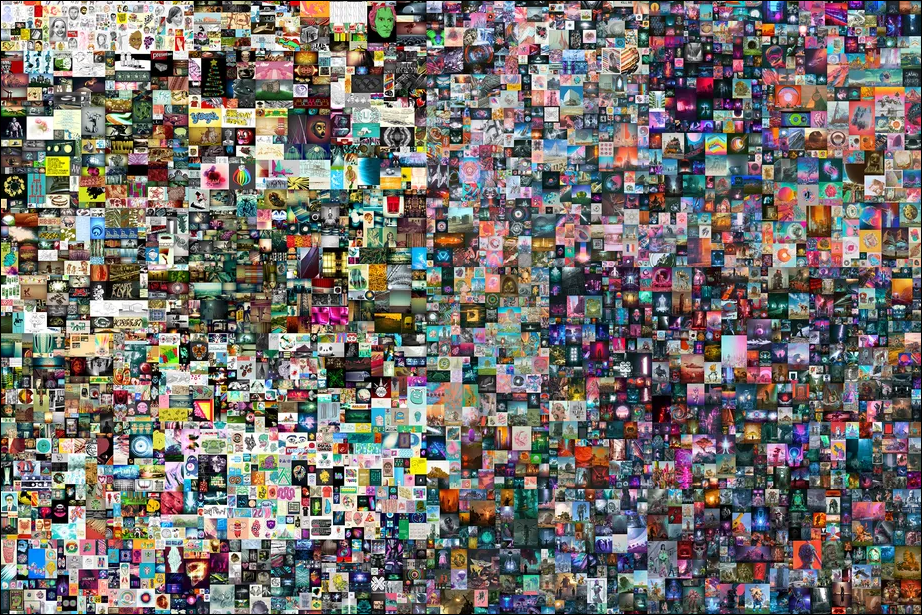
If you had to pick one word that’s been everywhere this year, it has to be NFT. NFTs have quite taken the digital art world by storm. If you haven’t yet heard of the NFT artist Beeple sold for a whopping $69 million dollars, it’s time to stop being a hermit and get out from under your rock.
NFTs have become quite the head-scratching attraction where everyone wants to get in on the action. Especially if you’re an artist or a collector, you need to know what all the hype is about. So, before you jump on the NFT wave, here’s everything you need to know.
What is an NFT?
Simply put, an NFT is a non-fungible token. Wow, that’s not much to go on, is it? If anything, it just brings more confusing terms to an already complicated topic. Let’s break it down, shall we? Non-fungible is an economic term that essentially means a unique and non-interchangeable item.
This attribute makes them different from say, bitcoins, which are fungible. You can trade one bitcoin for another and they’ll be exactly the same. But that doesn’t hold true for an NFT. Each NFT is unique.
How do NFTs work?
NFTs are stored on publically distributed digital ledgers known as blockchains and are used to prove ownership of unique items. You keep the NFT in your crypto wallet that supports NFTs.
Since they are stored on blockchains, it’s easy to prove ownership. Each block in the blockchain contains information like a cryptographic hash of the previous block, a timestamp, and transaction data. Blockchains are also resistant to modification because of the chains that the blocks form. Modifying one block cannot be done without altering the subsequent ones in the chain. Hence, your NFTs are relatively safe from stealing.
What Items Can be an NFT?
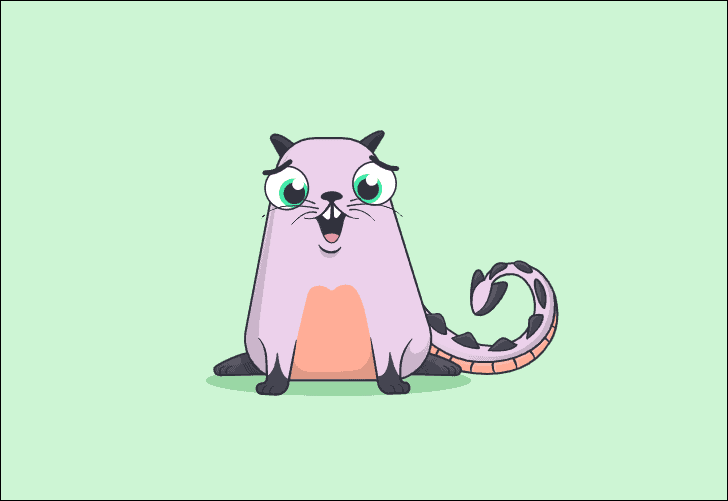
The NFT world is still rather new and there aren’t too many restrictions around what can be minted as an NFT. Most popular cases of items minted and sold as NFT include digital art, videos, GIFs, music, collectibles, and in-game items.
Digital art has obviously seen the most usage of NFT owing to the fact that blockchain assures you can prove ownership easily. There has also been the case of a tweet being sold as an NFT. Of course, the tweet was none other than the first-ever tweet from the founder of Twitter.
In-game items have also seen a recent surge in NFT usage. The use of NFT to sell items in a game has many-fold benefits. First, it can be used to maintain exclusivity and scarcity. A plot in a game was sold close to $1 million dollars recently. And given that the NFTs can be sold further and their prices can increase over time, even an in-game item can become an investment. Furthermore, owing to royalties, even game developers can earn more every time an NFT is resold.
NFTs also be used for tickets to events, deeds to items, essays or articles from online publications, limited sneaker lines, domain names, etc. A few more examples include word documents, recipes, even entire startups. And this is apparently just the beginning for NFTs.
NFT tokens have even been used for TV shows where you need an NFT related to the show to be able to watch it.
NFTs are still so confusing!
That they undoubtedly are. The most confusing thing about NFTs is the fact that anyone can download photos, videos, GIFs, etc., that’s an NFT. So, what’s all that about? That’s true that anyone can download the photo, video, etc. that’s being sold as an NFT.
Copies of the original file for NFT aren’t restricted to the owners only. You can copy and share an NFT just like any other file on the internet. But you won’t be the owners of it the way someone who buys an NFT would be.
Let’s take an example of an artwork, say ‘The Starry Night’ from Vincent Van Gogh. Anyone can have the print for the painting. In fact, yours truly has one hanging in their room. But is that the equivalent of being the owner of the real thing? Absolutely not. That goes for NFT too. You can think of NFT as a certificate of authenticity.
But there’s one obvious thing everybody points out. A print is not the same as a painting; there are obvious differences. But the copy of a photo is exactly the same. Some people think of NFT as just a flex for rich people. After all, why pay for something that’s exactly the same as its copy? But that’s a whole other debate.
NFT for Artists
NFTs can be great for digital artists and give you a platform to monetize your artwork. First off, you can easily prove you’re the creator of your work when you mint it as an NFT. But be aware that you should be the owner and aren’t using any art that you don’t have the copyrights for. There will be legal complications otherwise.
Moreover, instead of sharing your art on a social media platform where there are barely any earnings, you can directly sell your art in an NFT marketplace or peer-to-peer.
What has to be the best thing about using NFTs to sell your art has to be royalties. If you want, you can earn royalties on your NFT every time someone resells it. So, if the price of your NFT drives through the roof, you won’t be left out of the profits. You’ll automatically get the royalty as it’s part of its smart contract if you create it that way. This gives them an edge over physical artworks where there’s no way of receiving royalties when your piece resells.
As an artist, you also get to determine the scarcity of your artwork. It could be a one-of-a-kind NFT or you could produce a limited run, like a few tens or hundred collectibles of it. The more scarce your work, the more hype there will be for it.
And, just like any physical artwork, you get to retain the copyright to your work and the right to reproduce it. Even if you sell your NFT as a one-of-a-kind, you will have the right to reproduce it (although it won’t be ethical). Of course, copyrights can be explicitly transferred, but by default, copyright is not transferred with ownership. Both are separate on their own.
You can sell your NFTs at a fixed price or auction them off to the highest bidder.
NFT for Collectors or Buyers
There can be several reasons to buy an NFT. You might want to support the artist as a fan of their work. Maybe you fancy yourself an art collector and want the bragging rights of being an owner of the work.
When you own the work, you can easily prove that you’re the owner. You could simply keep it securely in your crypto-wallet or further sell it.
As blockchain ledgers are nearly impossible to manipulate or modify without changes to other blocks, you can rest assured that your digital asset is safe.
It’s important to know that being an owner of the NFT does not give you copyrights to the artwork. Unless the creator explicitly transfers the copyright to you, they’ll have the right to reproduce the work.
Also, when you resell the artwork, a portion of the sale price might go to the creator as royalties. It’ll be a part of the smart contract for the NFT and you can see if the creator will receive royalties.
Is every NFT unique?
Although NFTs are by nature non-fungible, it doesn’t necessarily mean that all NFTs are unique. The uniqueness and scarcity of any NFT are determined by its creator. They could be one of a kind or the creators could mint them as a rare item. So, there would be a few such items available like a trading card. But each NFT would still exist as a separate token with undeniable ownership rights to whoever buys it.
It’s important to know that even if the creator sells the item as one-of-a-kind, they’d still have the rights to reproduce it unless they explicitly transfer the rights. So, it’s always wise to know who you are buying an NFT from and that they aren’t opportunists who’d go back on their word. Because it won’t be illegal if they did, just unethical.
NFTs and Environmental Impact
Wow! NFTs sound so appealing right about now, don’t they? But everything is not sunshine and rainbows in the NFT land. They also have a dark side.
One of the controversies surrounding NFTs is the huge carbon footprint associated with them. And it’s important to make an informed decision whether you are thinking about making and selling or buying an NFT.
Since NFTs use blockchain technology, the amount of energy required to carry out the transaction is huge. Most marketplaces associated with NFT use the Ethereum cryptocurrency which was also the first platform to implement a standard for NFTs. Ethereum is also the most widely used platform to create and launch NFTs till now.
Now, Ethereum uses a Proof-of-Work system to validate transactions. The Proof-of-Work system is incredibly power-hungry. To add new blocks to the blockchain, users, or more accurately, miners, need to solve complex puzzles. To solve these puzzles, you need to use special computers that guzzle a lot of power. In return for their efforts and the electricity they use (which they have to pay for), they get tokens or transaction fees as rewards.
But the thing is, the system is so power-hungry on purpose. Since it requires so much power to add blocks to the ledger, miners won’t mess with it on purpose. It maintains the security of the ledger.
Until Ethereum and other platforms using the proof-of-work system move on to the proof-of-stake system, which isn’t as power-hungry, selling and buying NFTs will have a huge impact on the environment. There are already platforms that use the proof-of-stake system, most notably the Flow blockchain.
The proof-of-stake system requires that the players maintaining the ledgers have some stake in the system. They have to lock up some of their tokens and if they get caught compromising the ledger, the penalty is those tokens.
Ethereum has plans to move to the proof-to-stake system rather soon, and when that happens, their electricity consumption would drop to almost zero overnight as compared to now. To get an insight, Ethereum uses as much electricity as the country of Libya.
In fact, some creators have withdrawn from selling their NFTs due to the carbon footprint, while others like Beeple say they will offset the carbon emissions for their NFTs in the future. They’d do so by investing in renewable energy resources, technology that sucks carbon dioxide from the atmosphere, etc.
So, there you go. Now you have all the information you need to make an environmentally cautious decision regarding NFTs.
Are NFTs here to stay?
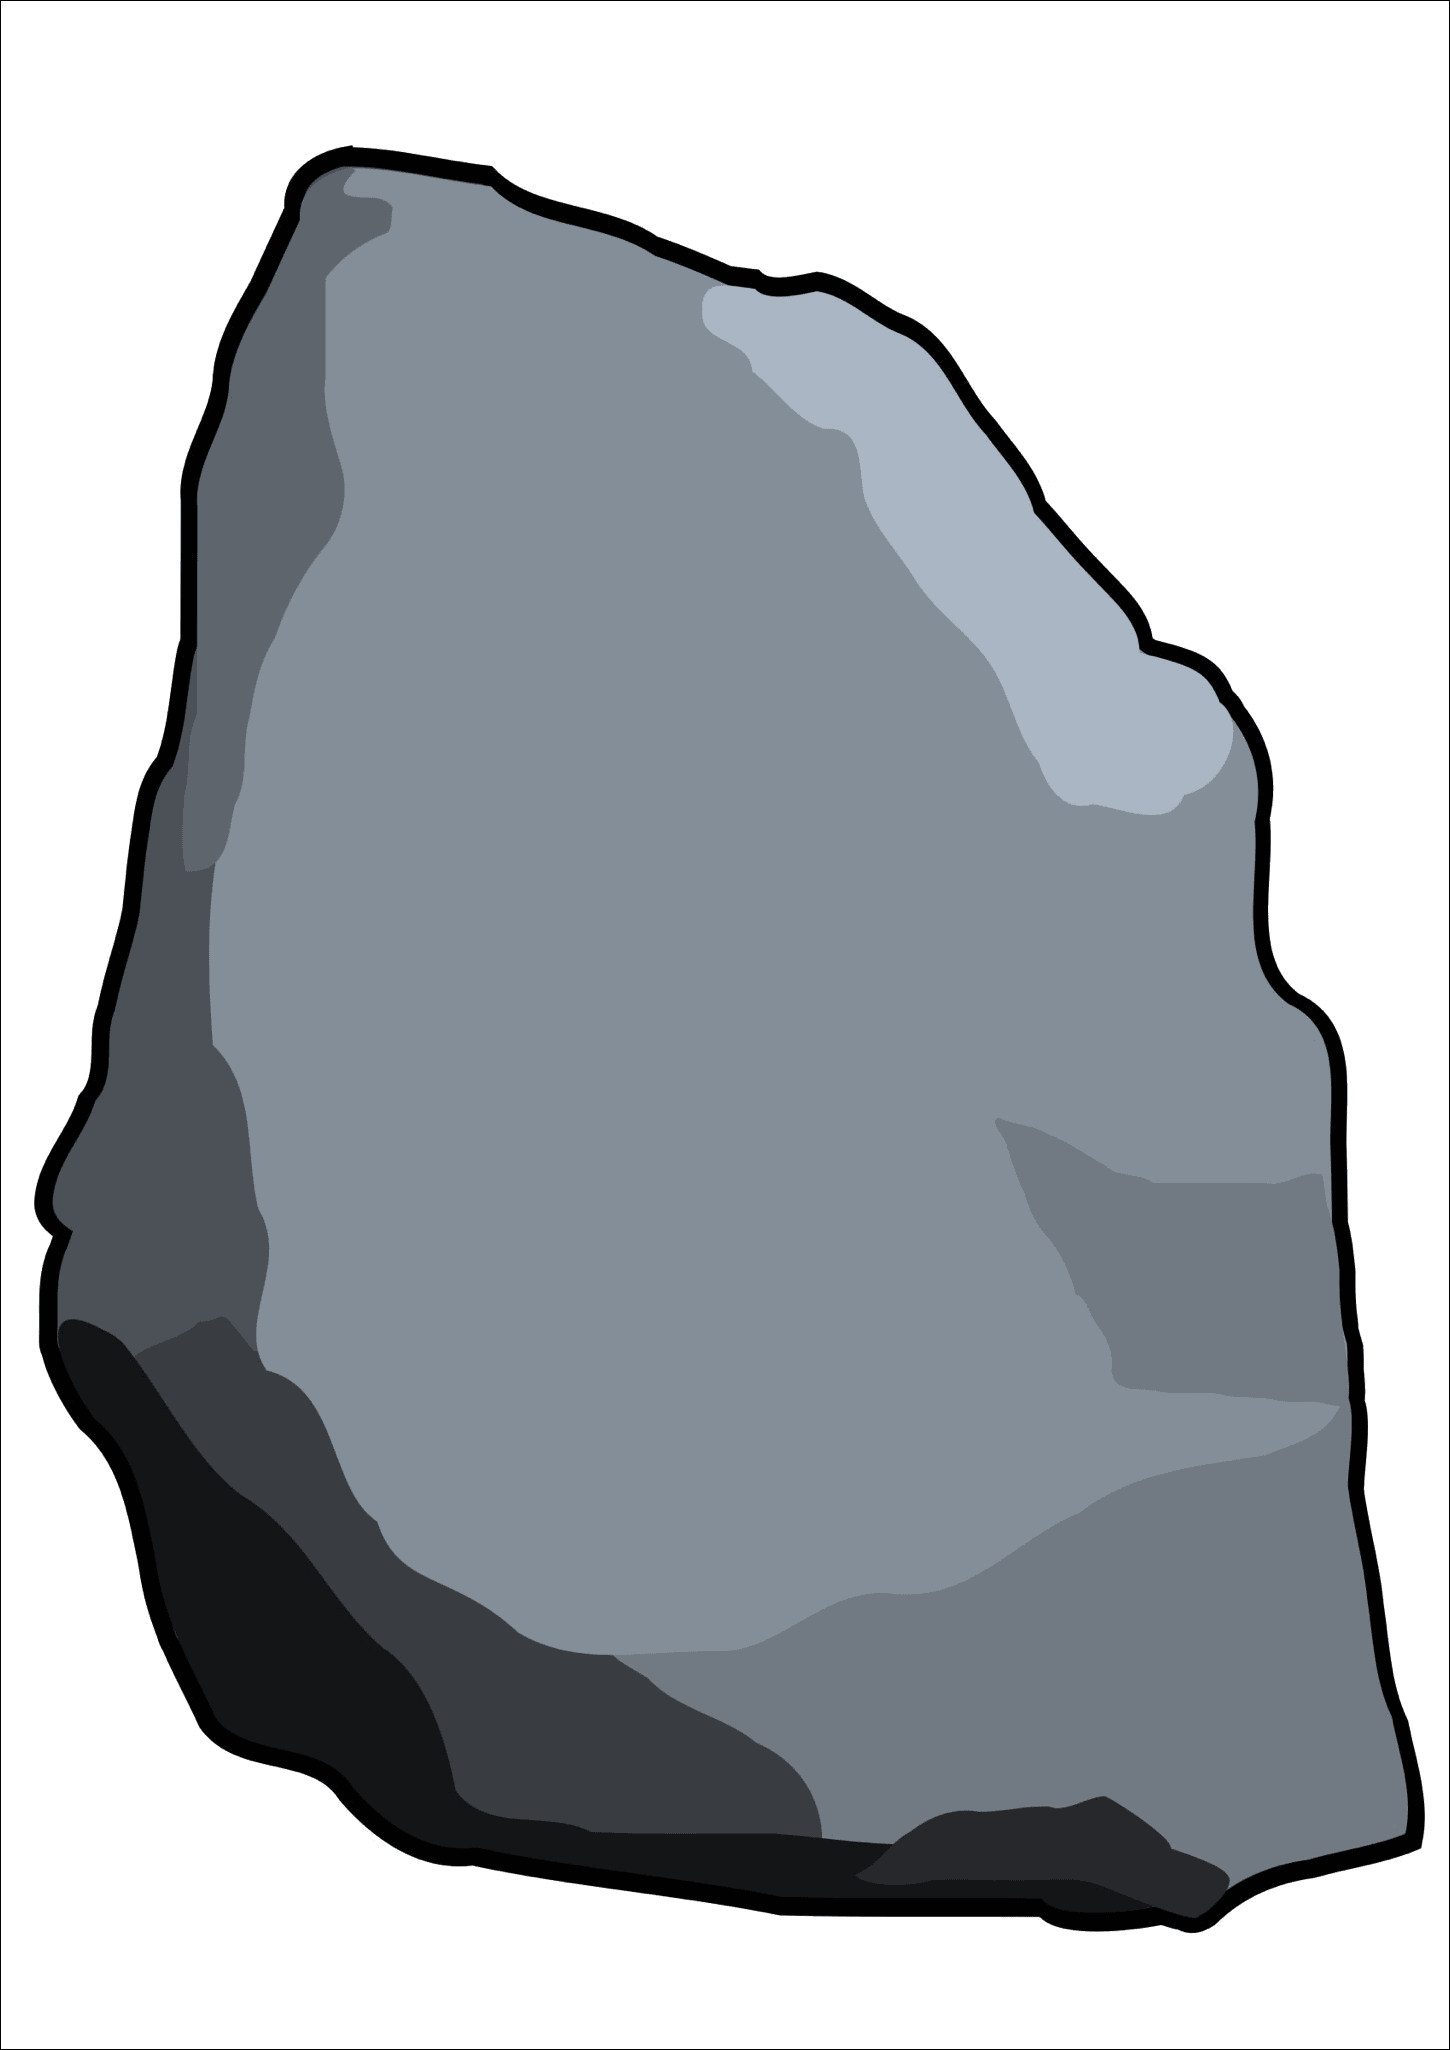
Understanding NFTs, how they work, their impact on the environment is all well and good, but the thing is, NFT is essentially an investment. Whether you’re buying digital artwork, space kitties, pet rocks, or virtually anything else, you’d be spending a lot of money.
So, can you expect your investment to increase or at the very least, stay the same? At this point, you should know that there is a risk with NFT just like any other investment. While many believe that NFTs are here to stay for good, others believe that they’re just a fad that could burn out at any moment.
They could be here to stay which seems like the most likely scenario currently, but the trend could also die as fast as it grew. So, you need to be careful.
How to Make an NFT
Now that you hopefully know what NFT is, it’s time to scratch that itch you’ve had all along: how to make and sell an NFT? Before you decide to create an NFT, it’s important to know that creating an NFT will cost you money.
Obviously, you’ve been seeing all the NFTs that have sold for millions or hundreds of thousands of dollars. But such occurrences are still super rare. Realistically, your NFT might not even sell. And even if it does sell, you might end up paying out of your pocket because of the minting, network, or transaction fees involved. On Ethereum, these fees are known as gas fees.
So, be ready to invest (and potentially bear loss) in your NFT. Also, there are various types of fees involved. First, you’ll need to spend money to create and list your NFT. Then, if you do make a successful sale, there are additional costs like the commission fee and transaction fee. So the whole ordeal can turn out to be costly.
Be ready to spend somewhere around $120 (could be less or more) to create your NFT. And this is just the cost for minting. Once the NFT actually sells, there are more prices associated.
There are many options available at each step of the way when it comes to creating and listing your NFT. We’ll discuss these as we move forward. Here are the steps involved in making your NFT.
Select the File you want to make into an NFT
It’s the basic starting step while making any NFT and chances are you might already have it. Still, here’s a reminder of what to select when making an NFT. It could be a digital drawing, photo, video clip, music file, a video game item (if you’re a developer), meme, any collectible item like those famous pet rocks, a GIF, even a tweet (it should be viral or famous though, to garner people’s interest). You get to decide whether you want to keep it just one-of-a-kind or a super rare collectible with a few items available.
Whatever you choose, just make sure you own the copyright for the item. Trying to turn something you don’t have the intellectual property rights for will land you in legal trouble.
Choose a Blockchain Technology
Once you’ve made up your mind about minting an NFT, you’ll need to determine which blockchain technology you want to use for your NFT. Ethereum, the first platform to introduce a standard for NFTs, is the most popular choice among most NFT creators and the one we’ll be using for this guide.
But the transaction prices (called gas fees) for using the ERC721 standard on Ethereum for minting NFTs can range anywhere between $80 – $120. It can go even higher as gas fees are always fluctuating due to high network usage. Other blockchain options for minting NFTs include options like Tezos, Cosmos, Polkadot, Flow, Binance Smart Chain, etc. You can use other blockchains like Polygon to mint and sell NFTs for free.
Select a Digital Wallet
Now that you’ve really begun your journey in the NFT space, you’ll need some cryptocurrency to fund the minting of your NFT. And a digital wallet to keep that crypto. There are a lot of wallets to choose from to keep your currency safe. The wallet is also crucial as it allows you to create accounts on and sign in to NFT marketplaces. If you already own cryptocurrency, you still need to set up a wallet and then you can transfer your tokens to the wallet to trade on NFT marketplaces.
Most NFT marketplaces accept ETH, the native cryptocurrency of the blockchain platform Ethereum. For this guide, we’ll use a wallet that uses Ethereum as well. There are many wallets to choose from but here are a few popular choices to explore.
Rainbow Wallet: This might be a relatively new wallet but it’s a great choice for NFTs as it was built with Ethereum assets in mind. This does mean that you can’t store your Bitcoin here. It has an Android and iOS app and buying Ethereum is very easy. You can buy crypto right inside the wallet.
Coinbase Wallet: This wallet from one of the largest cryptocurrency exchanges is another great option for beginners. It is extremely easy to use the Coinbase wallet to buy crypto. But when you use a Coinbase wallet, you’ll have to buy the currency on a separate exchange and transfer it to your wallet.
MetaMask Wallet: MetaMask connects with most NFT marketplaces easily. It also has a browser extension as well as iOS and Android apps making it extremely easy to use on any device. This is the wallet we’ll use for the purpose of this guide.
These are just a few options and there are many more wallets available for you to choose from.
Setting up the MetaMask Wallet
If you want to use the MetaMask wallet, you can follow the steps in this guide to create one.
On your browser, go to metamask.io and click the ‘Download’ button.
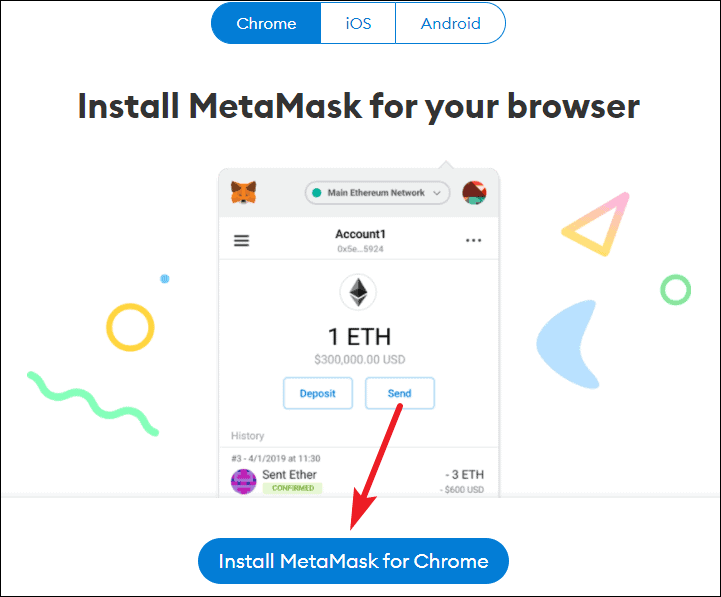
MetaMask has extensions for most major browsers like Chrome, Edge, Firefox, and Brave. For Chrome or Edge, click the ‘Install MetaMask for Chrome’ button.
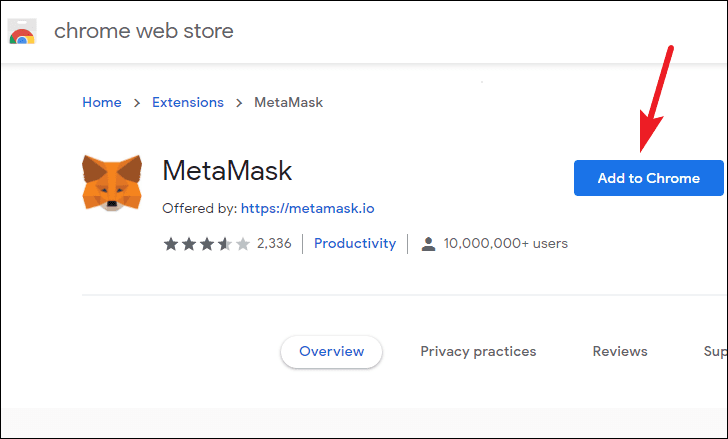
The listing for the MetaMask wallet in the Chrome web store will open. Click the ‘Add to Chrome’ button.
A confirmation prompt will appear on the screen. Click the ‘Add extension’ icon to install the extension and add it to your browser.

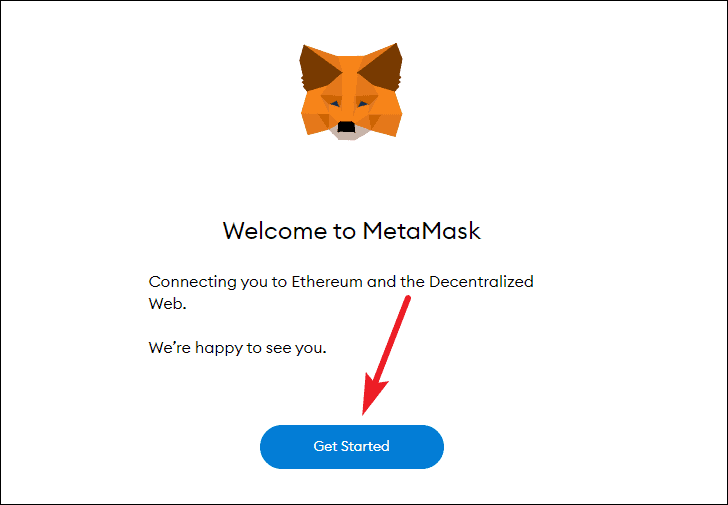
Once the extension installs, the extended view for it will open on its own in a separate tab.
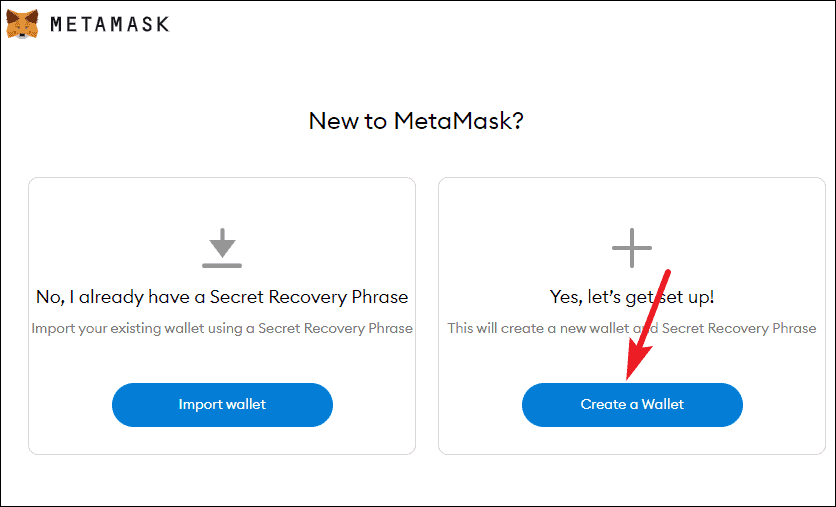
To create the wallet, click the ‘Get Started’ button.
Then, click the option for ‘Create a wallet’.
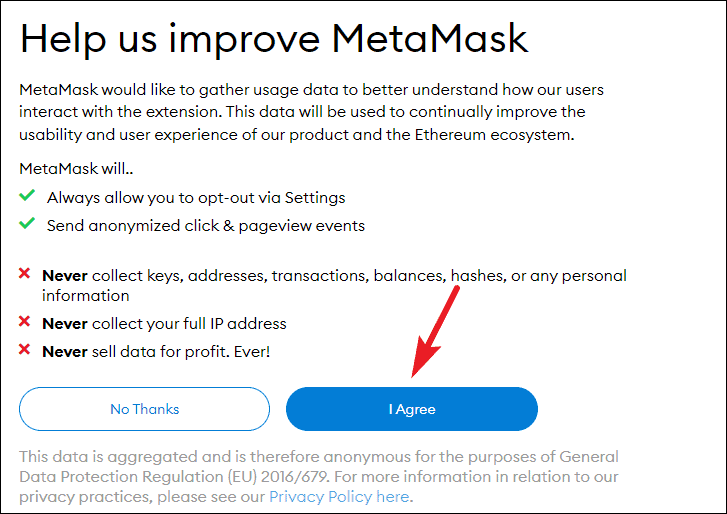
A set of privacy policies will appear. Click ‘I agree’ or ‘No thanks’ to move forward.
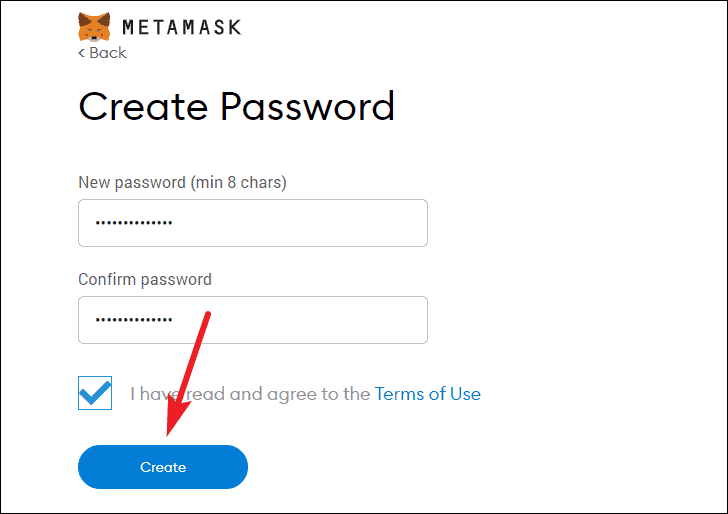
Then, create a password for your account, preferably a very strong one, check the option for terms of use, and click the ‘Create’ button.
MetaMask will give you a 12-word secret backup phrase.
Note down your backup phrase and keep it somewhere safe. Don’t share this phrase with anyone under any circumstance and never lost it in any instance. If you ever forget your password and need to get into your wallet, this backup phrase is the only thing that can do it. Not even the MetaMask team can help you if you don’t have the phrase; you’ll end up losing all the tokens in your wallet. Anyone else with access to your phrase can also access your wallet and transfer all your tokens.
Complete the instructions on your screen related to the backup phrase and your wallet will be created.
You can also use the Android or iOS app to set up the MetaMask wallet.
Once you’ve set up your wallet, you’ll need to add funds to it. You can add around $120 to your wallet for minting your NFT. You can skip this right now and add funds later on as and when required. Most marketplaces also let you add funds while minting the NFT so you don’t have to start the whole process again if you do choose to defer.
Select the NFT Marketplace
The words NFT marketplace have popped throughout this guide, but we haven’t really explained what it is. An NFT marketplace is the place that allows you to buy or sell your NFTs.
While selecting your NFT marketplace, there are a few things to keep in mind. First, the marketplace should be suitable for the type of art or NFT you want to sell. Second, it should be compatible with the type of token you intend to use. It should also be secure; before choosing a marketplace, research that there have been no security-related incidents in the past. There are plenty of NFT marketplaces in existence. The ones listed below are among the top NFT marketplaces.
Some marketplaces are exclusive and only admit creators or artists after an application process. This includes marketplaces like Nifty Gateway (choice of marketplace for Grimes, Beeple, and Paris Hilton) and SuperRare. Both SuperRare and Nifty Gateway are highly curated marketplaces that only let you sell digital art. So, it’s not for creators wanting to sell memes or other stuff.
Another example involves the NBA Top Shot that’s exclusively used to sell and buy collectibles from NBA and Women’s NBA. Similarly, Axie Marketplace is a space for the game Axie Infinity which itself is NFT-based.
A few open markets include OpenSea, Rarible, and Zora where anyone can sell without an invitation or application. You can also sell any type of content, but that also means that the marketplace is flooding with a lot of NFTs and you will have to put in extra efforts to market your NFT. Before choosing any marketplace, make sure that it’s the right fit for you.
Once you’ve chosen your NFT marketplace, you’ll have to connect your digital wallet to it. Then, you can create and list your NFT on the marketplace.
For this guide, we’ll show you how to mint an NFT on Rarible. Rarible also has a new option that lets you mint NFTs for free (or, rather puts off minting for later). So, if you’re just beginning in the NFT world, this can be a good choice for you.
Connect Rarible with your Wallet
Now, the first step in using Rarible to mint your NFT is connecting it to your digital wallet. Any transaction on Rarible from your wallet needs your permission so you can rest assured that your funds are safe until you want to use them.
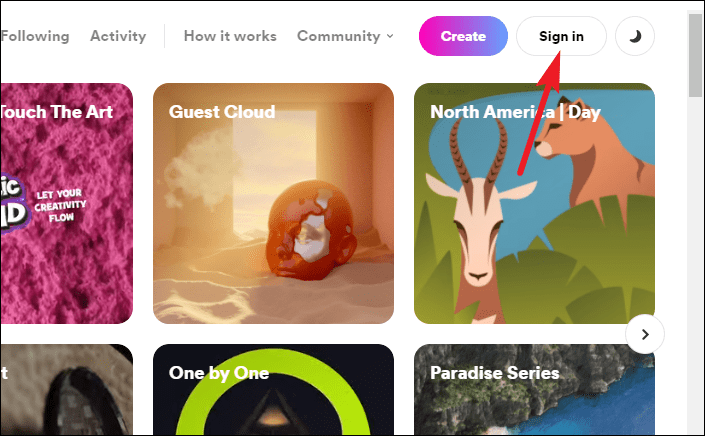
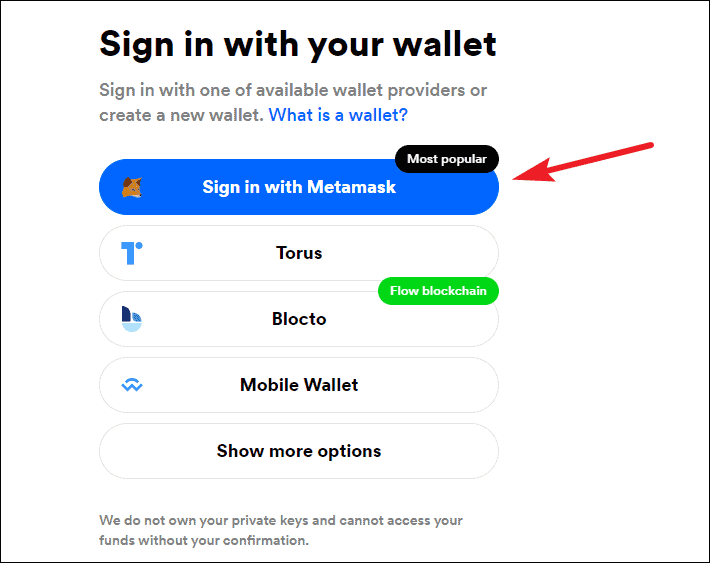
Go to rarible.com and click the ‘Sign in’ button in the top-right corner.
Then, click the ‘Sign in with MetaMask’ option. If you used any other wallet, click the corresponding option to connect your wallet to Rarible. If you can’t see the option, try closing your browser and opening Rarible again.
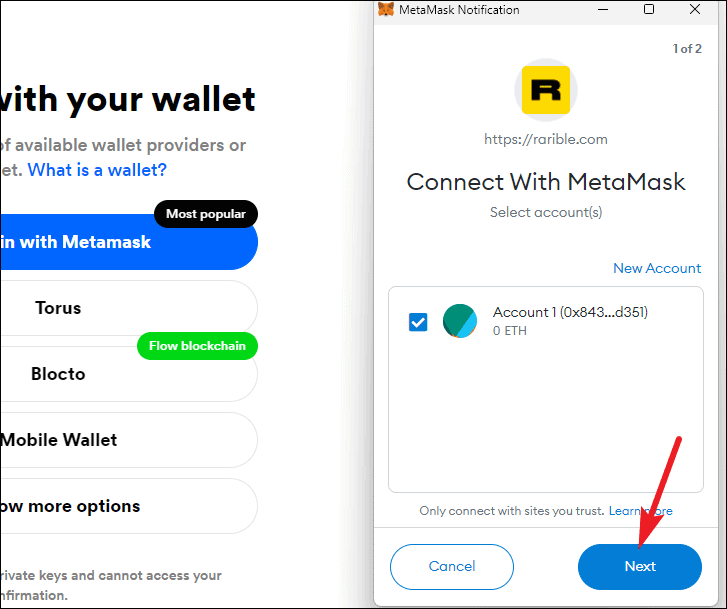
On the right side of your screen, a small window for MetaMask will open. Make sure that the checkbox next to your account is selected. Although this must be automatic, check the option yourself if it isn’t. Then, click ‘Next’.
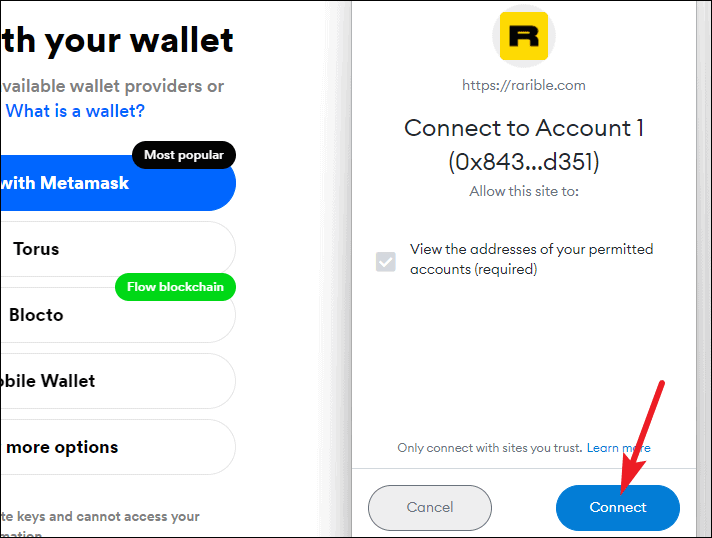
A permission request from Rarible will open. Click ‘Connect’ to proceed.
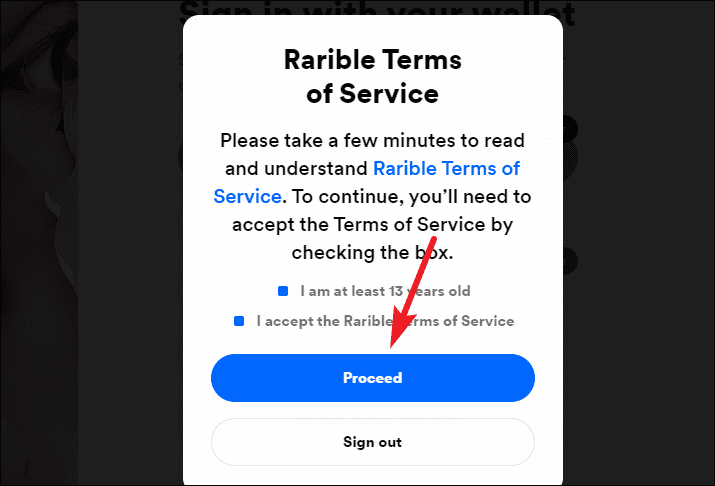
Rarible terms of service will appear. Check both the checkboxes and click the option for ‘Proceed’. Your wallet will be connected to Rarible.
Create an NFT on Rarible
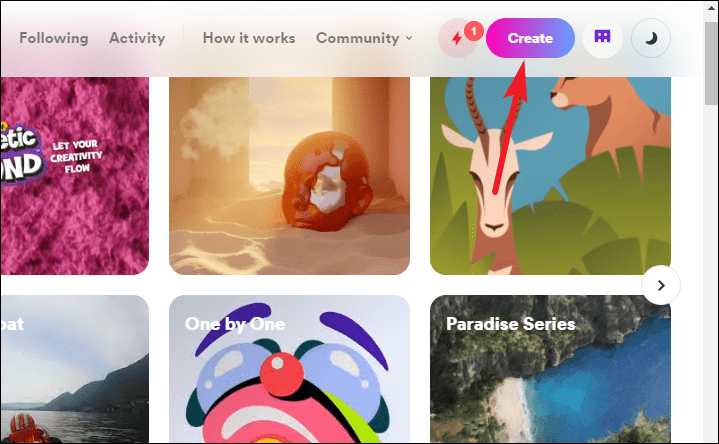
Click the ‘Create’ button in the top-right corner of the screen.
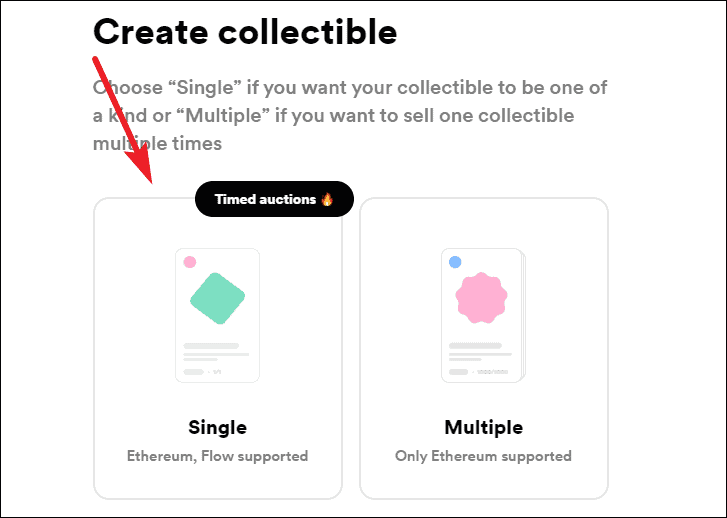
Now, depending on whether you want to create a one-of-a-kind item or multiple types of one item, click ‘Single’ or ‘Multiple’ respectively. Here, we’ll be creating a single NFT.
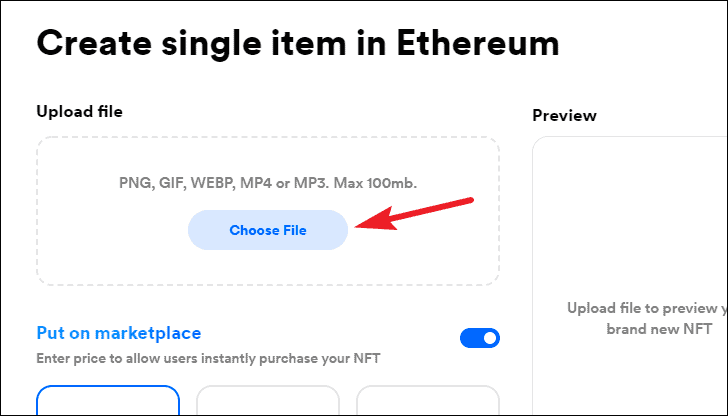
Then, upload the digital file for your NFT. The file could be in the format PNG, GIF, WEBP, MP4, or MP3 with a max. file size 100 MB. Click ‘Choose File’ to upload your file.
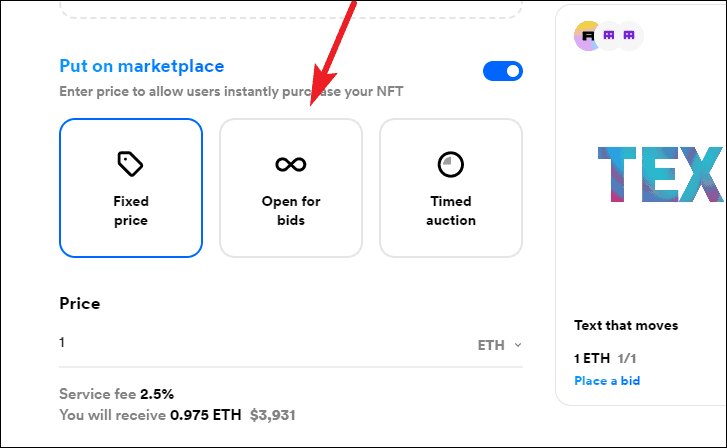
Then, in the next part, you’ll have to determine how to sell your NFT. There are three options available:
- Fixed Price: The fixed price option allows you to list your NFT for a price you’re demanding. The first person who pays that price gets your NFT. Rarible will charge a 2.5% service fee.
- Open for Bids: This will start an unlimited auction that’ll allow people to amke bids until you decide to accept one.
- Timed Auction: This will set up the auction for a limited time period during which people can put their bids. You select the currency, minimum bid and the starting and ending dates for the timed auction.
Select how you want to monetize the NFT. Whether you select timed auction or fixed price for your NFT, keep in mind to not list your NFT for too low or you could end up losing money instead of making any profits.
Then, the next option is ‘Unlock once purchased’. If you enable this option, you can use it to provide high-resolution images of the artwork or bonus content with your NFT. This content is only unlocked after someone buys the NFT and only for the buyer.
In collections, by default, the option is set to ‘Rarible Singles’. We will leave it to that. You can create your own collection but that’s more technical jargon to get into. For beginners, Rarible Singles is fine.
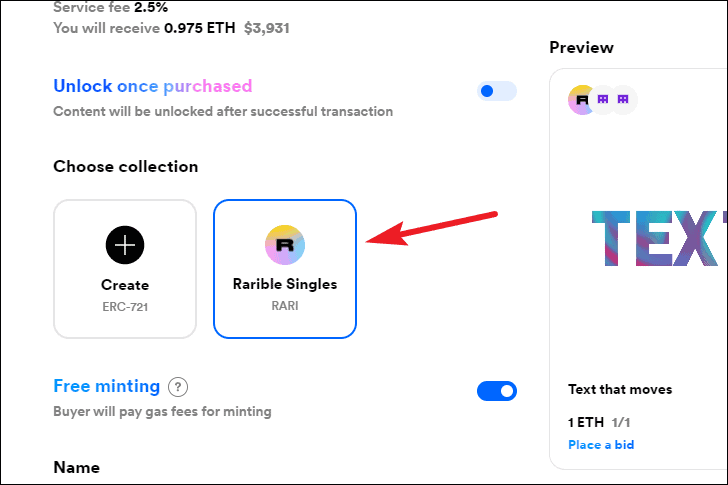
Rarible has a new option for ‘Free minting’ now or what’s also known as lazy minting. If you use this option, you won’t have to pay any gas fees for minting your NFT as the NFT isn’t minted right away. It’s stored and is minted later when someone buys the NFT. In this case, the buyer pas the gas fees.
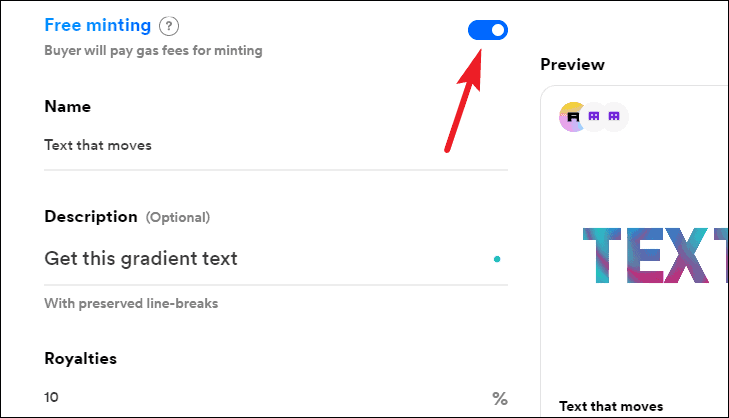
Rarible also says that using the free minting option is more sustainable as it prevents unnecessary minting transactions for NFTs that are never purchased. Although, be aware that unless someone really wants your art, lazy minting might also put off potential buyers as they might not want to pay the extra gas fees. It’s a gamble that you get to choose. You can also burn your lazy NFT later and turn it into a regular NFT where you pay the gas fees.
If you’re using free minting, your NFT is listed on the marketplace like any other NFT, but it’s instead stored on IPFS (decentralized storage). Also, even though you don’t need to pay the gas fees, you still have to sign the “minting authorizations” from your wallet. Once the buyer pays the gas fees, the NFT is first minted in your wallet and then transferred to the new owner automatically.
Free minting is currently only available for ‘Rarible’ collections.
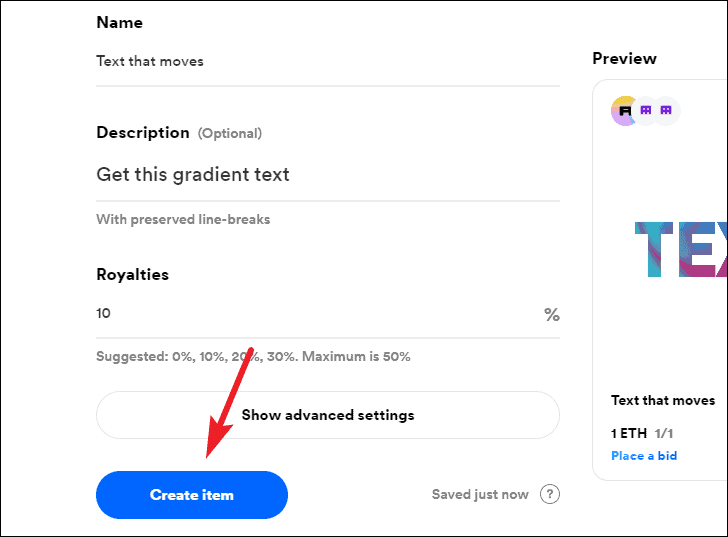
Then, enter a name and description for your NFT. Then, the final option is for Royalties. You can choose anywhere from 0 to 50% royalty for resales of your artwork. Choose a percentage you feel is fair; don’t go too high either lest the buyer gets discouraged from re-selling your NFT at all. Finally, click the ‘Create Item’ option.
The minting process will start. First, the digital files will upload. Then, if you’re not using the free minting option, you’ll have to pay the gas fees. While the minting step is in progress, MetaMask window will pop up on the right asking you to confirm the transaction.

When we tried to mint the NFT, the gas fees we were asked to pay were $136.55. The next time it dropped to $132.10. That’s more than we estimated. But since gas fees fluctuate with demand, there’s no telling whether these gas fees will increase or decrease in the future.
Furthermore, the gas fees are the expenses you pay for minting the NFT. To sell the NFT, there are further expenses involved like the service fee you pay the platform. There’s even a price to pay to accept the bid for sale. You can use the NFT Gas Station tool to get some idea of what it might cost you to mint and sell the NFT.
Click ‘Confirm’ in your MetaMask wallet to pay the gas fees. If you’re minting the NFT for free, this step is skipped.
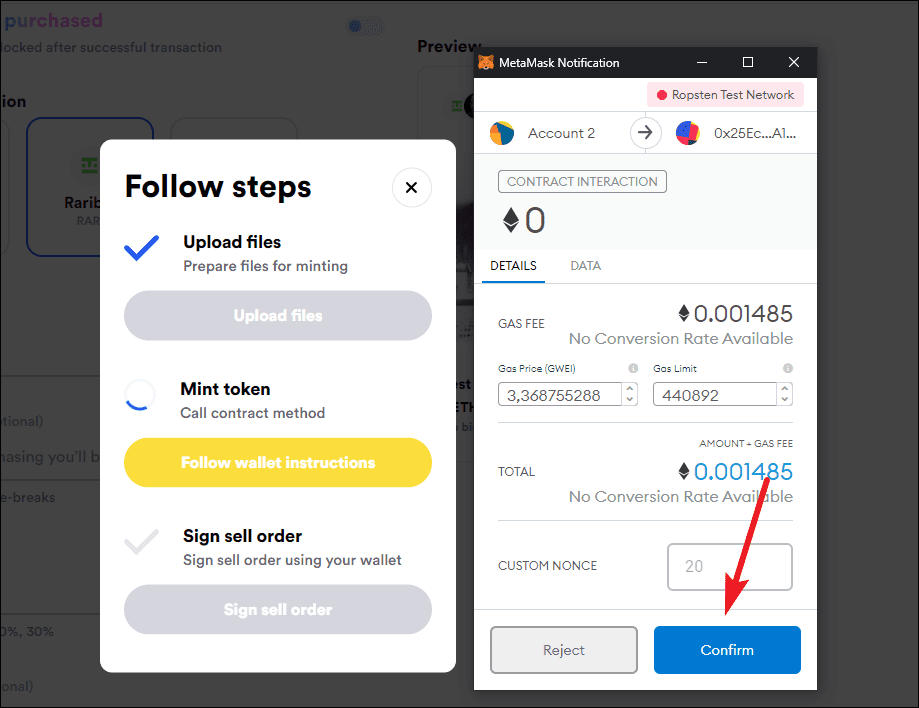
Finally, sign the sell order in your wallet to confirm you want to list the NFT for sale.
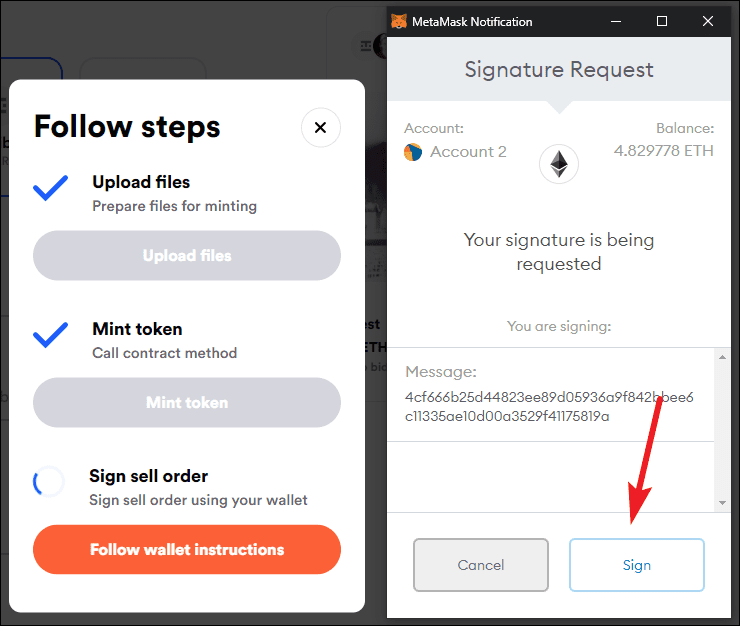
Once you sign the order, the NFT will appear on the marketplace within seconds.
Hopefully, this guide has been helpful in explaining what an NFT is and how you can go about creating one. May your NFT sell for huge amounts if you do decide to create one!