
Microsoft Teams is built into Windows 11, appearing on your taskbar by default and running in the background. While it’s a handy tool for collaboration, not everyone uses it, especially if you prefer alternatives like Zoom, Slack, or Skype. If you’re looking to disable or remove Microsoft Teams from your Windows 11 computer, this guide will walk you through several methods, from uninstalling the app completely to simply hiding its icons.
Uninstall Microsoft Teams in Windows 11
If you no longer need Microsoft Teams and want to remove it entirely from your system, you can uninstall it using one of the methods below.
Uninstall Microsoft Teams using Settings
Follow these steps to uninstall Microsoft Teams through the Settings app:
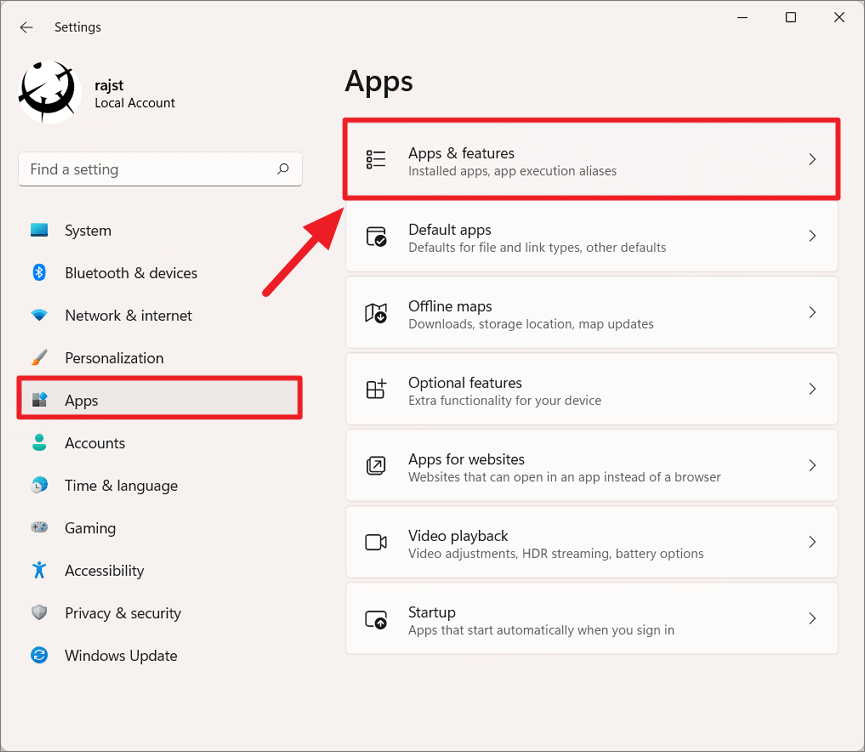
- Press
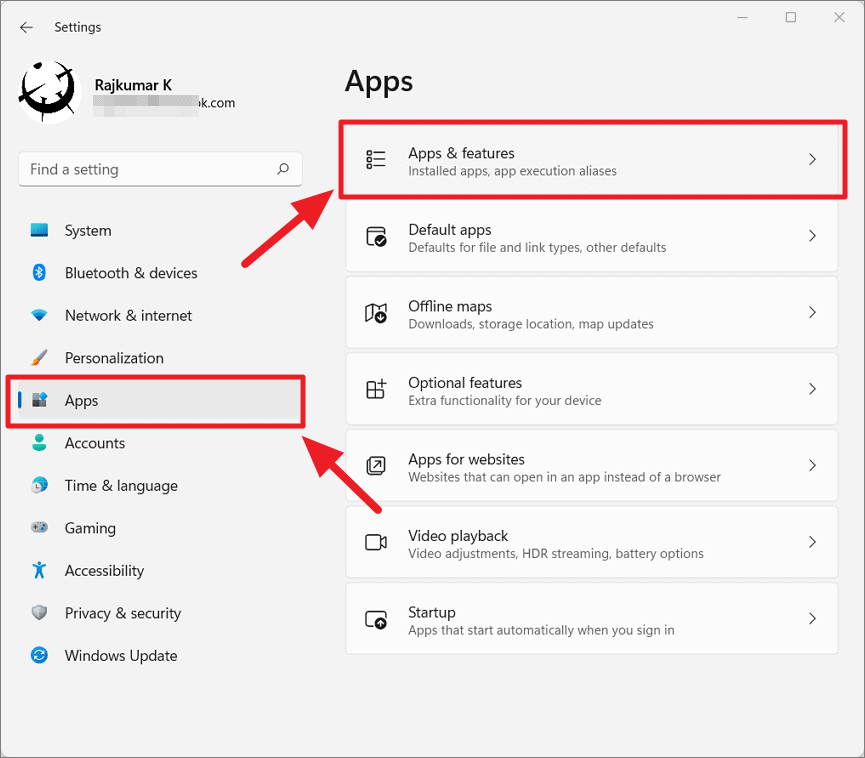
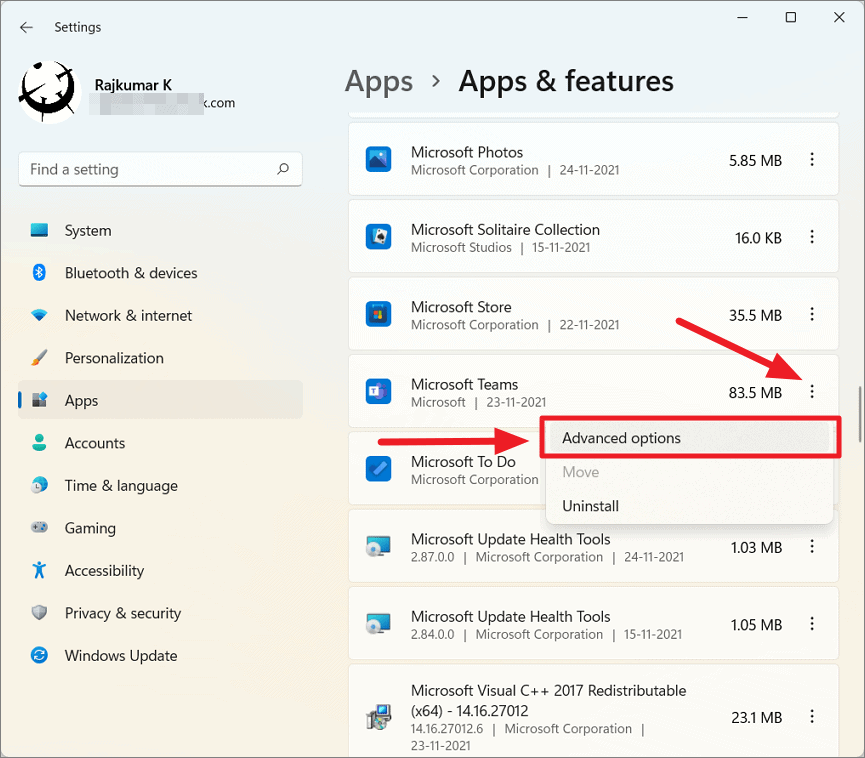
Windows+Ito open the Settings app. - In the Settings window, select Apps from the left sidebar, then click on Apps & features on the right.
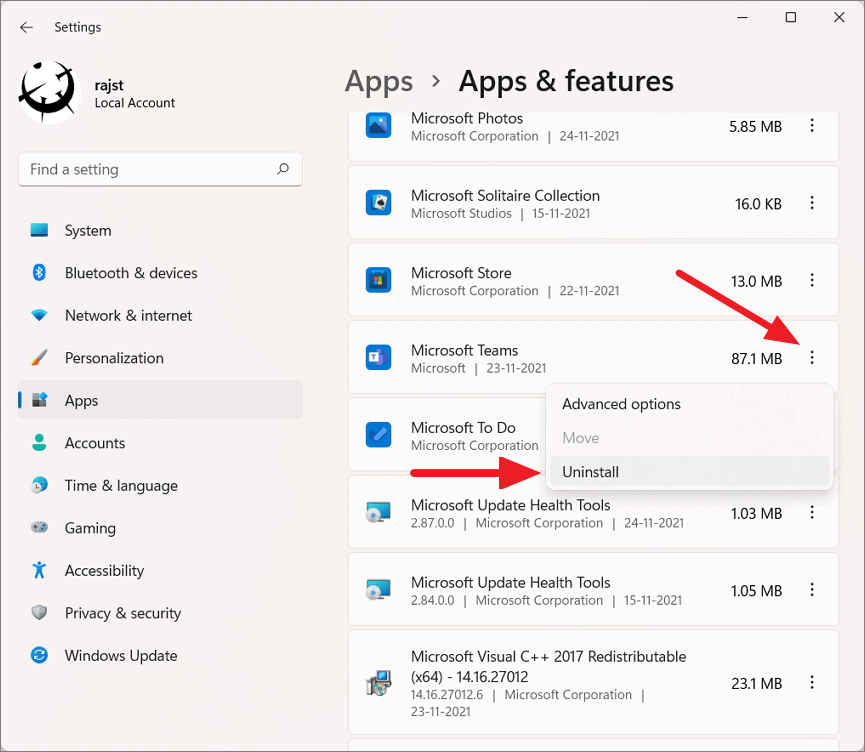
- Scroll through the list of apps to find Microsoft Teams. If you can’t find it, use the search bar at the top to search for “Microsoft Teams”.
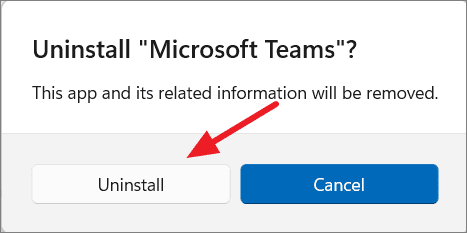
- Click the three-dot menu icon next to Microsoft Teams and select Uninstall.
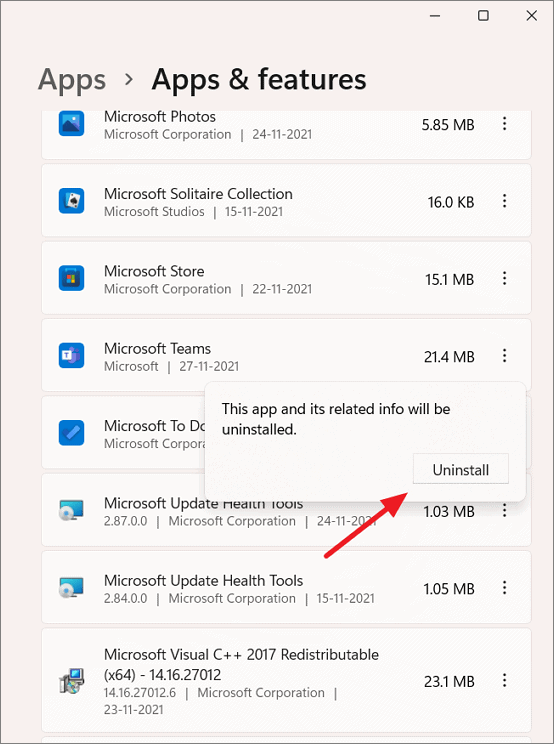
- Confirm the uninstallation by clicking Uninstall in the pop-up window.
After completing these steps, Microsoft Teams will be removed from your computer.
Uninstall Microsoft Teams from the Start Menu
You can also uninstall Microsoft Teams directly from the Start menu:
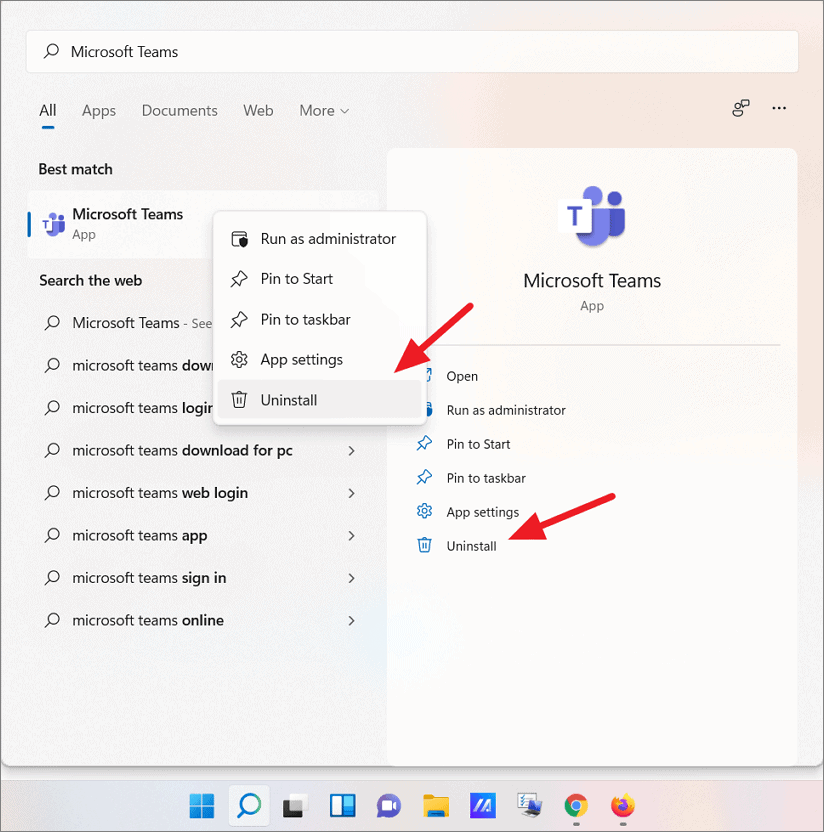
- Click the Start button on the taskbar and type “Microsoft Teams” in the search bar.
- In the search results, right-click on Microsoft Teams and select Uninstall, or click the Uninstall option on the right pane.
- In the confirmation dialog, click Uninstall to remove the application.
Uninstall Microsoft Teams using PowerShell
For advanced users, you can uninstall Microsoft Teams using Windows PowerShell:
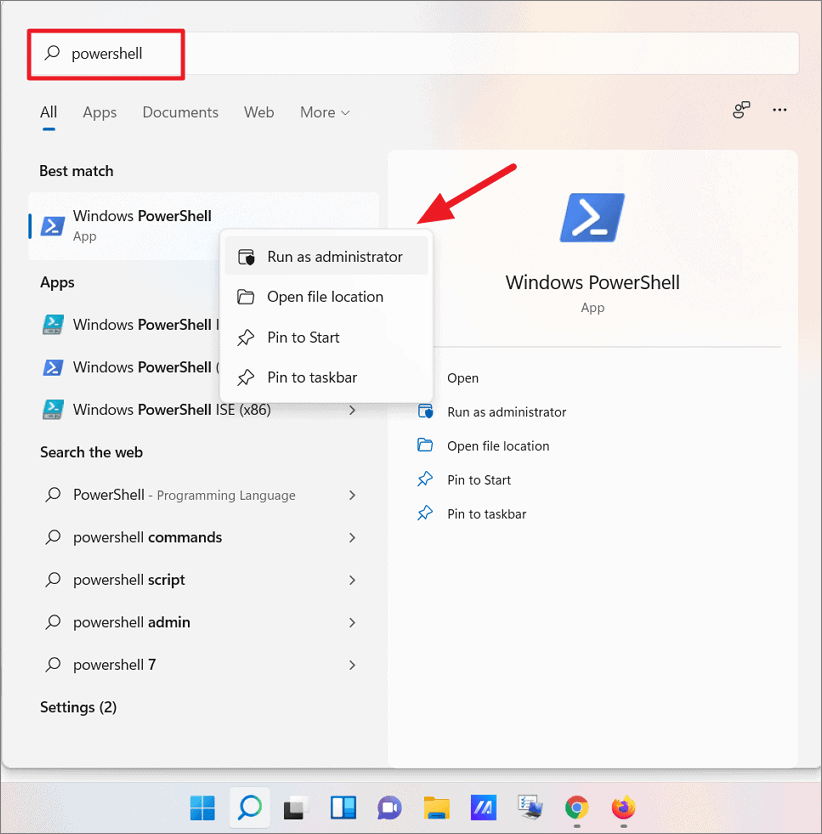
- Type “PowerShell” in the Windows search bar.
- Right-click on Windows PowerShell in the search results and select Run as administrator. Click Yes if prompted by the User Account Control.
In the PowerShell window, type or paste the following command and press Enter:
Get-AppxPackage MicrosoftTeams* | Remove-AppxPackage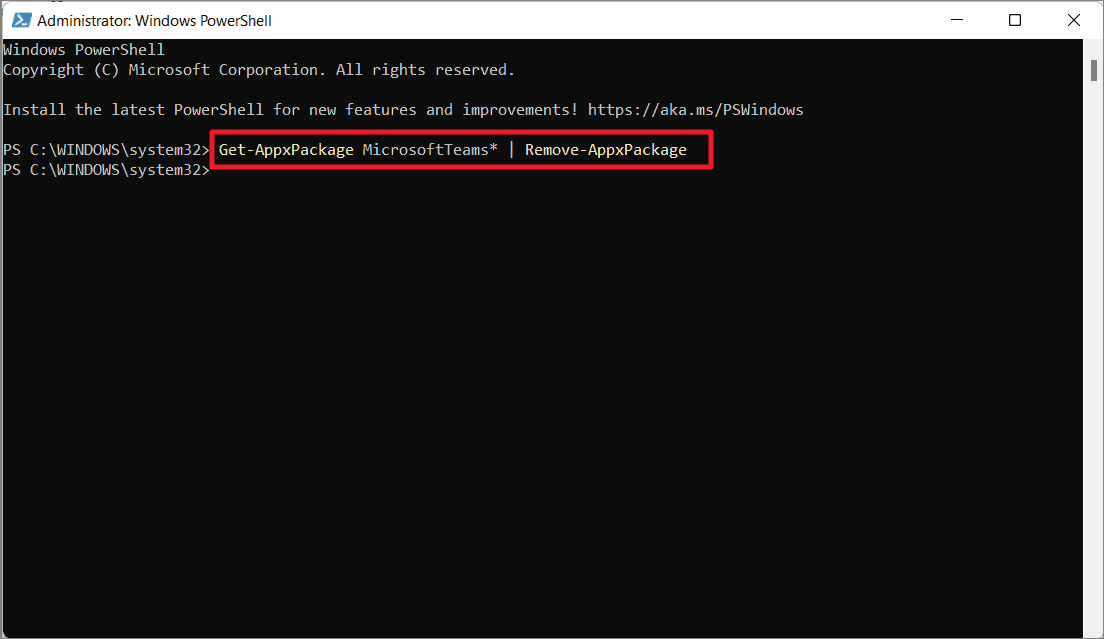
This command will completely remove Microsoft Teams from your system.
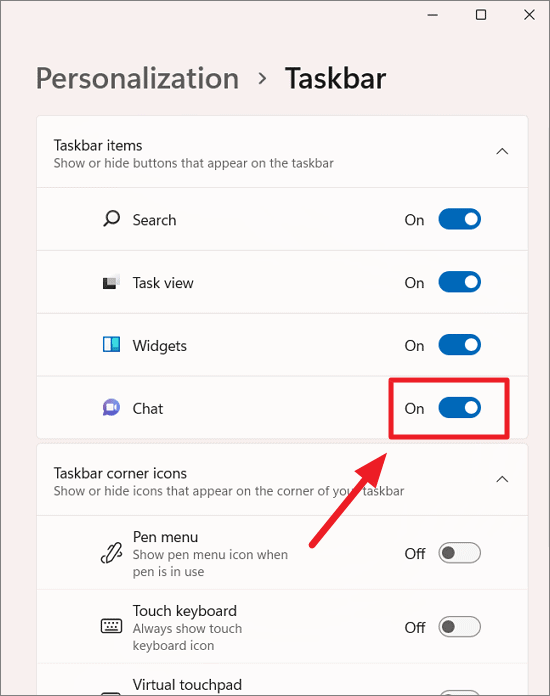
Hide the Microsoft Teams Chat Icon from Taskbar
If you prefer to keep Microsoft Teams installed but want to declutter your taskbar, you can hide the Teams Chat icon:
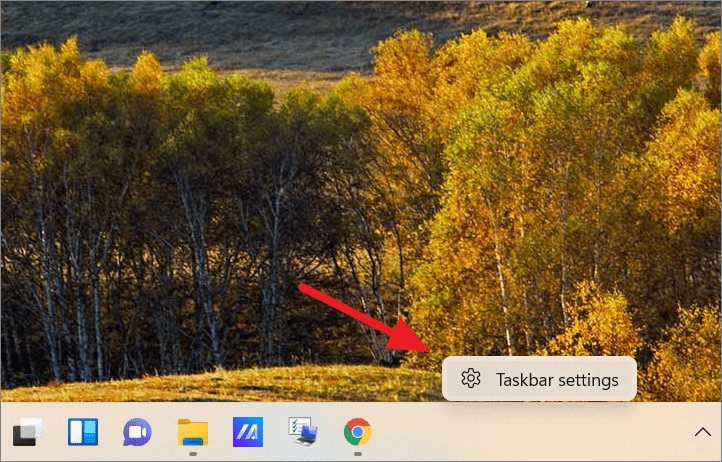
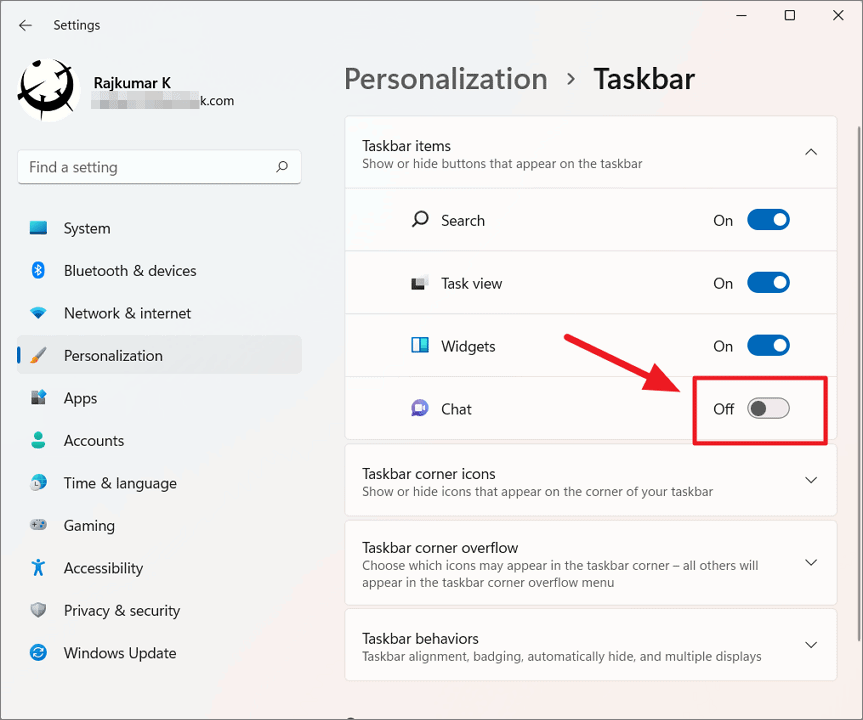
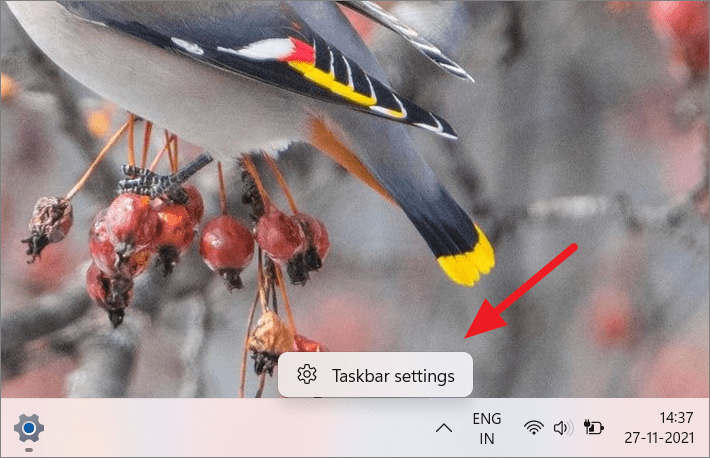
- Right-click on an empty area of the taskbar and select Taskbar settings.
- In the Taskbar settings window, turn off the toggle next to Chat under Taskbar items.
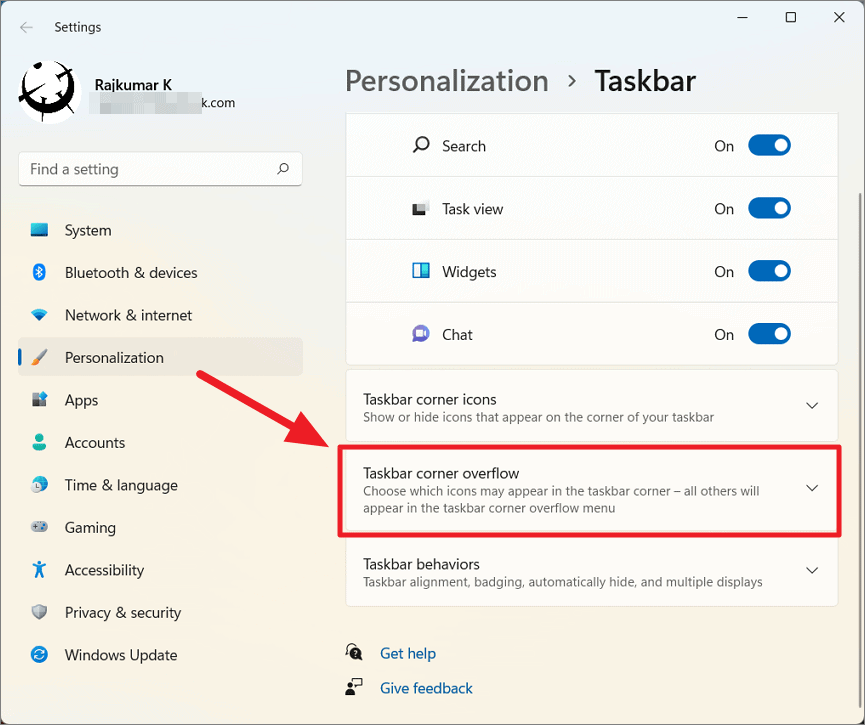
To remove the Teams icon from the taskbar corner near the system tray:
- In the Taskbar settings, expand the Taskbar corner overflow section.
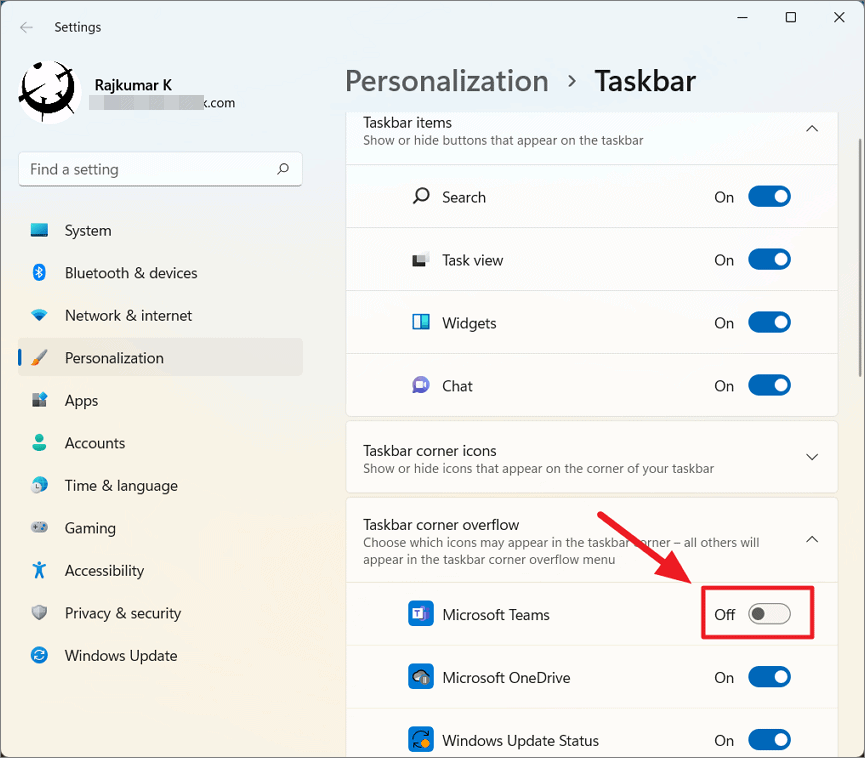
- Turn off the toggle next to Microsoft Teams to hide its icon from the taskbar corner.
Stop Microsoft Teams from Running in the Background
Even if you’re not using Microsoft Teams, it might still run in the background, consuming system resources. To prevent this:
- Open the Settings app by pressing
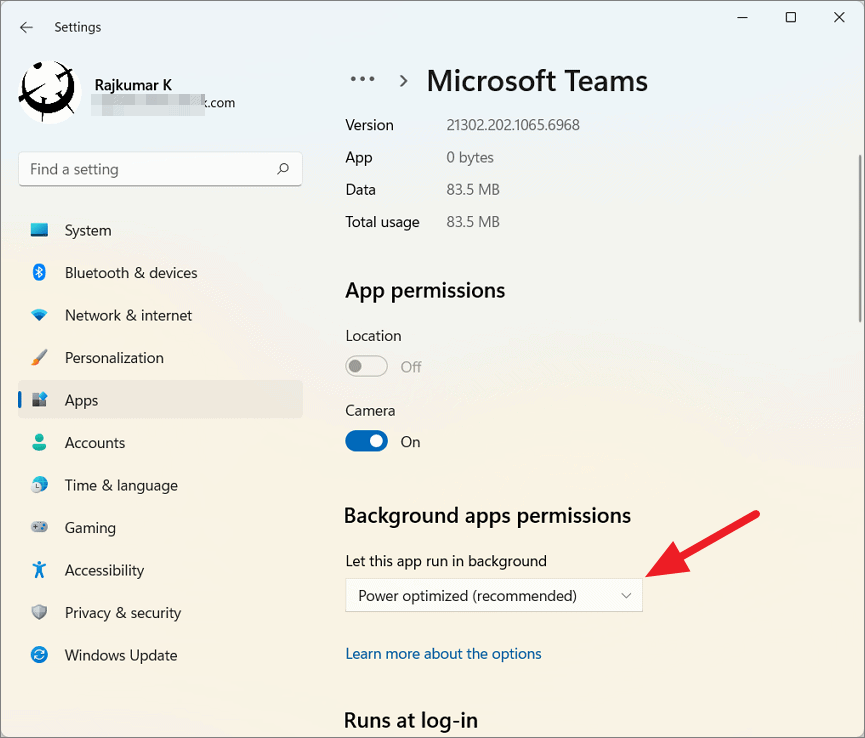
Windows+I. - Select Apps from the left sidebar, then click on Apps & features on the right.
- Find Microsoft Teams in the list of apps.
- Click the three-dot menu icon next to it and select Advanced options.
- Under the Background apps permissions section, find the dropdown menu for Let this app run in background.
- Select Never from the dropdown menu to prevent Teams from running in the background.
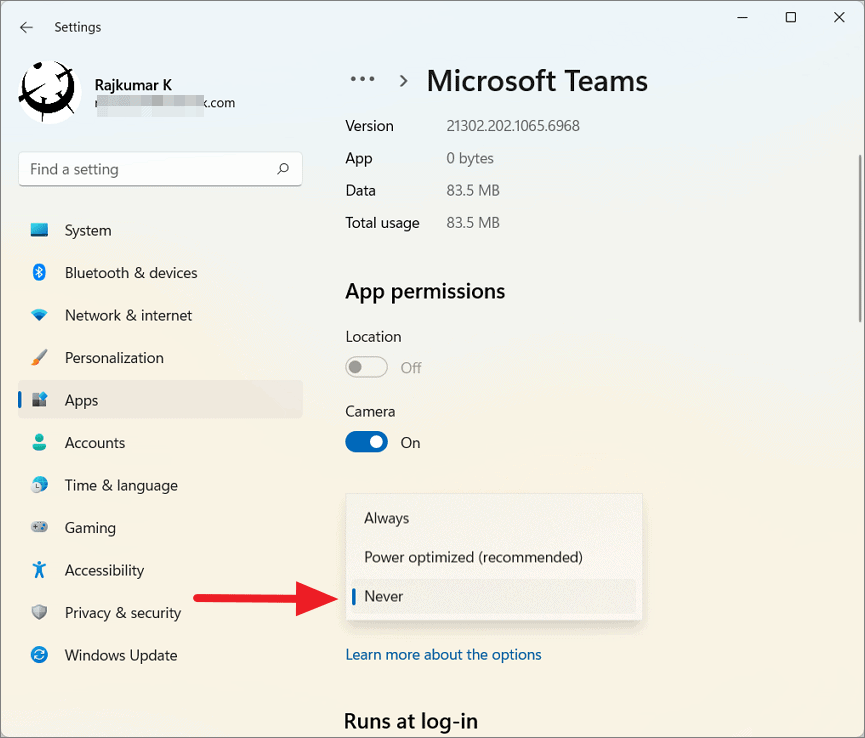
This will stop Microsoft Teams from consuming resources when you’re not using it.
Disable Microsoft Teams Without Uninstalling It in Windows 11
If you’d like to keep Microsoft Teams installed but prevent it from starting automatically or running when not needed, you can disable it without uninstalling.
Stop Microsoft Teams for the Current Session
To close Microsoft Teams temporarily:
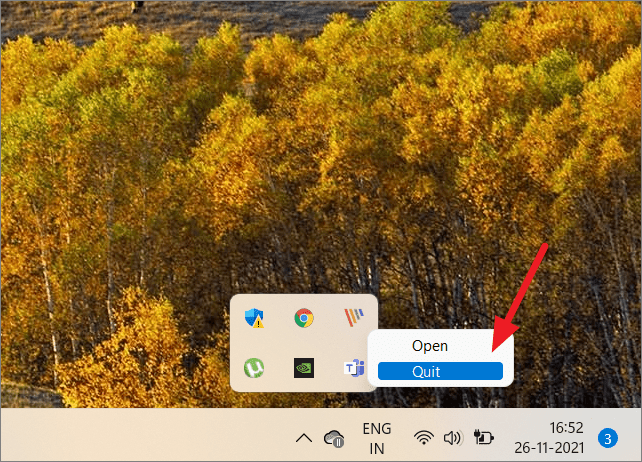
- Locate the Microsoft Teams icon in the taskbar corner or the hidden icons (click the up arrow).
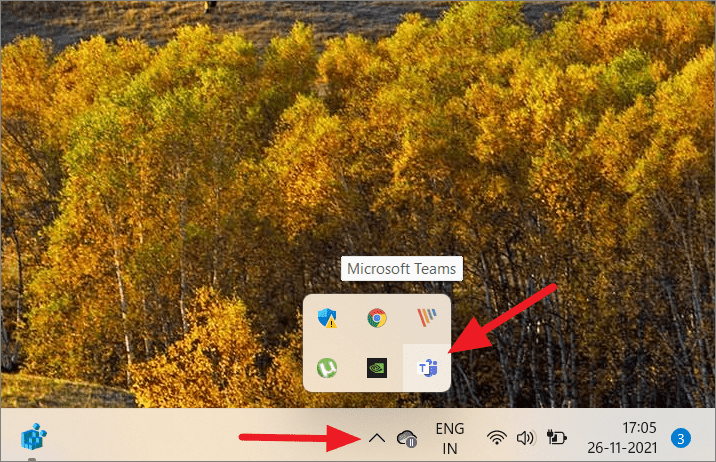
- Right-click the Teams icon and select Quit to close the app for the current session.
Prevent Microsoft Teams from Starting Automatically from Team Settings
To stop Microsoft Teams from launching on startup through its own settings:
- Open the Microsoft Teams app. You can search for it in the Start menu or click its icon in the taskbar corner.
- Click on the Settings and more button (three-dot menu) in the Title Bar, then select Settings.
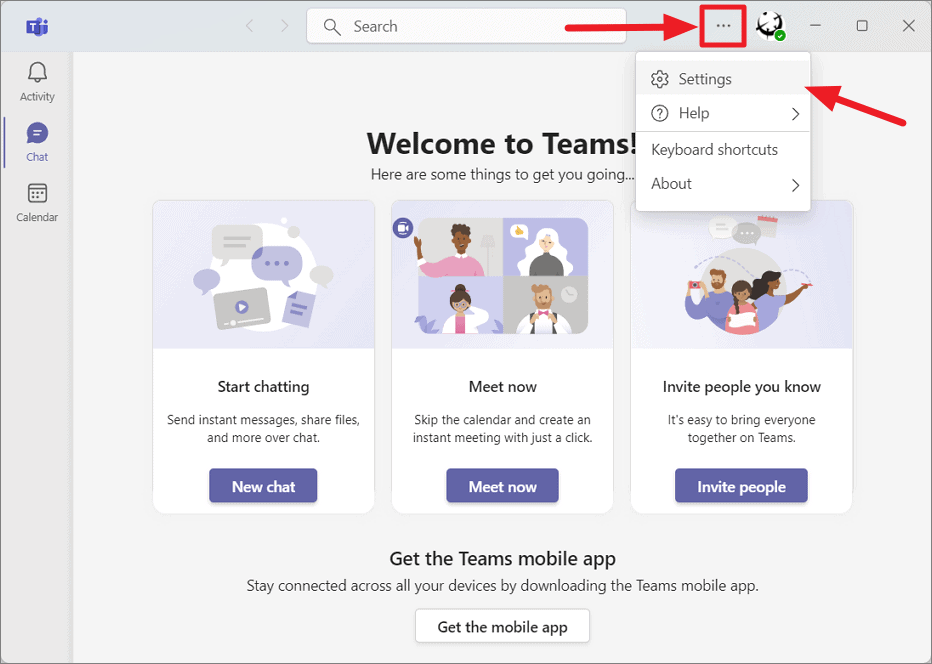
- In the Settings menu, ensure you’re on the General tab.
- Under the System section, uncheck the box next to Auto-start Teams.

Now, Teams will not start automatically when you turn on your computer.
Disable Microsoft Teams from Startup using Settings
Another way to prevent Teams from starting automatically is by disabling it in the Startup apps:
- Open the Settings app by pressing
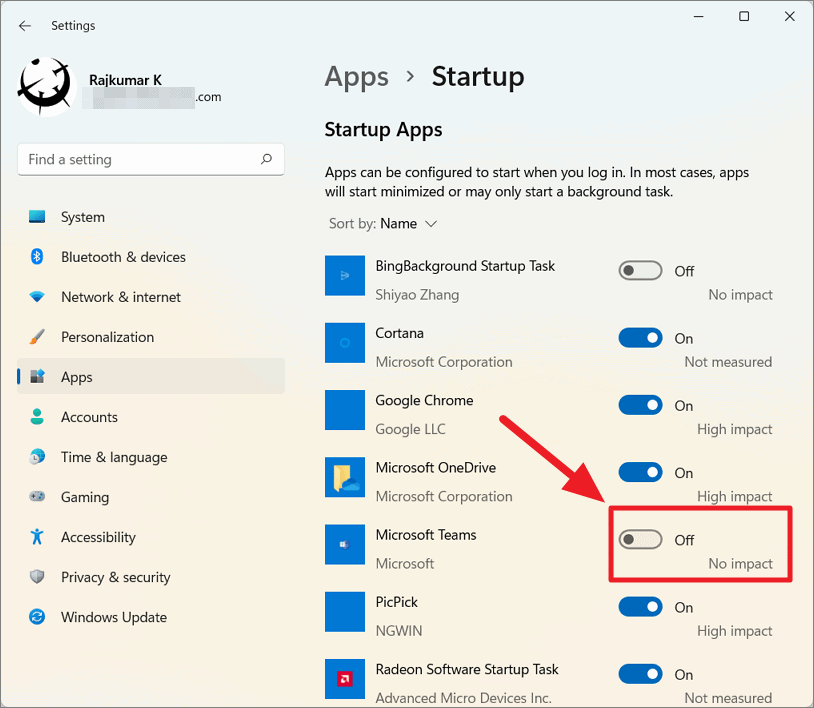
Windows+I. - Select Apps from the left sidebar, then click on Startup on the right.
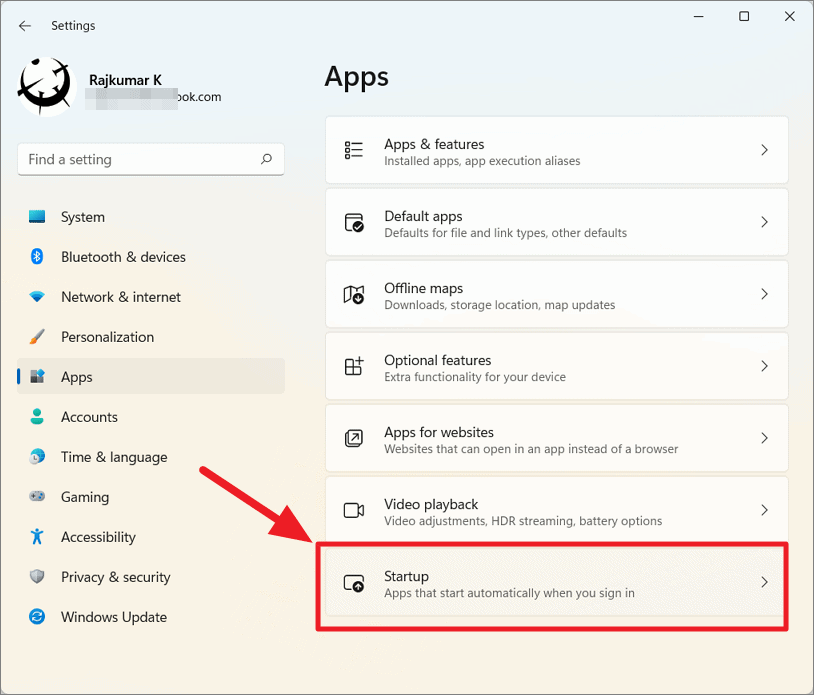
- In the list of startup apps, find Microsoft Teams and turn off the toggle next to it.
Disable Microsoft Teams from Startup using Task Manager
You can also disable Microsoft Teams from starting up via Task Manager:
- Right-click the Start button and select Task Manager, or press
Ctrl+Shift+Esc.
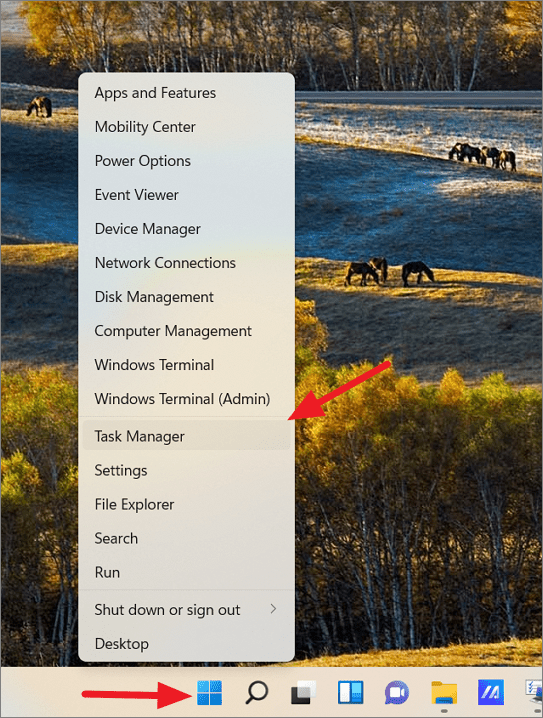
- In Task Manager, go to the Startup tab.
- Find Microsoft Teams in the list.
- Right-click on Microsoft Teams and select Disable, or select it and click the Disable button at the bottom right.
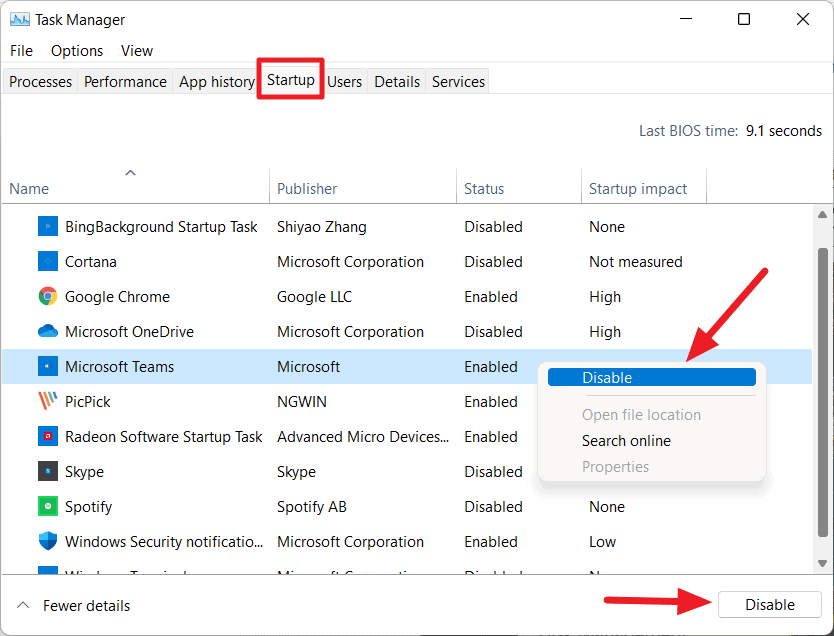
Microsoft Teams will no longer start automatically when you log into Windows.
Reinstall Microsoft Teams on Windows 11
If you decide to use Microsoft Teams again after uninstalling it, you can easily reinstall the app. Even after uninstalling, the Teams Chat icon may remain on your taskbar unless you’ve hidden it. To reinstall:
- Click the Chat icon (Microsoft Teams) on the taskbar.
- In the pop-up window, click on Continue.
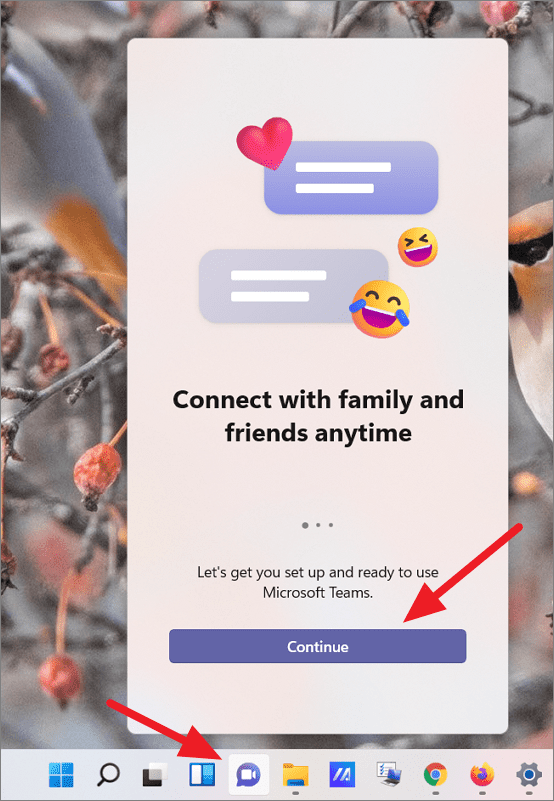
Windows will reinstall Microsoft Teams automatically. If you’ve hidden the Chat icon:
- Right-click on an empty area of the taskbar and select Taskbar settings.
- In Taskbar settings, turn on the toggle next to Chat to show the icon on the taskbar.
Alternatively, you can download Microsoft Teams from the official website or use the web version by signing in at https://teams.microsoft.com.
By following these steps, you can customize your Windows 11 experience by removing or disabling Microsoft Teams according to your preferences.


