
Pressing the Print Screen key on Windows 11 often launches the built-in Snipping Tool instead of third-party screenshot utilities like Greenshot. This default behavior prevents Greenshot from capturing screenshots with the expected shortcut, which slows down workflow—especially for users who rely on quick region captures or need advanced editing features. Adjusting system settings and Greenshot preferences allows users to restore the Print Screen key functionality for Greenshot, resolving the conflict and restoring efficient screenshot capture.
Disable Windows 11's Print Screen Shortcut for Snipping Tool
Windows 11 assigns the Print Screen key to its own Snipping Tool by default, which overrides Greenshot's ability to use this key for screenshots. Disabling this setting is essential to allow Greenshot to register the Print Screen key as its hotkey.
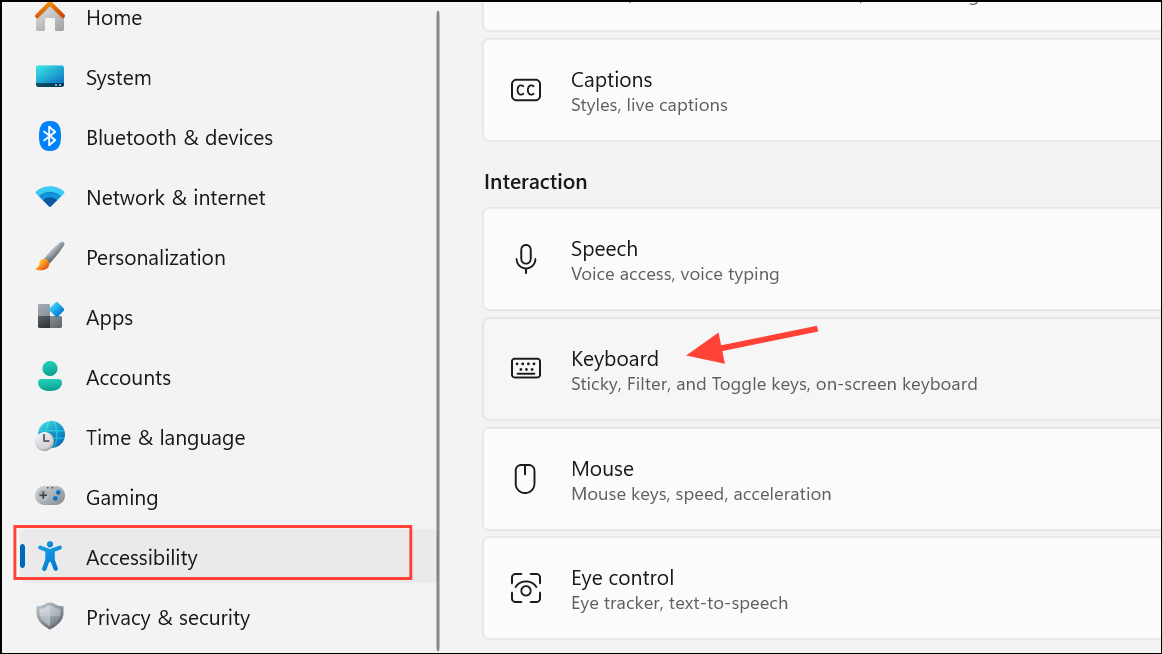
Step 1: Open the Windows 11 Settings app by pressing Win + I. Navigate to Accessibility in the sidebar, then scroll down and select Keyboard.
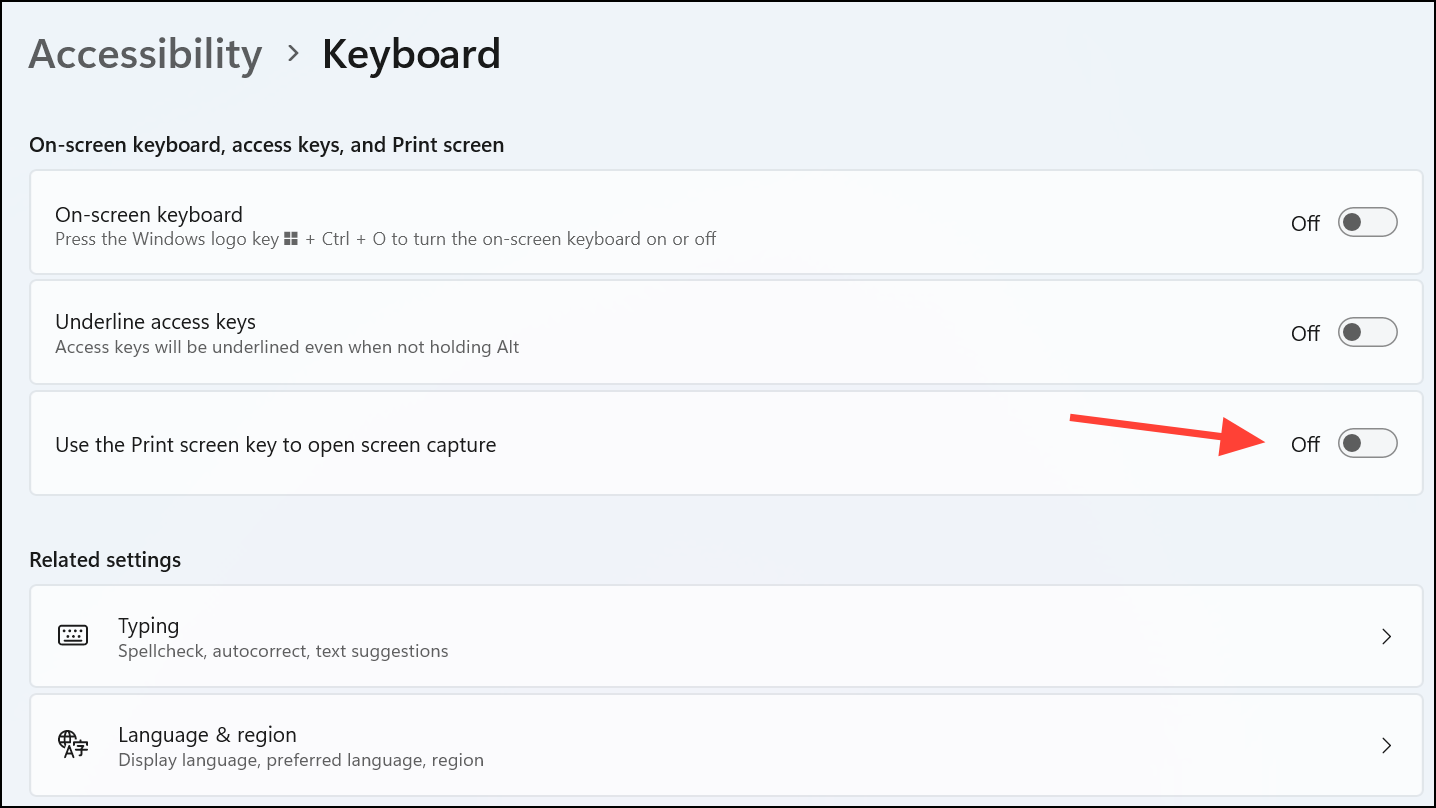
Step 2: Locate the option labeled Use the Print screen key to open screen capture. Toggle this setting off. This prevents the Snipping Tool from launching when the Print Screen key is pressed, freeing it for use by Greenshot.
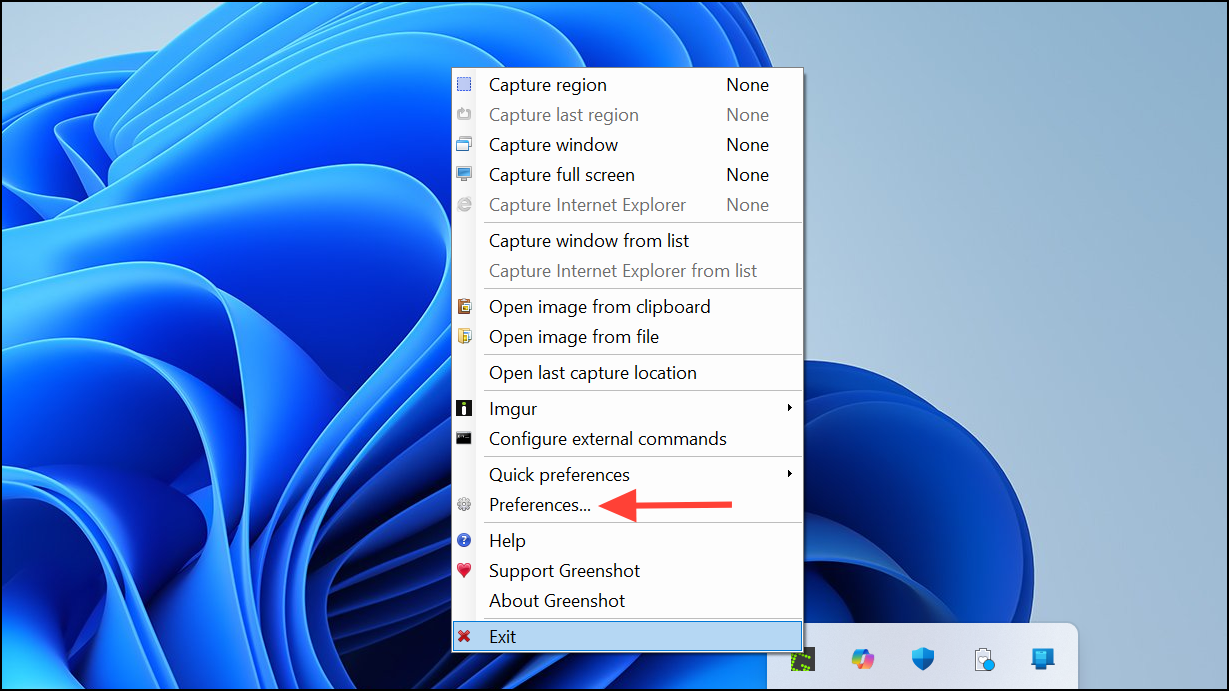
Step 3: After toggling the setting, restart Greenshot. Right-click the Greenshot icon in the system tray and select Exit, then launch Greenshot again from the Start menu. Restarting is necessary for Greenshot to re-register its hotkeys and detect the change

Reassign the Print Screen Key in Greenshot
After disabling the Windows shortcut, Greenshot may still need to have the Print Screen key re-registered as its capture hotkey. This ensures Greenshot responds when the key is pressed.
Step 1: Right-click the Greenshot icon in the system tray and choose Preferences or Settings.
Step 2: Under the Hotkeys section, locate the Capture Region or Capture Full Screen field under the General tab. Click inside the field, then press the Print Screen key. This action assigns the key to Greenshot's screenshot function.
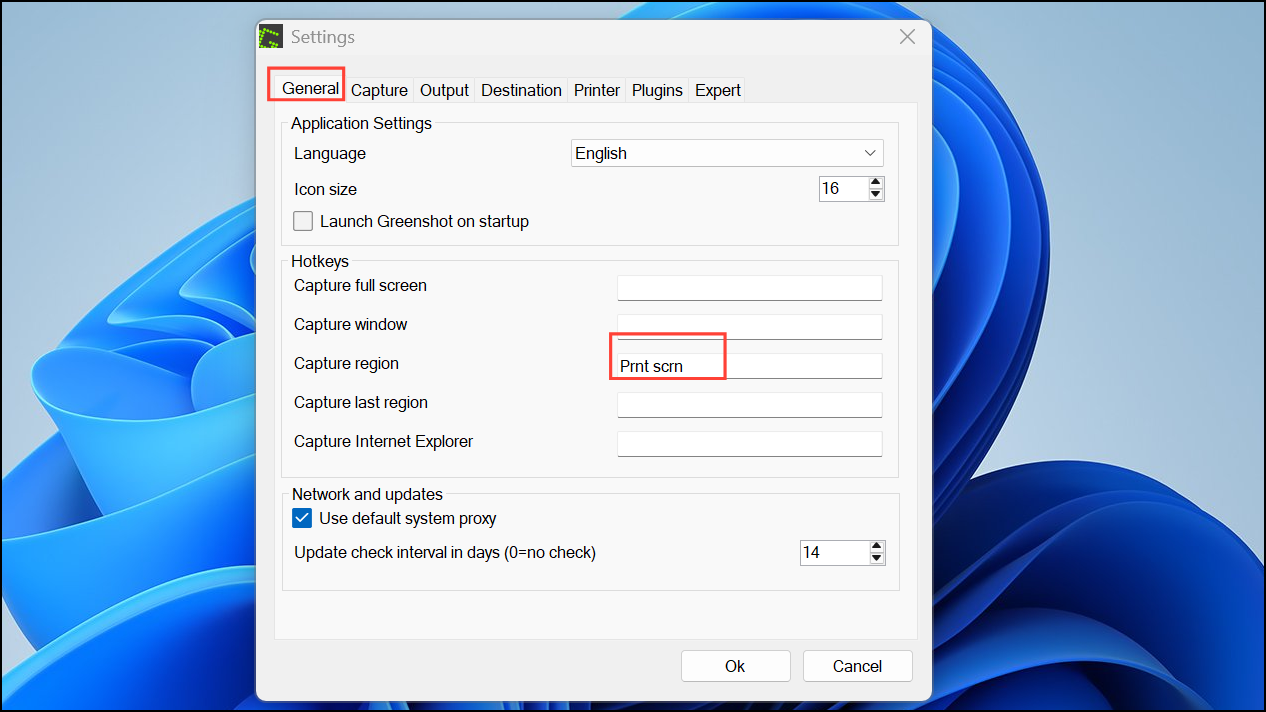
Step 3: Click OK or Save to apply the changes. Test by pressing Print Screen; Greenshot should now activate and allow region selection or full-screen capture, depending on your configuration.
Check for Keyboard-Specific Software or Function Key Settings
Some laptops—especially Lenovo models—and external keyboards may have additional software or function key configurations that affect the Print Screen key's behavior. These settings can interfere with Greenshot's hotkey registration.
Step 1: On Lenovo laptops, open the Lenovo Vantage app. Go to Input & Accessories, then Intelligent Keyboard options. Toggle the F1-F12 function or FnLock setting as needed. If Print Screen requires holding the Fn key, adjust the setting so Print Screen works directly.
Step 2: For Logitech or Razer keyboards, open the respective configuration app (such as Logitech Options or Razer Synapse). Locate the Print Screen key assignment and ensure it is set to standard Print Screen functionality, not a vendor-specific screen capture tool.
Alternative Approach: Assign a Different Hotkey in Greenshot
If the Print Screen key remains unavailable, you can assign a different key combination for Greenshot captures.
Step 1: In Greenshot's Preferences, under the Hotkeys section on the General tab, click the field for the desired capture function.
Step 2: Press a new key combination, such as Ctrl + Shift + G or Alt + Print Screen, to set it as the new shortcut.

Step 3: Save your changes and use the new hotkey to trigger Greenshot's screenshot tool. This approach provides a workaround if system restrictions or software conflicts prevent using Print Screen directly.
Resetting Windows 11's accessibility keyboard setting and restarting Greenshot restores fast, reliable screenshot capture with the Print Screen key. If problems persist, checking keyboard software or switching to a different shortcut keeps Greenshot working smoothly for all your screenshot needs.