If you have been using iMessage services on your Apple devices, you know how beautifully it keeps your messages and chats synced across your devices. Moreover, even if your iOS or iPadOS device is in another room, you can still reply to a received message directly from your macOS device.
That being said, at times you might want to mute iMessages on your Mac and unfortunately, Apple does not provide a simple one-click button to do that. However, that does not mean it is not achievable with a quick workaround.
There are multiple ways to mute iMessages on your Mac. Let’s explore all of them.
Mute Notifications from Messages App
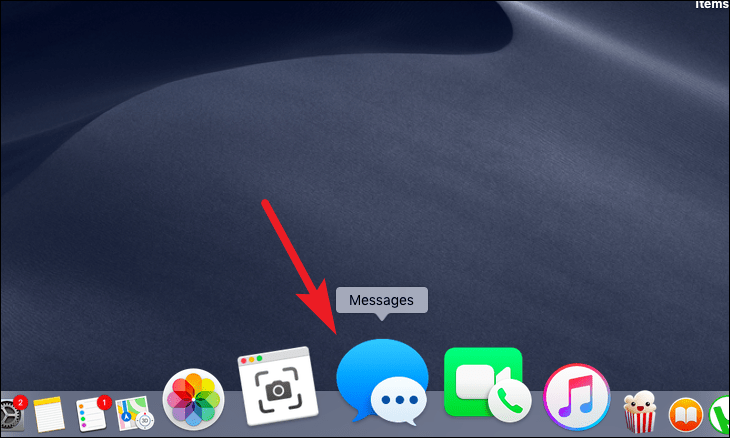
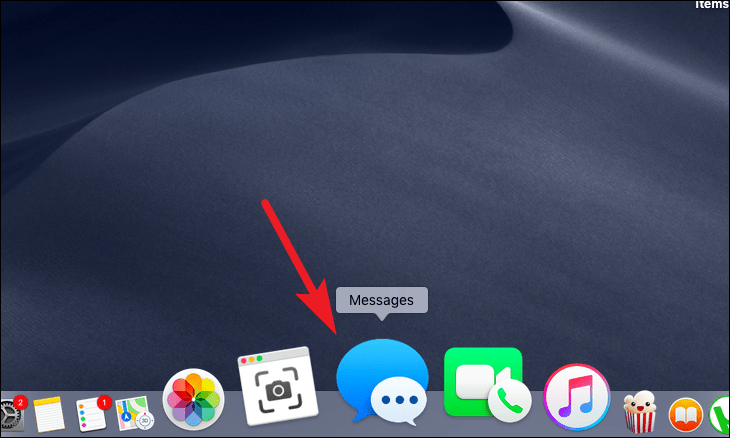
To mute notifications, first, launch the ‘Messages’ app either from your dock or from the launchpad of your macOS device.
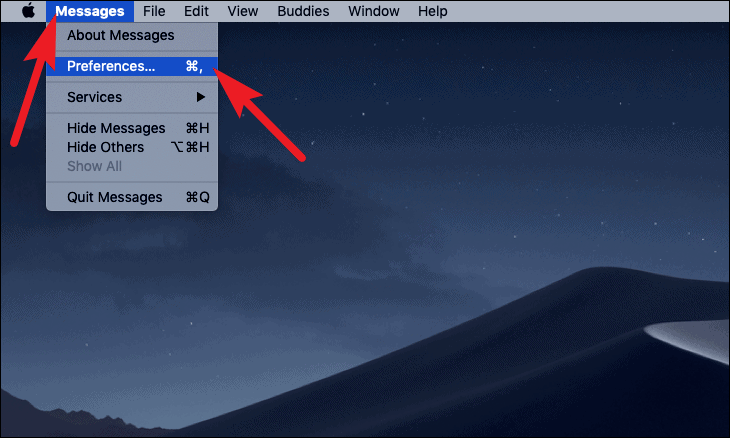
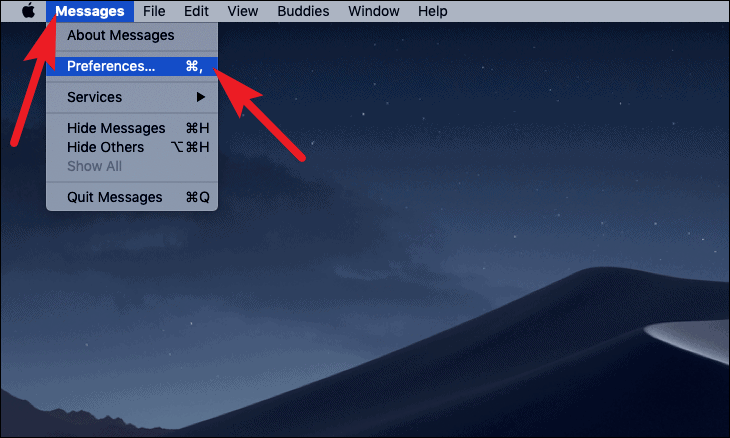
Then, click on the ‘Messages’ tab present on the menu bar situated at the top of your screen. Next, select the ‘Preferences’ option by clicking on it.
Now from the ‘Preferences’ window, uncheck the checkbox preceding the ‘Play sound effects’ option.
Note: This action will only mute the notifications from the Messages app, you will still be able to see the notifications on the top right corner whenever someone drops you a message.
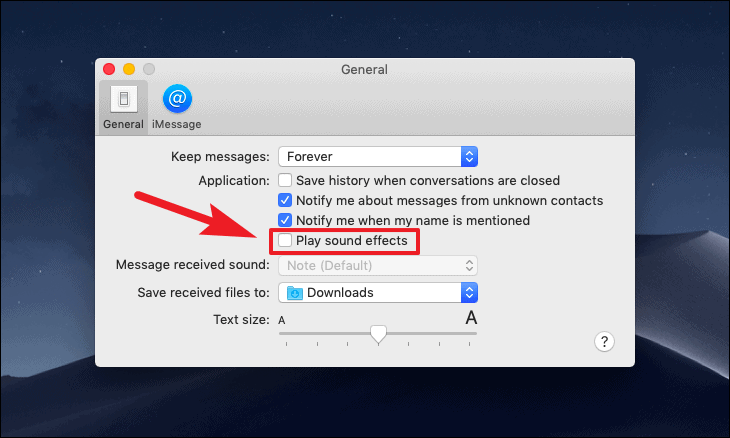
That’s it, your macOS device will not chime anymore whenever a new message arrives.
Mute or Turn Off Notifications from System Preferences
If only muting the notification doesn’t cut it for you and you want to disable the notification ticker as well for the Messages app, that can be achieved by quickly diving into the System Preferences app.
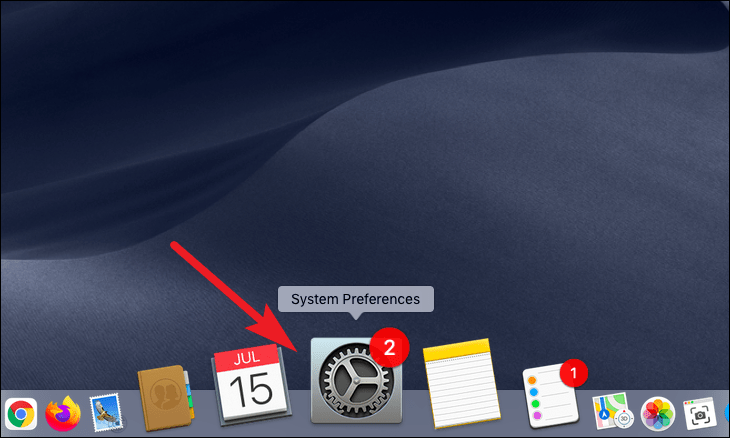
To do so, launch the ‘System Preferences’ app from the dock or from the launchpad on your macOS device.
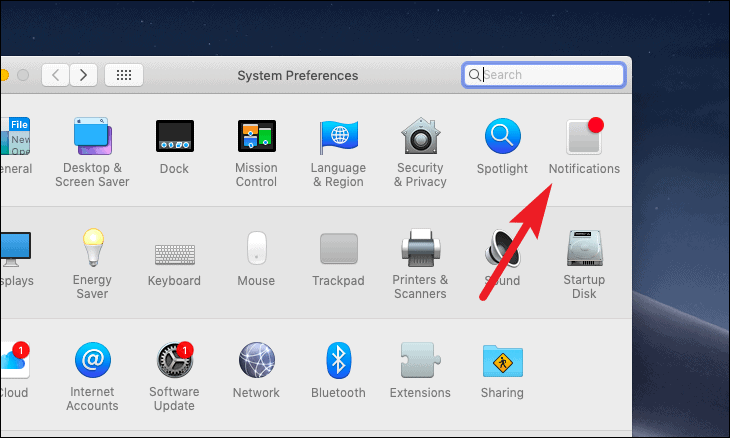
Then, click on the ‘Notifications’ option present on the System Preferences window.
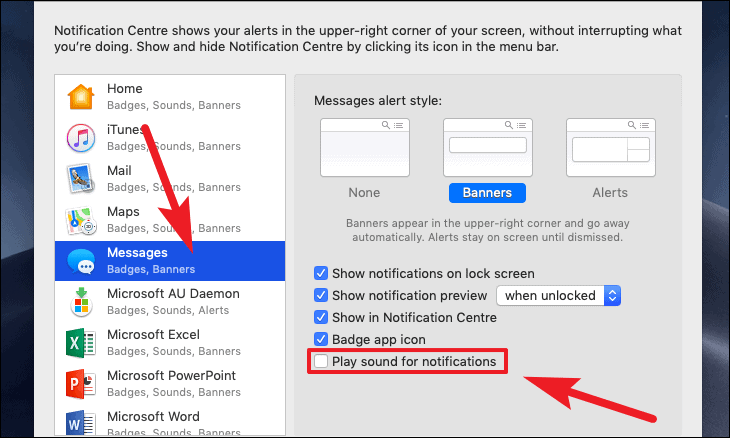
After that, scroll down and select the ‘Messages’ option from the left section of the window. Next, untick the ‘Play sound for notifications’ option to only mute the incoming messages.
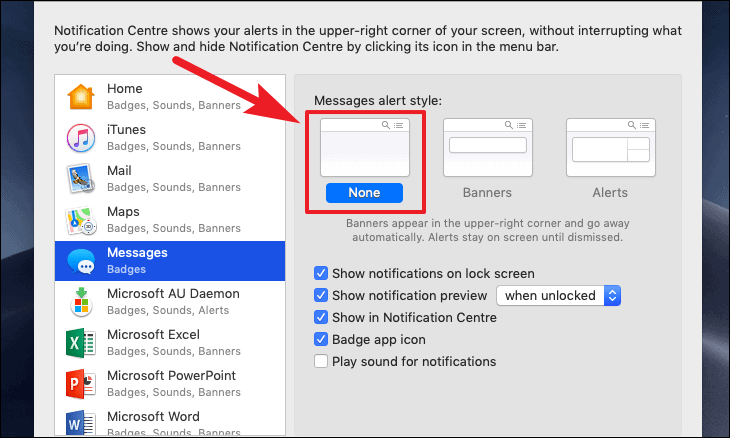
If you wish to turn off the Messages notification as well, click on the ‘None’ option from the ‘Messages alert style’ section on the screen.
Mute Notifications Using System-Wide Do Not Disturb
One another option is to enable a system-wide ‘Do not Disturb’ to mute notifications for the messages app. However, do remember ‘Do no disturb’ will also mute notifications from other apps as well.
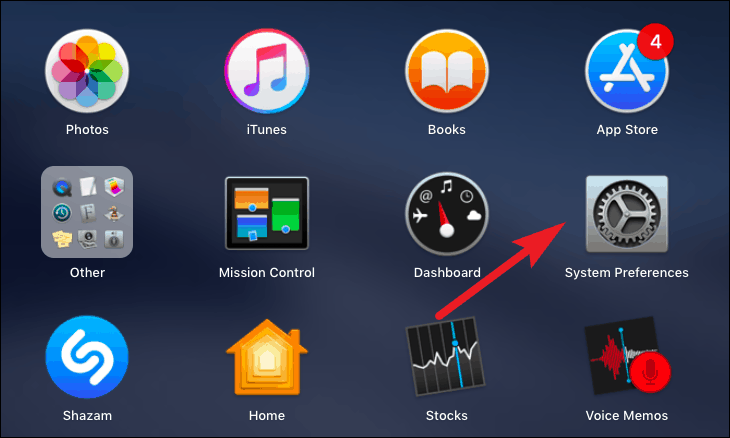
To mute notifications this way, launch the ‘System Preferences app from the dock or from the launchpad depending on your preference.
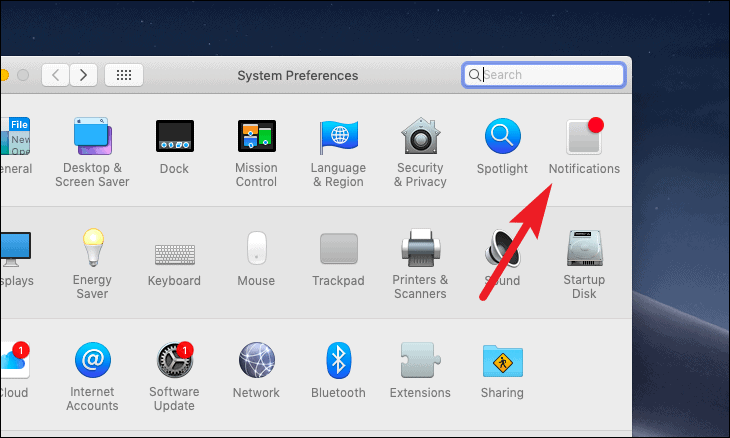
Then, click on the ‘Notifications’ option present on your screen.
After that click on the ‘Do Not Disturb’ option from the left section of the window. Then, tick the checkbox situated just under the ‘Turn on Do Not Disturb’ option and then set your preferred timings for the Do Not Disturb to be active.
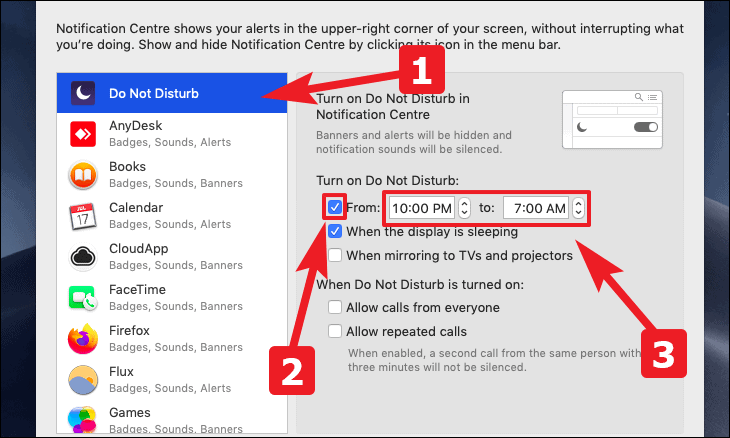
That’s it you will not receive any visual or audio clue if a message from that particular sender arrives during the specified time period.
Mute Notifications Using Do Not Disturb for Individual Sender
If a system-wide Do Not Disturb is not a feasible option for you, Apple also allows you to turn on Do Not Disturb for an individual sender.
To do so, launch the Messages app from the dock or from the launchpad on your macOS device.
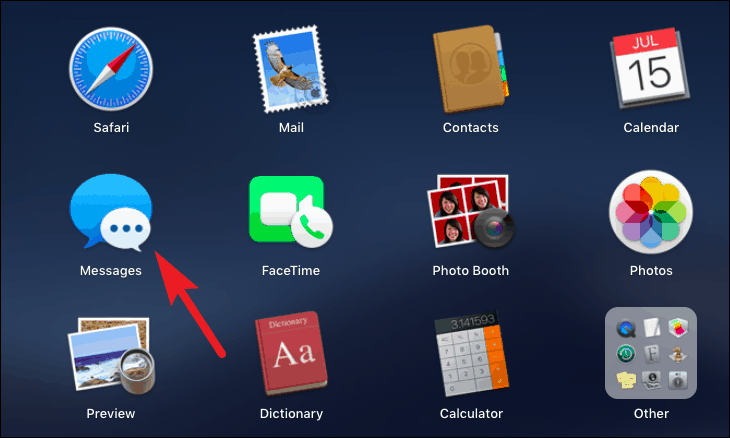
After that, click on the sender you want to turn on Do Not Disturb from the left sidebar present on the Messages window. Then, click on the ‘Details’ option present at the top right corner of the Messages window.
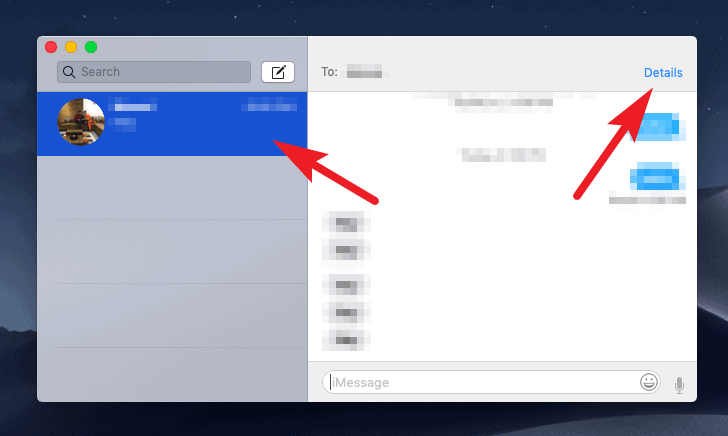
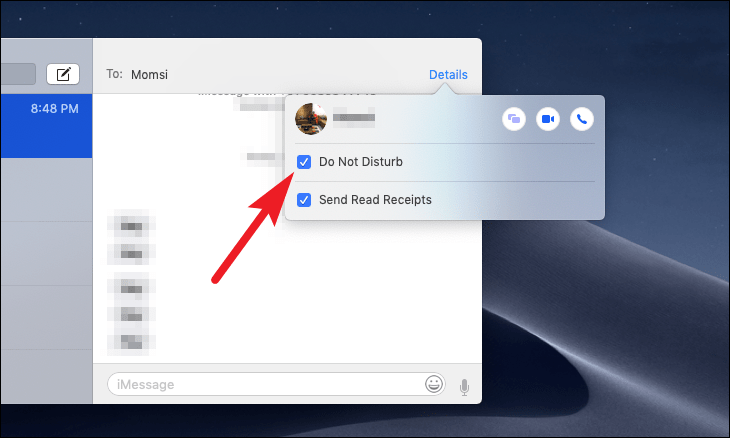
Next, click the checkbox preceding the ‘Do Not Disturb’ option from the overlay menu to enable the Do Not Disturb for the specific sender.
Note: ‘Do Not Disturb’ will be active for the particular sender till you manually disable it.
Block Individual Senders from Messaging
Now blocking somebody is an extreme measure but at the same time a necessary one when needed. Thus, knowing how to block someone from messaging you might come in handy someday.
To take this dire step, launch the Messages app from the dock or from the launchpad of your macOS device.
Then, click on the Messages tab from the menu bar. Next, click on the ‘Preferences’ option from the overlay menu.
Now, click on the ‘iMessage’ tab present on the Preferences window. After that, click on the ‘Blocked’ tab present on the screen.
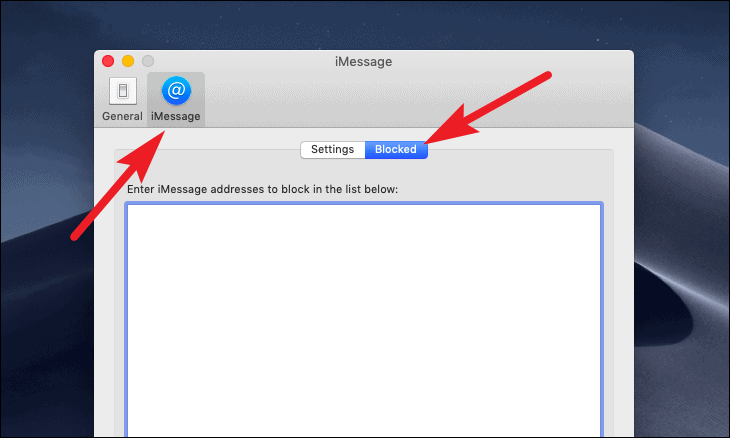
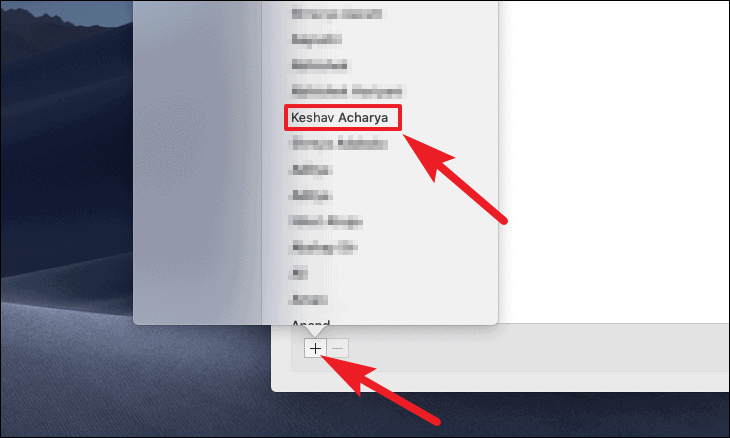
Then, click on the ‘+’ icon situated on the bottom left corner of the window. Now, select any of your contacts to block by clicking on their name from the list present on the overlay menu.
