
Opening Windows PowerShell with administrative privileges allows you to execute commands that require elevated rights. Whether you’re troubleshooting or managing system settings, here are the most effective ways to run PowerShell as an administrator in Windows 11.
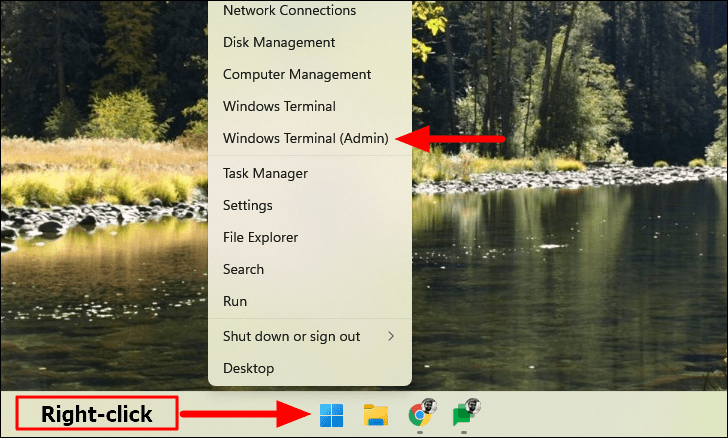
1. Open Elevated PowerShell from the Quick Access Menu
An efficient way to launch PowerShell with admin rights is through the Quick Access menu.
- Right-click on the Start icon in the taskbar or press
WINDOWS+Xto open the Quick Access menu. - Select Windows Terminal (Admin) from the list. When prompted by the User Account Control (UAC), click Yes.
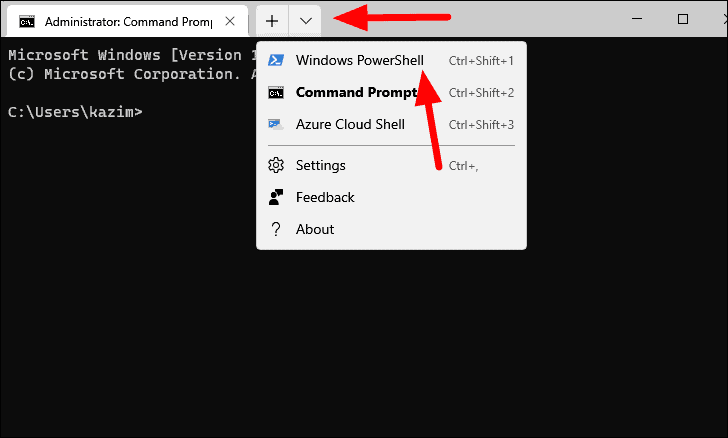
By default, PowerShell opens in Windows Terminal. If PowerShell isn’t the default profile, you can select it manually:
- Click the downward-facing arrow at the top of the Terminal window.
- Select Windows PowerShell from the dropdown menu.
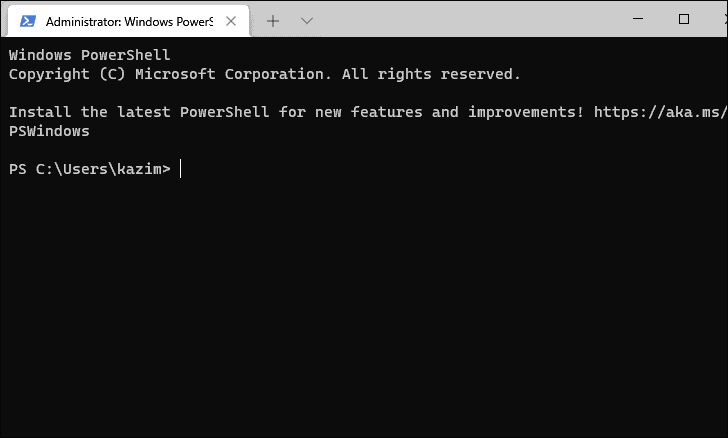
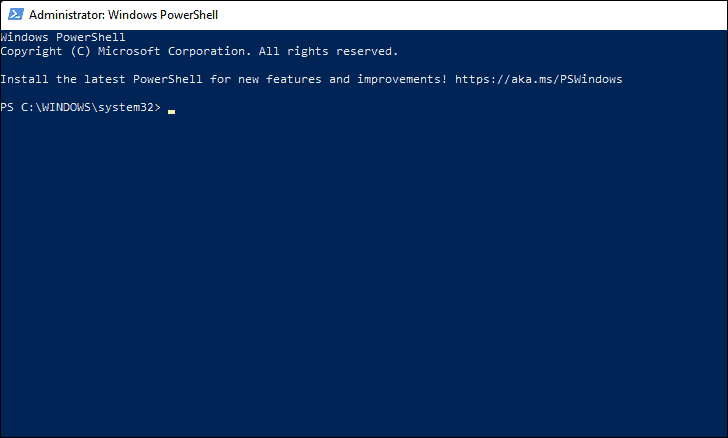
You now have an elevated PowerShell session.
2. Open Elevated PowerShell in Windows Terminal
You can also launch PowerShell as an administrator directly through Windows Terminal.
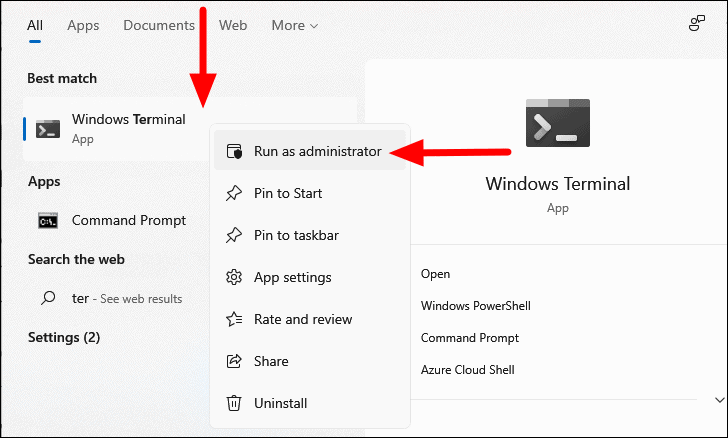
- Press
WINDOWS+Sto open the search menu. - Type Windows Terminal in the search bar.
- Right-click on Windows Terminal in the results and select Run as administrator. Click Yes on the UAC prompt.
If PowerShell is your default profile in Terminal, it will open automatically. If not, switch to PowerShell:
- Click the downward-facing arrow at the top of Terminal.
- Select Windows PowerShell from the options.
You can also use the shortcut CTRL + SHIFT + 1 within Terminal to open PowerShell.
3. Open Elevated PowerShell from the Search Menu
Using the search menu is another quick method.
- Press
WINDOWS+Sto open the search menu. - Type PowerShell into the search bar.
- Right-click on Windows PowerShell and select Run as administrator. Approve the UAC prompt by clicking Yes.

PowerShell will now launch with administrative privileges.
4. Open Elevated PowerShell Using Run Command
You can start PowerShell as an administrator directly from the Run dialog.
- Press
WINDOWS+Rto open the Run dialog. - Type powershell in the text field.
- Hold down
CTRL+SHIFTand click OK or pressCTRL+SHIFT+ENTER. - Click Yes on the UAC prompt.
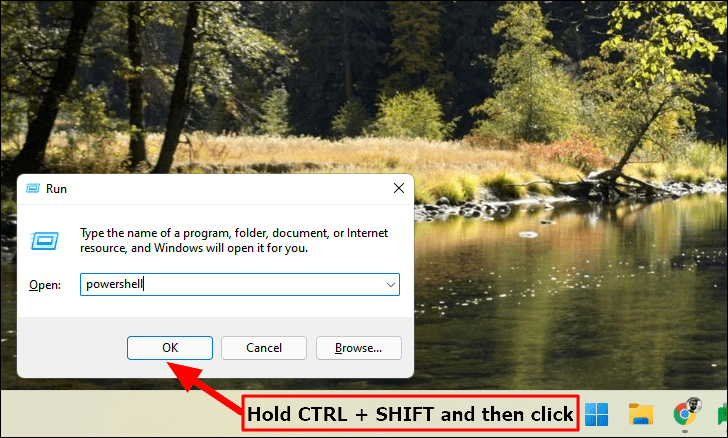
PowerShell will open with admin rights.
5. Open Elevated PowerShell from the Start Menu
You can access PowerShell as an administrator through the Start menu.
- Click the Start icon in the taskbar or press the
WINDOWSkey. - If PowerShell isn’t pinned, click on All apps.
- Scroll to find Windows Terminal in the list.
- Right-click on Windows Terminal, hover over More, and select Run as administrator.
- Approve the UAC prompt by clicking Yes.
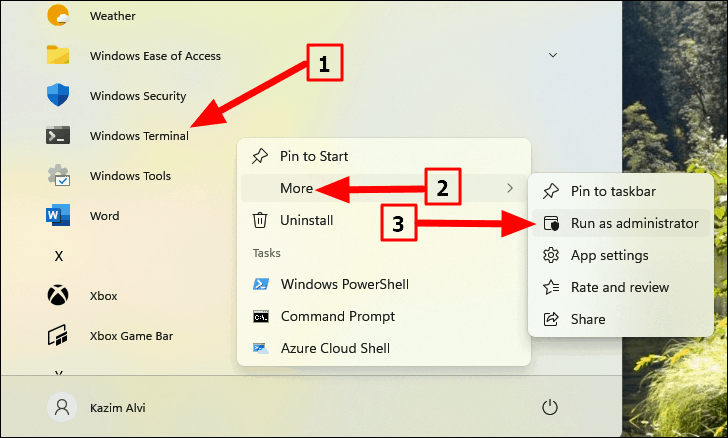
PowerShell will launch with administrative privileges.
6. Open Elevated PowerShell from Task Manager
If your system is unresponsive, you can use Task Manager to open PowerShell as an admin.
- Press
CTRL+SHIFT+ESCto open Task Manager. - Click on File in the top-left corner and select Run new task.
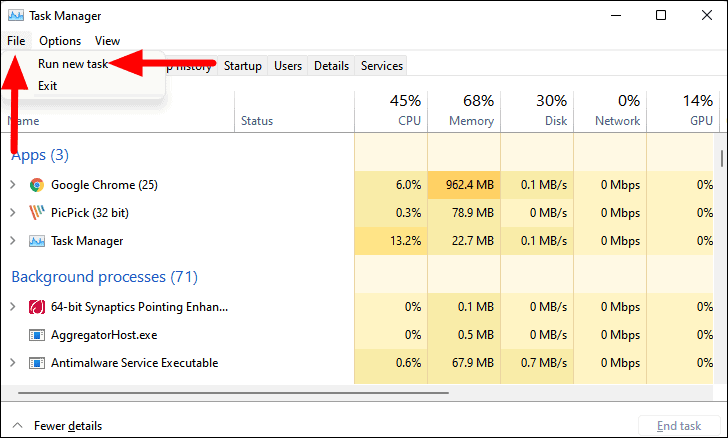
- In the dialog box, type powershell.
- Check the box for Create this task with administrative privileges.
- Click OK.
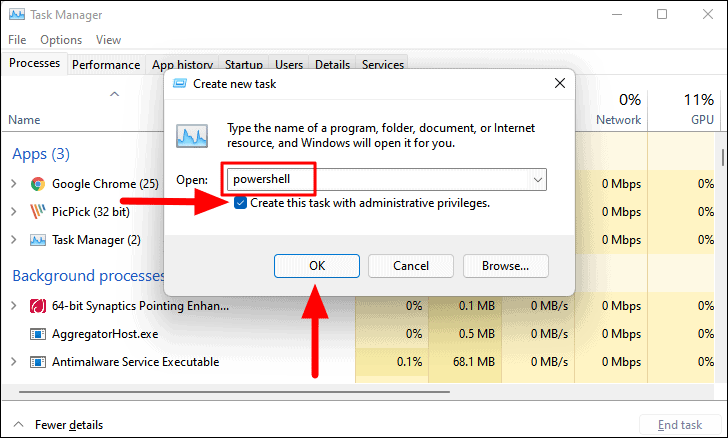
This will open PowerShell with admin rights.
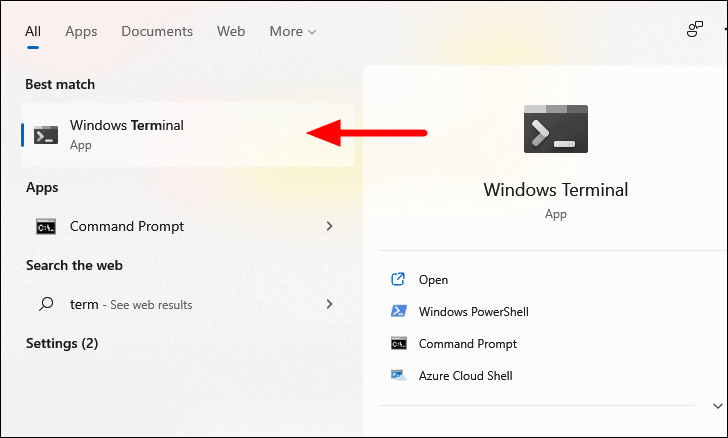
7. Open Elevated PowerShell from Command Prompt
You can start an elevated PowerShell session from Command Prompt.
- Open Command Prompt. You can search for Windows Terminal in the search menu and launch it.
- In Command Prompt, type the following command and press
ENTER:
powershell Start-Process powershell -Verb runAsClick Yes on the UAC prompt.
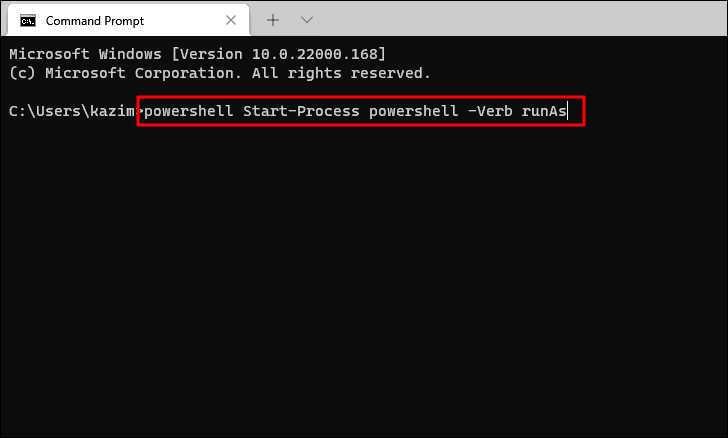
This command will launch PowerShell with administrative privileges.
8. Open Elevated PowerShell Using a Batch File
You can create a batch file to quickly open PowerShell as an admin.
- Right-click on the desktop, hover over New, and select Text Document.
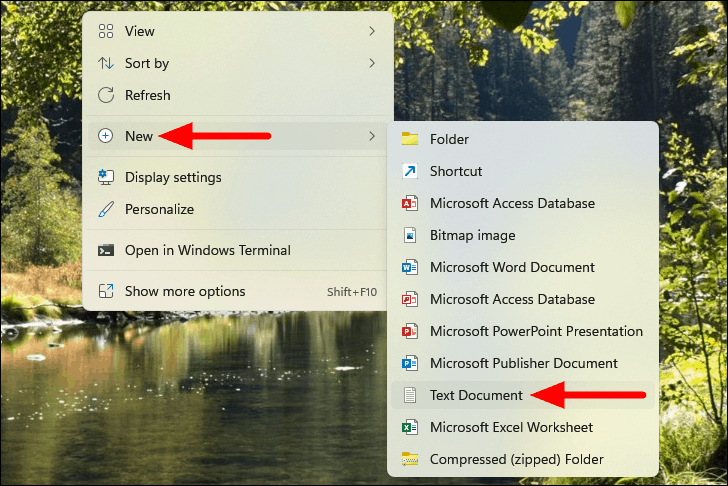
- Open the text file and paste the following command:
Powershell.exe -Command "& {Start-Process Powershell.exe -Verb RunAs}"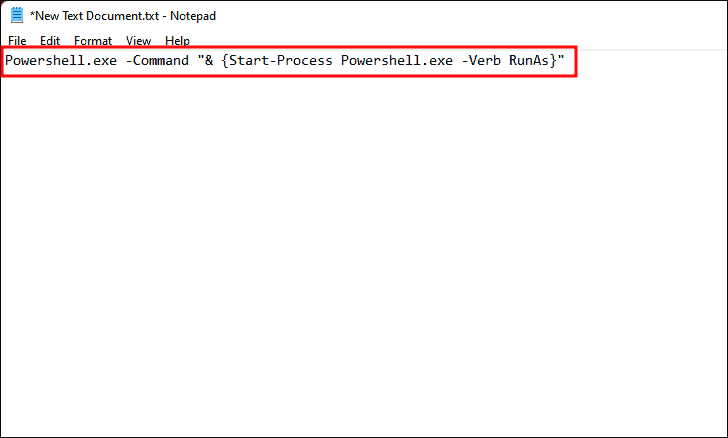
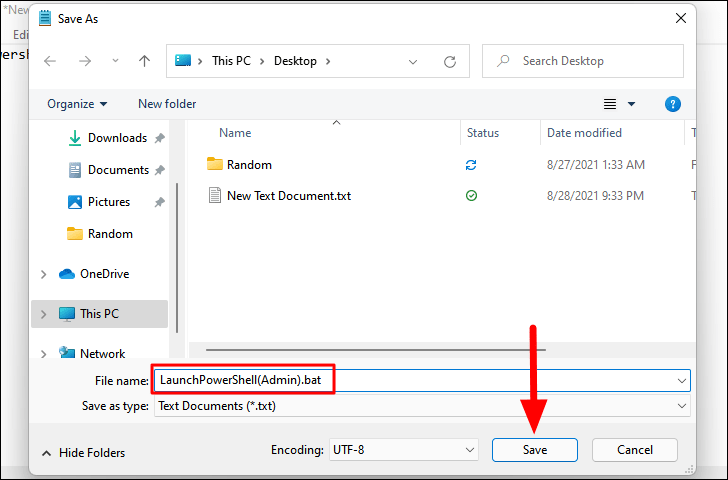
- Click on File and choose Save As.
- Name the file (e.g., LaunchPowerShellAdmin.bat) and make sure to include the
.batextension. - Click Save.
- Double-click the batch file you created. When prompted by UAC, click Yes.

This will open an elevated PowerShell session.
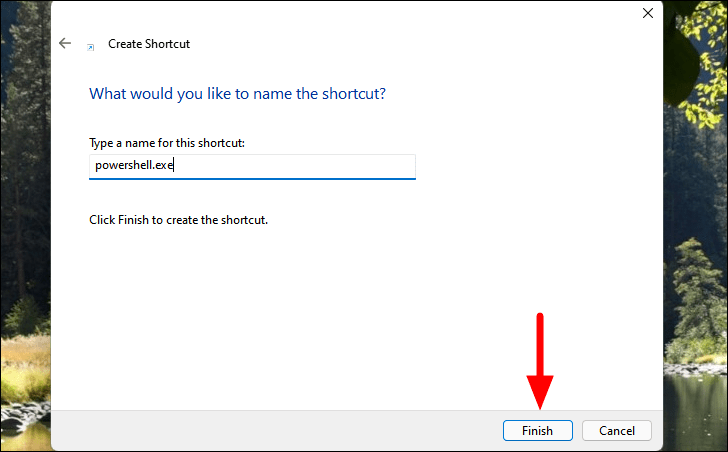
9. Open Elevated PowerShell via Desktop Shortcut
If you frequently need administrative PowerShell, creating a desktop shortcut can save time.
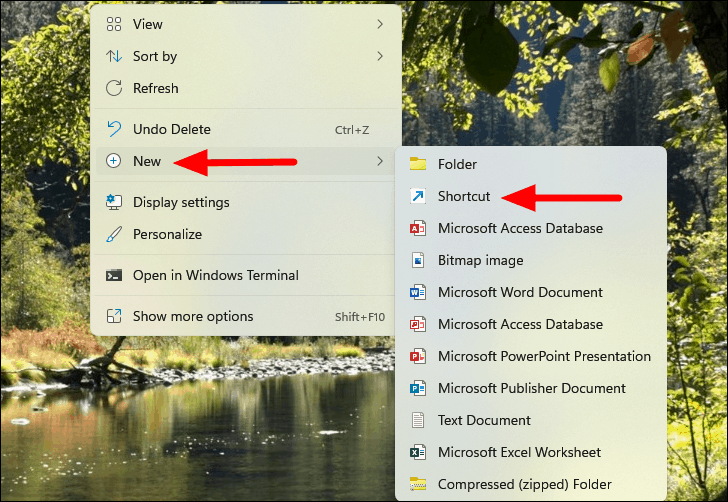
- Right-click on the desktop, hover over New, and select Shortcut.
- In the location field, enter the path for PowerShell:
For 64-bit Windows:
C:\Windows\System32\WindowsPowerShell\v1.0\powershell.exeFor 32-bit Windows:
C:\Windows\SysWOW64\WindowsPowerShell\v1.0\powershell.exe- Click Next, name the shortcut (e.g., PowerShell Admin), and then click Finish.
- Right-click the newly created shortcut and select Properties.
- In the Shortcut tab, click on Advanced.
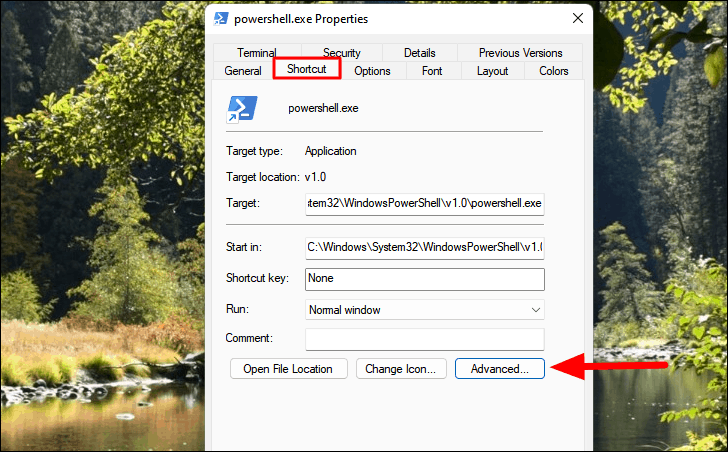
- Check the box that says Run as administrator and click OK.
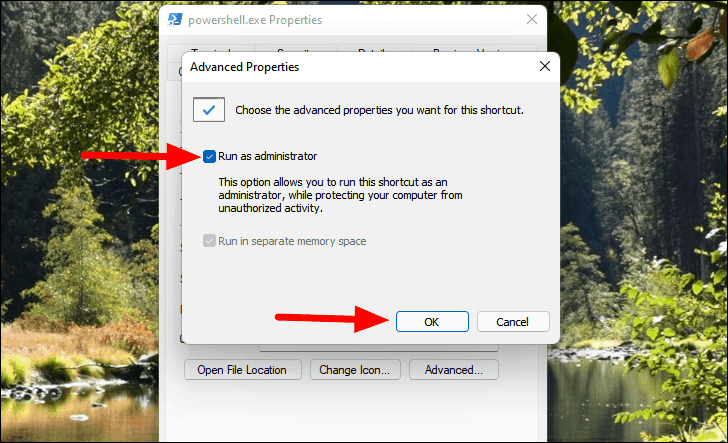
- Click OK again to save the shortcut properties.

You can now double-click this shortcut any time to open PowerShell with admin rights.
These methods provide various options to open Windows PowerShell as an administrator in Windows 11. Choose the one that suits your workflow best to efficiently manage your system.


