Screenshots are good for many situations when you want to share information from your screen. But they aren’t always enough. There are instances when you need to share a lot more of your screen with other people, and they are not physically present around.
Screen recordings come in handy in such cases. But many people are unaware of this wonderful feature on their iPad. Whether you need to share a tutorial, record your game moves, or capture an app in action to show off its features, screen recording is the way to go.
Where is the option for Screen Recording?
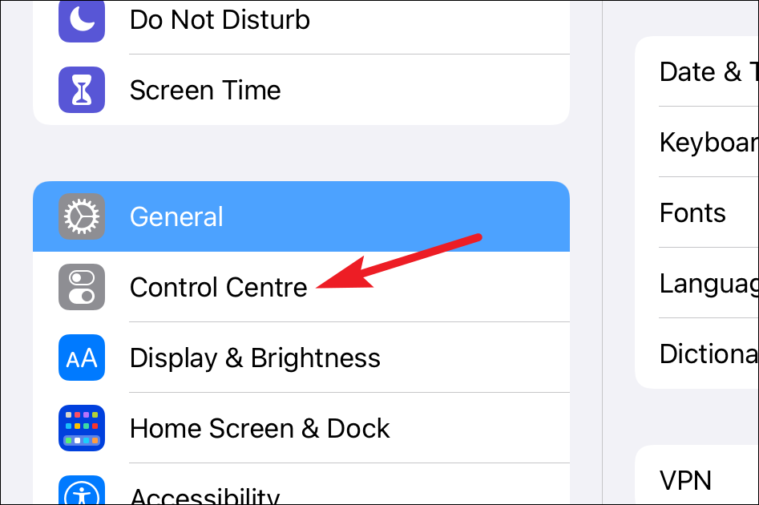
Before you can record your screen, you need to add it to the Control Centre. This is precisely the reason why many users end up oblivious about its existence.
To add Screen Recording to the Control Centre, open Settings on your iPad.
Then, tap the option for ‘Control Centre’. The settings for Control Centre will appear on the right half of the screen.
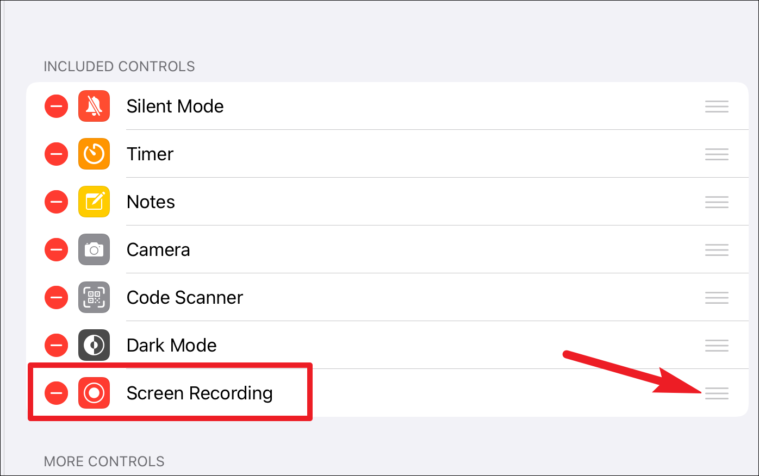
Scroll down and go to ‘More Controls’. Find ‘Screen Recording’ from the list of options and tap on the ‘Add’ button (+ icon) on the left.

The control for Screen Recording will move to the ‘Included Controls’ section. These are the options that appear in the Control Centre. To change the order in which ‘Screen Recording’ will appear on the Control Centre, tap the icon with three horizontal lines and move the option up and down.
Recording the Screen
When you want to record your screen, whether in a third-party app, game, or system app on your iPad, open that app.
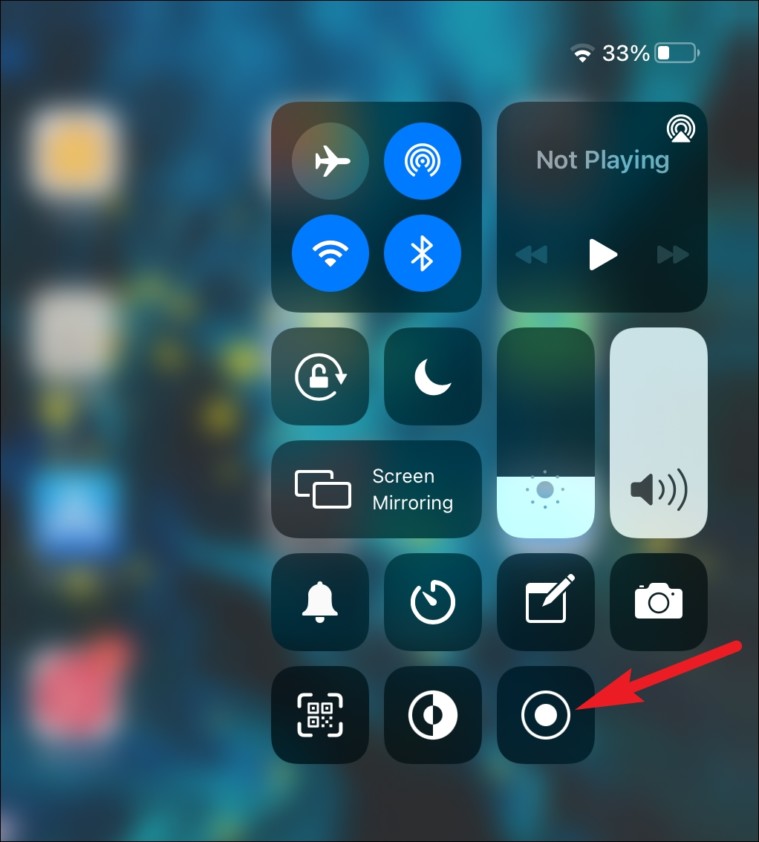
Swipe down from the upper-right corner of the screen to pull down the Control Centre. Then, tap the ‘Screen Recording’ option – a circle with a dot in it. Your iPad should be unlocked for recording the screen. If you tap the recording icon from the Control Centre while the iPad is still locked, it won’t start until you unlock it.
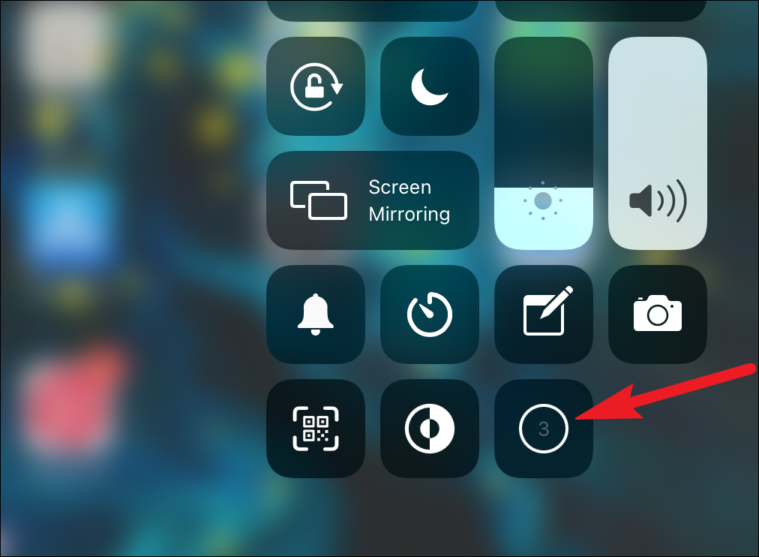
A 3-second reverse countdown will start in its place before turning to a red icon. Take this time to close the Control Centre and return to the screen you want to record.
The recording will start once the countdown is over. Everything on the screen, including notifications, will be recorded. So be careful not to open any sensitive information if you plan to share the recording. Also, put your iPad on Do Not Disturb to prevent unexpected notifications from getting recorded.
Note: Screen Recording does not work with streaming apps like Netflix or Disney+ for obvious reasons. And a special mention to Snapchat – just like when you take a Screenshot, a Screen Recording of a Snap, Story, or Chat on Snapchat will send a notification to the other person that you recorded the screen.
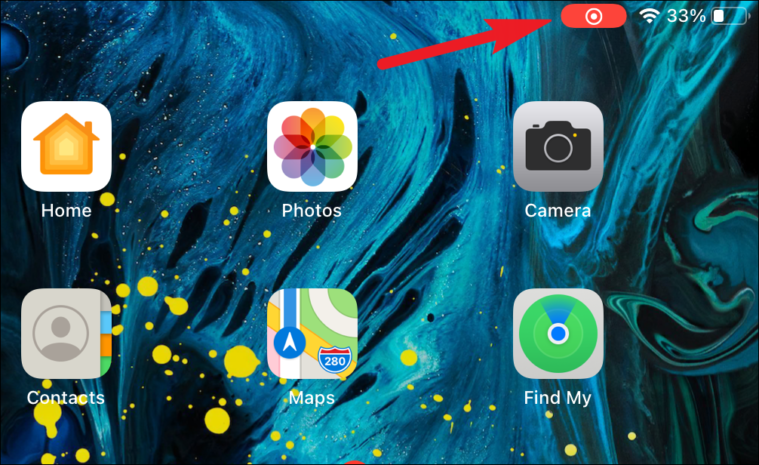
A small recording indicator will also appear on the Status Bar while the screen is recording. This indicator will also be visible in the screen recording. To stop the recording, tap the recording indicator.
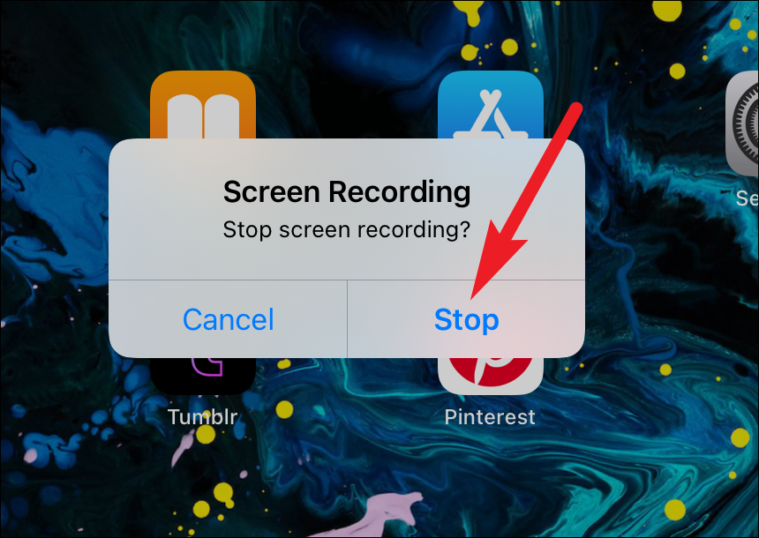
A confirmation message will appear. Tap ‘Stop’ to confirm your choice.
You can also pull down the Control Centre and tap the Screen Recording icon to stop the recording. A notification will appear stating that the recording was saved to Photos.
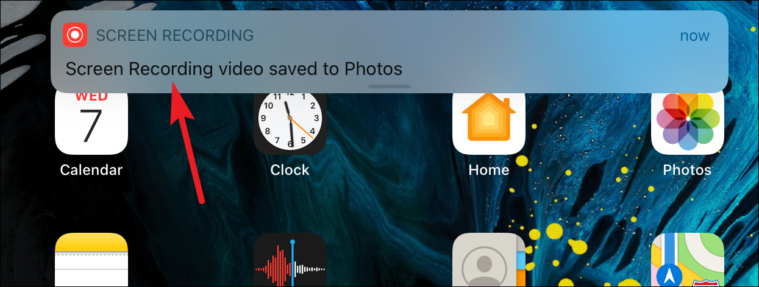
Go to Photos to see the video. You can edit the video, like trim the end or beginning if Control Centre was also recorded, from here and share it with other people.
Additional Settings
The Photos app or the Camera Roll is the default location for saving screen recordings. It’s also possible to change this location and other default settings. Open Control Centre and tap and hold the Screen Recording icon. Additional options for Screen Recording will open.
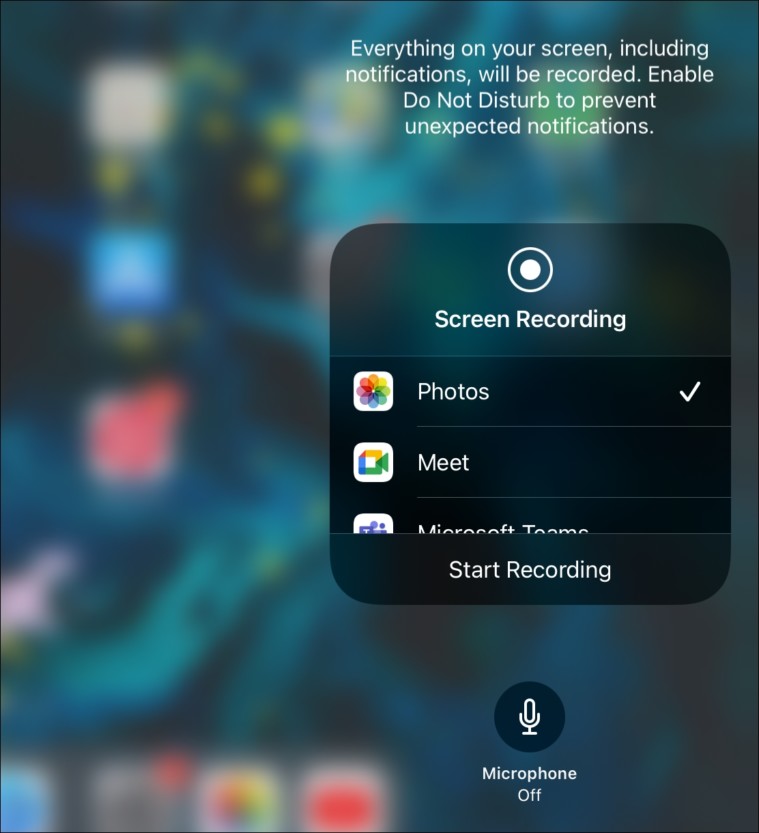
To change where to send the screen recording, tap one of the other available compatible apps. If you want to narrate the video, tap the ‘Microphone off’ option to turn it on.
Recording your screen on iPad is pretty easy. Whatever your need, you can record the screen and share it with others. The screen recording video can also be edited using Apple’s inherent editing options.