
Game stuttering occurs when your system struggles to deliver smooth, consistent frame rates, causing noticeable pauses and interruptions during gameplay. This issue often arises from outdated drivers, conflicting system settings, or resource-intensive background processes. Resolving game stuttering on Windows 11 involves several practical troubleshooting steps, beginning with the most effective solutions.
Update Your Graphics Drivers
Step 1: Open your preferred web browser and visit your graphics card manufacturer's official website—NVIDIA, AMD, or Intel.
Step 2: Navigate to the driver download section and select your graphics card model along with your operating system (Windows 11).
Step 3: Download the latest available driver package and run the installer. Follow the on-screen instructions to complete the installation process.
Step 4: Restart your computer to apply the changes. Keeping your GPU drivers updated ensures compatibility with the latest games and can significantly reduce stuttering.
Enable Windows 11 Game Mode
Windows Game Mode prioritizes gaming processes, dedicating more system resources to your game and minimizing background interruptions.
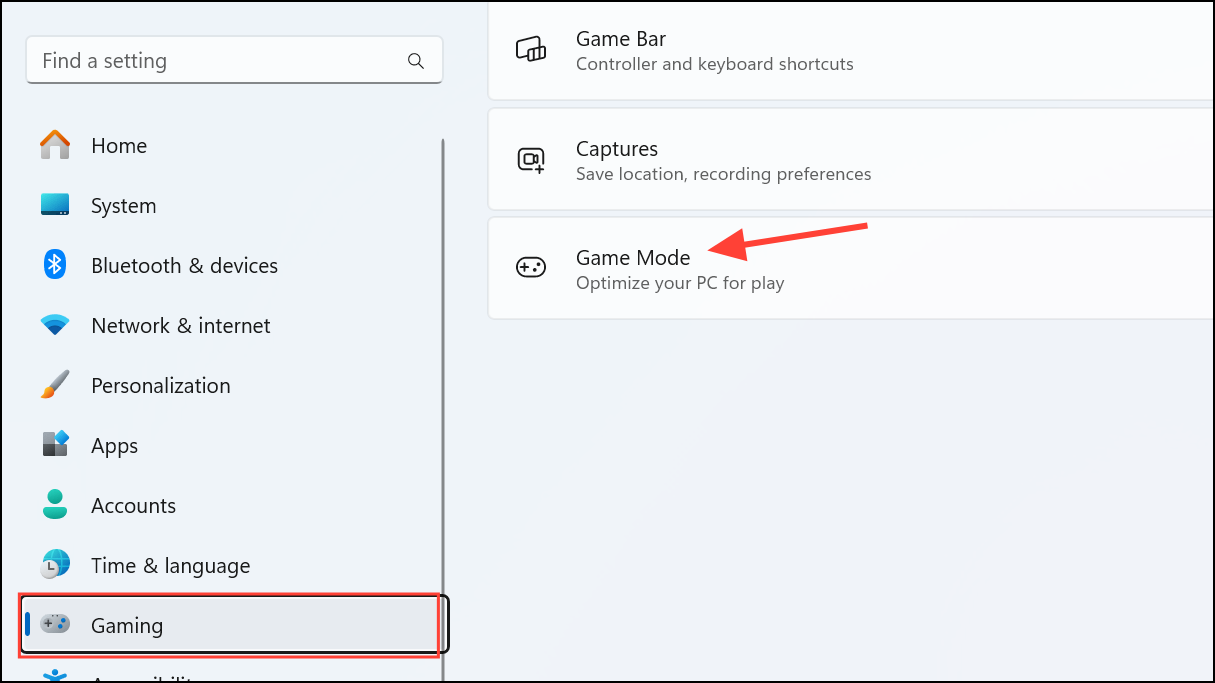
Step 1: Press Windows + I to open Settings.
Step 2: Select "Gaming" from the left sidebar and click "Game Mode."
Step 3: Toggle "Game Mode" to "On."
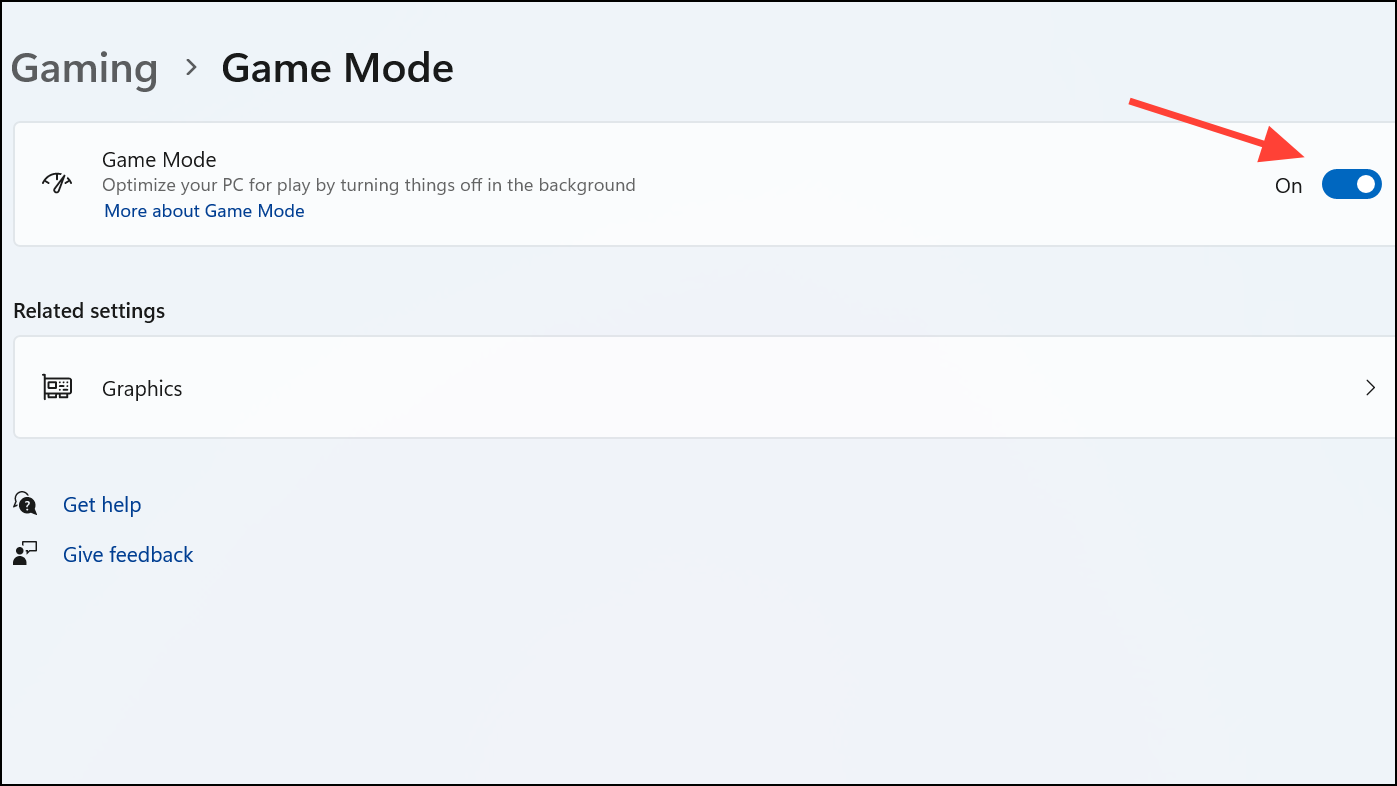
Game Mode helps stabilize your frame rate by temporarily pausing unnecessary system tasks during gameplay, resulting in smoother performance.
Disable Xbox Game Bar
While the Xbox Game Bar offers useful recording and social features, it can consume system resources and cause stuttering in some games.
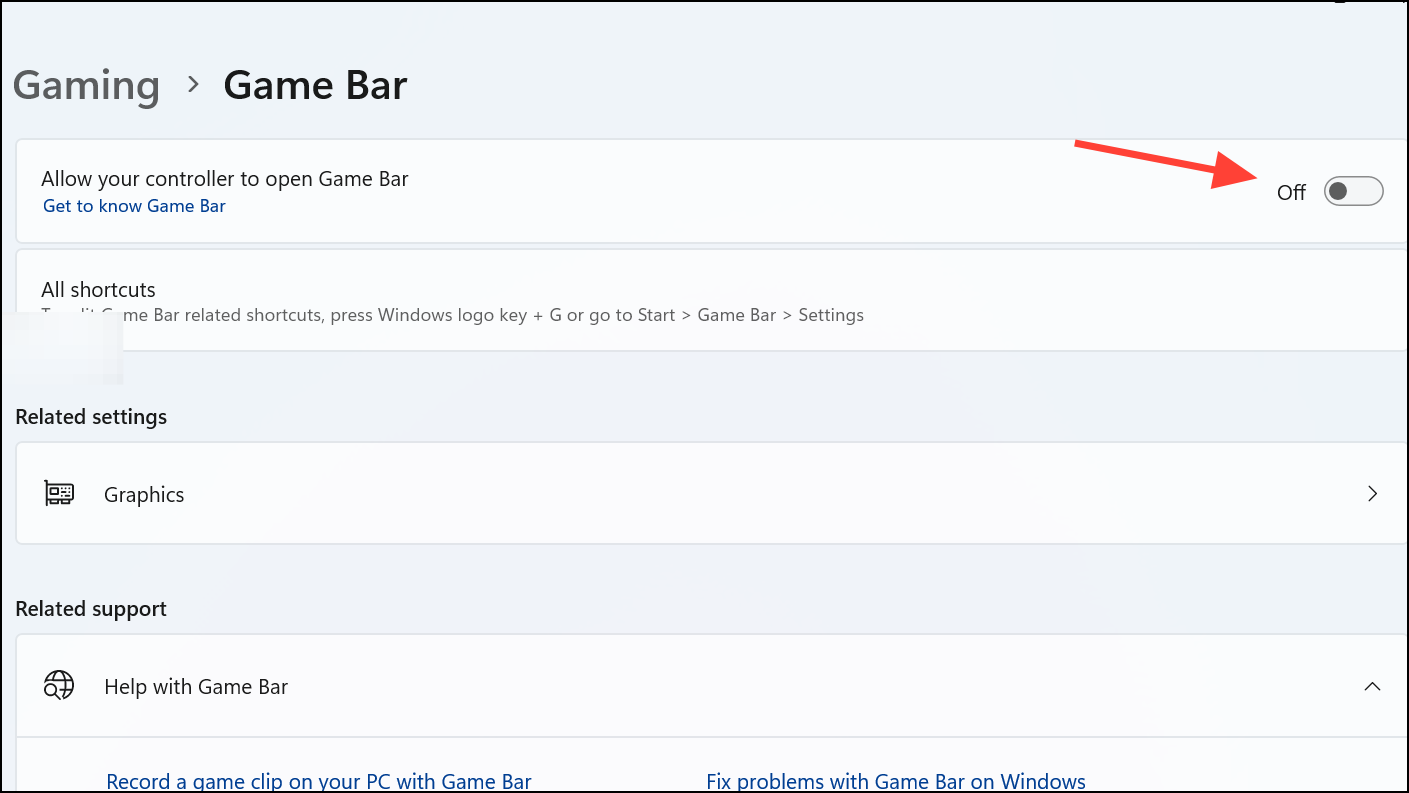
Step 1: Press Windows + I to open Settings and select "Gaming."
Step 2: Click "Xbox Game Bar" and toggle the feature to "Off."
Step 3: Next, click "Captures" in the Gaming menu and disable options such as "Background recording" and "Recorded audio."
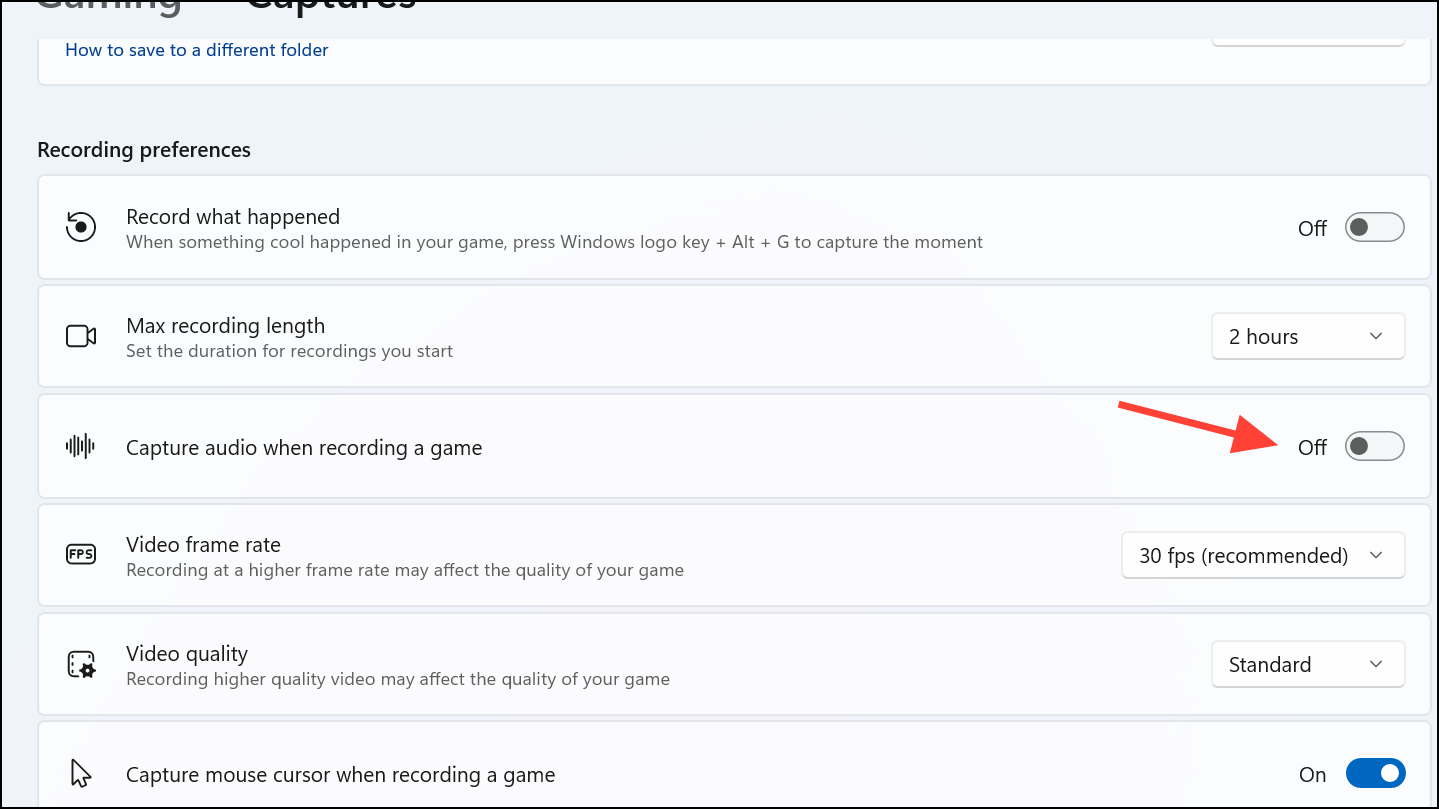
Disabling these features frees up resources, allowing your system to focus entirely on running your game.
Set High-Performance Graphics for Your Game
Windows 11 allows you to specify which GPU your game should use, ensuring it utilizes the most powerful graphics hardware available.
Step 1: Open Settings (Windows + I) and navigate to "System" > "Display."
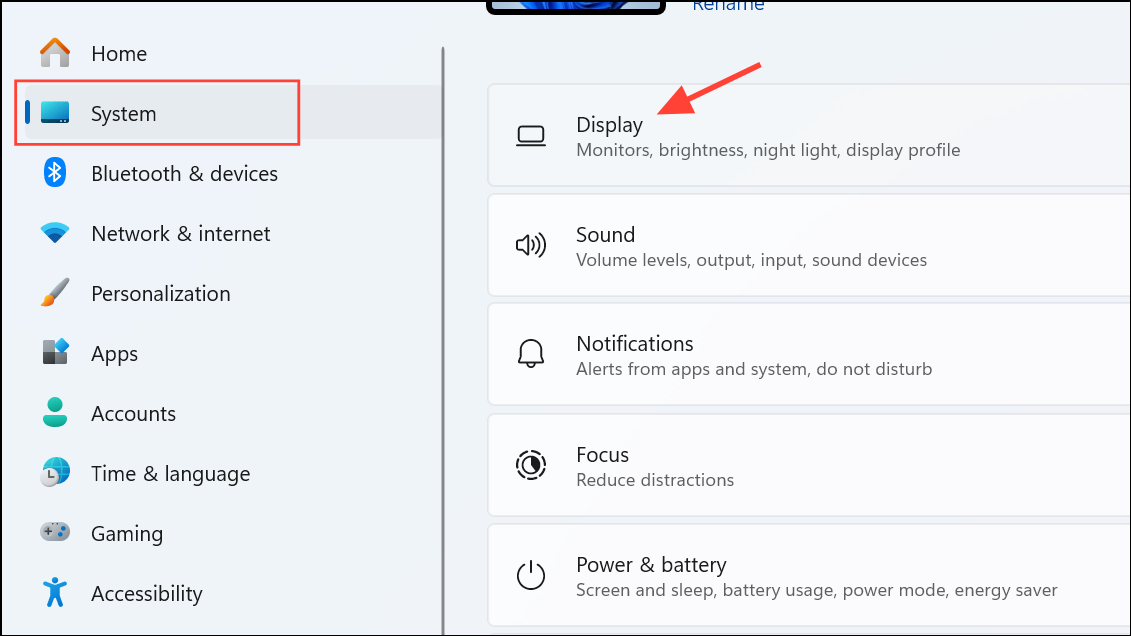
Step 2: Scroll down to "Graphics" under Related Settings.
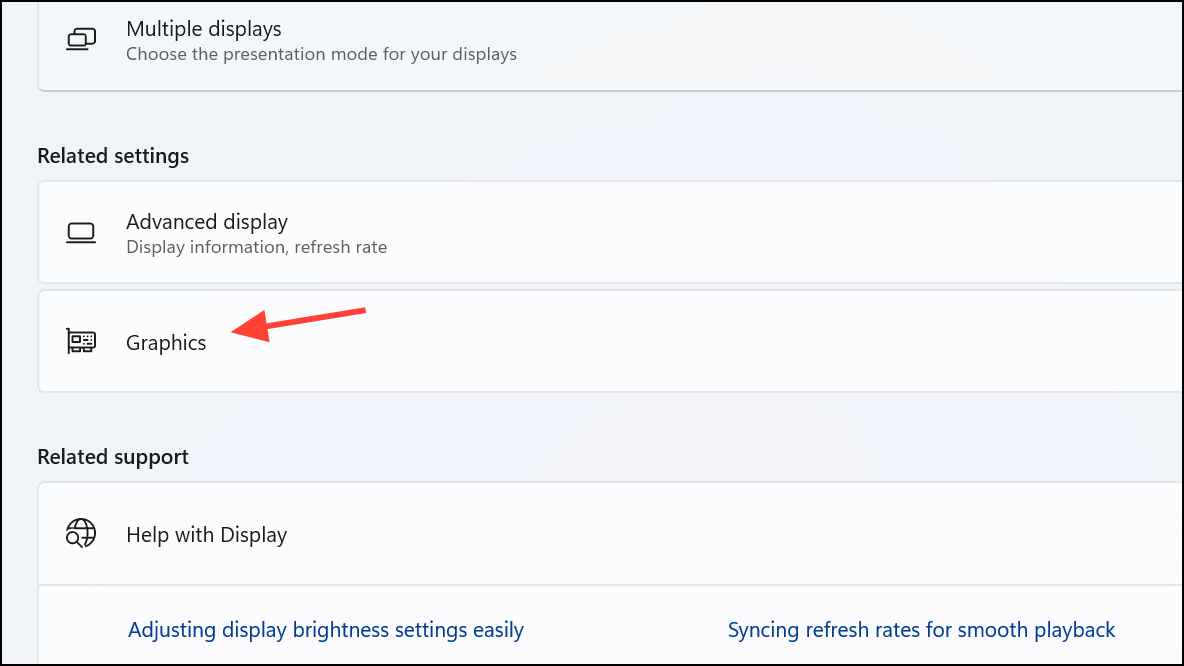
Step 3: Click "Add desktop app," locate your game's executable file, and add it to the list.
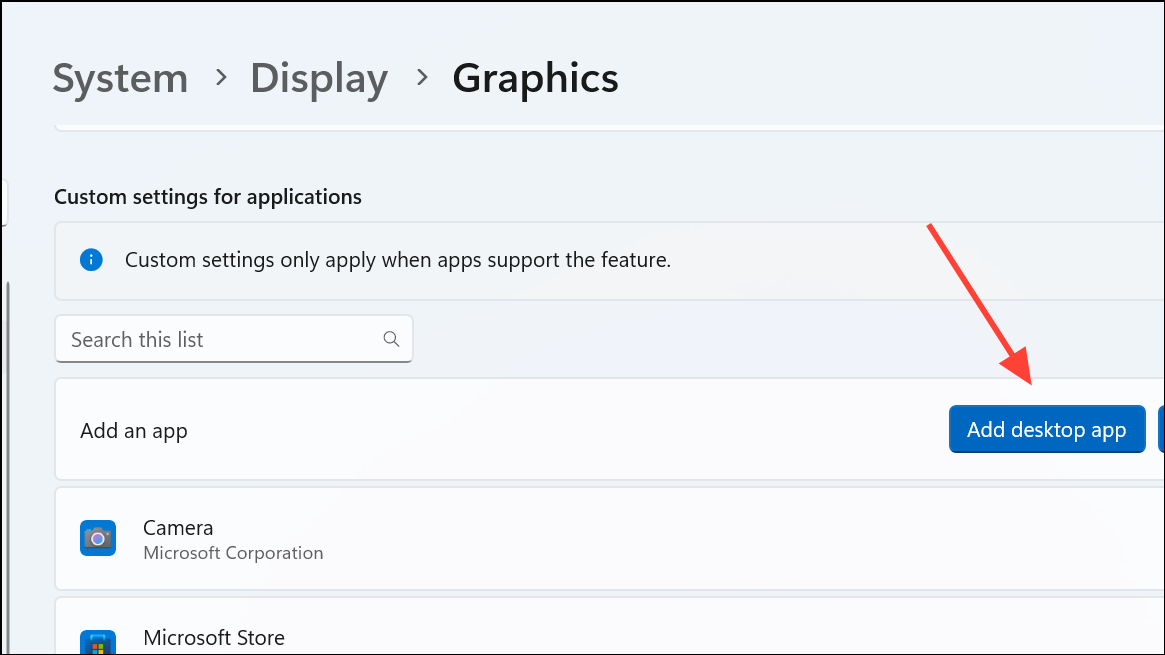
Step 4: Select your game, click "Options," and choose "High Performance." Save your changes.

This ensures your game leverages your GPU's full capabilities, reducing the likelihood of stuttering due to insufficient graphical power.
Disable Hardware-Accelerated GPU Scheduling
Although designed to reduce CPU overhead, hardware-accelerated GPU scheduling can sometimes introduce latency that causes stuttering.
Step 1: Open Settings and go to "System" > "Display" > "Graphics."\
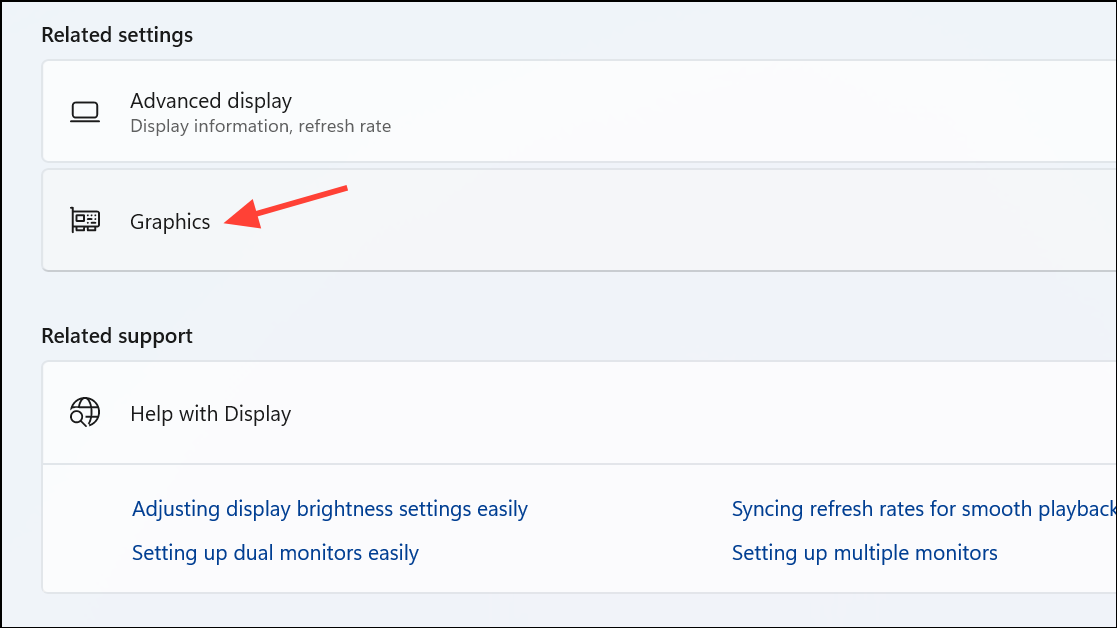
Step 2: Click "Change Default Graphics Settings."
Step 3: Toggle off "Hardware-Accelerated GPU Scheduling."
Step 4: Restart your PC to apply the change. Disabling this feature can eliminate latency-induced stuttering.
Switch to a High-Performance Power Plan
Windows power settings can limit CPU and GPU performance to save energy, negatively impacting gaming performance.
Step 1: Press Windows + R, type powercfg.cpl, and press Enter.
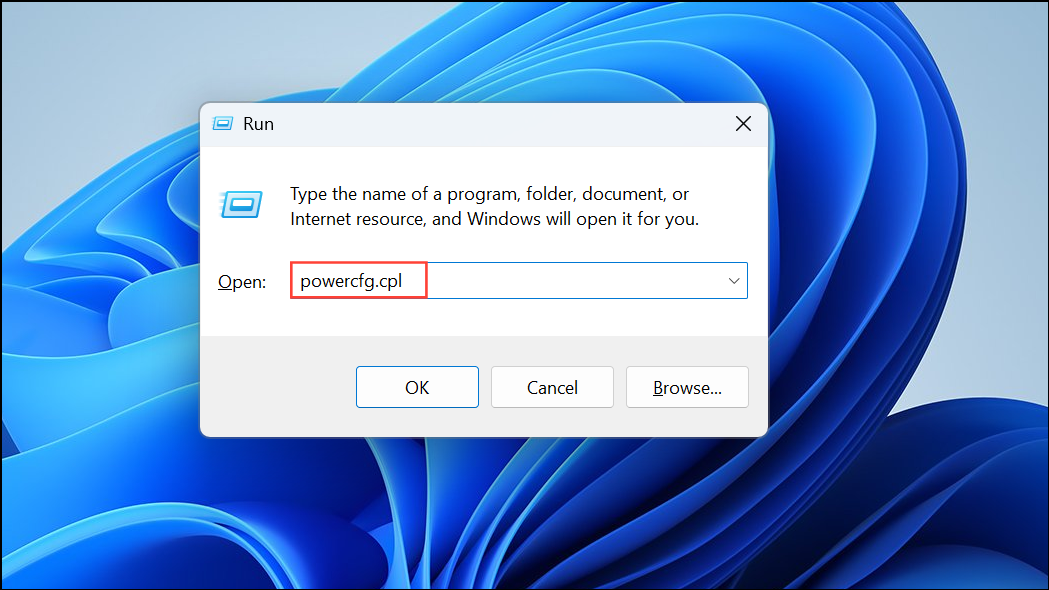
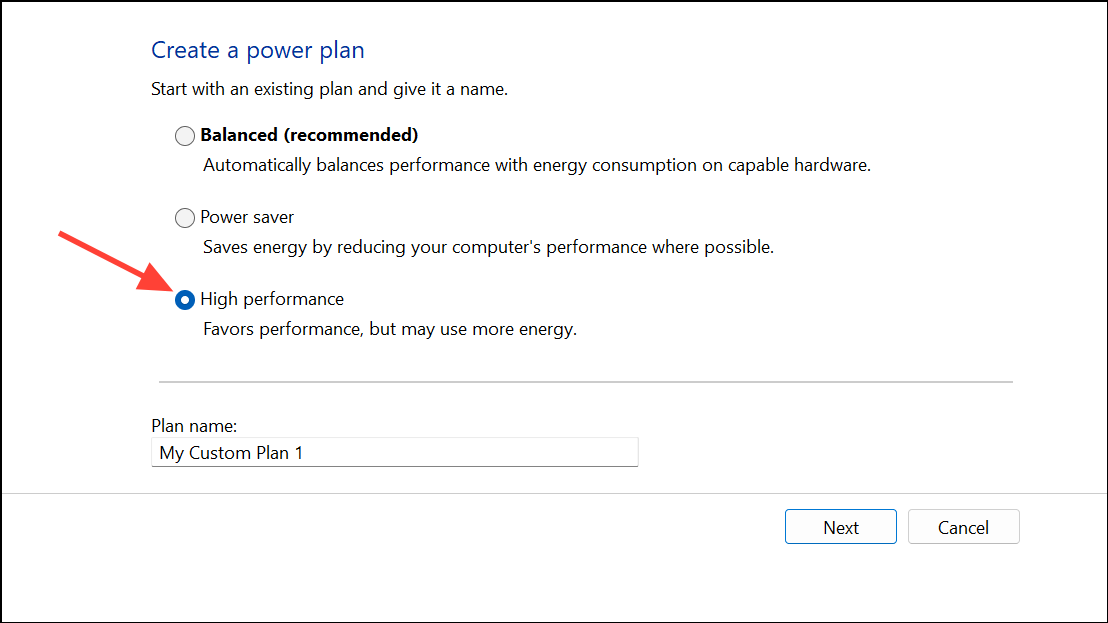
Step 2: In the Power Options window, select the "High Performance" plan. If it isn't visible, click "Create a Power Plan," choose "High Performance," and activate it.
This adjustment ensures your system's hardware operates at maximum capacity, reducing performance bottlenecks.
Increase Virtual Memory
Virtual memory supplements your physical RAM, providing additional resources when memory runs low, which can help prevent stuttering.
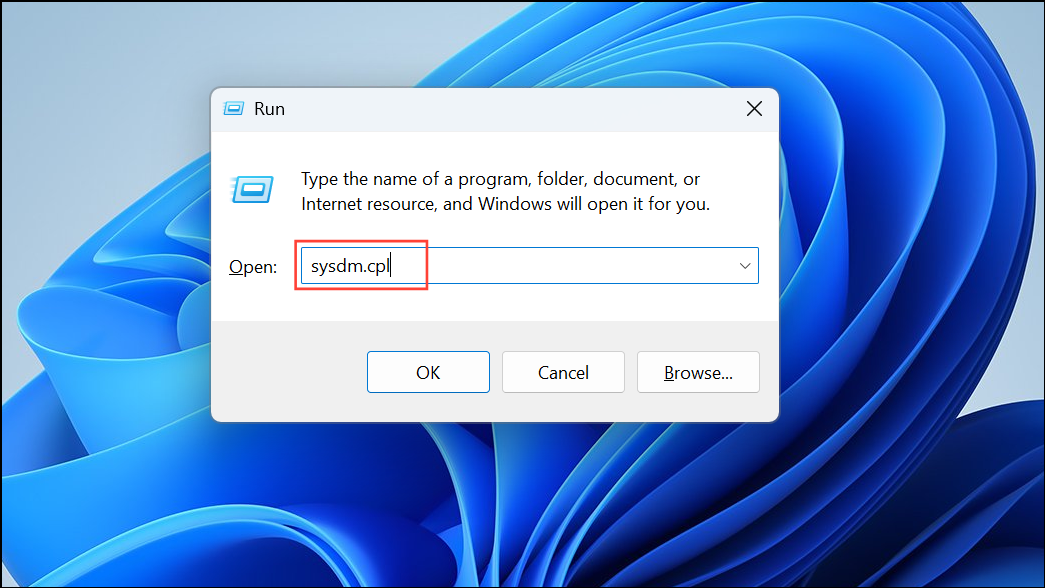
Step 1: Press Windows + R, type sysdm.cpl, and press Enter.
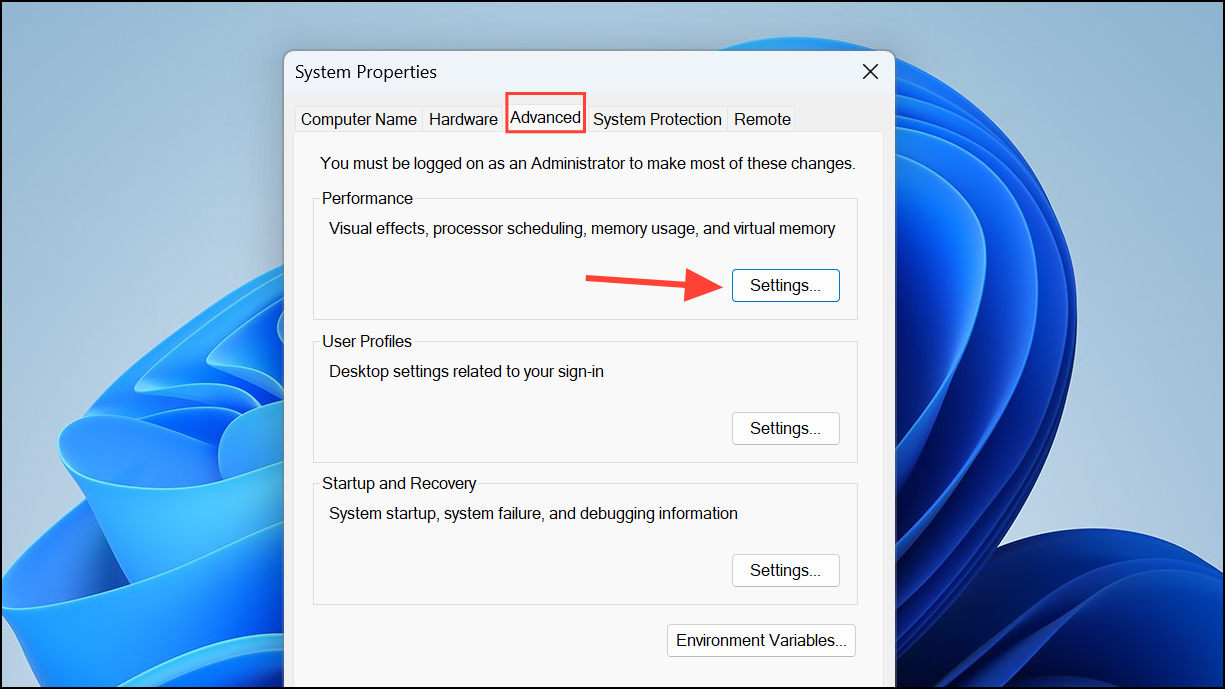
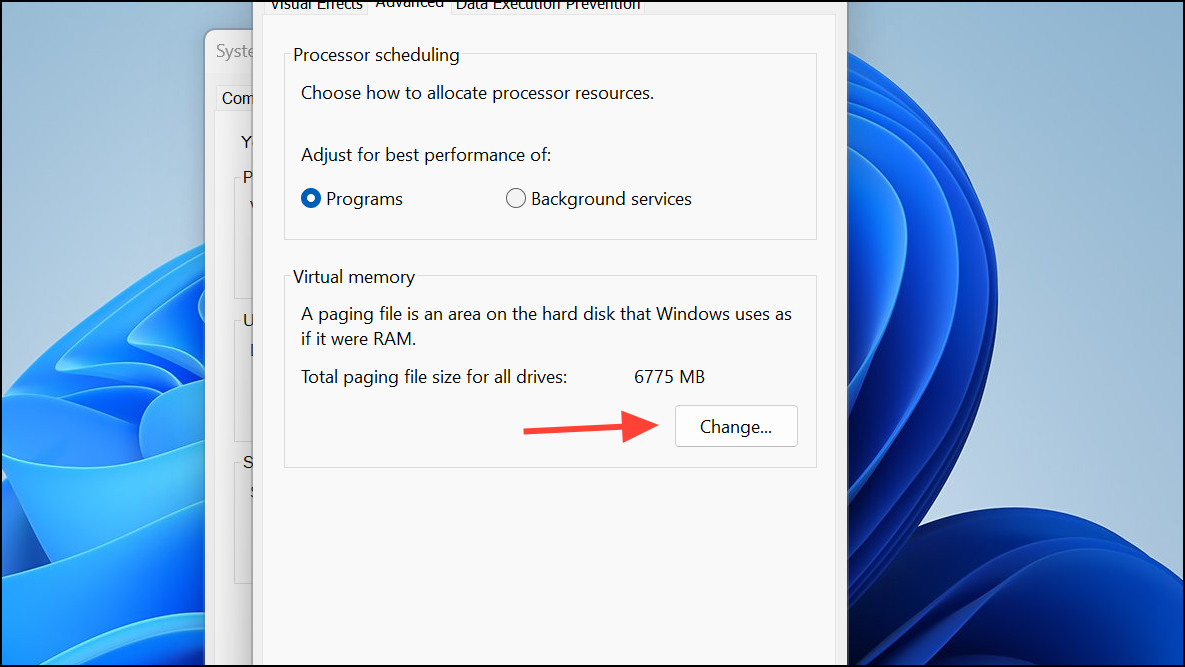
Step 2: Under the "Advanced" tab, click "Settings" in the Performance section.
Step 3: Select the "Advanced" tab again and click "Change" under Virtual Memory.
Step 4: Uncheck "Automatically manage paging file size," select your primary drive, choose "Custom Size," and set initial size to 1.5 times your RAM and maximum size to 3 times your RAM.
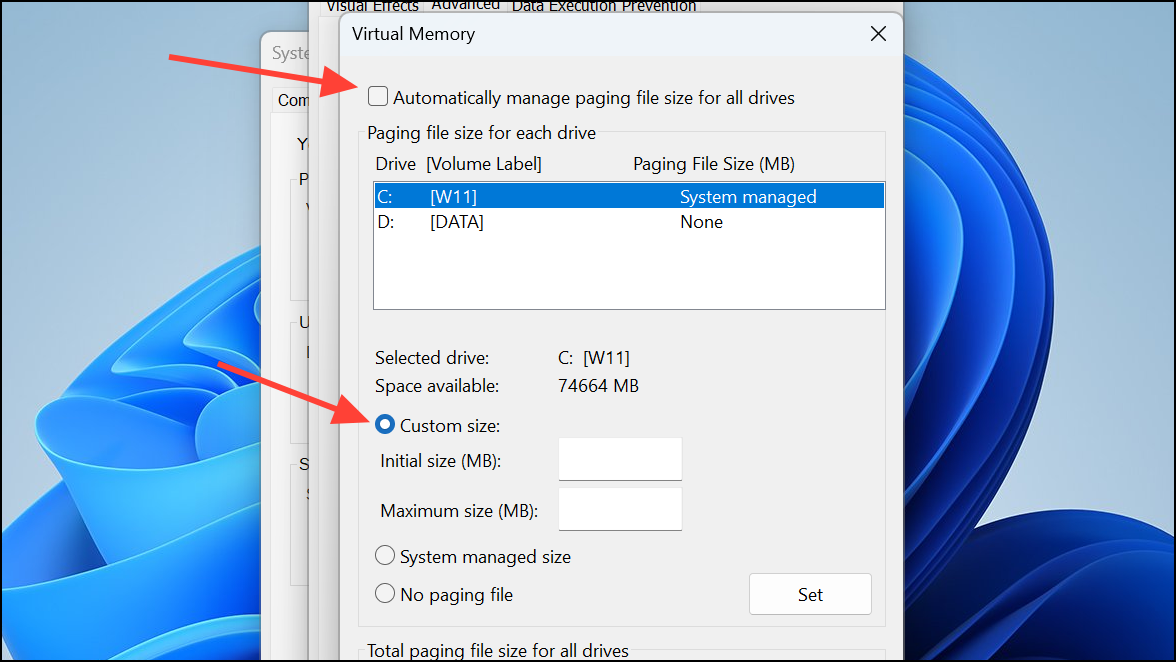
Step 5: Click "Set," then "OK," and restart your computer. Increasing virtual memory offers temporary relief from memory-related stuttering.
Update Games and Adjust In-Game Settings
Game developers regularly release patches that address performance issues. Additionally, in-game settings can significantly impact frame rates.
Step 1: Check your game launcher or in-game menus regularly for updates and install them promptly.
Step 2: Lower graphical settings such as shadows, textures, and anti-aliasing to reduce GPU load.
Step 3: Experiment with resolution and frame rate limits to find the optimal balance between visual quality and performance.
These adjustments can dramatically improve gaming smoothness without requiring hardware upgrades.
By following these detailed steps, you can effectively reduce or eliminate game stuttering on Windows 11, ensuring consistent, smooth gameplay. Keep your drivers updated, optimize system settings, and regularly monitor game updates for the best performance.